- Virtualization
- 01 September 2018 at 09:48 UTC
-

Although you can copy a VirtualBox virtual machine from one computer to another by simply transferring the folder from your virtual machine to a USB drive, it will not work if you want to reuse it with another virtualization solution.
To standardize the format of the virtual machines a little and offer some compatibility between the different virtualization solutions, the Open Virtual machine Format (OVF) appeared in 2007.
1. Export your virtual machine to OVF (OVA)
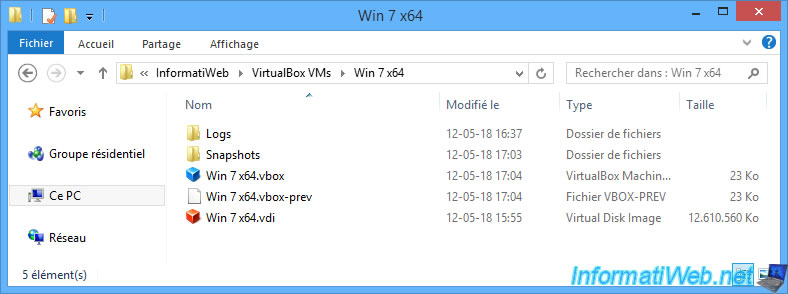
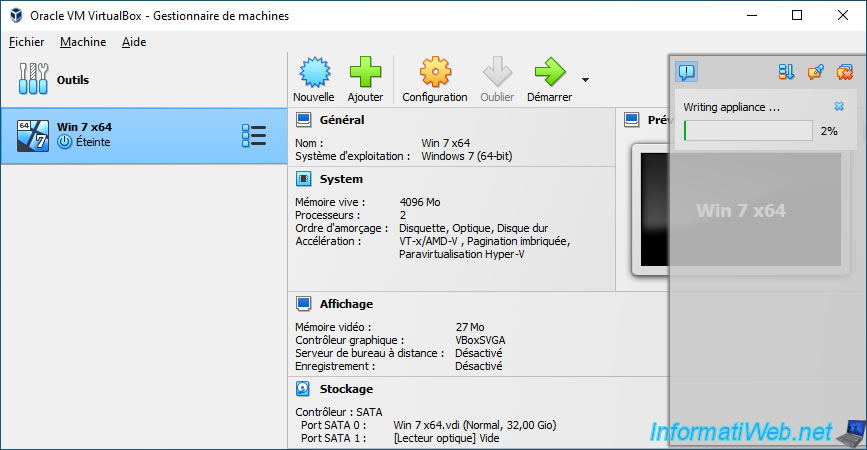
By default, your VirtualBox virtual machine consists of :
- a ".vbox" configuration file specific to VirtualBox
- a virtual hard disk in vdi format (by default)
- and some other files
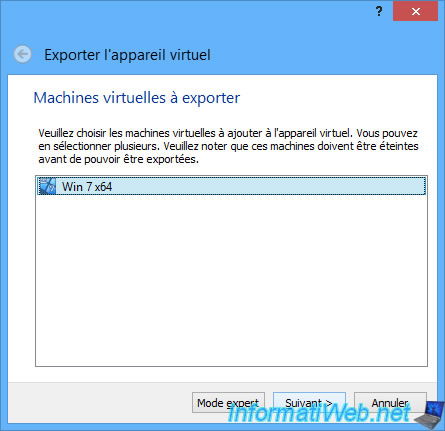
To export a virtual machine from VirtualBox, go to the File menu and click : Export Appliance.
Note : when you export a virtual machine, you create a Virtual Appliance.

Choose the virtual machine you want to export in OVF format.
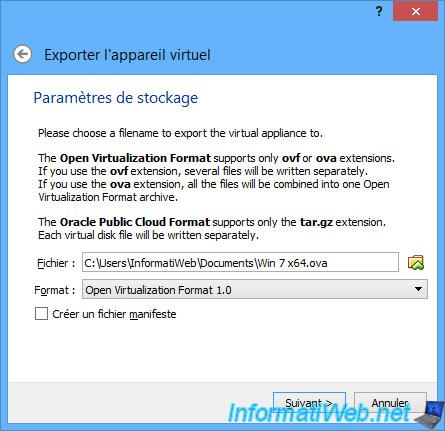
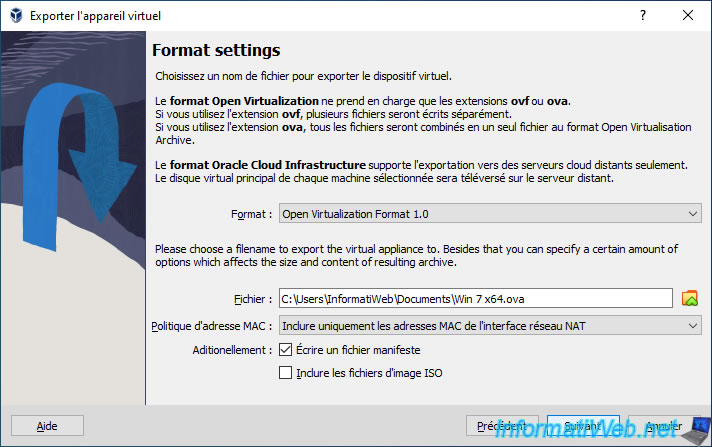
Select the folder where you want to export it by clicking the small folder icon.
Since version 6.1 of VirtualBox, the options have changed slightly.
The "Create manifest file" option has been renamed to "Write Manifest file".
In addition, you now have the possibility :
- MAC Address Policy : to choose whether to keep the MAC addresses for the exported virtual machine or not.
- Supprimer toutes les adresses MAC de l'interface réseau : de nouvelles adresses MAC seront générées pour les cartes réseau de la machine virtuelle lorsque vous réimporterez celle-ci.
Ce qui est recommandé pour éviter des conflits sur l'ordinateur où vous importerez votre machine virtuelle au format OVA. - Inclure uniquement les adresses MAC de l'interface réseau NAT : conserver les adresses MAC pour les cartes réseau connectées en mode NAT.
- Inclure toutes les adresses MAC de l'interface réseau : conserver les adresses MAC de toutes les cartes réseau de la machine virtuelle.
- Supprimer toutes les adresses MAC de l'interface réseau : de nouvelles adresses MAC seront générées pour les cartes réseau de la machine virtuelle lorsque vous réimporterez celle-ci.
- Inclure les fichiers d'image ISO : de choisir s'il faut exporter aussi les images ISO (CD/DVD virtuels) connectées à votre machine virtuelle ou non.
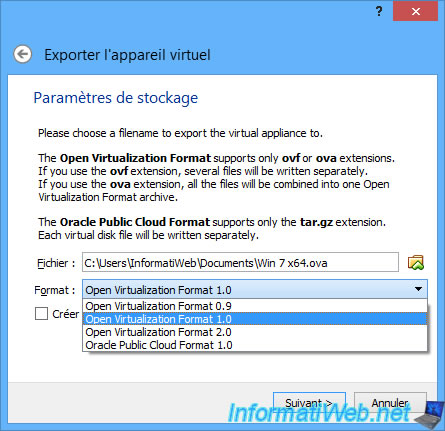
In the "Format" list, you will see that you will have the choice between :
- Open Virtualization Format 0.9
- Open Virtualization Format 1.0 (default choice)
- Open Virtualization Format 2.0
- Oracle Public Cloud Format 1.0 or Oracle Cloud Infrastructure (is for Oracle's paid online service)
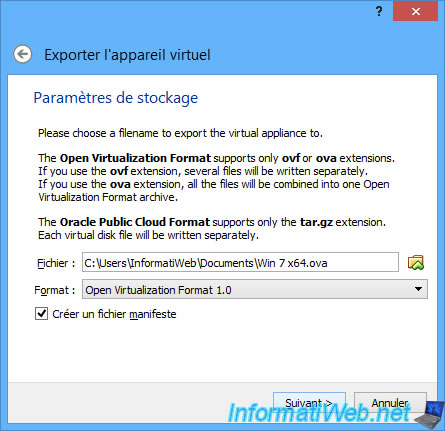
To be able to check the integrity of the exported virtual machine, you have to check the "Write Manifest file" box.
So, when you want to import your virtual machine, you will be able to check if the data has not been damaged before using it.
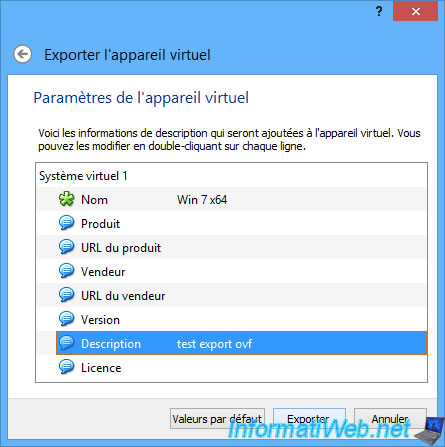
Then, you can add info about your virtual appliance.
The name is the one that will appear in VirtualBox.
For the rest, it's useful if you distribute this virtual machine on your personal website, for example.

In our case, we will add a small description.
Since VirtualBox will convert your virtual machine's virtual hard disk to vmdk, exporting your VM may take a long time.
It all depends on the performance of your computer and the size of the hard disk used by your virtual machine.
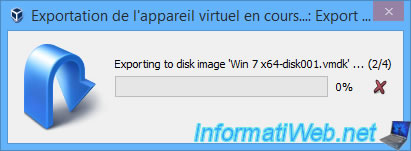
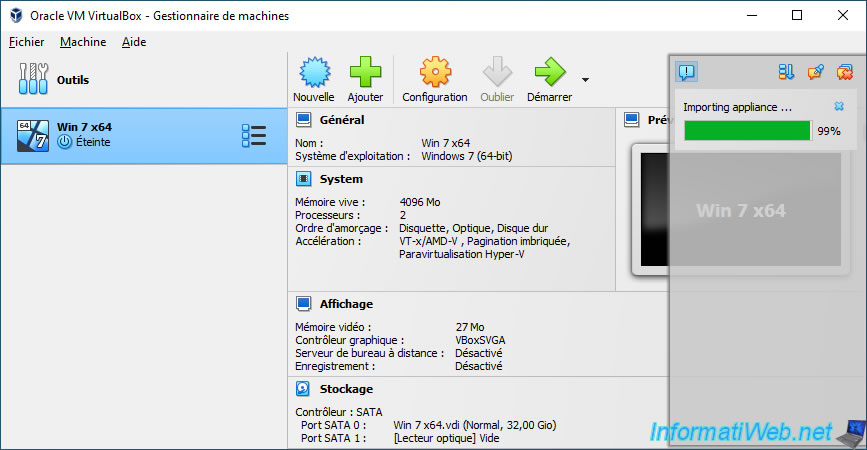
Since version 6.1 of VirtualBox, the "Writing appliance" message will appear in the VirtualBox interface when exporting your virtual machine.
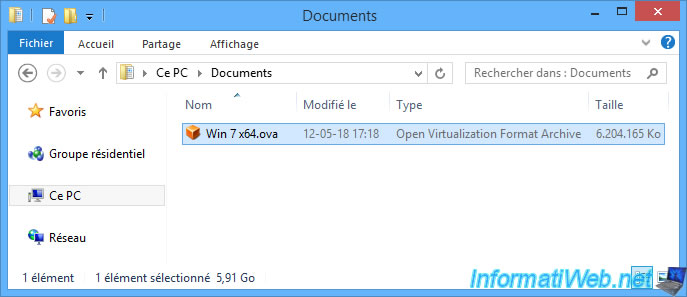
Once the virtual machine is exported, you will find a ".ova" file.
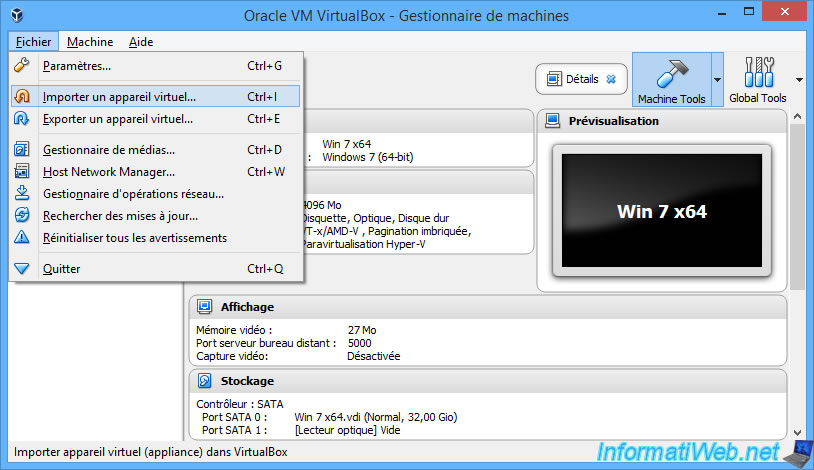
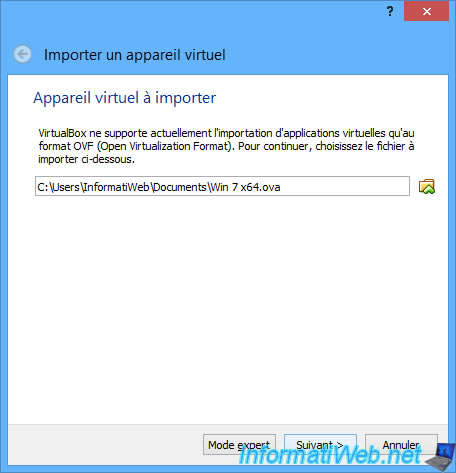
2. Import an OVF virtual machine into VirtualBox
To import a VM into VirtualBox, go to the File menu and click : Import Appliance.
Select the ".ova" file (the OVF format archive format) or the ".ovf" file provided with the virtual machine downloaded from the Internet (for example).
Since version 6.1 of VirtualBox, you will find a new "Source" option thanks to which you can choose between :
- Local File System : to import a virtual machine in OVA/OVF format stored on your computer.
- Oracle Cloud Infrastructure : to import a virtual machine from Oracle Cloud Infrastructure.
Requires your Oracle Cloud Infrastructure account information.

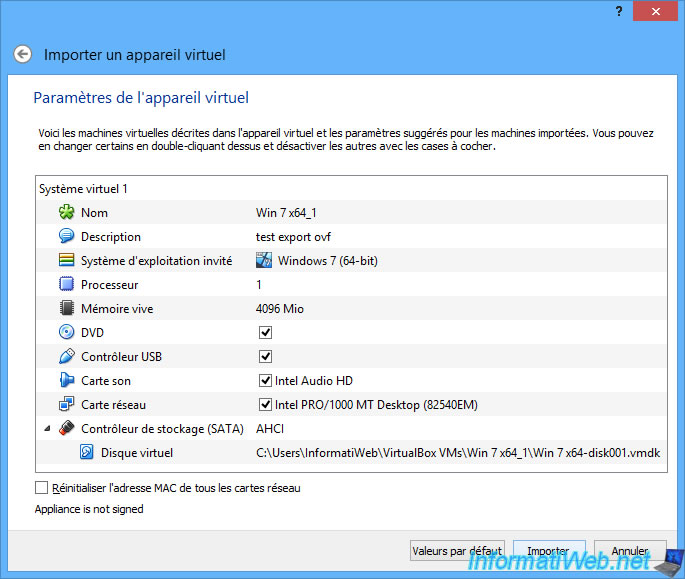
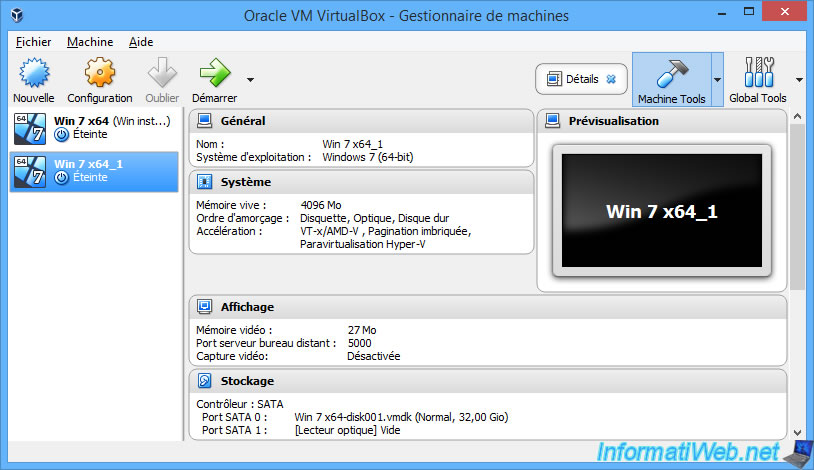
The information of the virtual machine to import is displayed.
Note that you will also find the name and description specified when exporting it from VirtualBox.
In this case, VirtualBox to add a suffix "_1" because the original VM "Win 7 x64" is still present in VirtualBox.
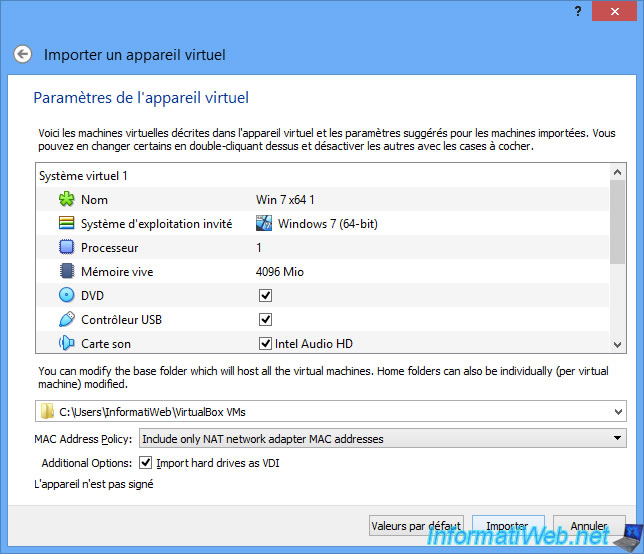
Since version 6.0 of VirtualBox, you will find the options concerning the conservation or not of the MAC addresses of the network cards of the virtual machine.
You will also find an "Import hard drives as VDI" option to import the virtual hard drives in VDI format, even if it's not the case in the virtual machine which had been exported in OVA/OVF format.
VirtualBox imports the virtual machine.
Note that the imported hard disk will remain in vmdk format.
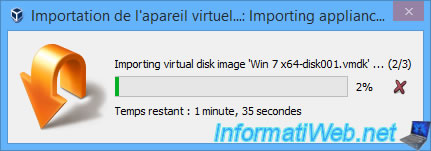
Since version 6.1 of VirtualBox, the "Importing appliance" message will appear in the VirtualBox interface.
Once the virtual machine is imported, it will appear in VirtualBox.
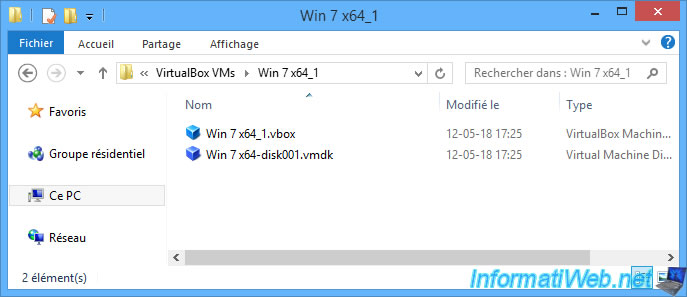
And, in our case, 2 files will appear in a subfolder of "VirtualBox VMs" :
- the VM configuration file in vbox format
- the hard disk of the VM in vmdk format
Share this tutorial
To see also
-

Virtualization 8/30/2019
Hyper-V - Coexistence with VirtualBox or VMware Workstation
-
Virtualization 8/25/2018
VirtualBox - Clone a virtual machine (VM)
-
Virtualization 7/22/2018
VirtualBox - Configure settings of your VMs
-

Virtualization 11/6/2020
VirtualBox - Connect an USB key to a VM
You must be logged in to post a comment