Virtualize Unraid 6.9.2 with VirtualBox 7
- Virtualization
- VirtualBox
- 20 July 2026 at 07:58 UTC
-

- 2/5
2.2. Create virtual SSDs for Unraid cache on VirtualBox
To emulate SSDs on VirtualBox, you have 2 possibilities:
- use an NVMe controller to simulate the use of NVMe SSDs.
However, Unraid only recognizes one disk per NVMe controller and VirtualBox only allows you to add one NVMe controller per virtual machine.
Since we will need 2 virtual SSDs for the Unraid cache, this solution will not work in this case. - use a SATA controller and tell VirtualBox to make these virtual hard disks appear as if they were virtual SSDs.
Which is no problem and very easy to do.
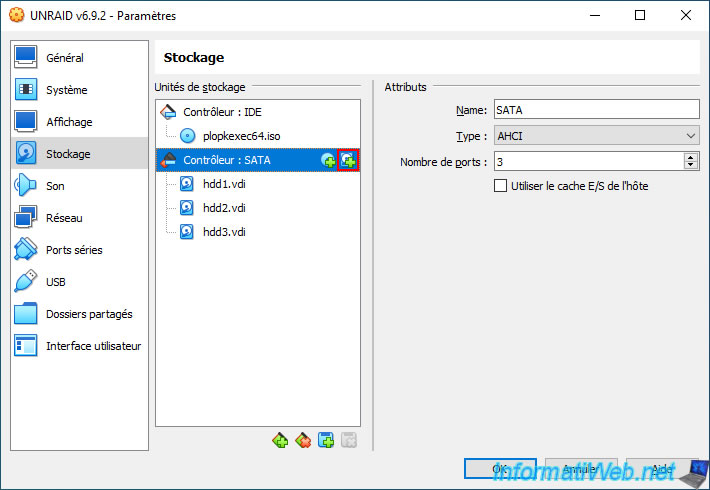
Click again on the "+" icon with the hard drive icon located to the right of your virtual machine's SATA controller.
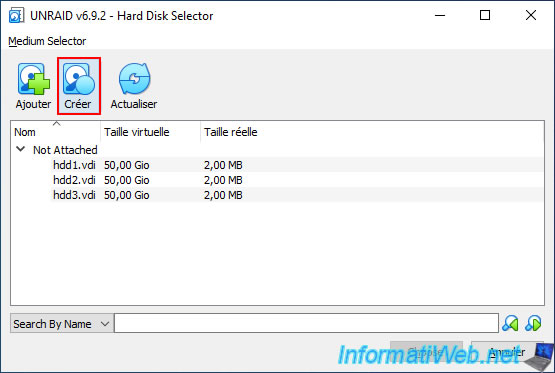
In the "UNRAID v6.9.2 - Hard Disk Selector" window that appears, click: Create.
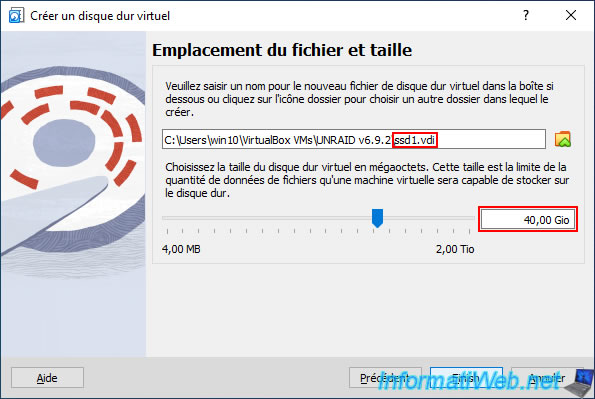
Specify "ssd1.vdi" for the virtual hard disk file name and indicate the desired size for this virtual SSD.
In our case: 40 GB.
Important : to be able to easily differentiate your SATA virtual hard disks and your SATA virtual SSDs on Unraid, we recommend that you use a different size for the virtual SSDs.
However, again, the size indicated for all your SSDs must be the same.
For your 2nd virtual SSD, specify "ssd2.vdi" for the file name, then specify the same size as for your 1st virtual SSD.
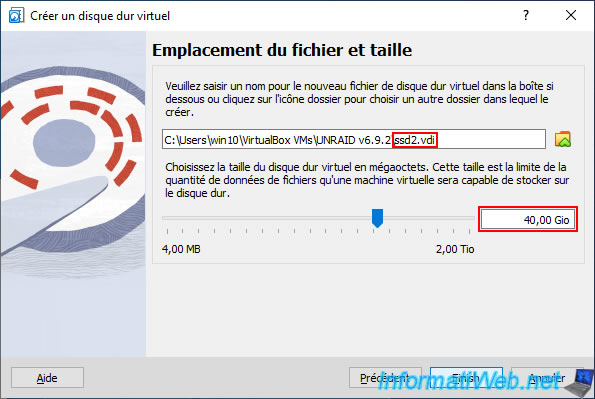
Your virtual SSDs appear in the list.
Note that, for the moment, nothing indicates that they are virtual SSDs.
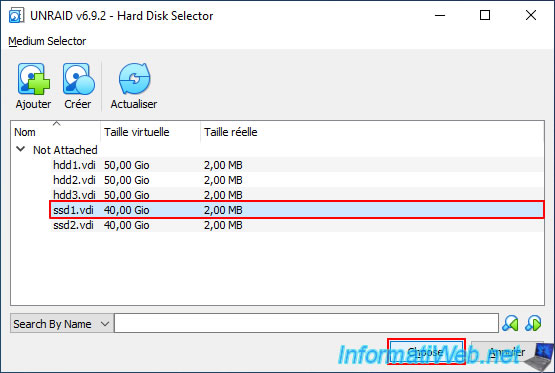
Select your 1st virtual SSD (ssd1.vdi) and click on: Choose.
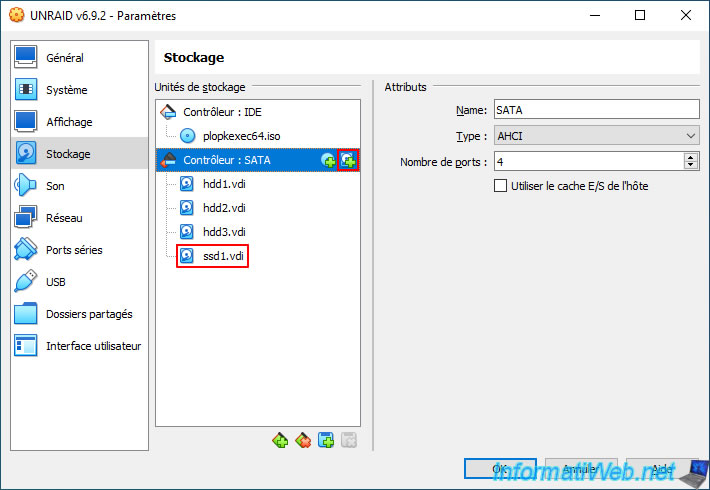
Your 1st virtual SSD (ssd1.vdi) appears in the list of disks connected to your virtual SATA controller.
Click again on the "+" icon with the hard disk icon.
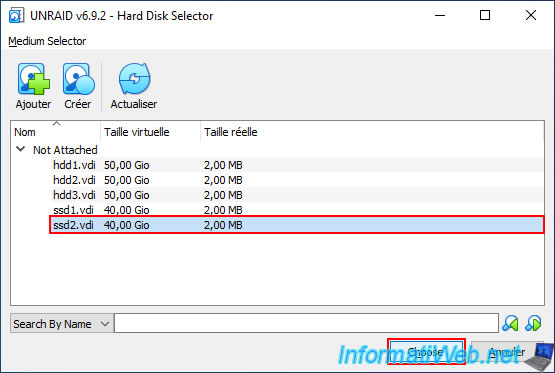
Select your 2nd virtual SSD (ssd2.vdi) from the list and click: Choose.
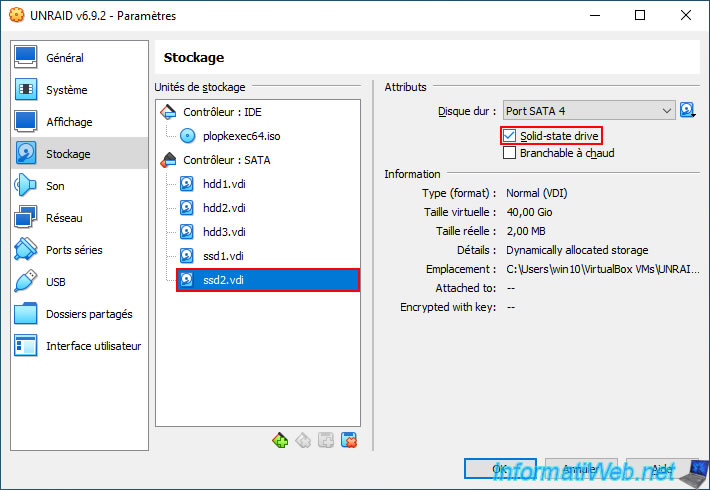
Once the 2 virtual SSDs are connected to your virtual SATA controller, select your 1st virtual SSD (ssd1.vdi) and check the "Solid-state drive" box on the right so that this virtual SATA hard drive is seen as an SSD (Solid State Drive) by the operating system (in this case: Unraid) running in your virtual machine.
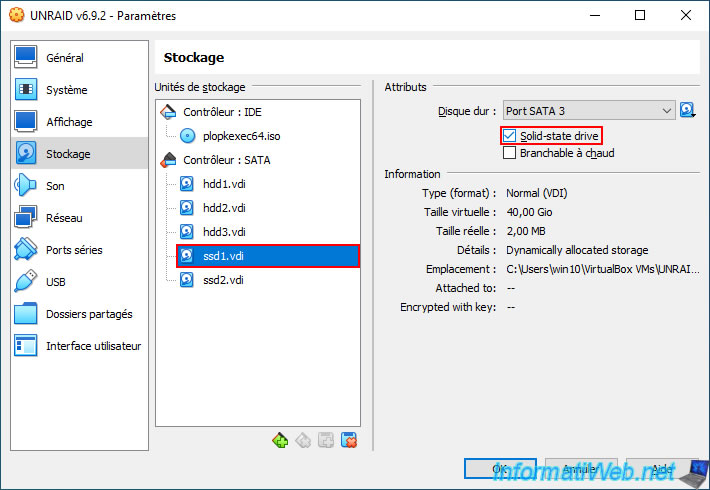
Do the same for your 2nd virtual SSD (ssd2.vdi).
3. Configure your Unraid virtual machine on VirtualBox
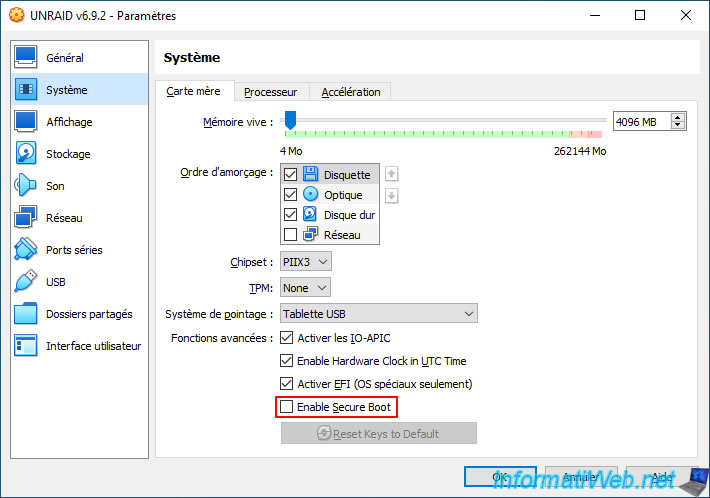
In the "System -> Motherboard" section of your virtual machine, make sure that the "Enable Secure Boot" box is unchecked.
Indeed, although Unraid supports booting in UEFI mode (if you checked the "Allow UEFI Boot" box when creating your Unraid USB key), secure boot is not yet supported.
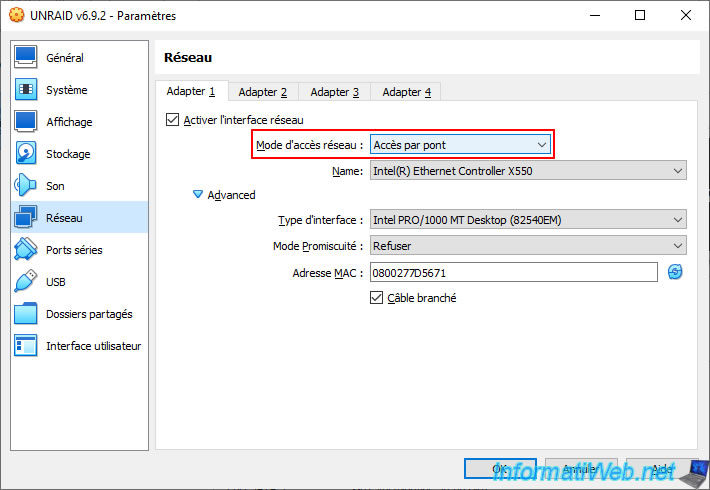
In the "Network -> Adapter 1" section, select the "Bridge Access" network access mode so that your virtual machine is virtually connected to your physical network.
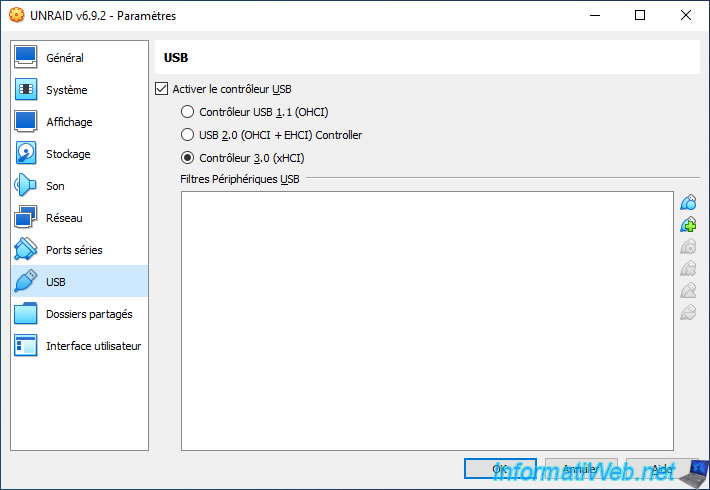
In the "USB" section, make sure that the "Enable USB Controller" box is checked and select the version corresponding to the USB port on your physical computer where your USB key is plugged.
Indeed, if you plug your Unraid USB key into a USB 3.0 port on your computer (which is increasingly the case), you will need to use a USB 3.0 controller for your virtual machine.
Otherwise, your USB key will not appear in your VirtualBox virtual machine and PlopKexec will therefore not find it.
Finally, click OK to save the changes to your virtual machine configuration.
Your "UNRAID v6.9.2" virtual machine on VirtualBox is fully configured.
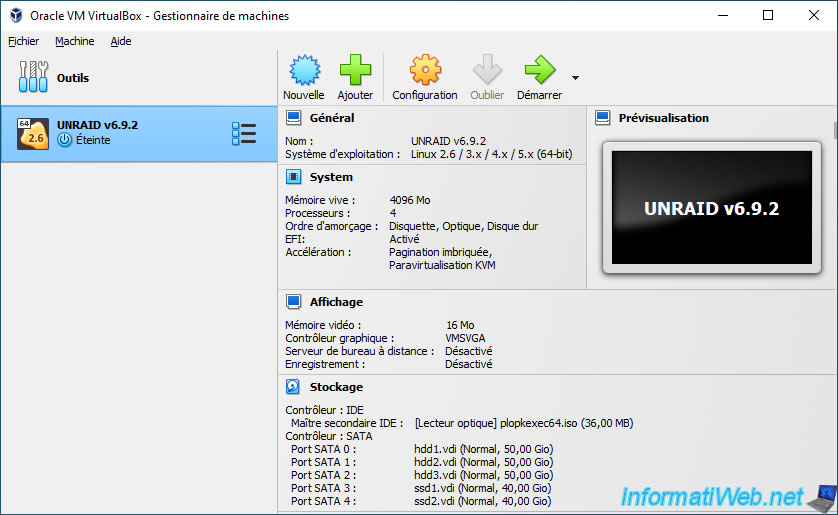
4. Start your Unraid virtual machine on VirtualBox
Start your Unraid virtual machine on VirtualBox.
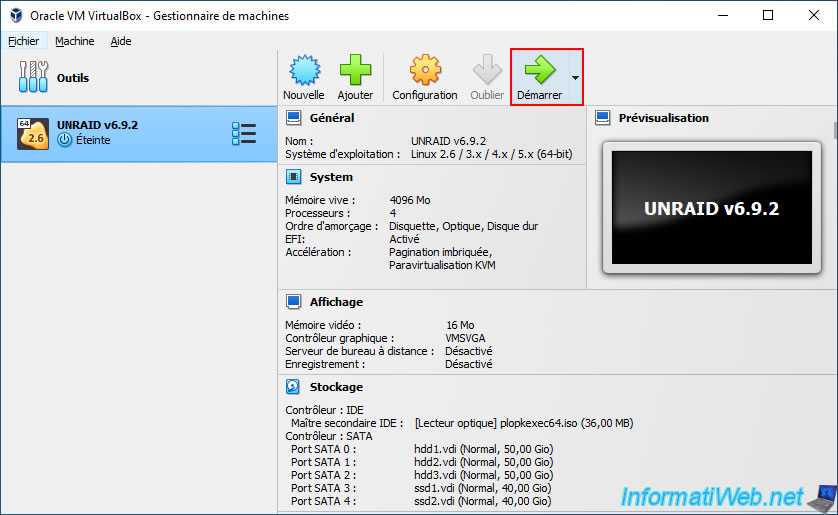
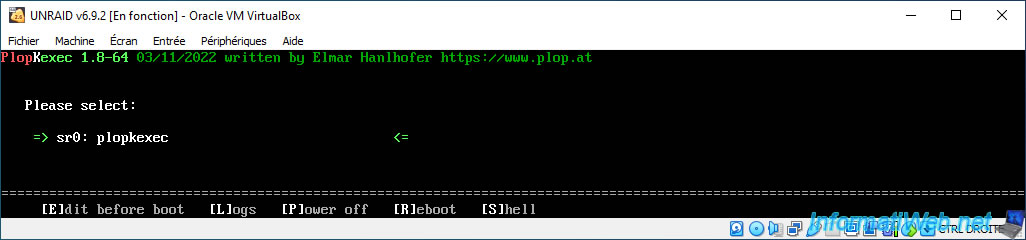
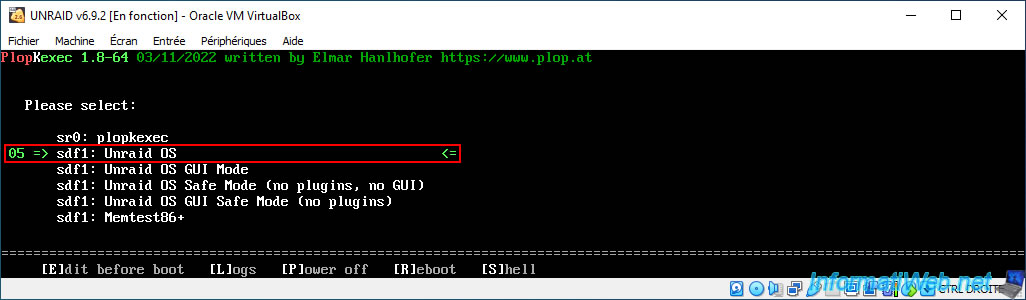
A "PlopKexec" screen appears.
Plain Text
Please select:

sr0: plopkexec
Go to the "Devices -> USB" menu of your virtual machine and click on the name of your USB key where you installed Unraid.
In our case, it's a "SanDisk Ultra" USB key.
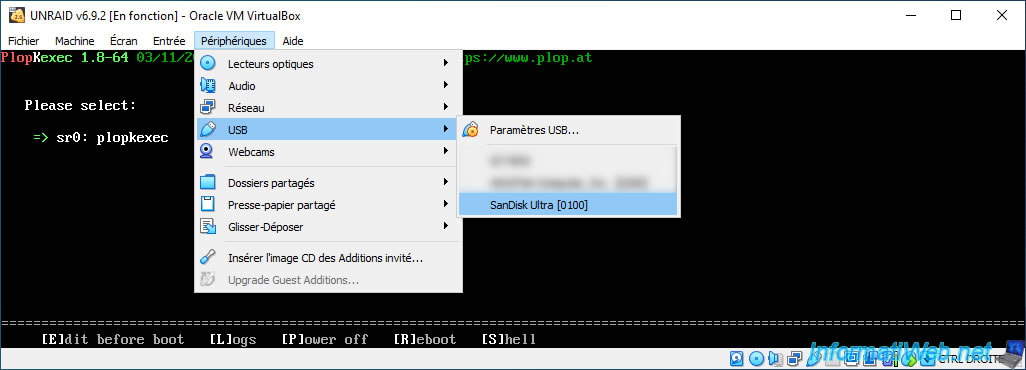
A few seconds later, you will see "Unraid OS" boot options appear.
Plain Text
Please select:

sr0: plopkexec
sdf1: Unraid OS
sdf1: Unraid OS GUI Mode
...
Press Enter or wait 5 seconds for PlopKexec to boot to the "sdf1:Unraid OS" boot option.
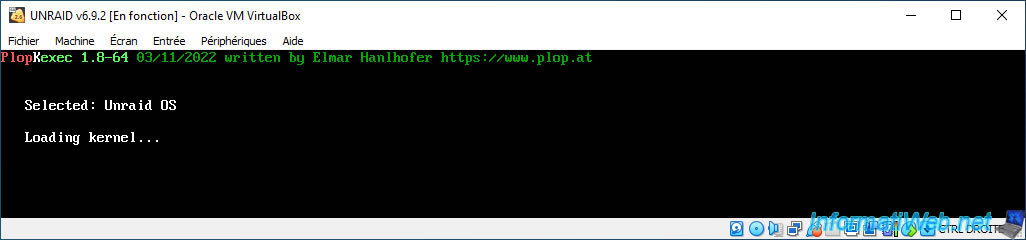
Then, PlopKexec will load the Unraid kernel for a few seconds.
Plain Text
Selected: Unraid OS

Loading kernel...
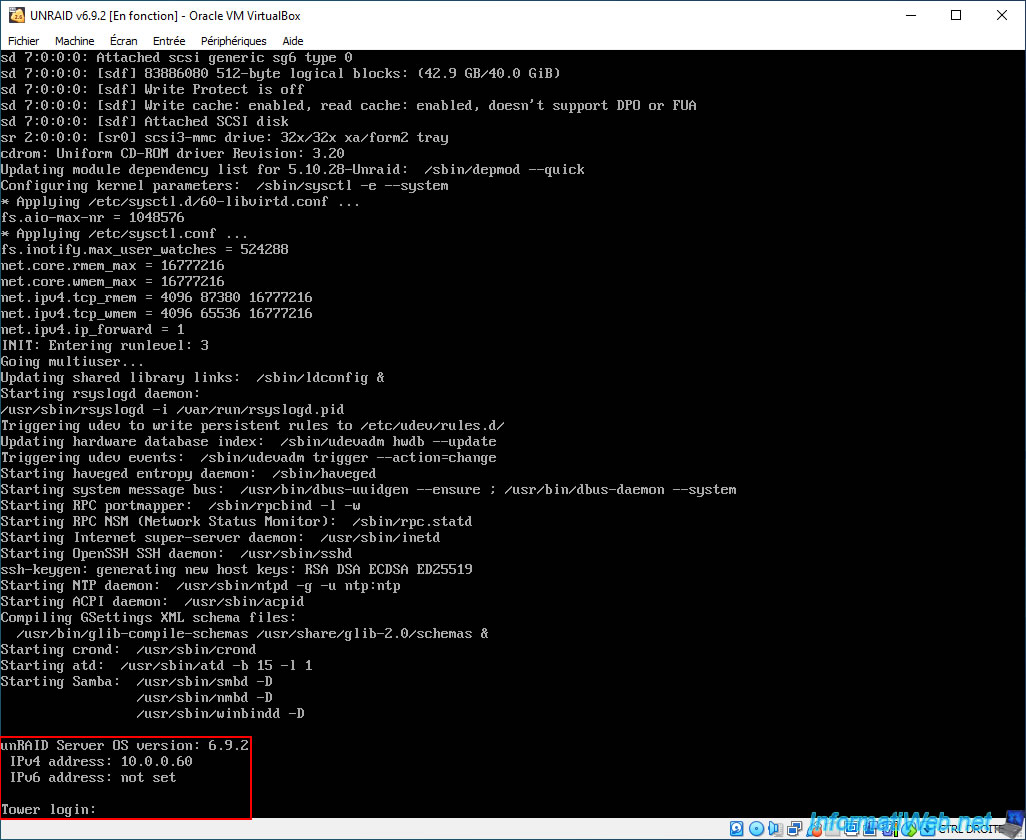
Unraid will boot into your VirtualBox virtual machine and you will see this at the bottom of the screen once Unraid has finished booting.
Plain Text
unRAID Server OS version: 6.9.2.
IPv4 address: 10.0.0.60
IPv4 address: not set

Tower login:
5. Start the Unraid evaluation period
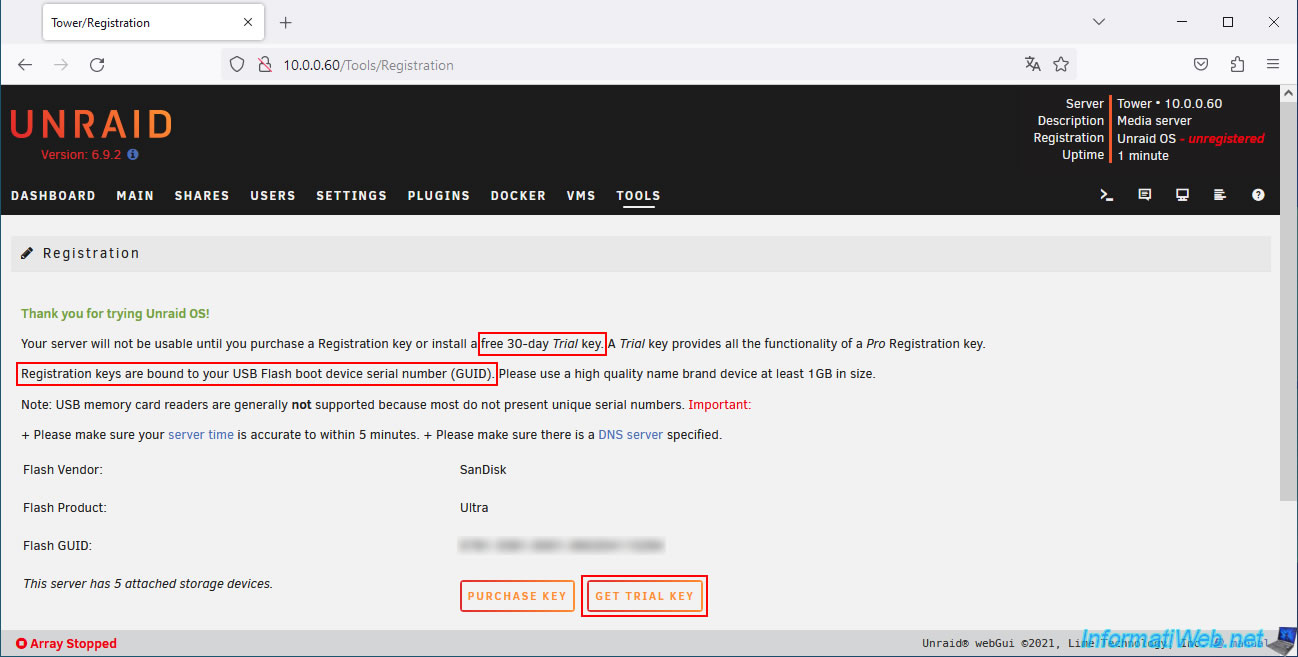
Enter the IP address in the address bar of your web browser and you will see the Unraid registration page automatically displayed.
As you can see on this page, you can use a 30-day trial version of Unraid whose license will be linked to the unique identifier (GUID) of your USB key.
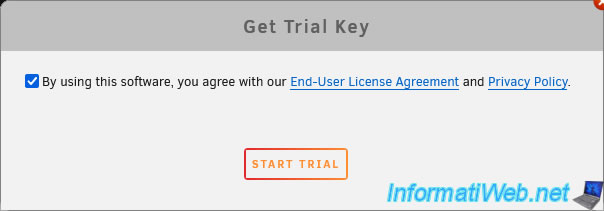
Click on: Get trial key.
Check the box "By using this software, you agree ..." and click on: Start trial.
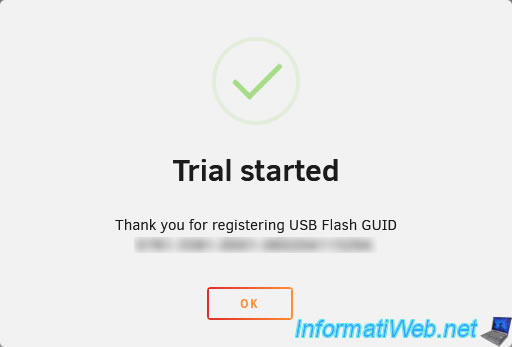
The "Trial started" message appears.
Click OK.
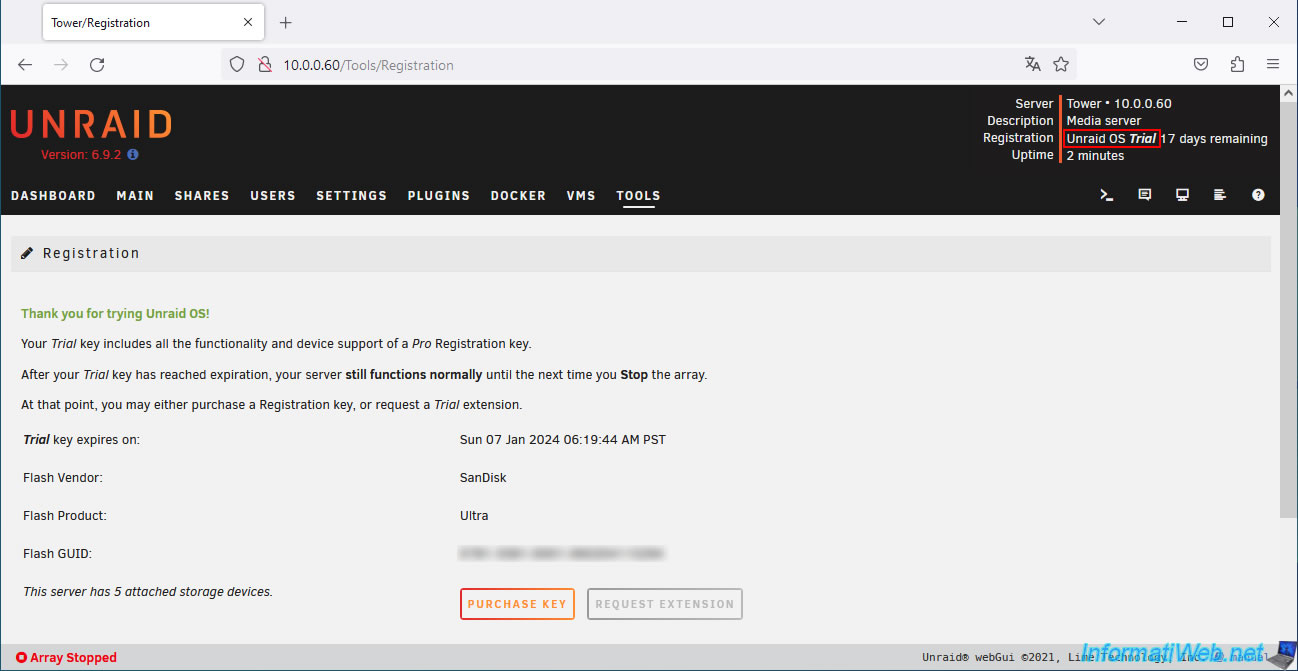
At the top right of the page, you will see that Unraid is running in an evaluation version (Unraid OS Trial).
Note: since we used the same USB key for our other tutorials explaining how to virtualize Unraid on different VMware products, it's normal that the number of days has already decreased in our case.
Share this tutorial
To see also
-
Virtualization 8/25/2018
VirtualBox - Clone a virtual machine (VM)
-

Virtualization 7/7/2018
VirtualBox - Installing and virtualizing your 1st machine
-

Virtualization 10/20/2018
VirtualBox - Manage your VMs remotely with Hyperbox
-
Virtualization 2/23/2022
VirtualBox - Virtualize Windows 11 (unsupported hardware)
No comment