Virtualize Unraid 6.9.2 with VirtualBox 7
- Virtualization
- VirtualBox
- 20 July 2026 at 07:58 UTC
-

- 3/5
6. Disk types seen by Unraid
Previously, we had configured VirtualBox so that 2 of our virtual hard drives were seen as SSDs.
If you go to the "Dashboard" tab in Unraid and look at the disks displayed in the "Unassigned" section, you will see that 2 disks ("Dev 2" and "Dev 4") have a different icon than the other disks ("Dev 1", "Dev 3" and "Dev 5").
In this case, disks 2 and 4 on Unraid are seen as SSDs.
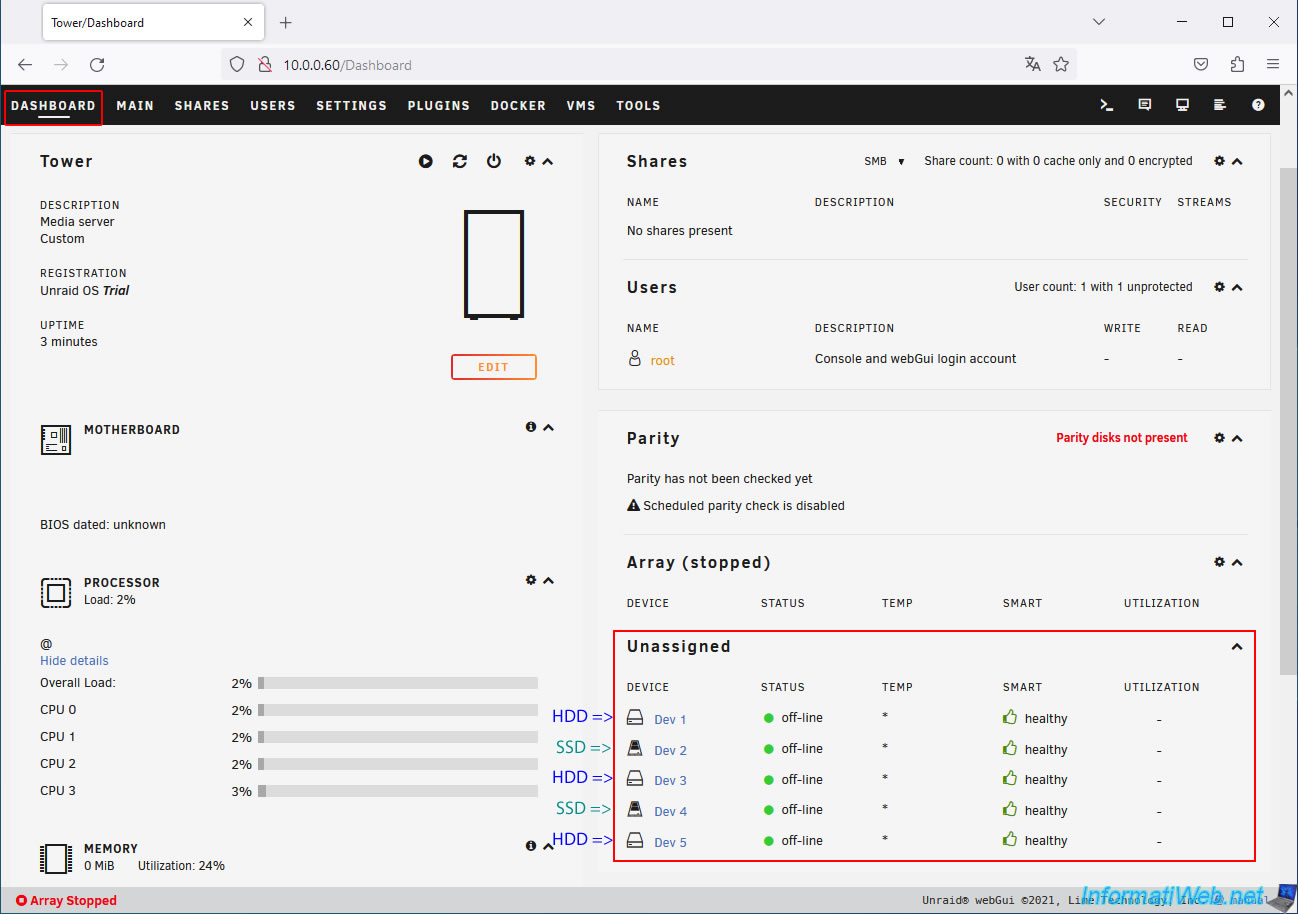
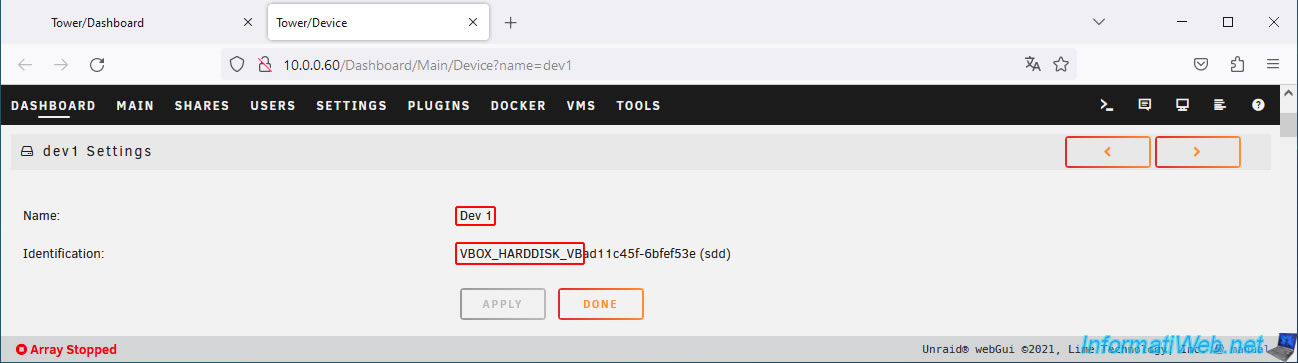
To check this, click on the name of the 1st disk (Dev 1) which is seen as a hard disk.
At the top of the page, you will see that the model of this disk is "VBOX_HARDDISK_VB...".
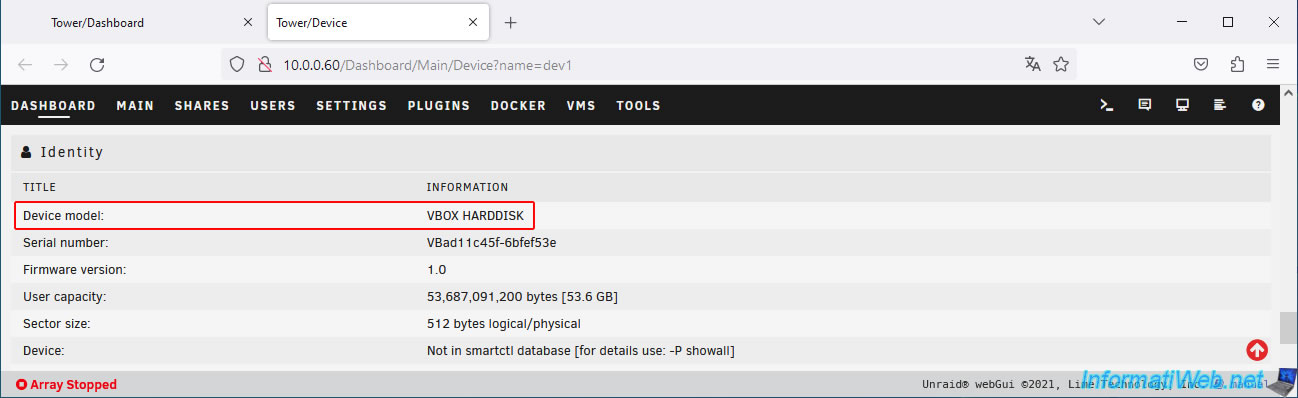
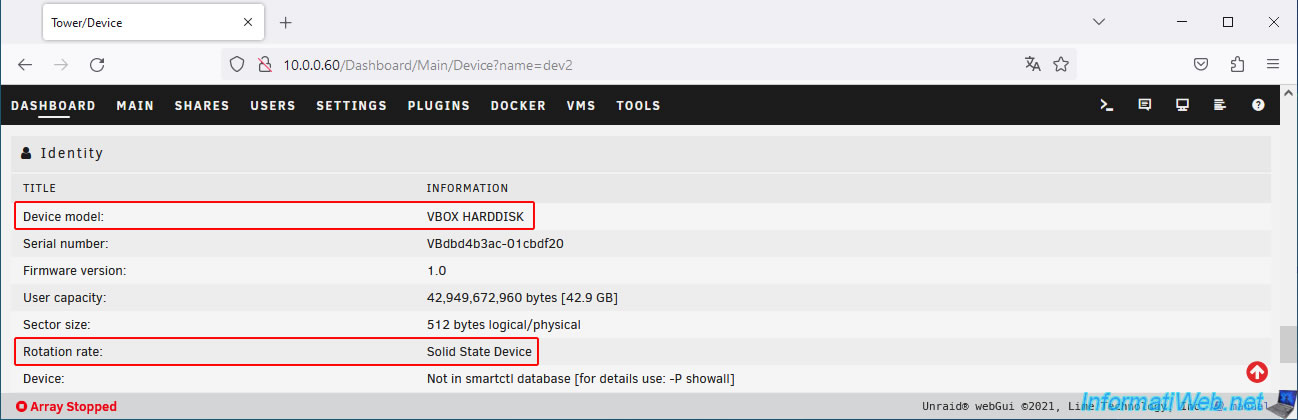
At the bottom of the page, you will see this.
If you click on the 2nd disk (Dev 2) which is seen as an SSD, you will see that the name is similar to "VBOX_HARDDISK_VB...".
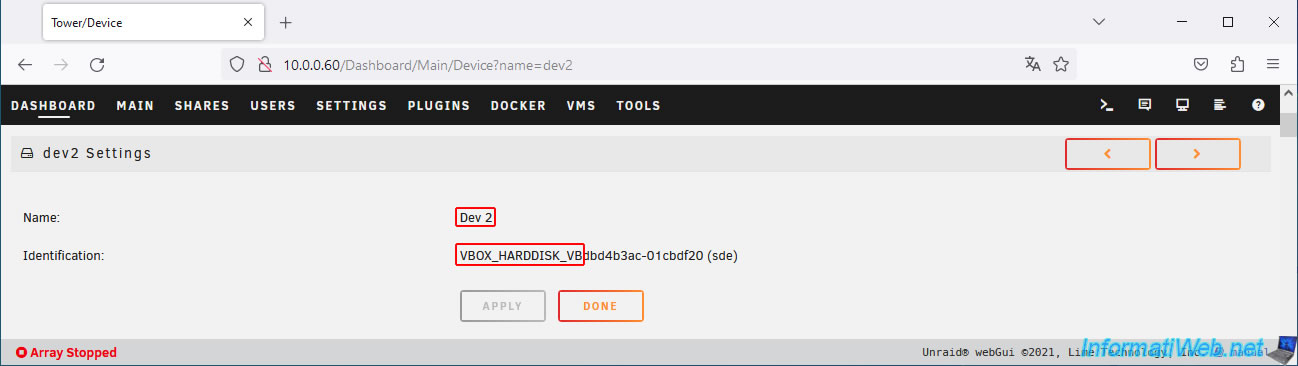
At the bottom of the page, for drives that are viewed as SSDs, you will see the line "Rotation rate: Solid State Drive".
Note: Solid State Drive = SSD.
7. Configure Unraid array
To configure the Unraid array, go to the "Main" tab.
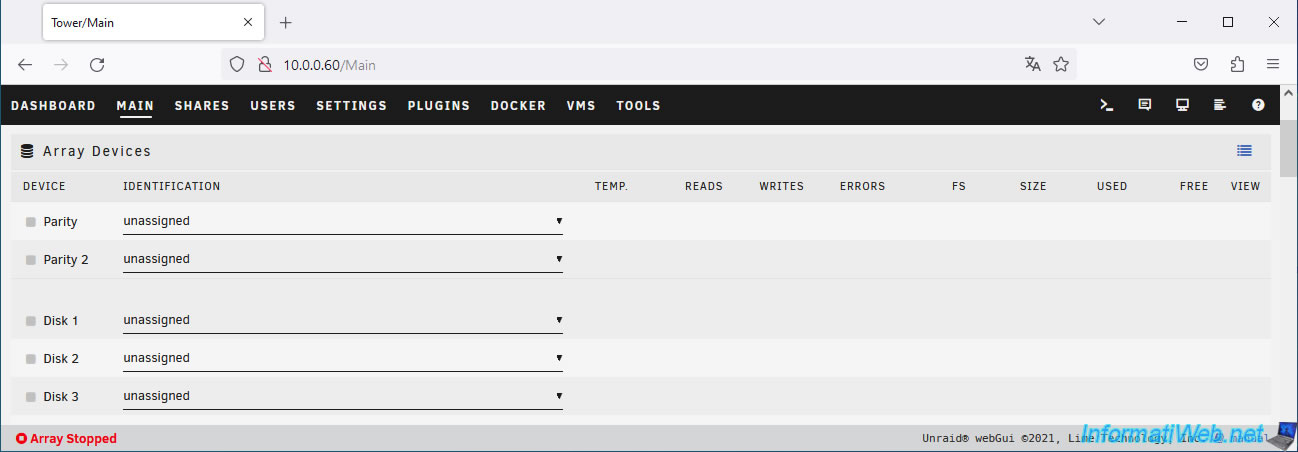
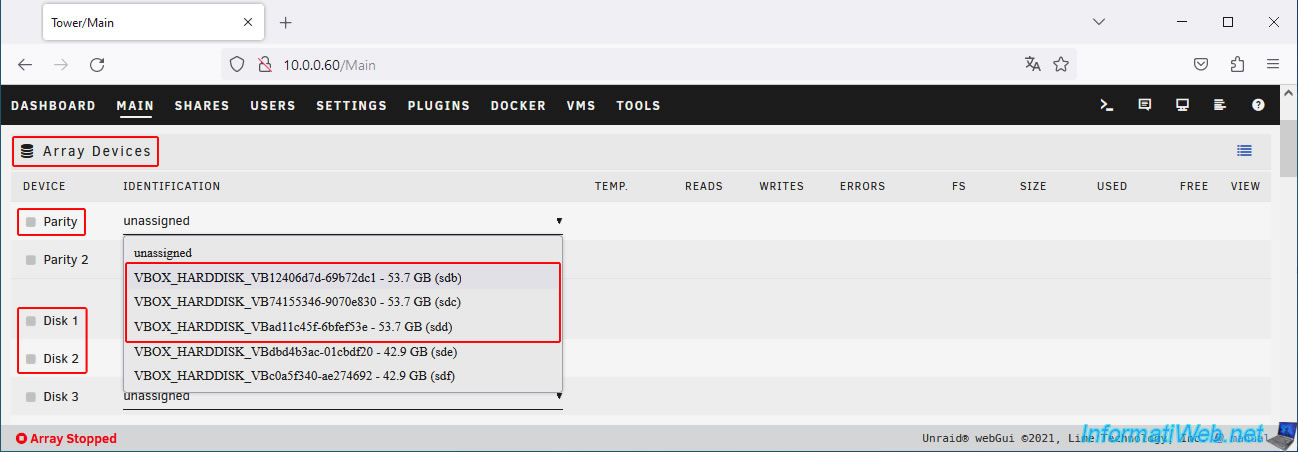
Assign the 3 virtual hard disks to the devices: "Parity", "Disk 1" and "Disk 2".
As a reminder, in our case, we created 3 virtual hard disks of 50 GB and 2 virtual SSDs of 40 GB.
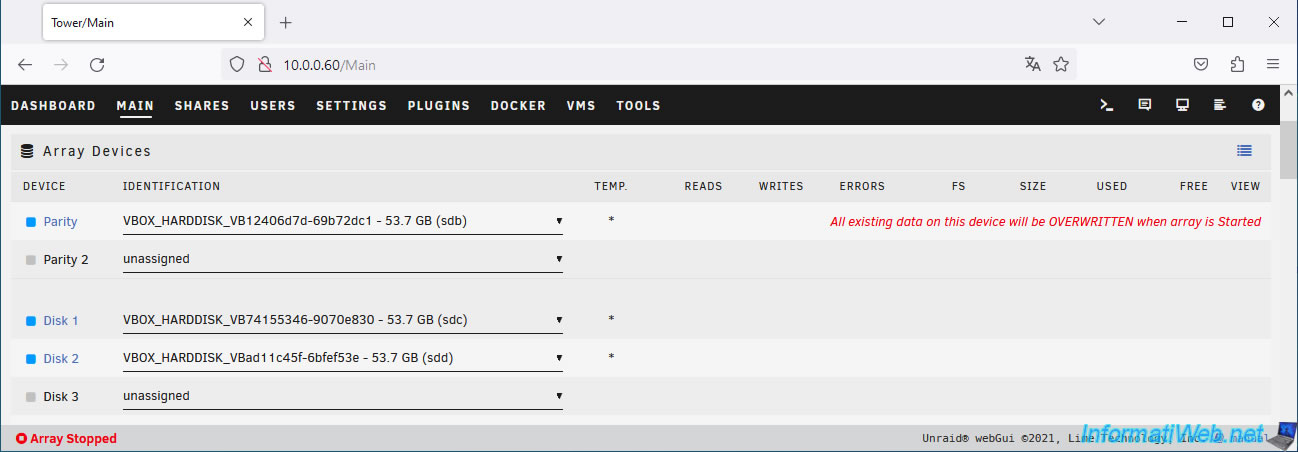
These disks are recognized by Unraid with sizes of 53.7 GB (for virtual hard disks) and 42.9 GB (for virtual SSDs) in our case.
Our 3 x 50GB (53.7GB) SATA virtual hard drives are assigned to our array on Unraid.
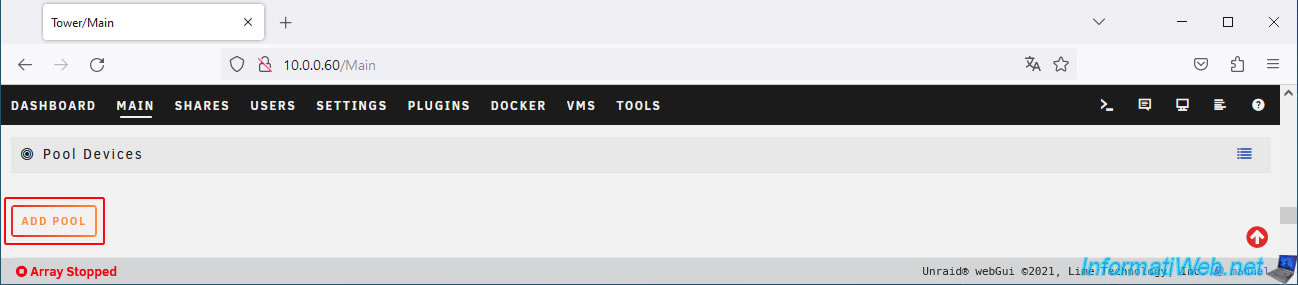
In the "Pool Devices" section, click on the button: Add pool.
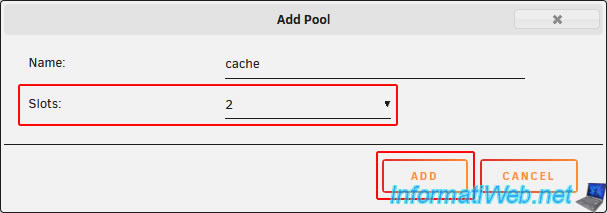
Select "Slots: 2" and click: Add.
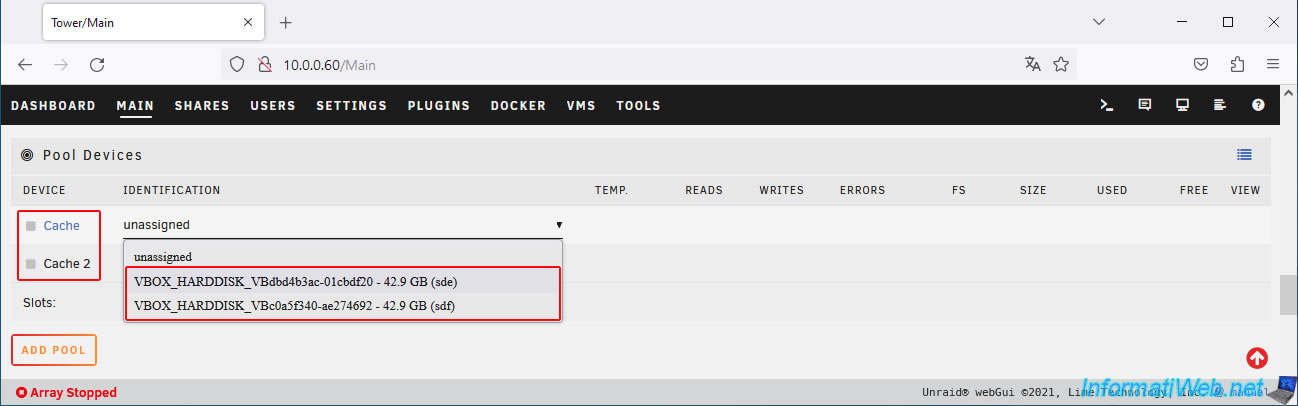
Assign the remaining 2 disks to Unraid's cache ("Cache" and "Cache 2").
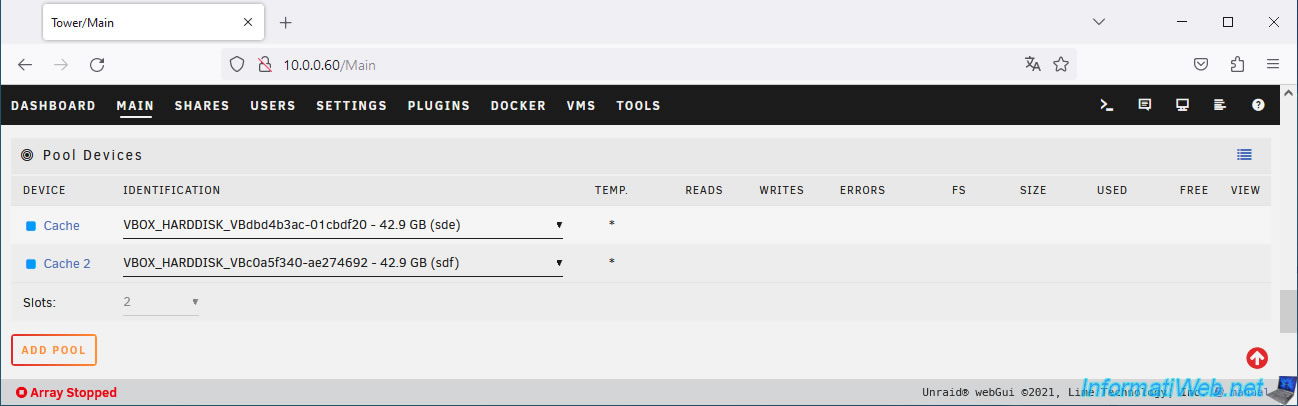
The 2 virtual SATA SSDs are now assigned to the Unraid cache.
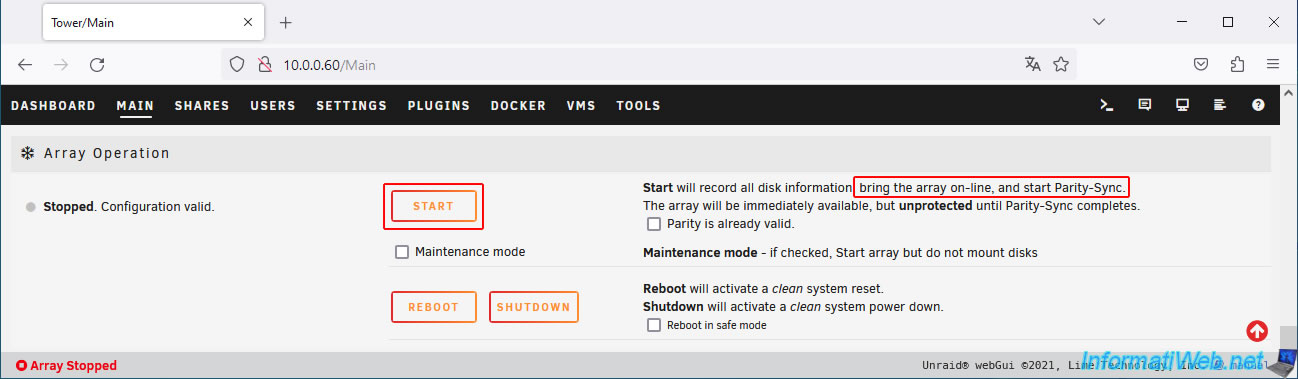
At the bottom of the page, click on: Start.
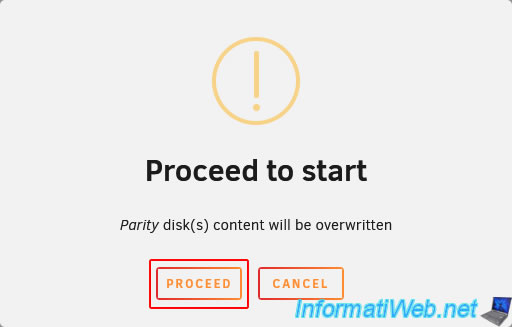
Click on: Proceed.
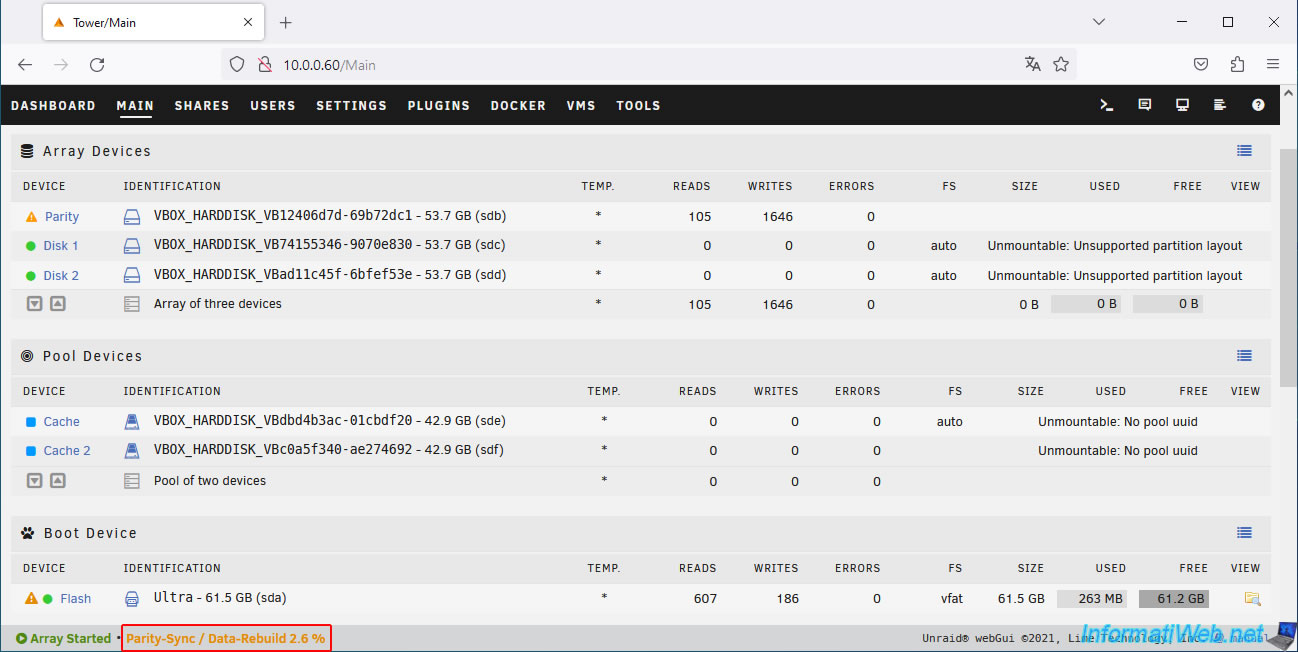
At the bottom of the page, you will see the status "Parity-Sync / Data-Rebuild" appear.
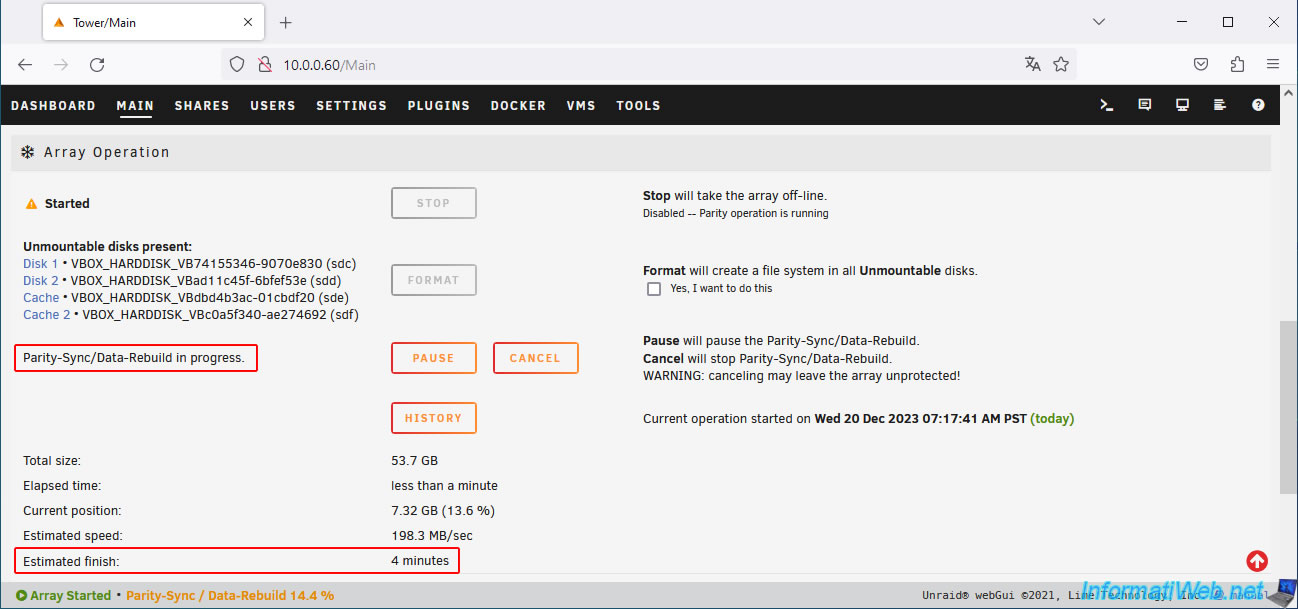
At the bottom of the page, you can follow the progress of the parity disk calculation.
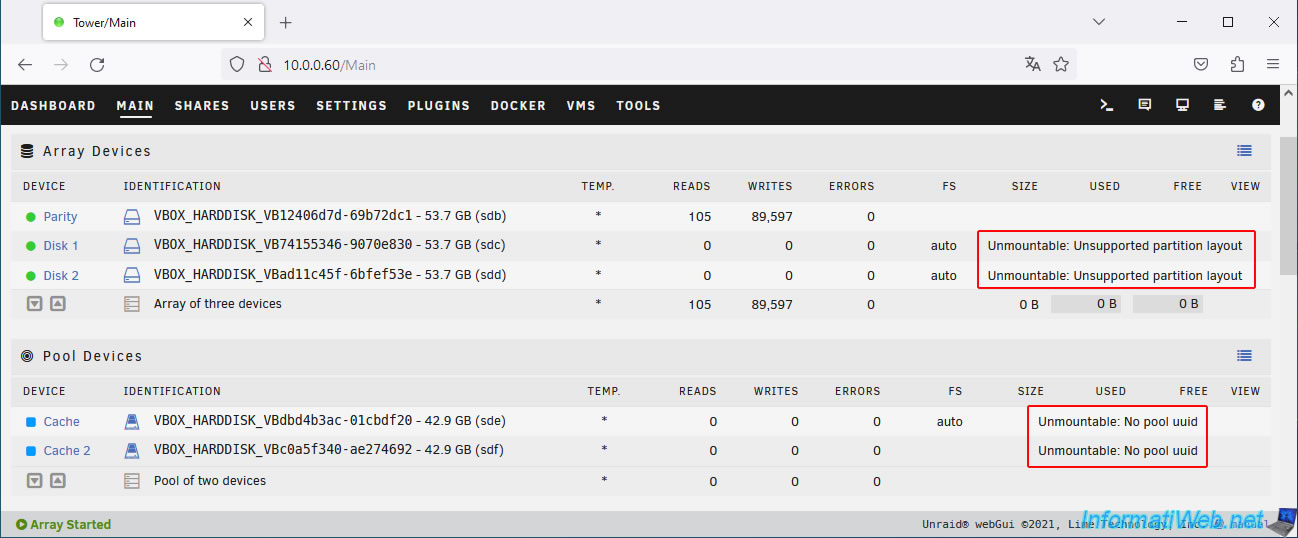
Once the parity disk calculation is complete, you will see that the disks are not mountable at this time.
Plain Text
Unmountable: Unsupported partition layout.
Unmountable: No pool uuid.
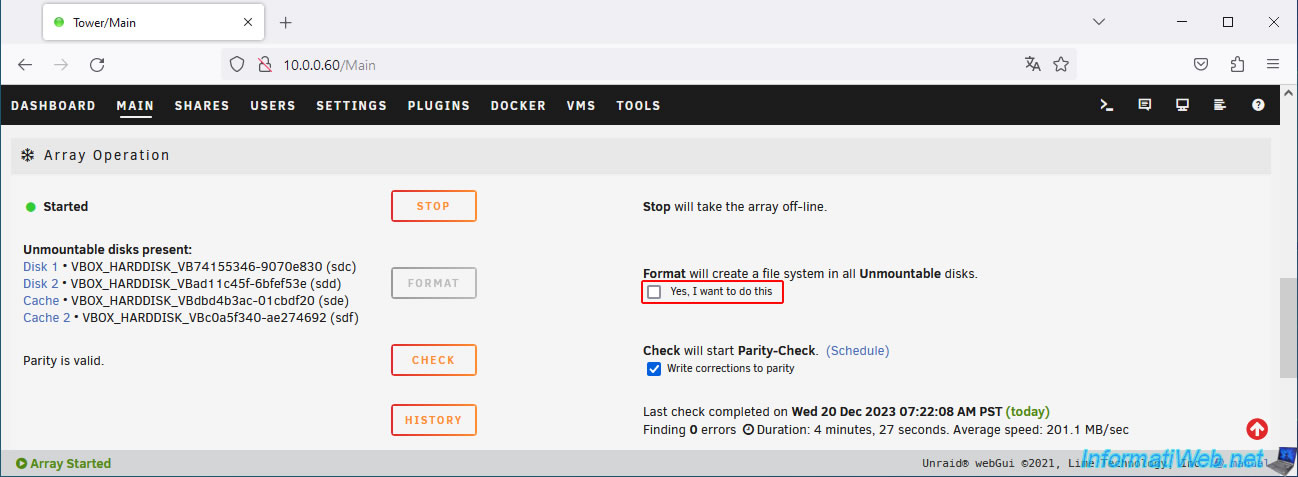
To fix the problem, at the bottom of the page, check the box "Yes, I want to do this" (to the right of the "Format" button).
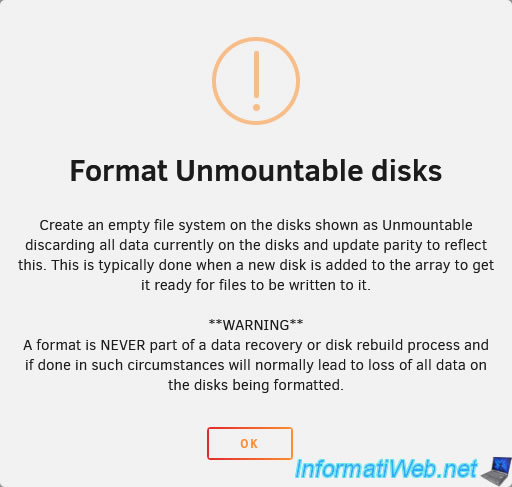
Ignore the warning that appears by clicking OK.
Now, click the "Format" button to have Unraid create a file system on your disks.
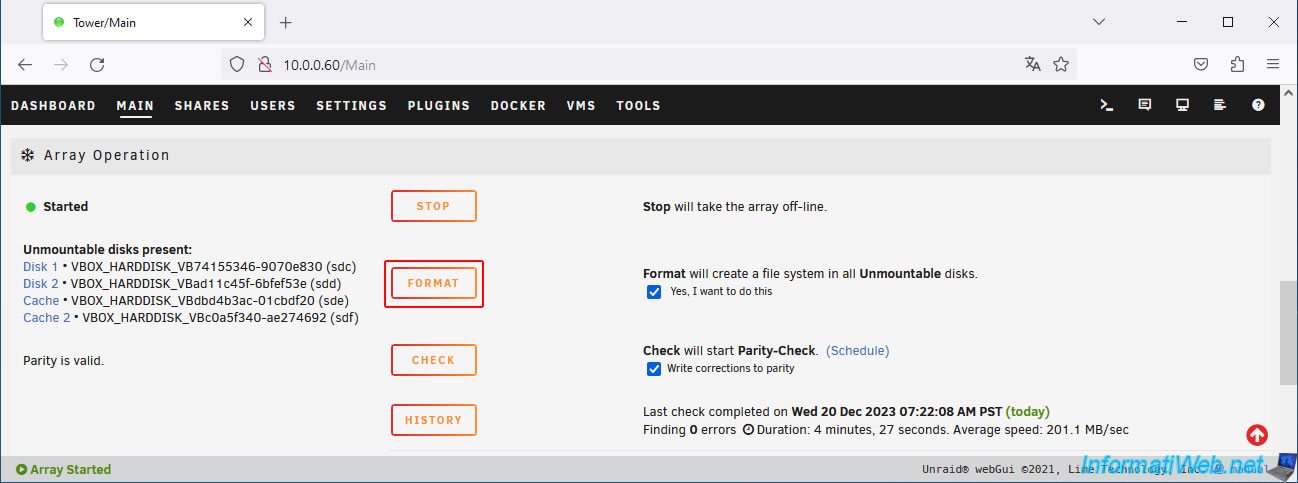
Please wait while your disks are formatted.
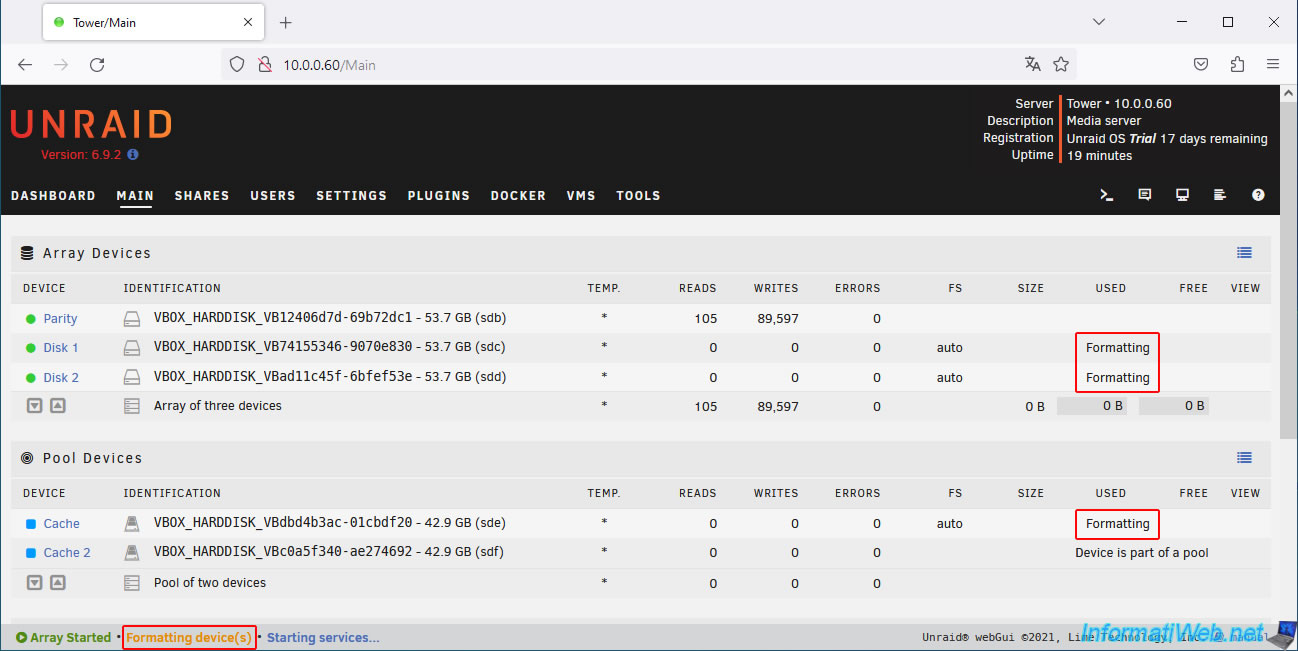
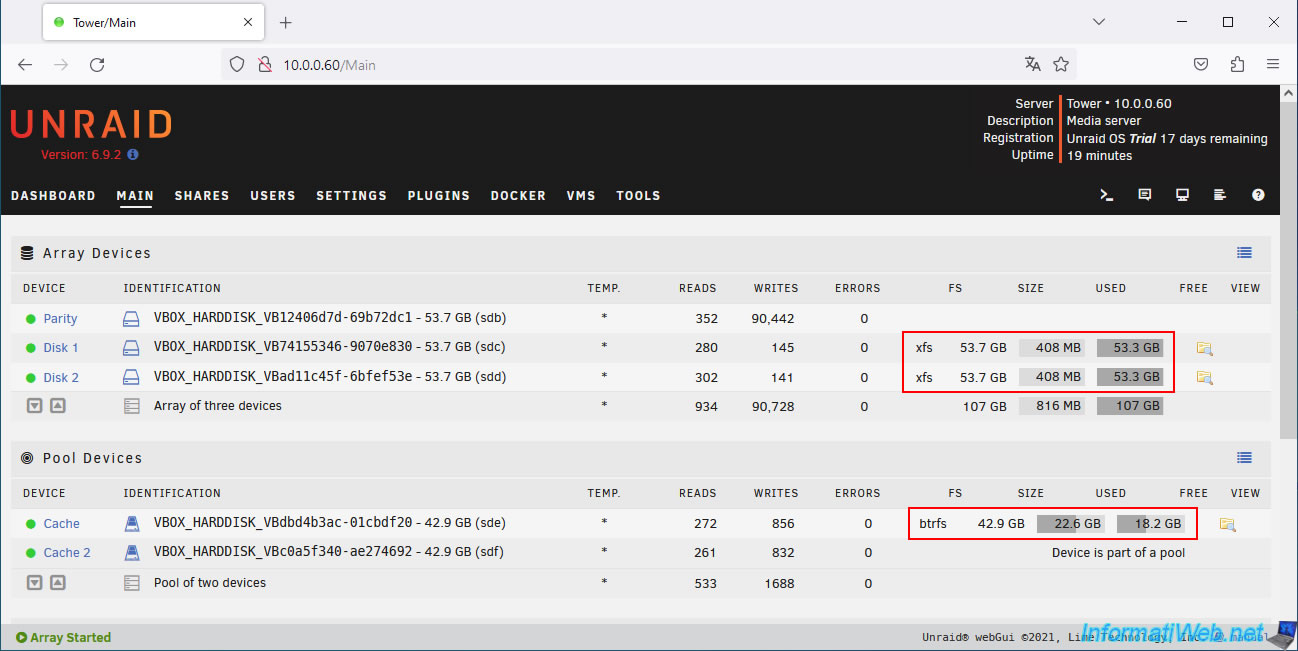
Once your disks are formatted, you will see that a file system (FS) has been created on them and the disk space for them is displayed.
Share this tutorial
To see also
-

Virtualization 11/6/2020
VirtualBox - Connect an USB key to a VM
-
Virtualization 10/13/2018
VirtualBox - Manage your VMs from a web browser
-
Virtualization 8/3/2018
VirtualBox - USB 3.0 support with Windows 7
-

Virtualization 12/5/2022
VirtualBox - Virtualizing your 1st machine (on VirtualBox 7)
No comment