Change the network profile used (private or public) on Windows 10
- Windows
- Windows 10
- 04 April 2022 at 09:07 UTC
-

- 2/2
5. Choose the type of network location from the network section of file explorer
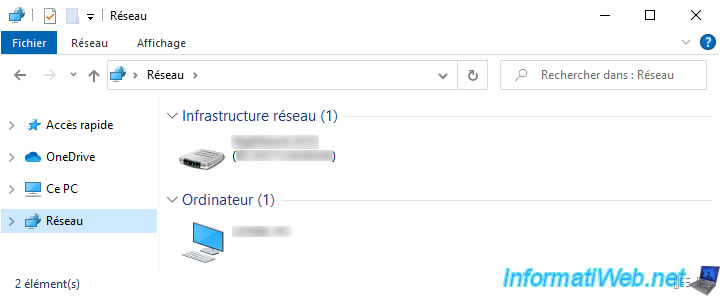
As on previous versions of Windows, it's still possible on Windows 10 to switch to a private network by going through the "Network" section of the file explorer.
This method is practical, because the path is strictly identical since Windows 7.
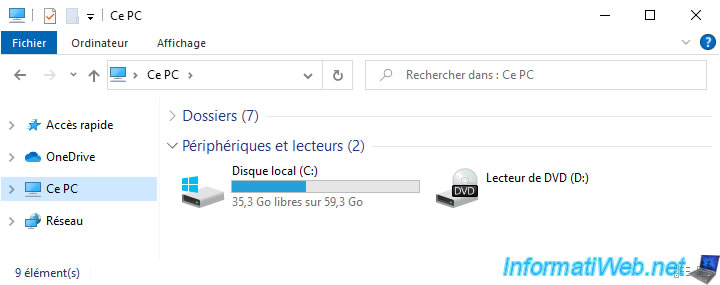
To get started, open file explorer.
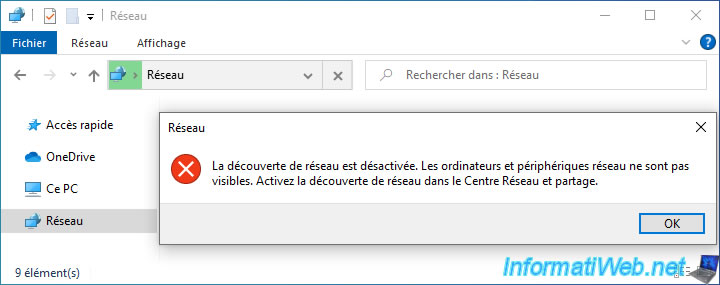
Then, go to the "Network" section displayed on the left and an error message will appear telling you that :
Network discovery is turn off. Network computers and devices are not visible. Please turn on network discovery in the Network and Sharing Center.
Click OK to hide this error.
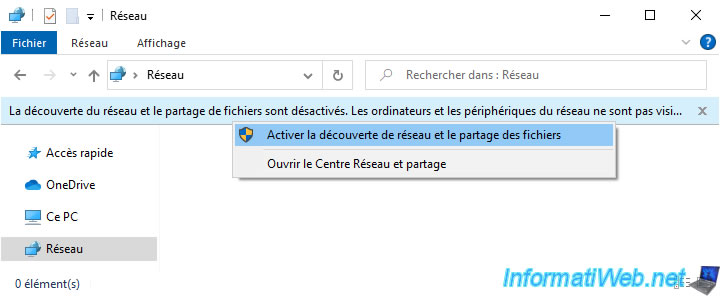
Then, a yellow banner (with the same message) will appear. Click on it, then on : Turn on network discovery and file sharing.
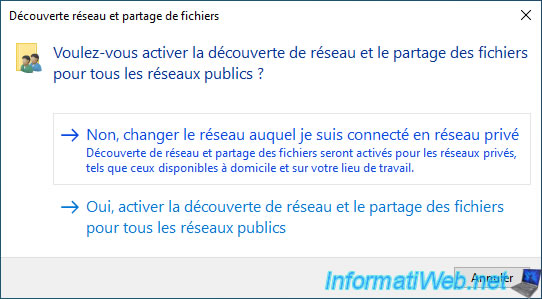
A "Network discovery and file sharing" window with the "Do you want to turn on network discovery and file sharing for all public networks?" question.
You can answer this question :
- No, make the network that I am connected to a private network : allows you to change the network location type of the network you are connected to to "Private network".
Since network discovery and file sharing are allowed for the "Private Network" network location type, this will fix the problem. - Yes, turn on network discovery and file sharing for all public networks : enable network discovery and file sharing for all public networks (those you've connected to before, as well as future networks you'll connect to).
This will therefore modify a global default value and this is strongly discouraged. Indeed, this means that the shared folders on your computer will be visible at home, but also for hackers when you connect to a public Wi-Fi network.
Click "No, make the network that I am connected to a private network" to change only the network location type of the network you're connected to to "Private network".
As expected, you can now see :
- Network Infrastructure : the Box, the router or the switch to which you are connected
- Computers : the computers on your network
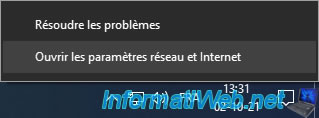
To check if the type of network location has been changed to "Private network", right-click on the "Network" icon present in the taskbar, then click on : Open Network & Internet settings.
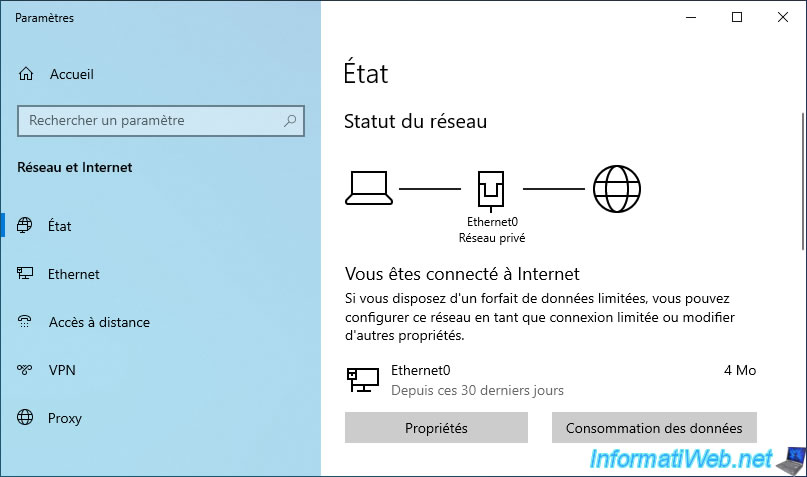
As expected, the type of network location used is now : Private network.
6. Choose the type of network location from command line via PowerShell
As on Windows 8 and 8.1, you will have the option to quickly change the type of network location to use (via the same PowerShell commands as before).
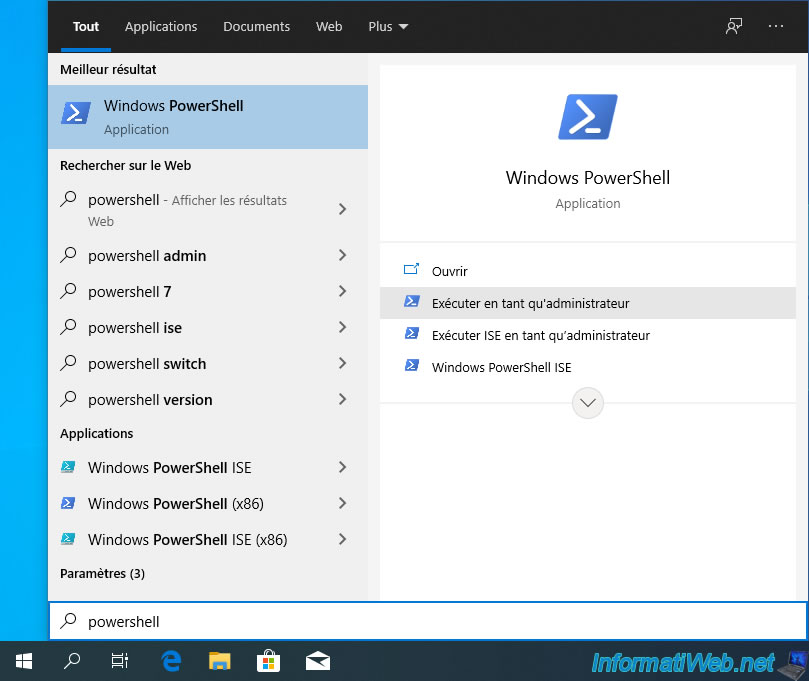
To get started, search for "powershell" via the Windows 10 start menu and click : Run as administrator.
To get information about the network you are connected to, type this :
PowerShell
Get-NetConnectionProfile
As you can see, the name of the network chosen by Windows 10 is : Network.
You can also see that the type of network location used at the moment is "Public". Which means it's a public network.
Plain Text
Name             : Network
InterfaceAlias   : Ethernet0
InterfaceIndex   : 8
NetworkCategory  : Public
IPv4Connectivity : Internet
IPv6Connectivity : LocalNetwork
To change the network location type of this network, target it by its name and specify the "Private" value for the "NetworkCategory" attribute to use a private network.
PowerShell
Set-NetConnectionProfile -Name "Network" -NetworkCategory Private
Check that the change has been taken into account.
PowerShell
Get-NetConnectionProfile
As expected, the type of network location used is now "Private".
Plain Text
Name             : Network
InterfaceAlias   : Ethernet0
InterfaceIndex   : 8
NetworkCategory  : Private
IPv4Connectivity : Internet
IPv6Connectivity : LocalNetwork
To reuse a public network, target it by its name and specify the "Public" value for the "NetworkCategory" attribute.
PowerShell
Set-NetConnectionProfile -Name "Network" -NetworkCategory Public
Now, it's a public network.
PowerShell
Get-NetConnectionProfile
Plain Text
Name             : Network
InterfaceAlias   : Ethernet0
InterfaceIndex   : 8
NetworkCategory  : Public
IPv4Connectivity : Internet
IPv6Connectivity : LocalNetwork
7. Choose the type of network location by editing Windows 10 registry
Finally, you can also go through the Windows 10 registry.
To get started, search for the "regedit" program and launch the registry editor.

The Registry Editor appears.
Go to the "HKEY_LOCAL_MACHINE\SOFTWARE\Microsoft\Windows NT\CurrentVersion\NetworkList\Profiles" registry key.
In this "Profiles" folder, you will find folders corresponding to the networks to which you have already connected at least once.
To do this, base yourself on the name displayed for the "ProfileName" data present in each folder.
In our case, it's the network named "Network" by Windows 10.
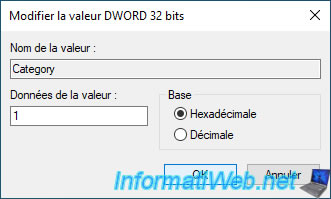
To change the type of network location of the desired network, change the value of the "Category" data item by double-clicking on it.
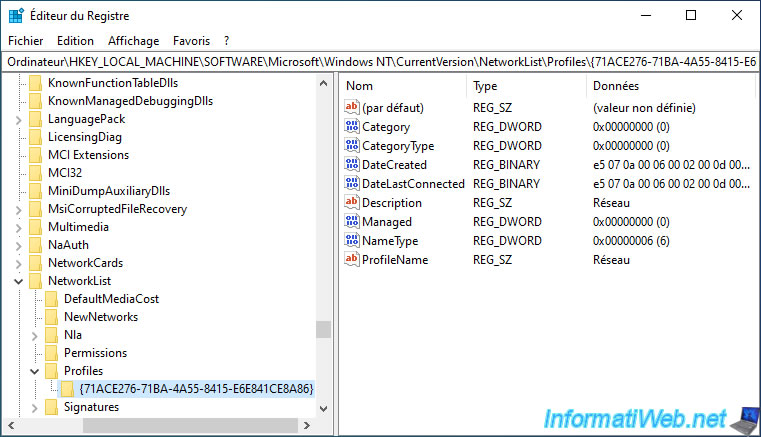
For the value of this data, you have the choice between :
- 0 : to use a "public network" network location type.
- 1 : to use a "private network" network location type.
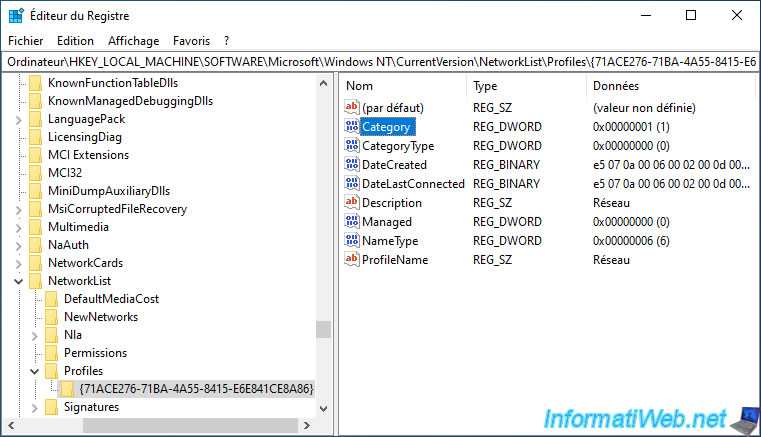
The value of the "Category" data item has been modified.
You can close the Registry Editor.
To check if you have entered the correct value, you can check what type of network location Windows 10 has included by right-clicking on the "Network" icon located in the taskbar, then on : Open Network & Internet settings.

Share this tutorial
To see also
-

Windows 5/20/2016
Control a computer remotely (Win 7 to 11)
-

Windows 4/17/2025
Windows 10 - Microsoft Store - Change download location
-
Windows 5/16/2025
Windows 11 / 10 - Enable Windows Photo Viewer
-

Virtualization 1/29/2024
Windows 8 / 8.1 / 10 / 11 - Install Hyper-V on Windows Home Edition
No comment