- Windows
- Windows 11
- 19 April 2022 at 09:24 UTC
-

On Windows 11, you can create Microsoft accounts or local accounts for your new users.
Creating a local account allows you to not depend on a Microsoft account and avoid being traced for different things.
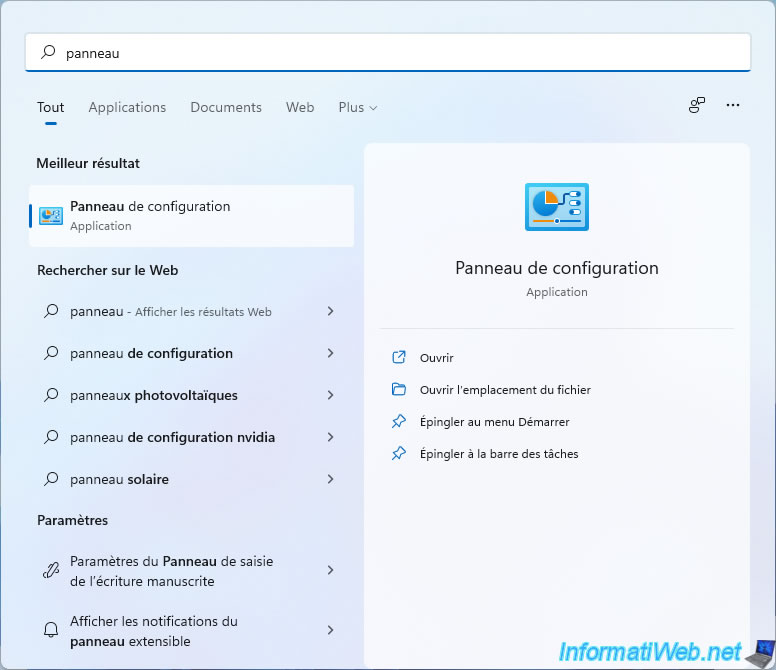
To create a local account on Windows 11, open the start menu, type "panel" and open the "Control Panel".
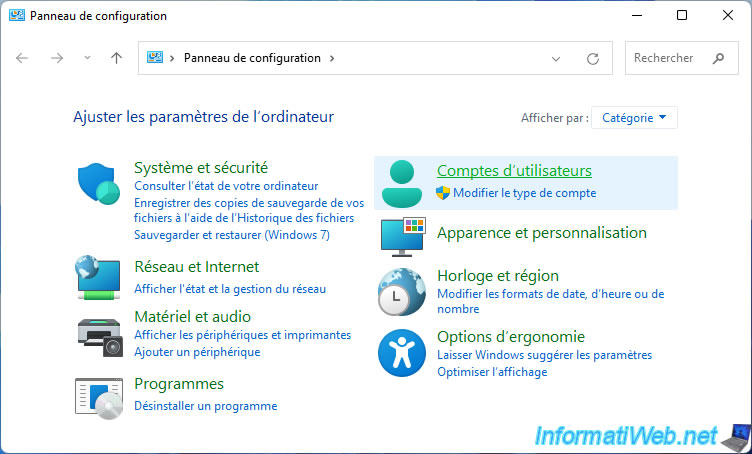
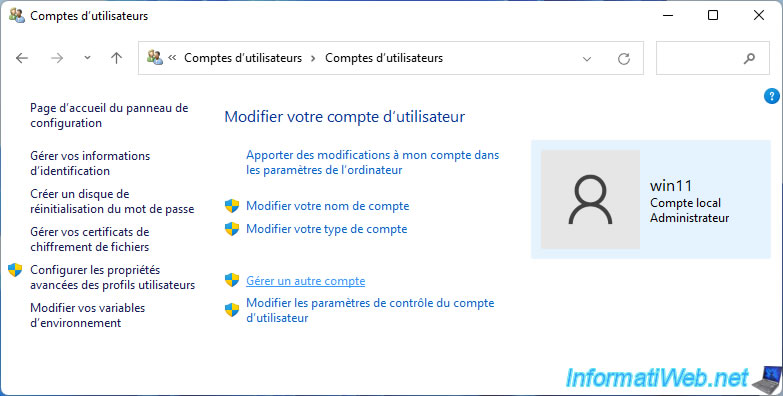
In the control panel that appears, click on : User Accounts.
Click again on : User Accounts.
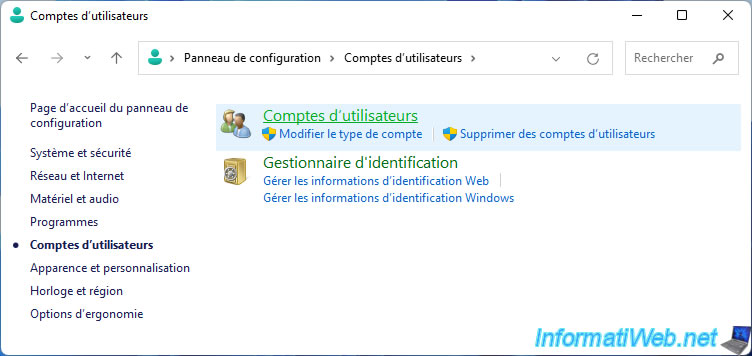
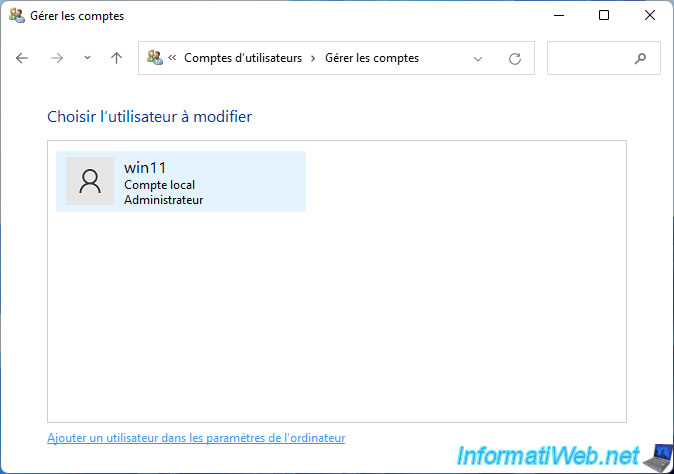
Then, click on the "Manage another account" link.
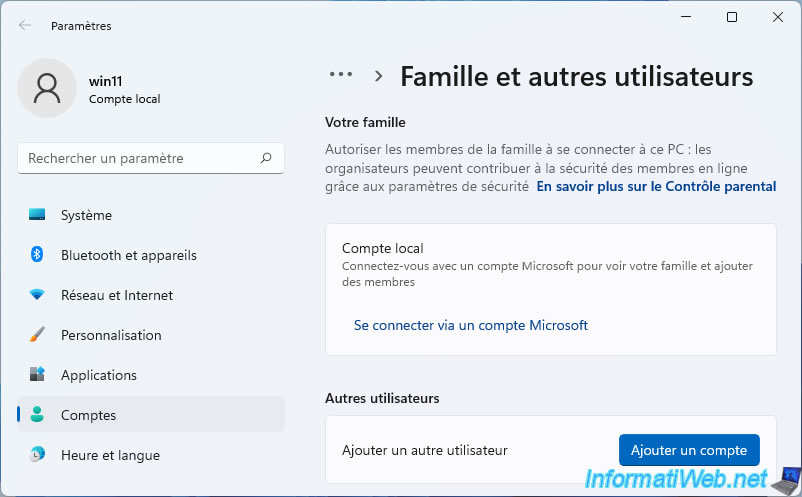
At the bottom, click on the "Add a new user in PC settings" link.
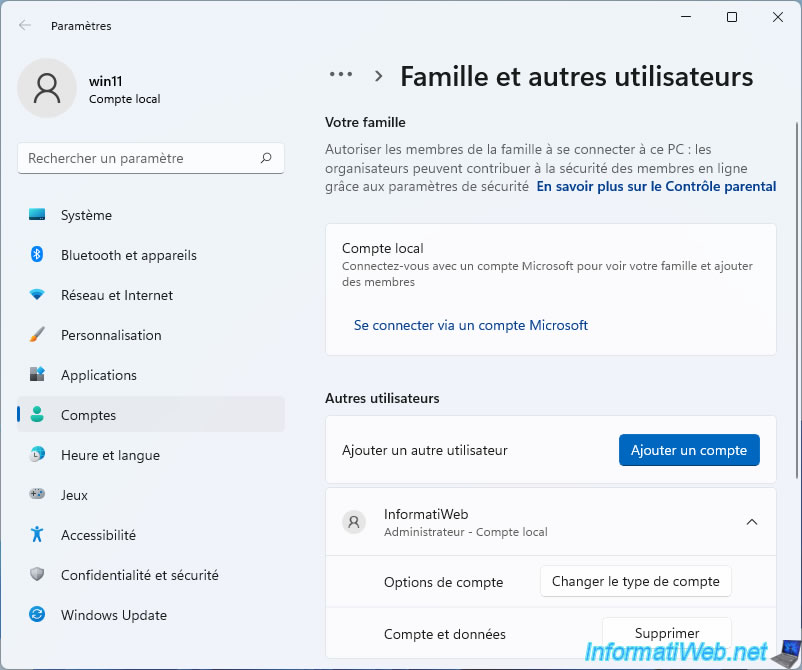
The Windows 11 "Settings" application appears with the "Family & other users" section.
Click on the blue button : Add account.
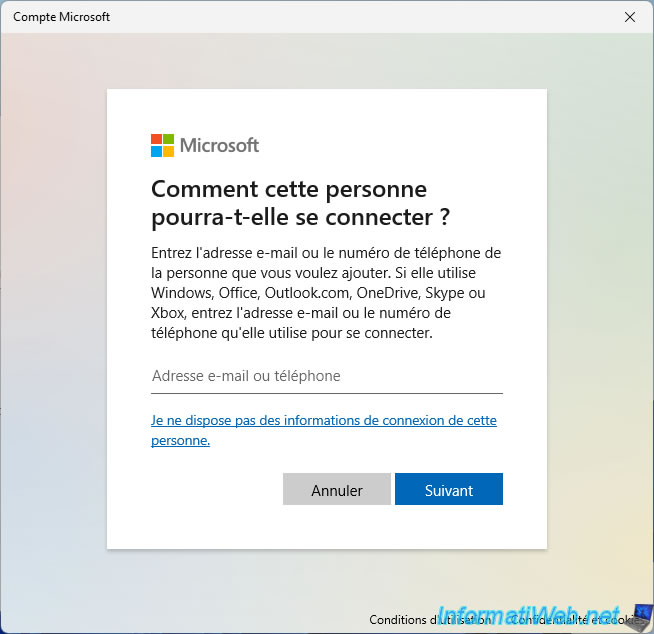
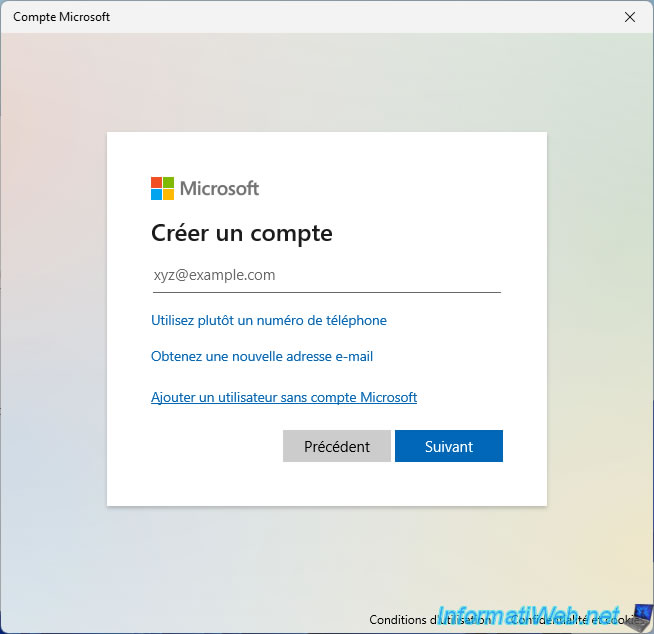
As usual, Windows tries to get you to create a Microsoft account instead of a local account.
To create a local account on Windows 11, you must first click on the "I don't have this person's sign-in information" link.
Then, click on : Add a user without a Microsoft account.
Provide a name for your new user, as well as a password (if desired), then click Next.
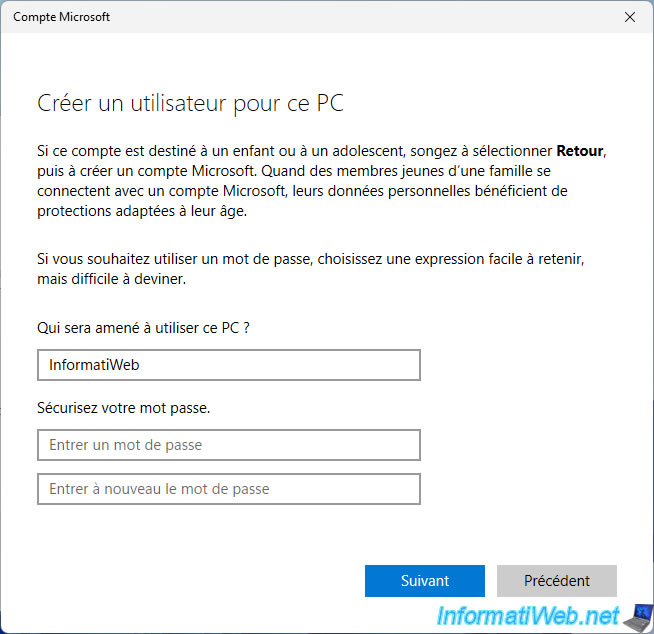
Your new user has been added.
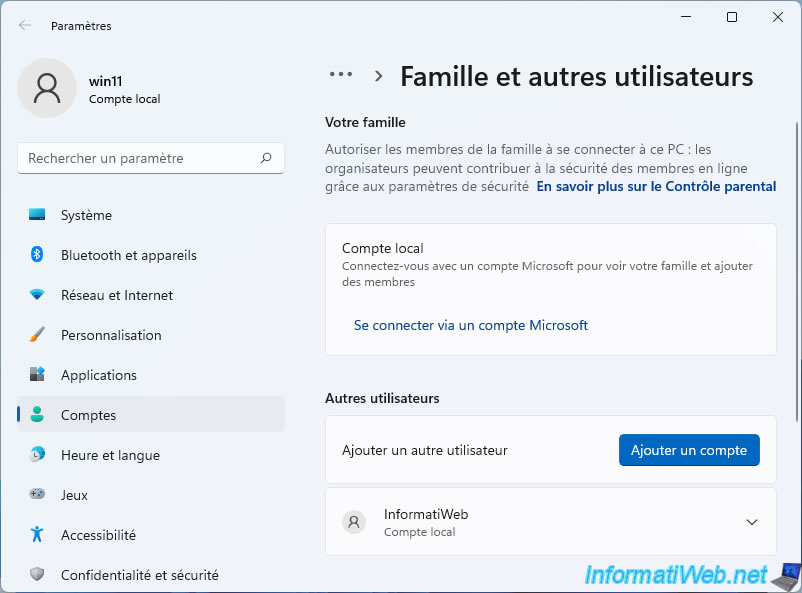
Important : by default, the new users you create are "Standard" type accounts.
This means that their rights will be limited. Which is handy when you create user accounts for your children to prevent it from crashing Windows too easily.
If you wish to grant the "Administrator" right to this new user, click on the small arrow to the right of the user account, then click on the "Change account type" button.
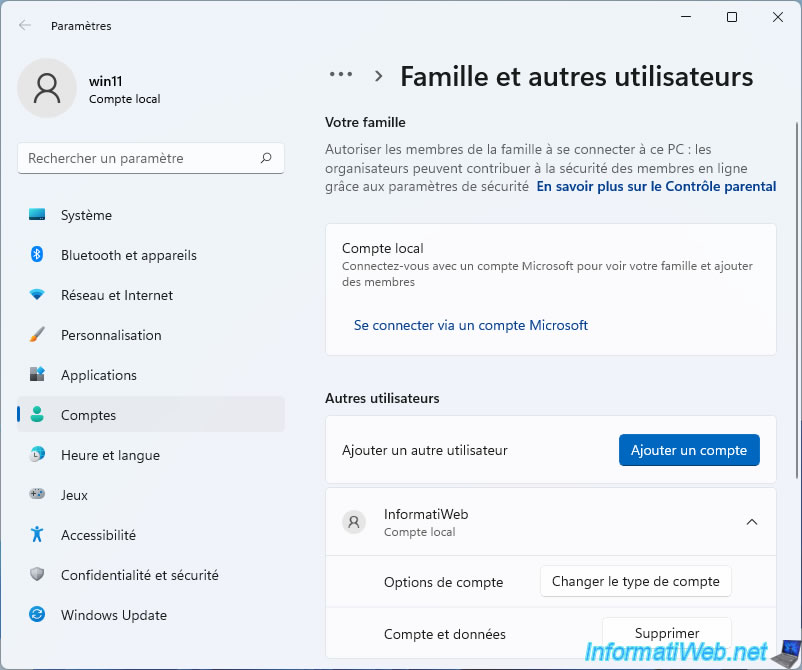
Select "Administrator" instead of "Standard User" and click OK.
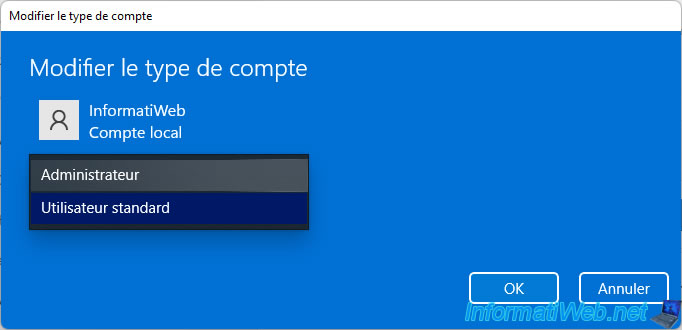
Now, the account appears with the status "Administrator - Local account" instead of "Local account".
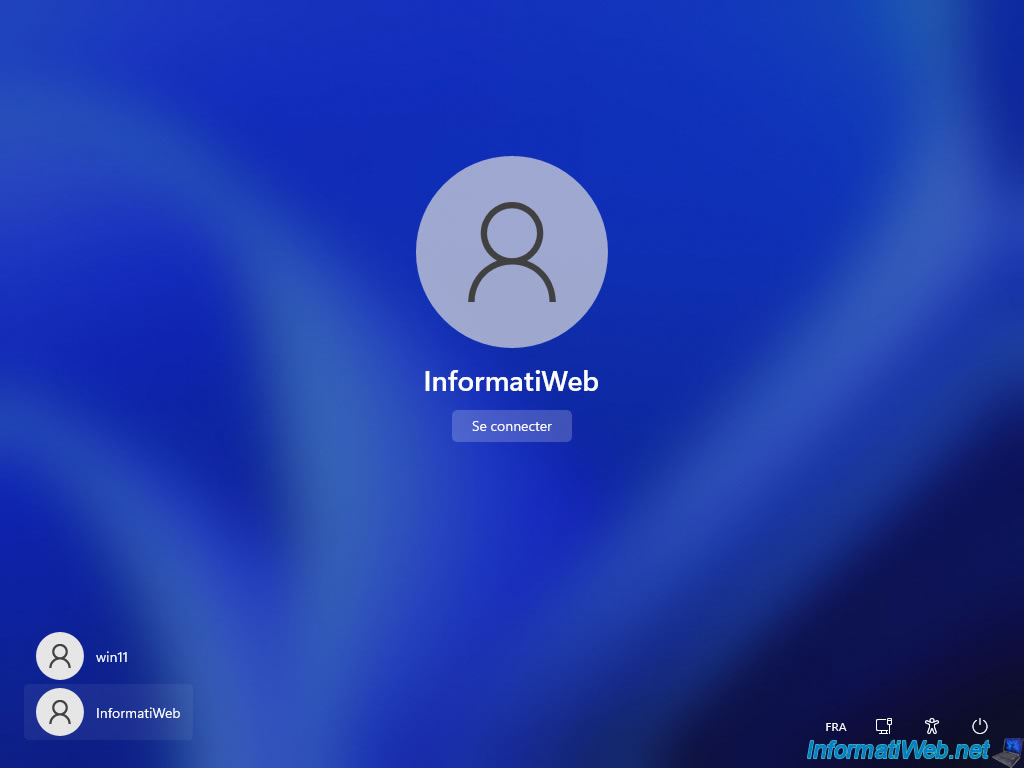
Log out and click on the name of the newly created user visible at the bottom left.
During the first opening of his session, the "This might take a few minutes" message will appear.

Then, several configuration steps will appear.
These steps are the same as those that appear at the end of the Windows 11 installation.

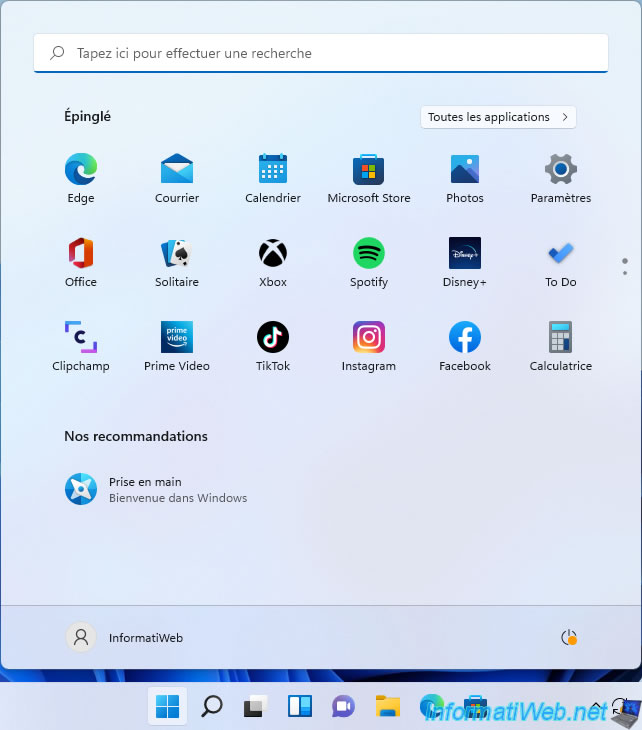
You are now logged in with your new user.
Share this tutorial
To see also
-
Windows 3/15/2022
Upgrade from Windows 10 to Windows 11 (not compatible hardware / unofficial method)
-
Windows 1/25/2022
Windows 11 - Download the official iso from Microsoft's server
-
Windows 3/13/2025
Windows 11 / 10 / 8.1 / 8 - Create a storage space (software RAID)
-
Windows 5/22/2025
Windows 11 / 10 / 8.1 / 8 / 7 - Add a mirror disk to a software RAID 1
You must be logged in to post a comment