Change the network profile used (home, work or public) on Windows 7
- Windows
- Windows 7
- 01 April 2022 at 11:04 UTC
-

- 2/2
6. Choose network location type from the Network section of File Explorer
As you will understand, you can change network location type in several ways on Windows 7.
Nevertheless, if you are looking for an easy-to-remember technique that has the same path on all Windows versions (from Windows 7 to 10), then use this one.
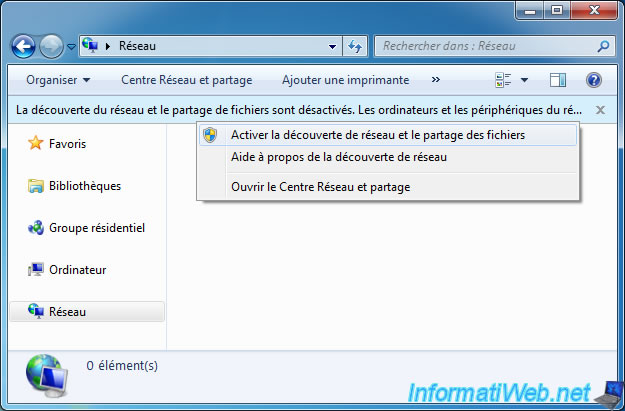
To get started, open File Explorer.

Then, go to the "Network" section (in the left column).
If you are connected to a public network or network discovery is not enabled for you, a yellow banner "Network discovery and file sharing are turned off. Network computers and devices ..." will appear.
Click on this banner, then click on the "Turn on network discovery and file sharing" option which is displayed.
Note : on Windows Vista, this "Network" section is only accessible from the start menu via the "Network" option found there.
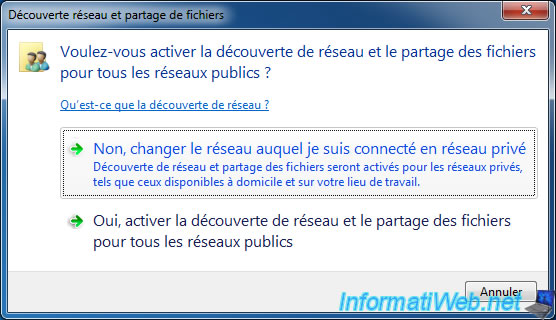
A "Network discovery and file sharing" window will appear and offer you to choose between :
- No, make the network that I am connected to a private network : allows you to change the type of network location to "Home network" (= private network).
- Yes, turn on network discovery and file sharing for all public networks : leave the current network location type as "Public Network", but just enable network discovery for ALL public networks.
So, choose the 1st option (No, make the network that I am connected to a private network) to change the network location type of the network you are connected to to : Home network.
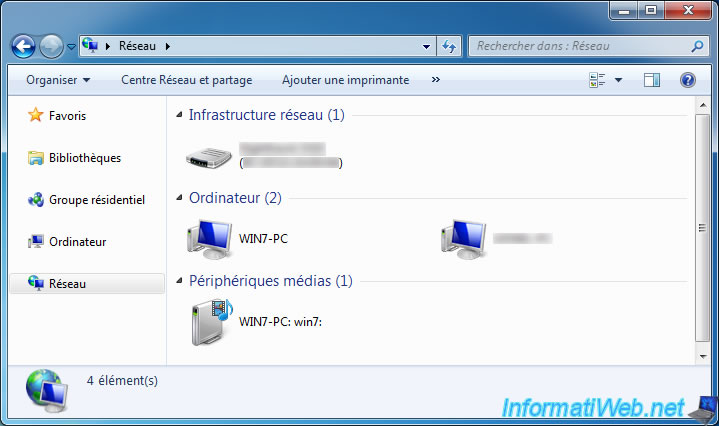
As you can see, when you choose "Home network" as the network location type for the network you are connected to, network discovery will be allowed and therefore you will be able to see :
- Network Infrastructure : the switch or router (or Box) to which you are connected
- Computer : computers connected to your network
- Media Devices : visible media servers on your network.
7. Choose network location type by editing Windows 7 registry
On Windows 7, changing the network location type by editing the registry is complicated.
So only use this technique as a last resort, if none of the methods described above worked for you.
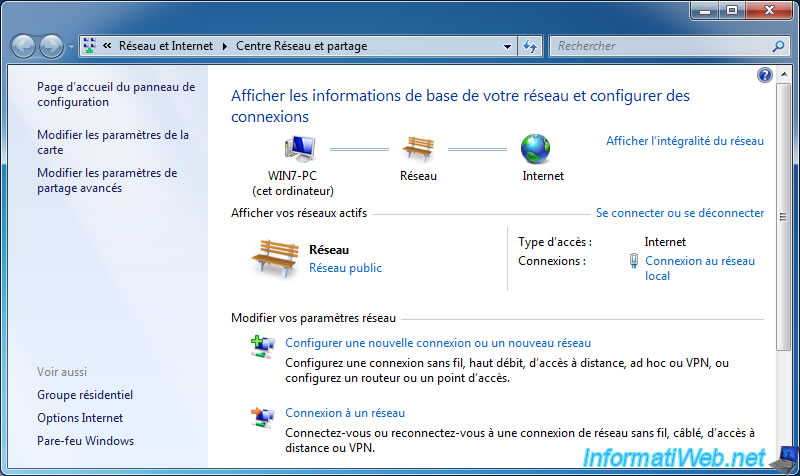
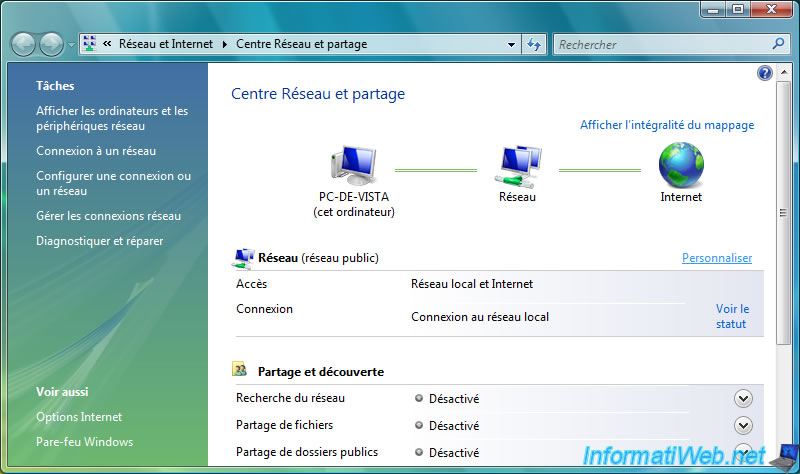
As you can see, at the moment, Windows 7 considers the network to which we are connected as a public network.
To begin, open the Windows 7 registry editor by searching for the "regedit.exe" program via the Windows 7 start menu.
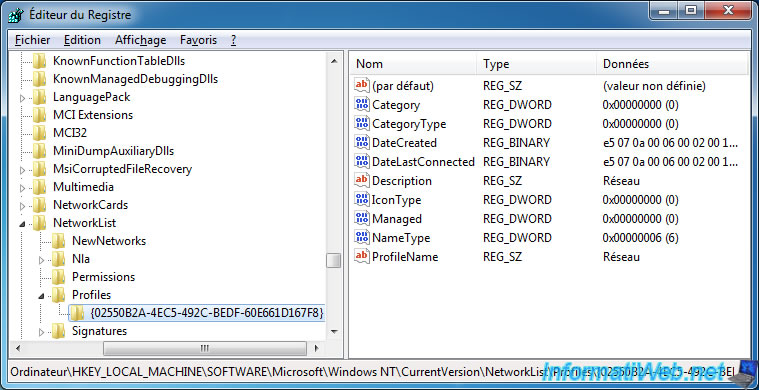
In the Windows 7 Registry Editor that appears, go to the "HKEY_LOCAL_MACHINE\SOFTWARE\Microsoft\Windows NT\CurrentVersion\NetworkList\Profiles" registry key.
In this "Profiles" folder, you will find several folders, each of which has an unique identifier as a name.
Each of these subfolders corresponds to a network (wired or wireless) to which you have connected at least once with this computer.
To find the folder corresponding to the network you are connected to, look at the name listed as "ProfileName" in each of these folders.
The name of your network being displayed in bold in the Windows 7 Network and Sharing Center.
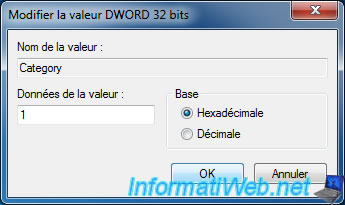
To change the type of network location to use for the desired network, simply change the value of the "Category" data.
The possible values are :
- 0 : public network
- 1 : work or home network
- 2 : domain network
To begin, enter the value "1" and click OK.
This will tell Windows 7 to use the "Work network" or "Home network" location type.
In order for Windows 7 to know whether it's a "Work network" or "Home network" type network, you will need to create an additional key in the Windows 7 registry.
However, for this, you will need :
- the unique identifier of this network : in other words, the name of the folder concerning the network that you are modifying
- the name of this network : which corresponds to the value of the "ProfileName" data present in this folder
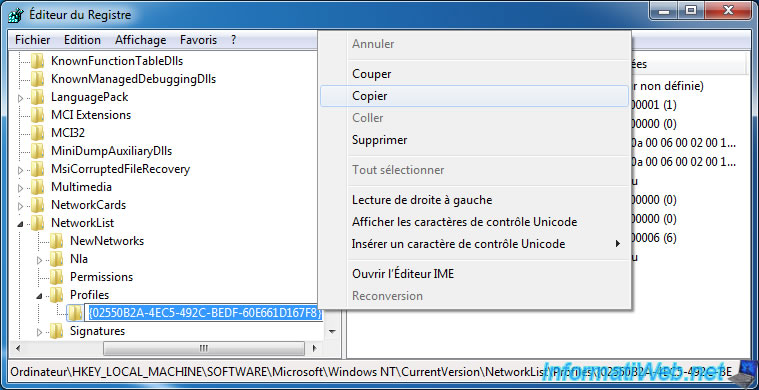
Since the unique identifier of this network profile is rather long, here is how to easily copy it.
To begin, right-click "Rename" on this folder.
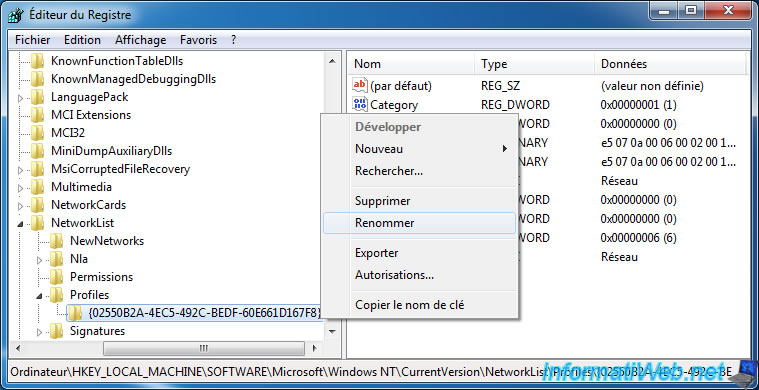
Then, right-click "Copy" on it (when its full name is selected = highlighted in blue).
Note : you can also use the keyboard shortcut "CTRL + C" to copy it.
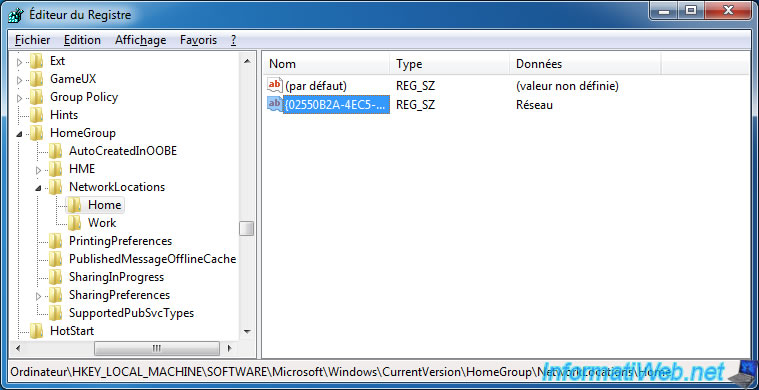
Then go to the "HKEY_LOCAL_MACHINE\SOFTWARE\Microsoft\Windows\CurrentVersion\HomeGroup\NetworkLocations" registry key.
In this registry key, you will find 2 folders :
- Home : for the list of "Home network" type networks
- Work : for the list of "Work network" type networks
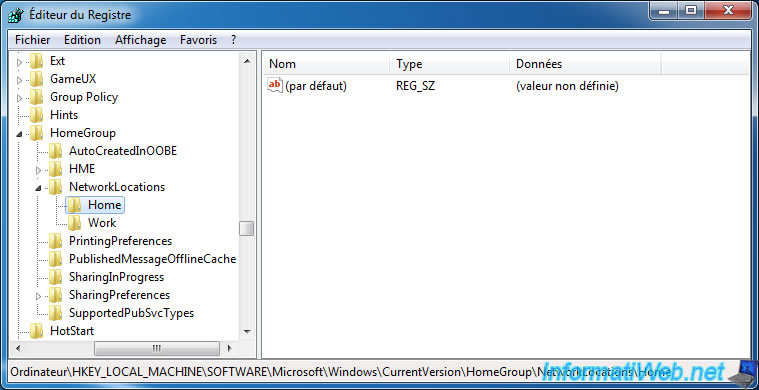
Choose the desired folder depending on the network location type you want to use.
In our case, we select the "Home" folder to use the "Home network" network location type.
Right-click "New -> String Value" in the white space on the right side and specify the identifier of your network profile by right-clicking "Paste" in the white box or using the keyboard shortcut "CTRL + V".
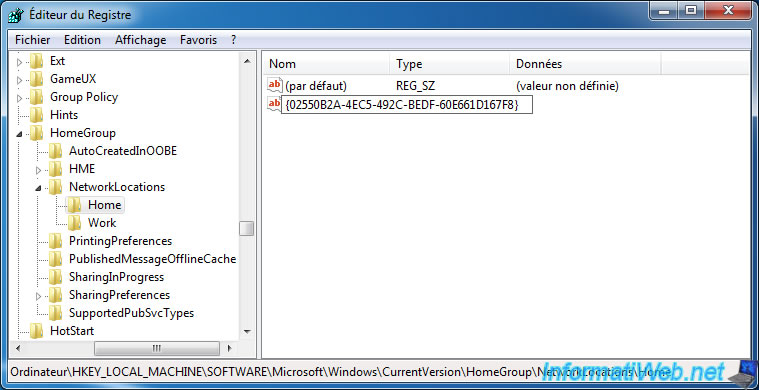
A new "REG_SZ" type data has been created with the unique identifier of your network profile as name.
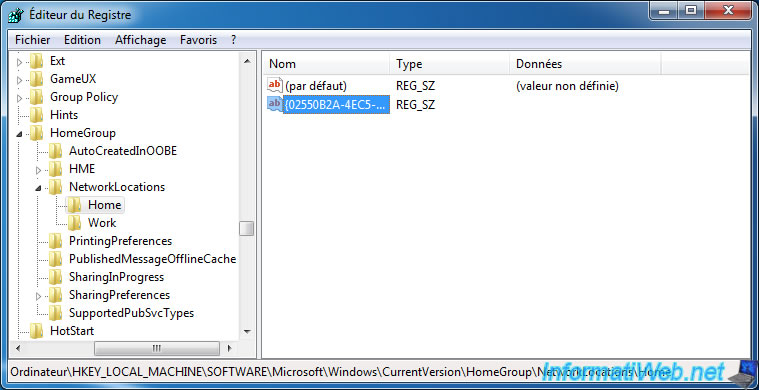
Double-click on the created data and provide the name of your network (= the value of the "ProfileName" data previously retrieved from the previous registry key) as value.
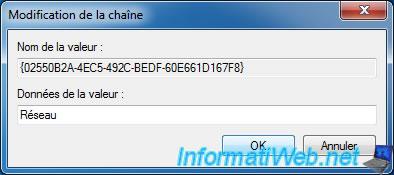
Now, Windows 7 knows that it's a home network.
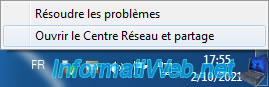
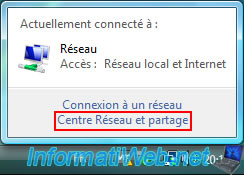
To check that the modification has been taken into account, right-click on the "Network" icon in the taskbar and click on : Open Network and Sharing Center.
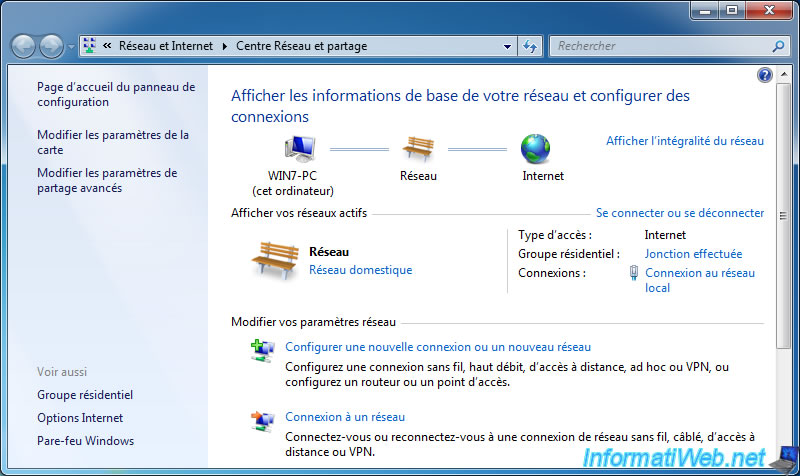
As you can see, modifying the registry will not be sufficient on Windows 7 to make the interface correct.
However, the main thing is that Windows 7 treats your network as a home network. Trust what it says "Home Network" and not the icon (which you can manually change if you want).
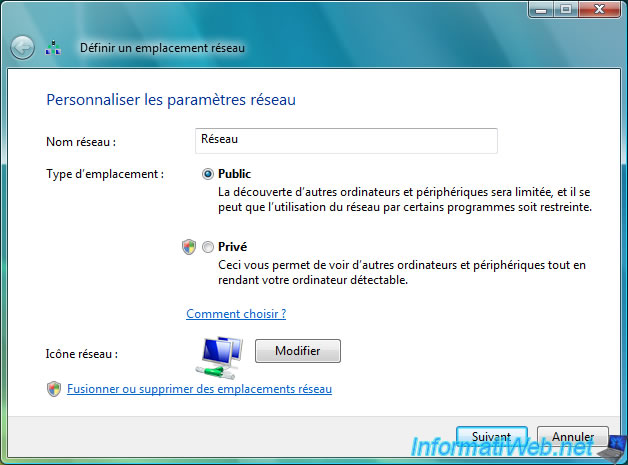
To change the icon, you will need to click on it. Indeed, this modification is not managed via the Windows registry.
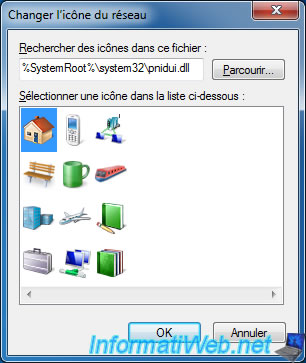
Click on the "Change" button.
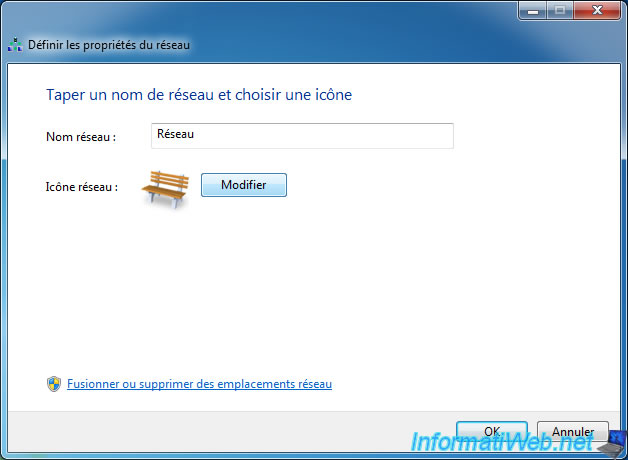
Select the icon representing a small house if you have chosen the home network.
Note : the 2 icons just below correspond to the public network (for the wooden bench) and to the work network (for the blue building).
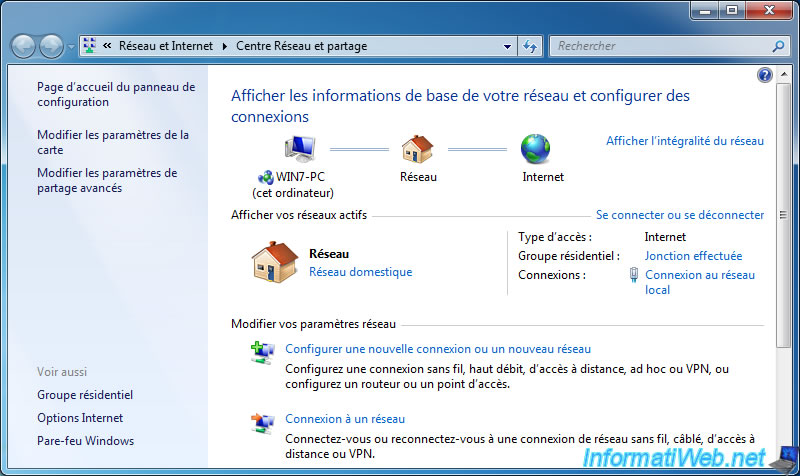
Now, the icon is correct.

The icon is also fixed in the Network and Sharing Center.
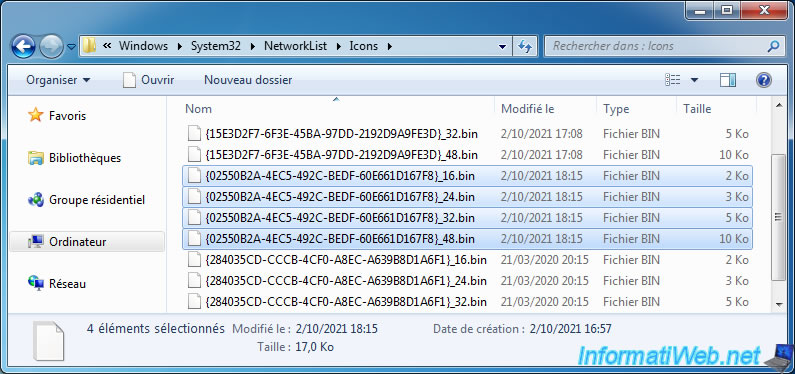
If you're looking for where Windows 7 changes this icon, you need to look in the Windows 7 "C:\Windows\System32\NetworkList\Icons" folder.
Indeed, when you change the icon of a network from the Network and Sharing Center, Windows 7 modifies 4 files whose name is composed of : [network profile identifier]_[size in pixels of the icon].bin .
Which means that Windows 7 uses 4 icon formats per network profile : 16x16 px, 24x24 px, 32x32 px and 48x48 px.
However, Windows 7 dynamically generates these files.
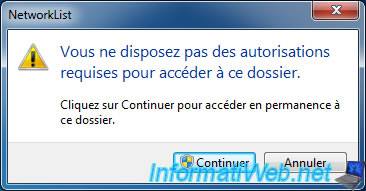
Note that the "C:\Windows\System32\NetworkList" folder is not normally accessible, hence the warning "You don't currently have permission to access this folder" which will appear if you attempt to get back there.
Warning : if you click "Continue" and wait about ten seconds, Windows 7 may let you enter this folder (if you have administrator rights), but this will permanently modify the permissions set on this folder.
This is not recommended for security reasons.
8. Choose network location type on Windows Vista
If you still have a computer on Windows Vista, here's how to change its network location type.
To get started, click on the "Network" icon in the taskbar, then click on : Network and Sharing Center.
As you can see, this computer is connected to the "Network" network and the type of network location currently used is : public network.
To modify it, click on the "Customize" link.
On Windows Vista, you will have the choice between : Public and Private.
If you are at home, choose "Private" to benefit from Windows file sharing, network discovery, ...
Otherwise, choose "Public".
Then, click on : Next.

The network location type has been changed.

Share this tutorial
To see also
-

Windows 8/22/2022
Windows - Install the drivers from the supplied CDs
-

Windows 12/12/2020
Windows 7 - Create a backup system image
-
Windows 3/26/2021
Windows 7 - Create a bootable USB key of the system repair disc
-

Windows 1/16/2015
Windows 7 - Install from an USB 3.0 key
No comment