- Windows
- Windows 7
- 01 April 2022 at 11:04 UTC
-

- 1/2
On Windows 7, you can choose between 3 network location types : home, work or public.
Depending on the network location type selected, Windows 7 will adapt some network settings and opened or closed ports in your computer's firewall will not be the same.
For example, file sharing and network discovery are allowed by default on a home network, but not on a public network.
This makes it possible to automatically adapt the security settings of Windows 7 according to the network on which you connect.
- Choose network location type when installing Windows 7
- Choose network location type when a new network is detected
- Choose network location type from Network and Sharing Center
- Choose network location type for a Wi-Fi network you're connected to
- Choose network location type from homegroup settings
- Choose network location type from the Network section of File Explorer
- Choose network location type by editing Windows 7 registry
- Choose network location type on Windows Vista
1. Choose network location type when installing Windows 7
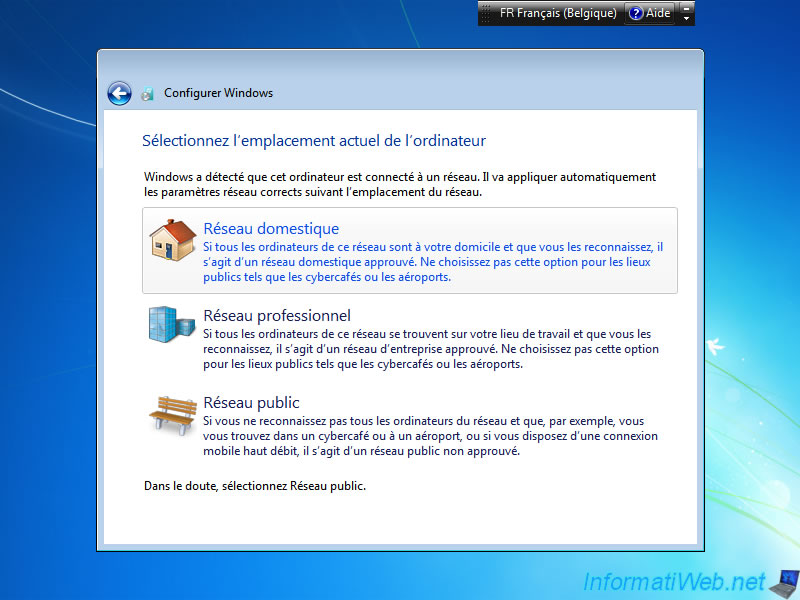
Once the Windows 7 installation is complete, a setup wizard will appear before you access your Windows session.
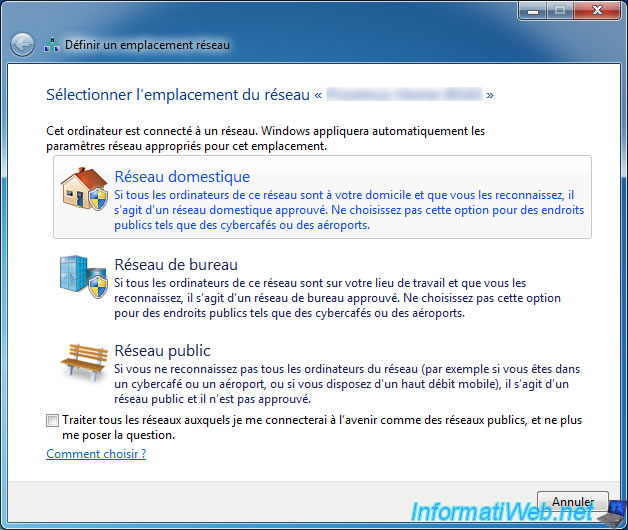
In this wizard, you will see a "Select your computer's current location" step appear at some point where you will have to choose between :
- Home network : if your computer is connected to your home network.
This will allow you, for example, to automatically enable file sharing when your computer is connected to this network. - Work network : if your computer is connected to your company network.
- Public network : if your computer is connected to a network outside your home.
For example : on a Wi-Fi network available outside your home. Whether it's free or not.
If you are at home, choose : Home network.
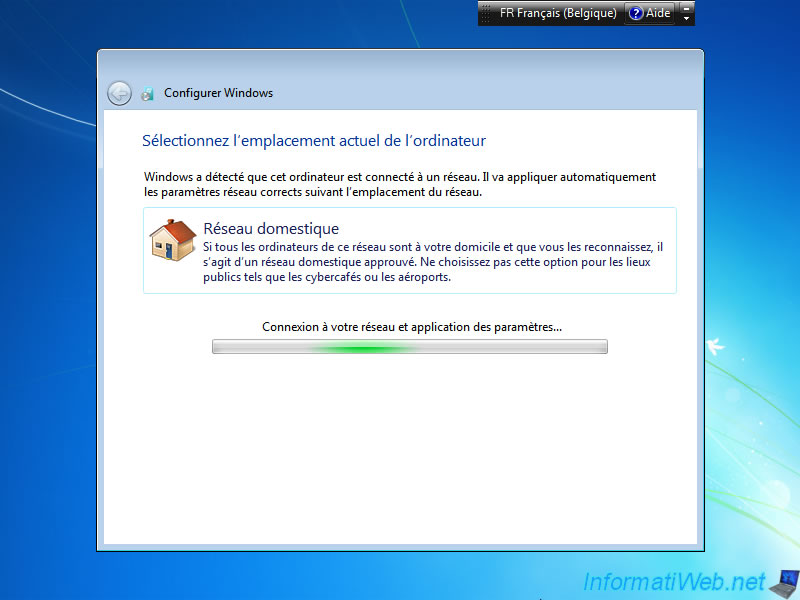
The "Connecting to your network and applying settings" message appears for a few seconds.
Once the Windows 7 setup wizard is complete, you will arrive at your Windows 7 desktop.
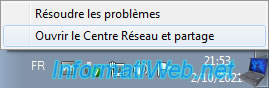
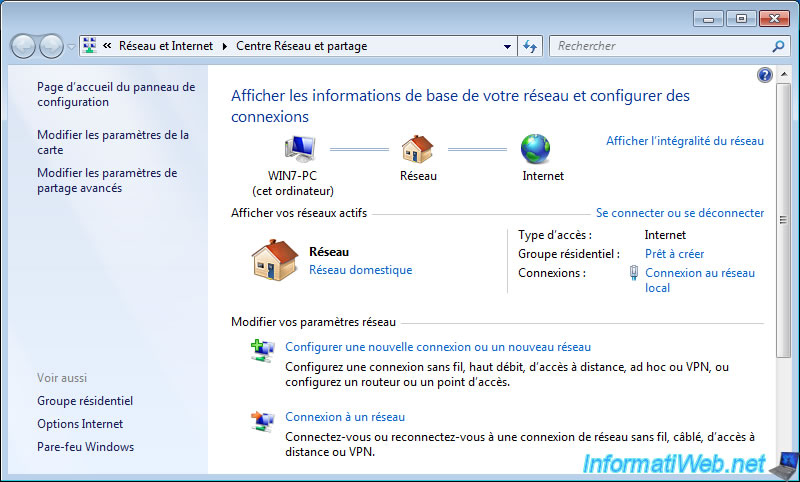
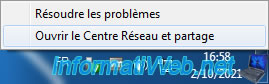
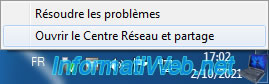
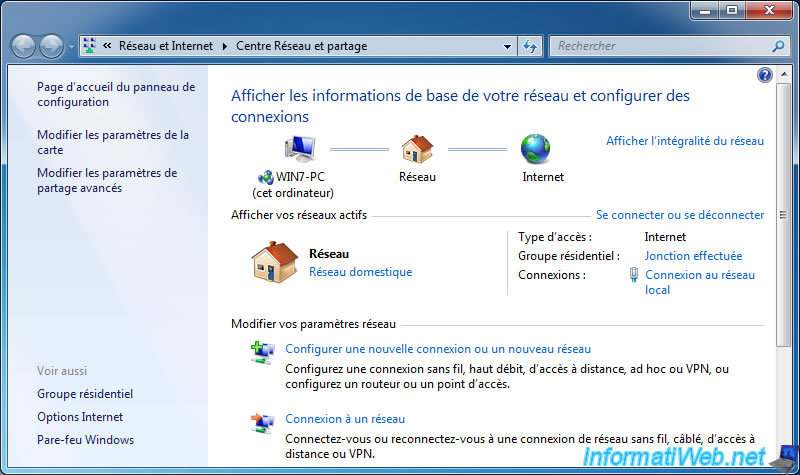
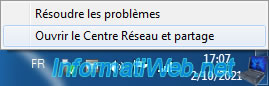
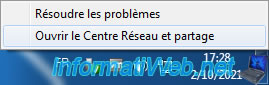
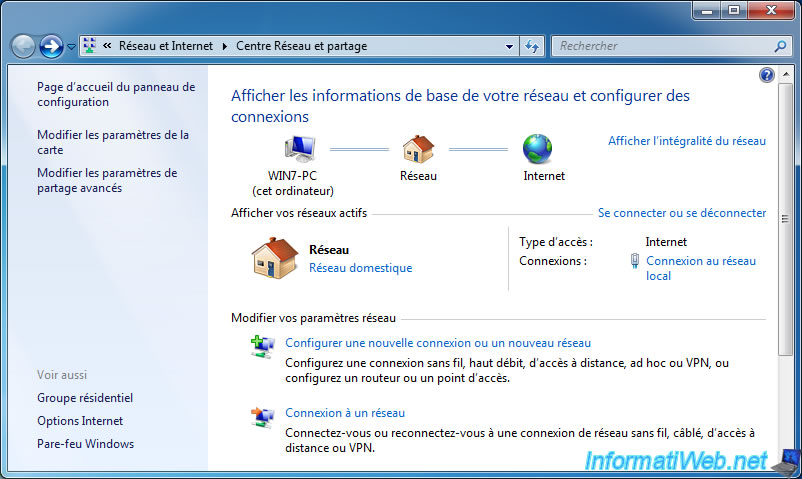
Right-click on the network icon in the taskbar, then click : Open Network and Sharing Center.
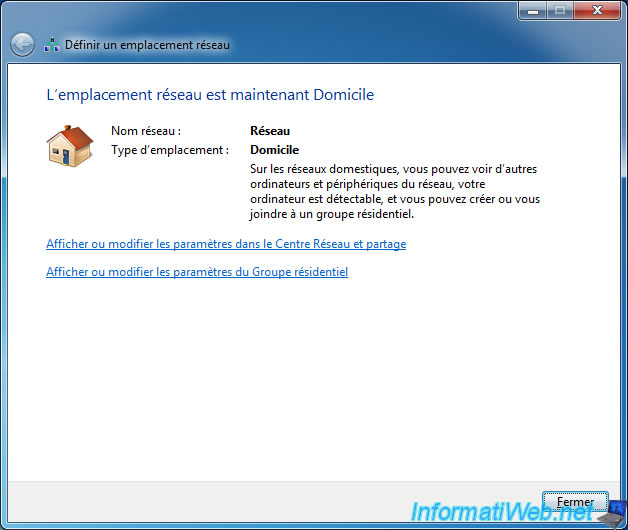
As you can see, the selected network location is : Home network.
Hence the little house that corresponds to this type of network location.
2. Choose network location type when a new network is detected
When you connect your computer to a new network (either via network cable or wirelessly via Wi-Fi), Windows 7 will again display a "Set Network Location" window.
Note that Windows 7 creates each time a new network profile per detected network. A network profile therefore concerning an unique network (wired or wireless) and not a specific network adapter on your computer.
Thus, you can very well configure Windows 7 so that it treats your Wi-Fi network at home as a domestic network and the other Wifi networks (free Wifi networks, that of the local coffee, ...) as public networks .
If you are connected to your own network (at home), choose "Home network" to see the computers on your network from the file explorer, enable file sharing, ...

As expected, the network location is now Home.

To check that this choice has been taken into account, right-click on the "Network" icon in the Windows 7 taskbar and click on : Open the Network and Sharing Center.
As expected, the network location type detected is : Home network.

3. Choose network location type from Network and Sharing Center
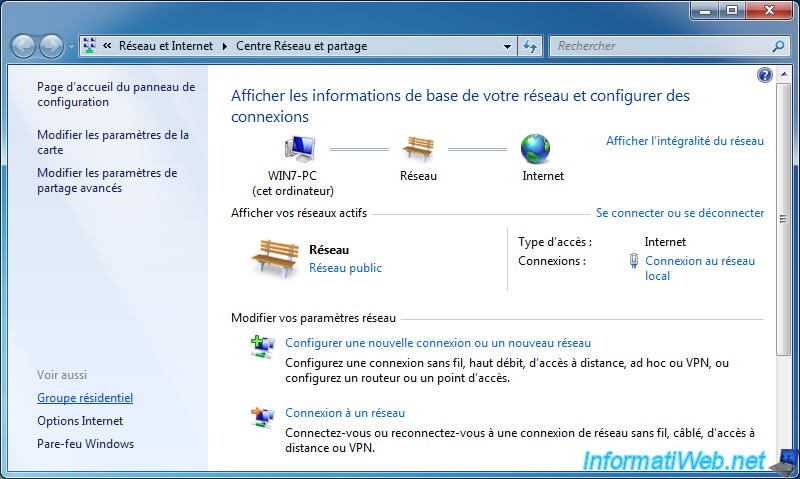
To manually change the network location type to use for a network you've connected to before, you can open the Network and Sharing Center.
To do this, right-click on the "Network" icon in the taskbar and click on : Open Network and Sharing Center.
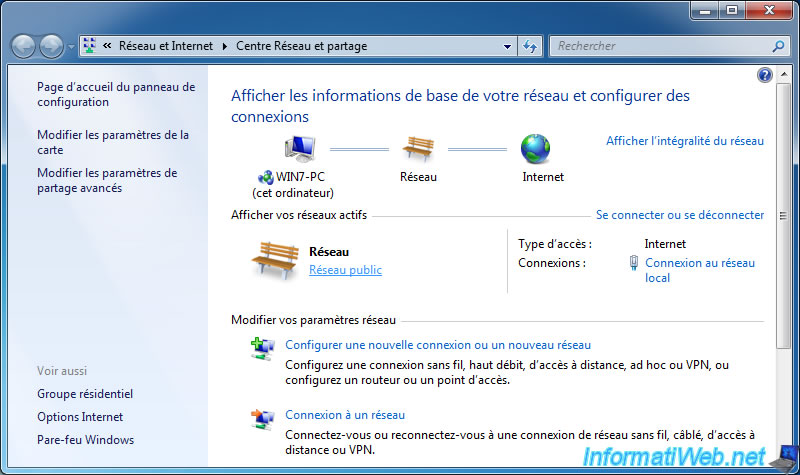
By default, if you don't set the network location type yourself, Windows 7 will treat the new network as a public network.
Hence the bench icon displayed by Windows 7.
To change the type of network location to use for the network you are connected to, click on the "Public network" link located just below the name of your network.
If this is not possible in your case, use one of the other techniques presented later in this tutorial.
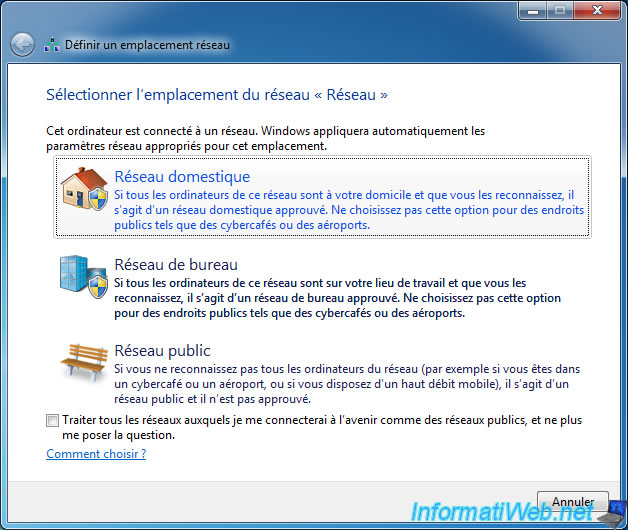
If this is possible in your case, the "Set Network Location" window will appear and allow you to choose between :
- Home network : if you are connected to your own network (at home)
- Work network : if you are connected to the network of your company (or the one where you work)
- Public network : if you are connected to a public Wi-Fi network (for example)

The network location type has been changed.

The network location type has been successfully changed.
4. Choose network location type for a Wi-Fi network you're connected to
If you are connected to a wireless network (Wi-Fi), the procedure is the same as for wired networks (Ethernet).
If you click once on the "Network" icon in the taskbar, you will see that you are connected to a Wi-Fi network.
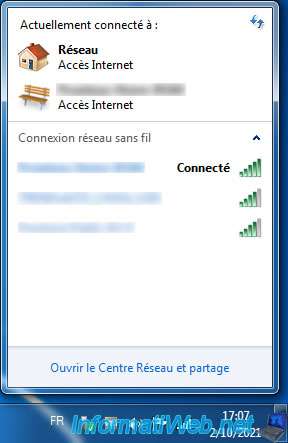
To change the network location type for the wireless network (Wi-Fi) to which you are connected, right-click on the "Network" icon present in the taskbar, then click on : Open Network and Sharing Center.
Click on the type of network location listed below under the name of the Wi-Fi network you are connected to.

Choose the network location type to use for this Wi-Fi network.
The network location type has been successfully changed for this Wi-Fi network.

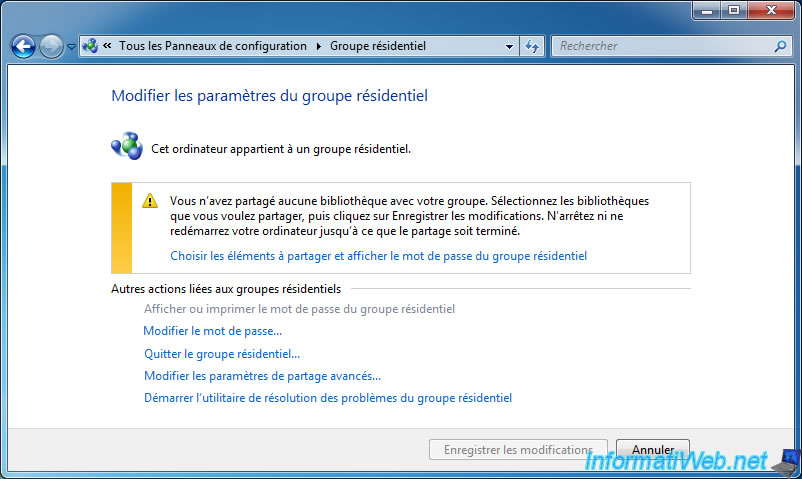
5. Choose network location type from homegroup settings
On Windows 7, you can also use a roundabout way to change the network location type from "Public network" to "Home network".
To do this, open the Network and Sharing Center by right-clicking on the "Network" icon present in the taskbar.
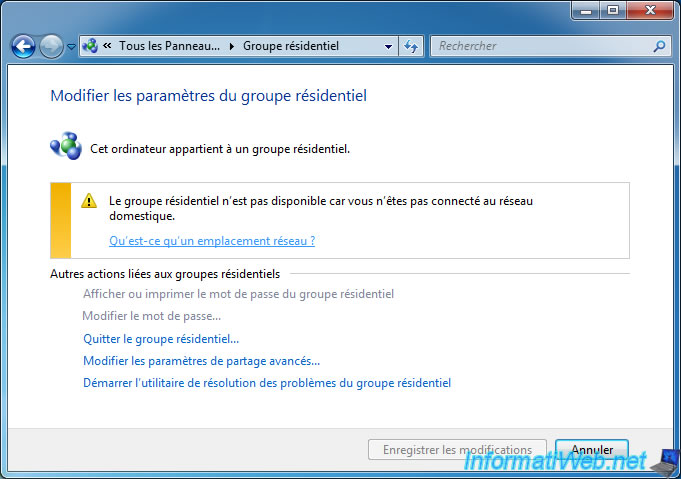
Then, click on the "HomeGroup" link located at the bottom right.
If the network location type currently in use is different from "Home network", Windows 7 will show you a warning : Homegroup is not available because you're not connected to the home network.
Click on the "What is a network location?" link located just below.
A "Set Network Location" window will allow you to choose between :
- Home network : if you are connected on your own network
- Work network : if you are connected to the corporate network
- Public network : if you are connected on a public Wi-Fi network (for example)
In our case, we chose "Home network".
Windows 7 therefore shows us that the network location is now Home.
The displayed warning has changed.
Click the "Back" arrow at the top left to return to the Network and Sharing Center.
As expected, the network location type has been changed.
Share this tutorial
To see also
-

Windows 4/6/2013
Get the serial number of Windows
-

Windows 1/28/2017
Speed up your computer (ReadyBoost)
-

Windows 3/13/2021
Windows 7 - Switching from IDE to AHCI without reinstalling Windows
-

Virtualization 8/9/2019
Windows 7 - XP mode
You must be logged in to post a comment