- Windows
- Windows 7
- 13 March 2021 at 10:14 UTC
-

By default, motherboards are configured with an IDE controller mode (to improve compatibility with various existing operating systems).

Although it works without problem, it's still preferable to use the AHCI (Advanced Host Controller Interface) which allows to benefit from new features and which makes it more efficient.
However, you cannot change controller mode without first performing some manipulations in the Windows 7 registry.
1. Issue
You change the controller mode in your computer's BIOS from IDE (or : ATA) to AHCI, for better performance.

You restart your computer. The Windows 7 logo appears at startup.

Then, a blue STOP screen appears.
Plain Text
A problem has been detected and Windows has been shut down to prevent damage to your computer.
...
Technical information:
*** STOP: 0x0000007B (0xFFFFF880009A97E8, 0xFFFFFFFFC0000034, 0x0000000000000000, 0x0000000000000000)

2. Solution
As reported on Microsoft's website, this problem is caused by changing controller mode after installing Windows.
Indeed, when you install Windows, any driver which will not be used by Windows 7 will be automatically deactivated.
So, when the controller mode is set to IDE and you install Windows 7, the AHCI driver is automatically disabled. Hence this blue STOP screen displayed at startup.
To solve the problem, all you have to do is reactivate this AHCI driver in the Windows registry before changing the controller mode to AHCI in the BIOS of your motherboard.
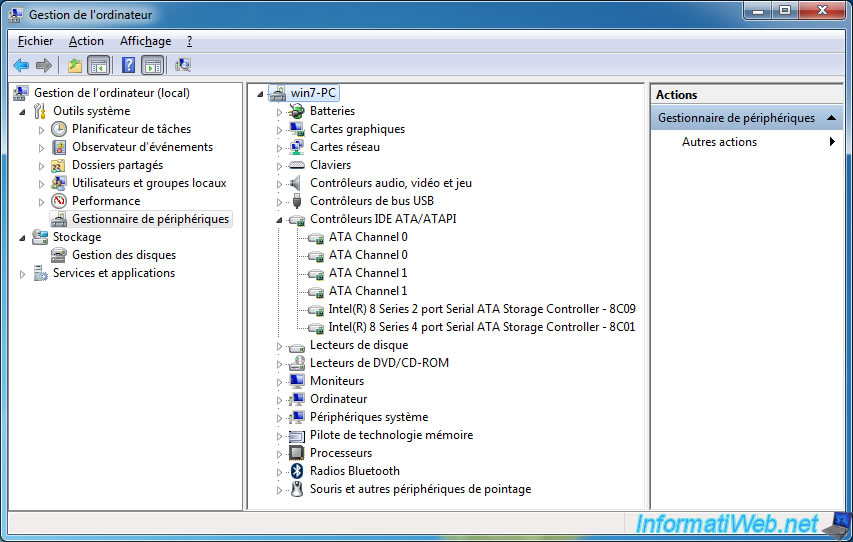
If you look in Windows 7's Device Manager, these are the controllers currently in use.
To access Device Manager, open File Explorer and right click "Manage" on "Computer". Then, click on "Device Manager" in the left column.
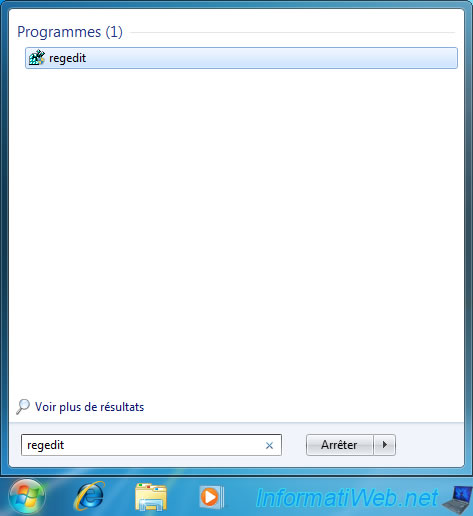
Launch the "regedit.exe" program which corresponds to the registry editor of Windows 7.
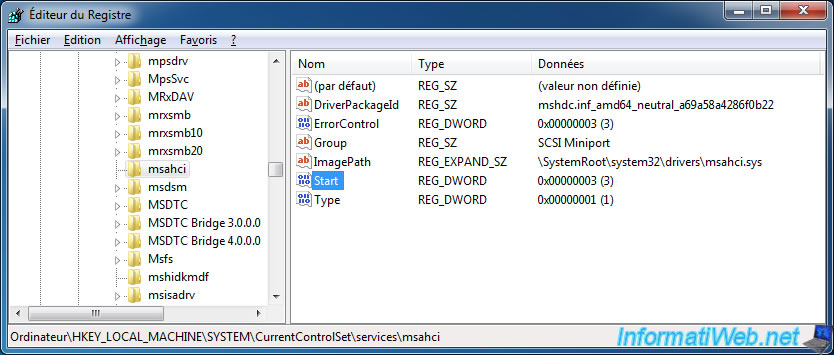
Go to the "HKEY_LOCAL_MACHINE\SYSTEM\CurrentControlSet\Services\msahci" registry key and locate the "Start" data.
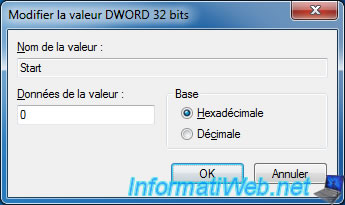
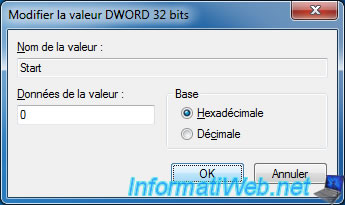
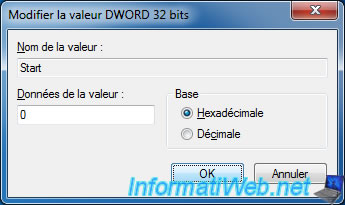
Double click on it to change its value, specify 0 in the box and click on OK.
Do the same for the "HKEY_LOCAL_MACHINE\SYSTEM\CurrentControlSet\Services\pciide" key.
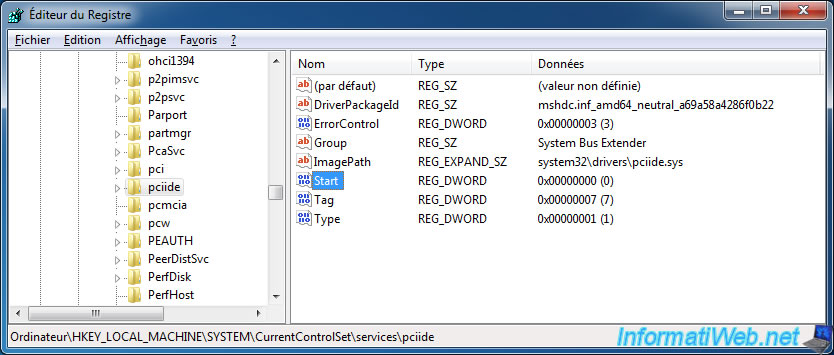
Change the value of the "Start" data item to 0.
And finally, go to the "HKEY_LOCAL_MACHINE\SYSTEM\CurrentControlSet\Services\iaStorV" key.
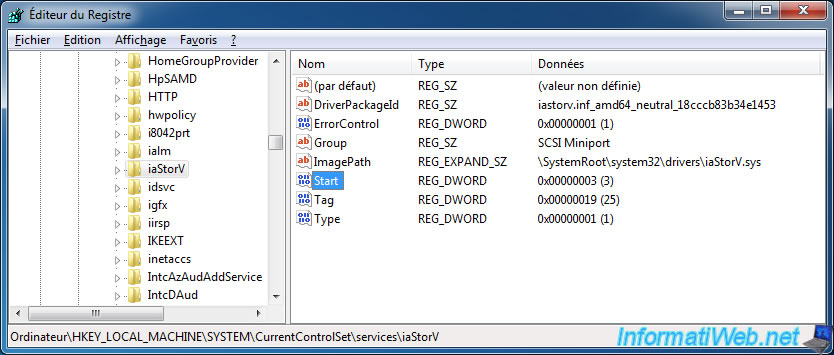
And also change the "Start" data to 0.
Then, restart your computer and enter BIOS to change controller mode to AHCI.
If necessary, refer to our tutorial : Change the hard disk controller mode.
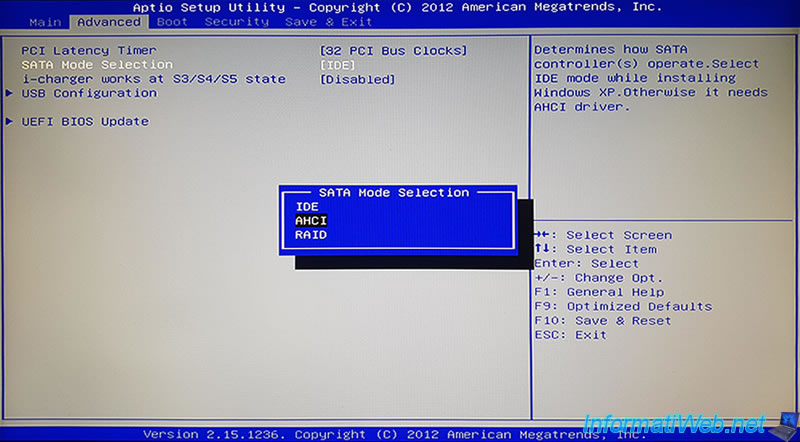
After restarting, when you get into your Windows session, Windows will detect new devices and automatically install the drivers for them :
- Standard AHCI 1.0 Serial ATA Controller
- ATA Channel 0
- Disk drive
- ... ATA Device
- and more
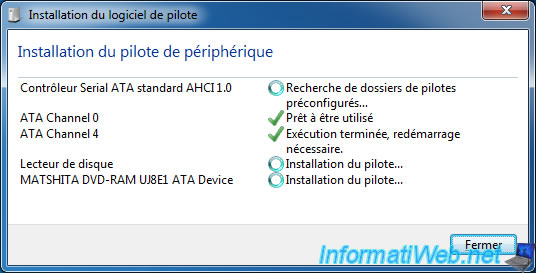
Once the drivers are installed, a "Microsoft Windows" window will appear asking you to restart.
Click on : Restart now.

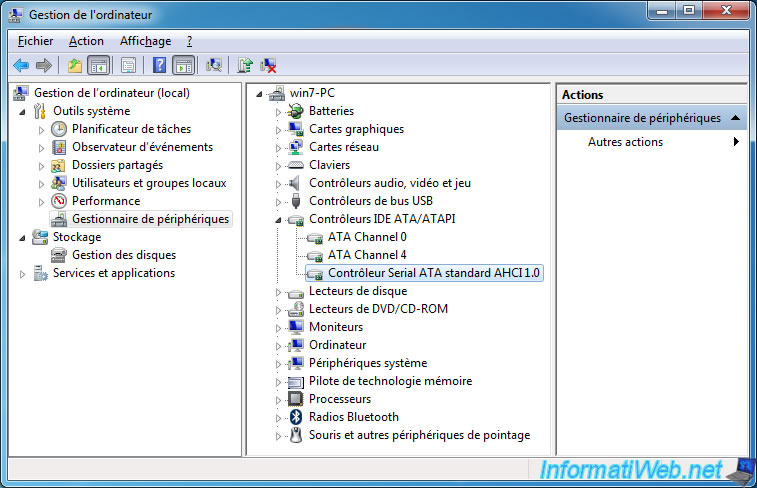
After restarting, you will find a new device "Standard AHCI 1.0 Serial ATA Controller" in the "IDE ATA/ATAPI controllers" section of the Device Manager.
Share this tutorial
To see also
-

MultiBoot 3/25/2024
Microsoft multiboot with Windows 7 and Windows 8.1
-

Windows 8/29/2022
Windows - Install the drivers from the manufacturer's site
-

Windows 2/6/2023
Windows 11 / 10 / 8.1 / 8 / 7 - Disable User Account Control (UAC)
-

Windows 4/23/2021
Windows 7 - Configure default programs

You must be logged in to post a comment