- Windows
- Windows 8 / 8.1, Windows 7, Windows 10, Windows 11
- 22 August 2022 at 13:43 UTC
-

When you buy your components (motherboard, graphics card, ...) yourself, installing the drivers is rather simple if you have kept at least the driver CDs that were supplied with them.
- Drivers not installed
- Drivers CDs provided
- Install the drivers of your motherboard
- Install the drivers of your graphics card
1. Drivers not installed
By default, when you install Windows on your computer, the drivers to properly use your devices are not installed.
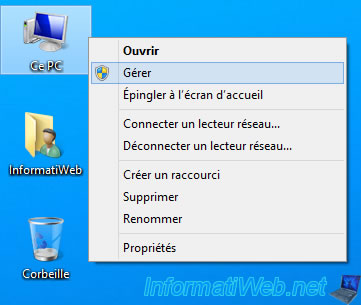
To see it, right click "Manage" on "This PC" (in the file explorer or in the start menu, for example).
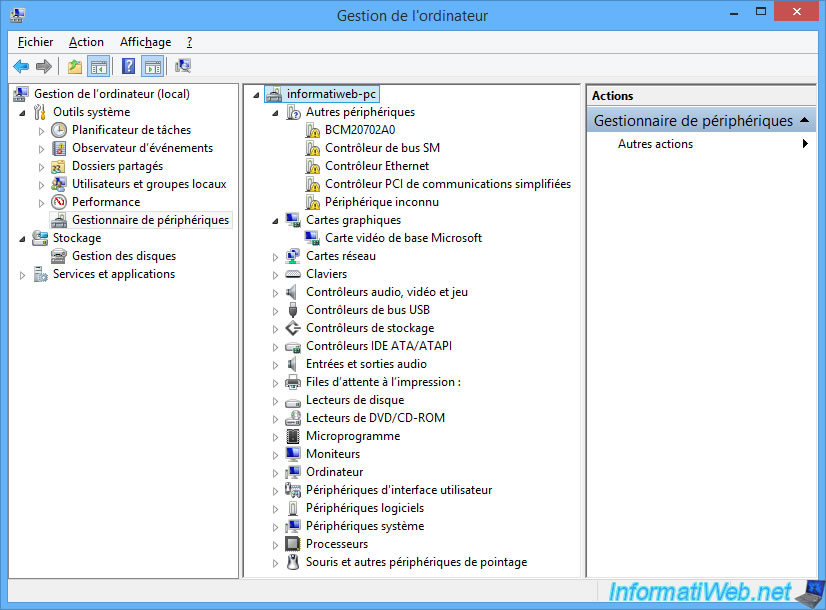
Then, click on "Device Manager" in the left column.
Other devices that you see with yellow icons indicate that the affected driver is not installed for them.
If you deploy the "Graphics cards" node, you will see that a Microsoft Basic Display Adapter is installed.
This means that the driver that the real driver for your graphics card is not installed. But this allows you to have a display with the basic VGA resolution : 800x600.
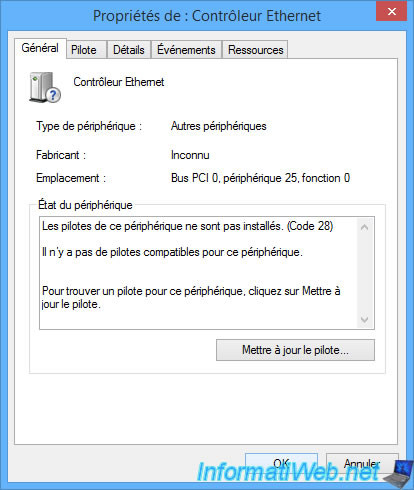
If right click "Properties" on one of the devices with a yellow icon, Windows will tell you that the drivers for this device are not installed. (Code 28)
2. Drivers CDs provided
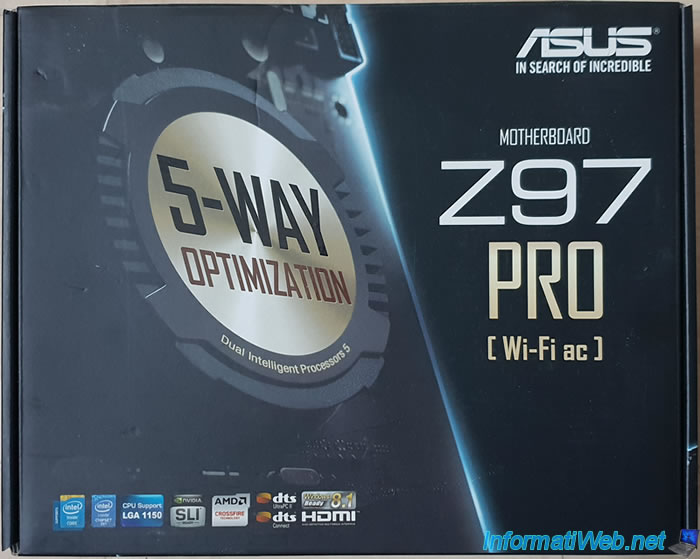
When you buy a motherboard, you will always find a driver installation CD in its box.
The convenience of these CDs is that it makes it easy for anyone to install their computer's drivers.
However, if you take a good look at this driver CD, you will see that it only supports one version of Windows. The supported version of Windows is that currently marketed by Microsoft.
In our case, this driver CD supports Windows 8.1 in 64 bits.
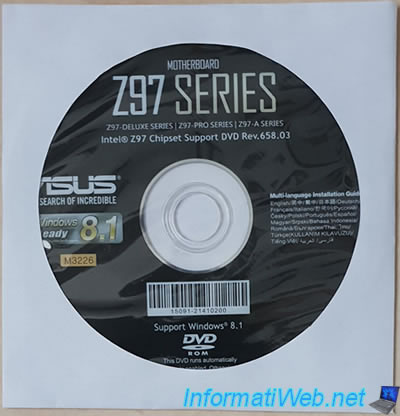
In the box of your graphics card, you will also find a driver CD for it.
In our case, it also contains tools to customize the settings of our graphics card.

The main disadvantage of these driver CDs is that the drivers installed will not be as up to date as those you might download from the manufacturer's site.
Although you will have to manually install them one by one if you choose to download them from the manufacturer's site.
3. Install the drivers of your motherboard
To install the drivers of your motherboard, insert the motherboard driver installation CD, then go to the file explorer.
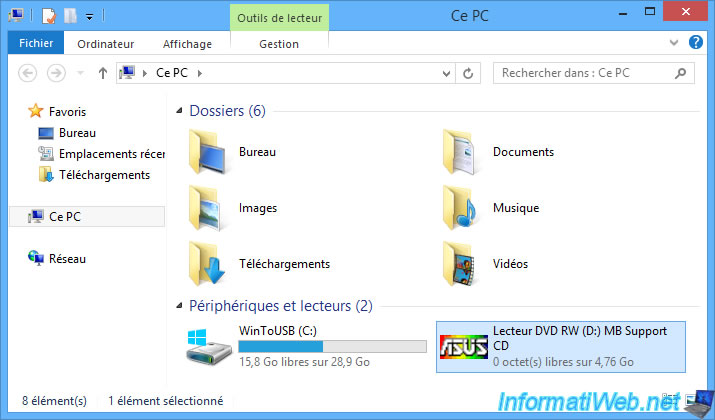
In this PC (or "Computer"), you will see that your CD/DVD drive icon will have changed.
In our case, this is the driver CD for our "Asus Z97 Pro Wi-Fi ac" motherboard.
If the driver installer doesn't launch automatically, double click on your CD/DVD drive.
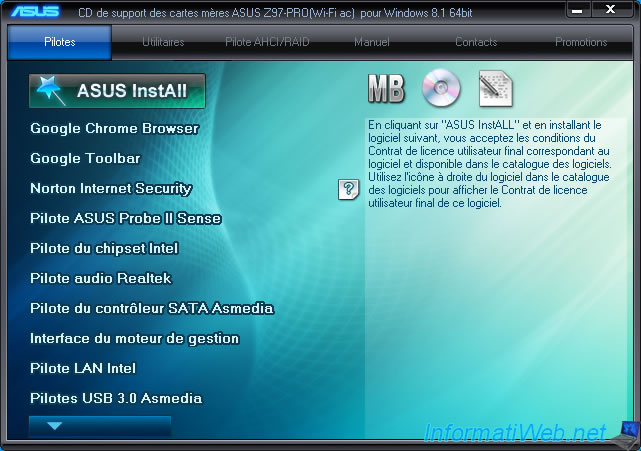
If you have an Asus motherboard, you will have a program with the "ASUS InstallAll" option which allows you, as its name suggests, to install all the drivers automatically.
Click on this "ASUS InstallAll" button.
As you can see, Asus also offers some third party software (probably due to a partnership with other companies) like Google Chrome and Norton Internet Security.
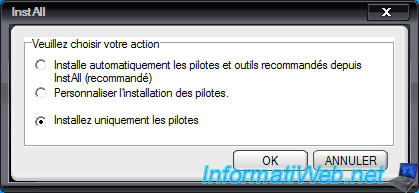
Then, select "Install only drivers" to avoid installing third-party software that you absolutely don't need and click OK.
The ASUS InstallAll program will tell you the number of restarts required during the installation.
Click on OK.

Driver installation begins.
Note that ASUS InstallAll will launch the various installation programs for these drivers in silent mode. This means that these will not appear on the screen, but will run in the background.
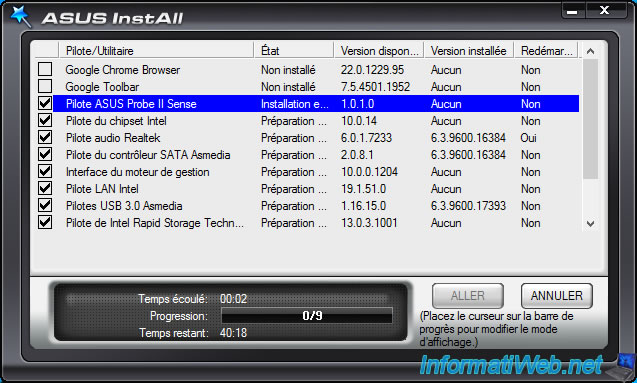
Note that Asus advertises its services or products offered by other companies during driver installation.
If this appears, place your cursor on the progress bar to return to the previous display with the list of drivers being installed.

As previously indicated by the installer, your computer will need to be restarted at least once.
However, be aware that motherboard driver CDs are often bootable (which means that a computer can boot from it).
This means that depending on your BIOS configuration, your computer is likely to boot from this driver CD instead of booting into Windows.
Which will produce this.
Tip : to avoid this problem, take out the driver CD when Windows shuts down, and insert it again when Windows starts.
Warning : computers automatically insert the CD/DVD when restarting the computer (after Windows is shut down, but before Windows starts).
So, don't get fooled.

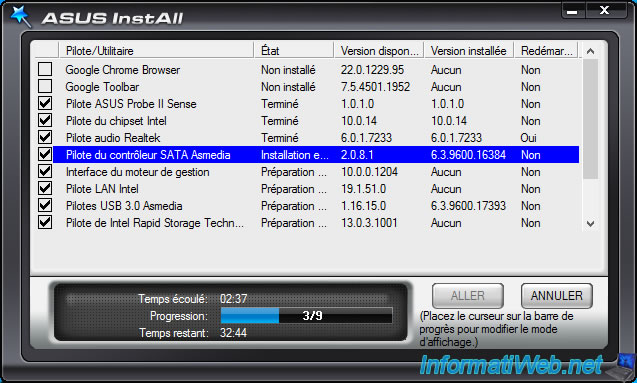
When logging in, ASUS InstallAll will automatically open and display a "Loading ..." message.

A few seconds later, the driver installation will continue.
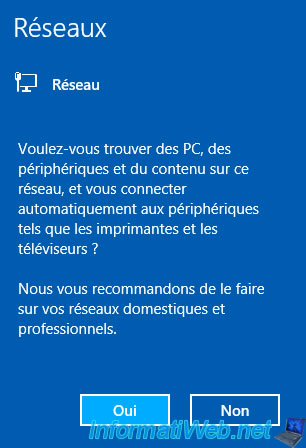
While installing the network driver, Windows may display a window or a message on the right-hand side of the screen (depending on your version of Windows) regarding the new network detected.
If you are using Windows 7, preferably choose "Home network" to enable file sharing.
If you are on Windows 8 / 8.1, click "Yes" when this message appears for the same reason.
Once the installation is complete, you will need to restart your computer.
Click on OK.

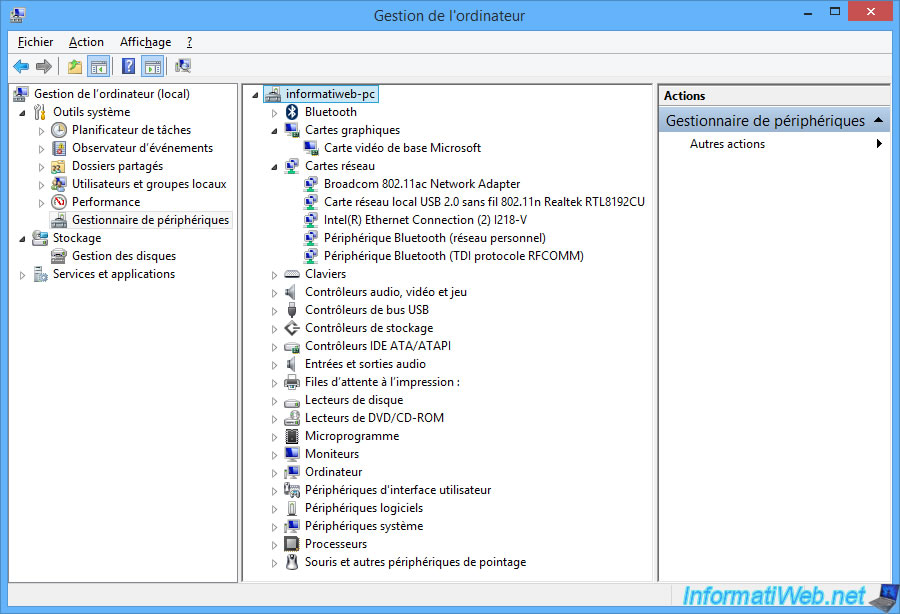
Once the computer has restarted, you will see that the "Other devices" section has disappeared and that the drivers for your devices have been installed.
Including those for the network.
But, if you deploy the "Display adapters" node, you will see that the recognized device is always : Microsoft Basic Display Adapter.
This means that your graphics card driver is not yet installed.
4. Install the drivers of your graphics card
To install the drivers of your graphics card, insert the graphics card driver CD and double click on your CD/DVD drive.
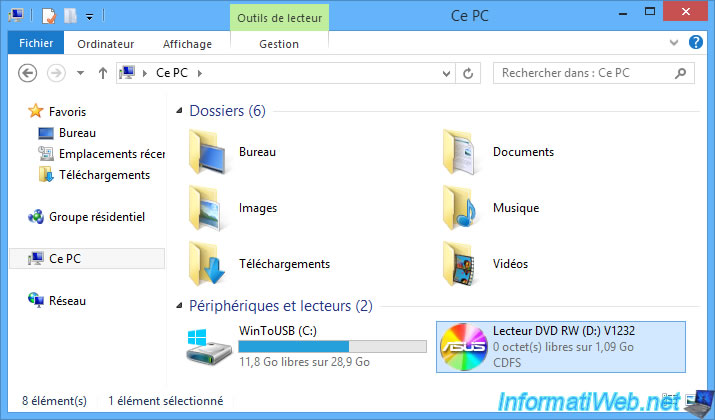
The driver installation program for your graphics card appears.
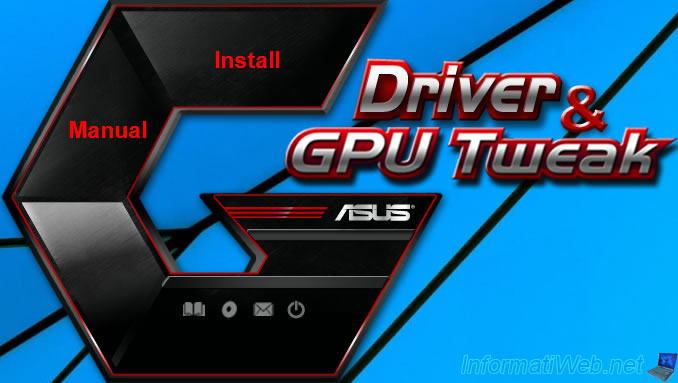
In the case of our Asus graphics card, this is the "Asus Driver & GPU Tweak" program.
Click on : Install.
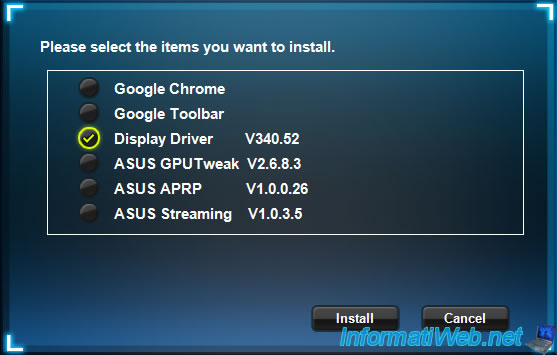
As on your motherboard driver CD, third-party software may be available.
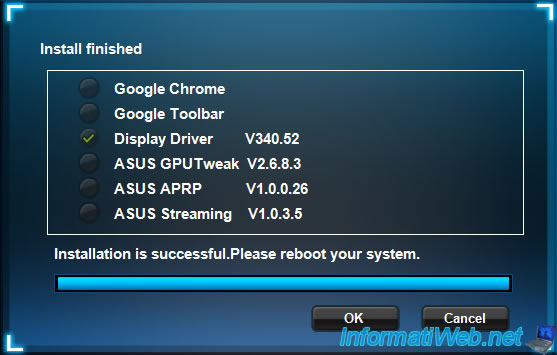
However, the only thing you need to install is the : Display Driver.
Note that the Asus programs offered allow you to overclock your graphics card.
But it can be dangerous if you don't know what you are doing and it can also void the warranty on it. Since you will have forced your graphics card to operate beyond the limits that had been configured on it.
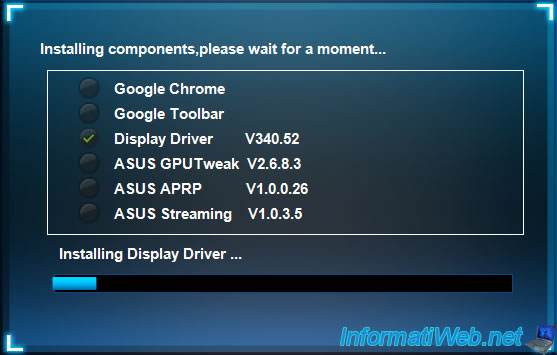
Wait while the graphics driver is installed.
By the way, note that it's NVIDIA (in this case) or AMD who develop the graphics drivers and not other brands like Asus, Gigabyte, ...
You could therefore also download the driver directly from NVIDIA or AMD to be able to install the latest version of it and thus best support recent games.
After the display driver is installed, you will need to restart your computer.
Click on OK.
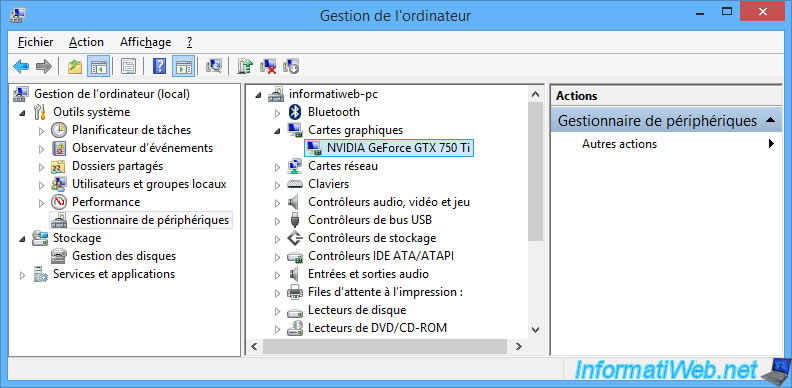
After your computer has restarted, open Device Manager again.
As you can see, Windows correctly recognizes our "NVIDIA GeForce GTX 750 Ti" graphics card.
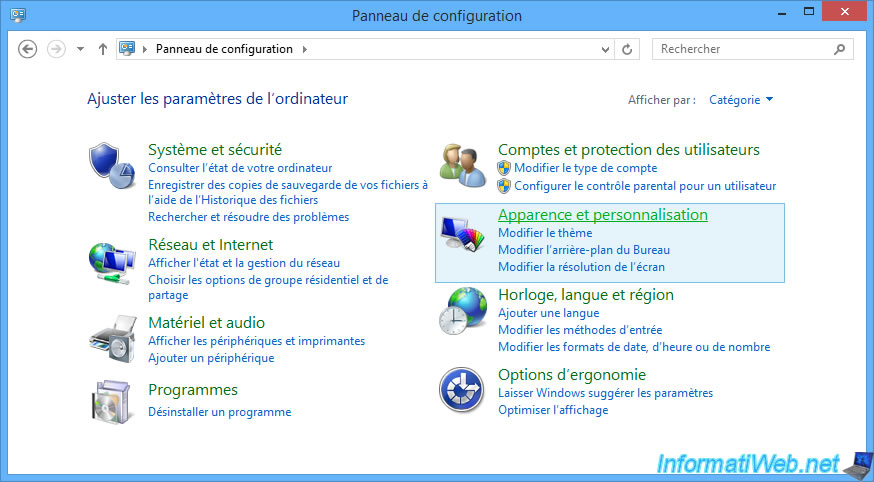
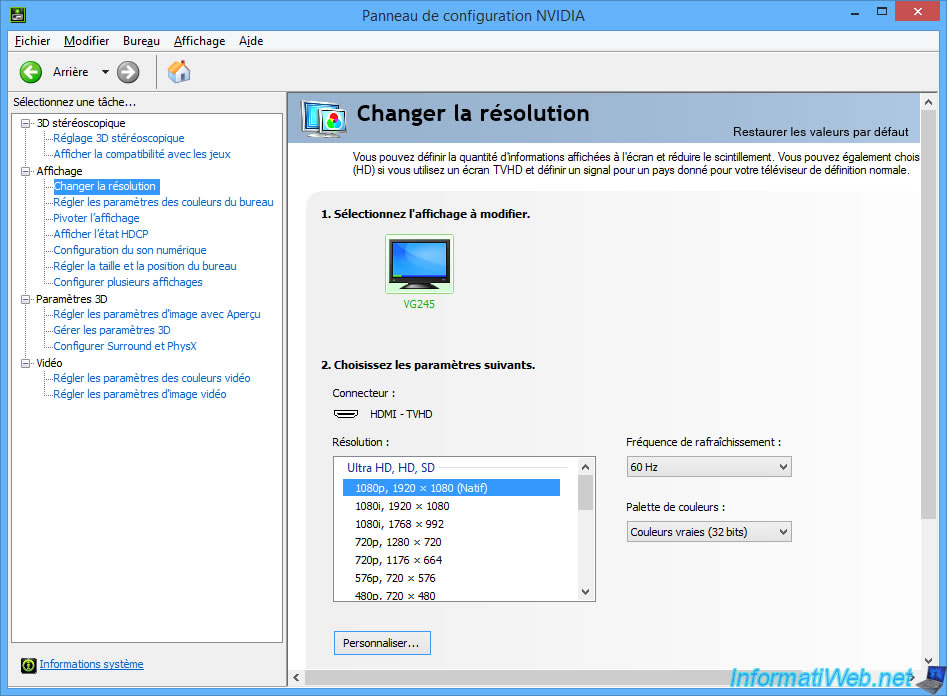
Note that in the case of NVIDIA, this also adds an option in the Windows control panel.
To access it, open the control panel and go to : Appearance and Personalization.
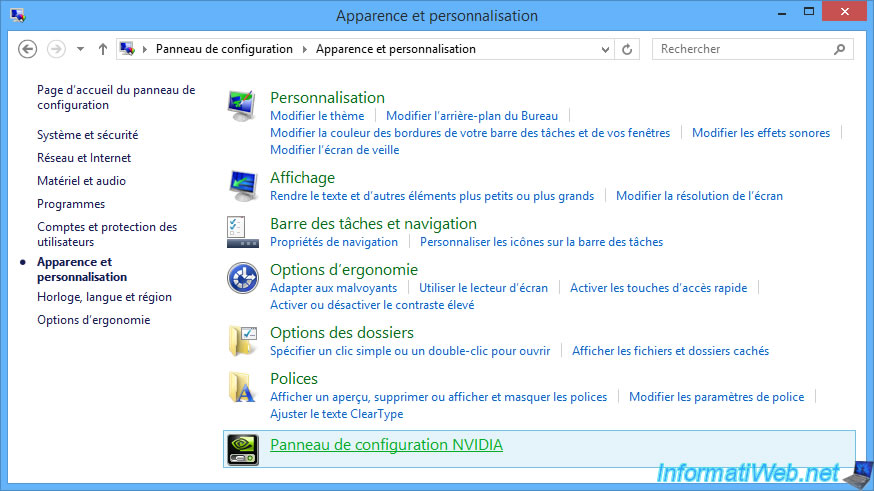
At the bottom, you'll find a new setting : NVIDIA Control Panel.
Note that you can also access it via the NVIDIA icon displayed at the bottom right of your screen (right next to the time).
In this NVIDIA control panel, you will be able to do many things, including adjusting :
- the screen resolution to use : in our case, 1080p (1920x1080)
- the refresh rate : in our case, 60 Hz
Share this tutorial
To see also
-
MultiBoot 5/28/2017
Multiboot Windows 7 / 10 / Win RE based on syslinux
-
Windows 3/17/2025
Windows 11 / 10 / 8.1 / 8 - Expand a simple storage space (software RAID 0)
-
Windows 2/26/2021
Windows 7 - Fix Windows Defender updates issue
-
Windows 10/21/2024
Windows 8 - Use a Bluetooth headset

You must be logged in to post a comment