- Windows
- Windows XP
- 22 November 2012 at 13:28 UTC
-

When you buy a laptop PC running Windows XP, it may not have a CD drive.
So, if you want to reinstall Windows XP, you will need a Windows XP installation USB key (instead of its installation CD).
To create this Windows XP installation USB key, the only possibility is to use version 2.18 of Rufus.
Indeed, it's the latest version of the Rufus utility which still supports Windows XP.
Source : Windows XP, Windows Vista, Windows 7 (NO LONGER SUPPORTED).
- Create the Windows XP installation USB key
- Partition blank hard drive
- Install Windows XP
- Change drive letters
1. Create the Windows XP installation USB key
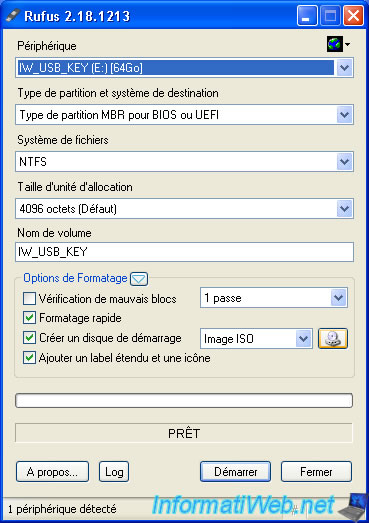
Plug in an USB key (which will be erased by Rufus), launch the Rufus 2.18 utility and select your USB key in the "Device" list.
Then, click on the icon to the right of "ISO Image" (bottom right).
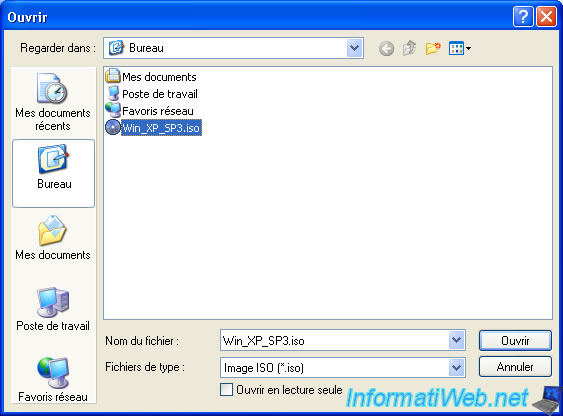
Select the Windows XP installation ISO.
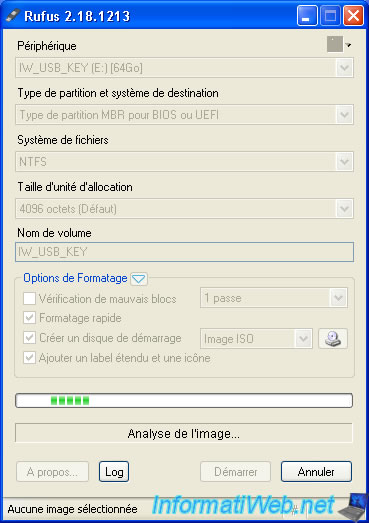
The "Analyzing image" message appears.
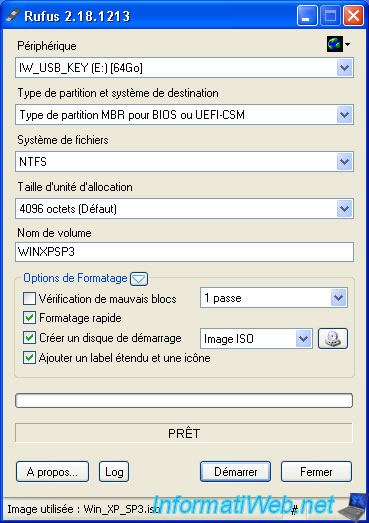
Rufus adapts the settings automatically based on the selected ISO file.
As you can see, the volume label (the name under which your USB key will appear in the workstation) will be the name present in your ISO file.
In our case : WINXPSP3.
Warning : as Rufus warns you, your USB key will be erased before creating the Windows XP installation USB key.
Click OK.

To start, Rufus will format and create the appropriate file system (in this case : NTFS) on your USB key.
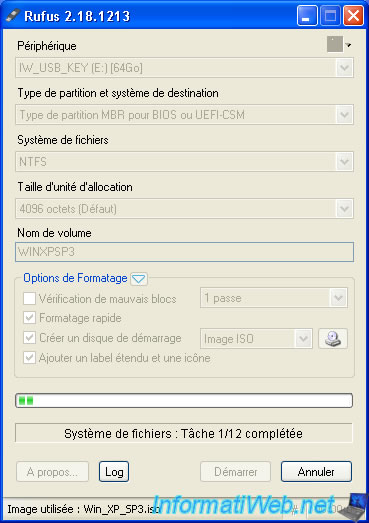
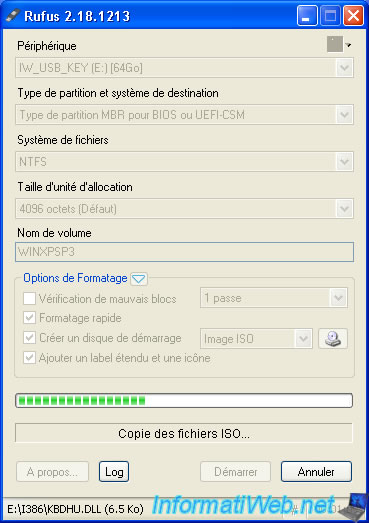
Then, Rufus will copy the contents of the Windows XP ISO file to your USB key.
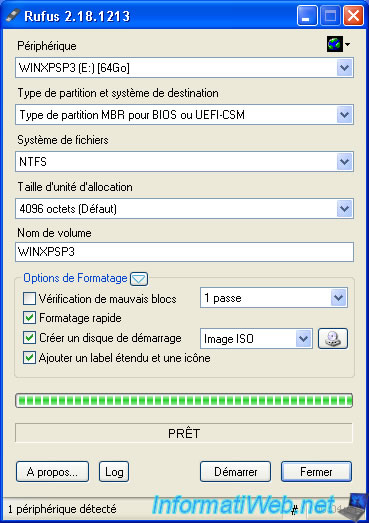
Once the Windows XP installation USB key has been created, the status will be "Ready".
Click Close.
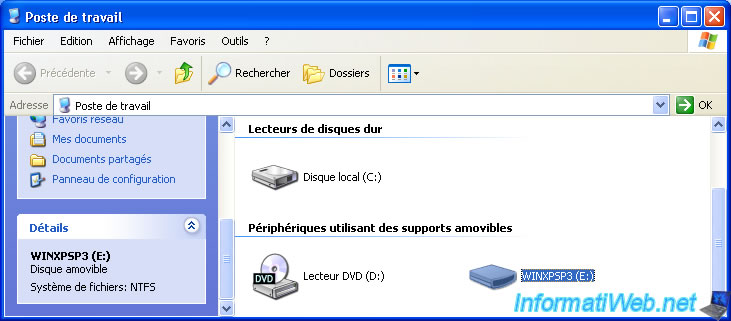
In my computer, you will see that your USB key will have changed its name.
In our case : WINXPSP3.
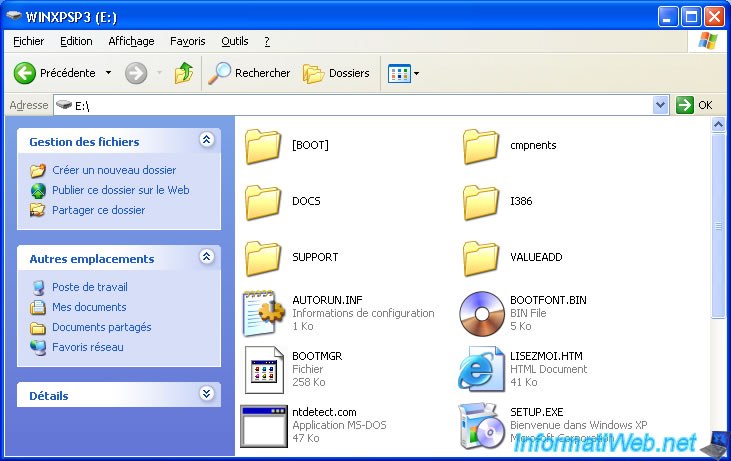
Here is the content of your Windows XP installation USB key.
Now that your USB key is created, configure your computer's BIOS to boot on your USB key.
2. Partition blank hard drive
If your computer's hard drive is blank (= it contains no partitions), you will see that the installer will not correctly assign letters to your partitions.
Note : if your hard drive is already partitioned and you just want to reinstall Windows XP, skip to the next step of this tutorial.

Wait while the Windows installer loads.
When it's finished loading, you'll see the Windows XP installer appear.
Press Enter.

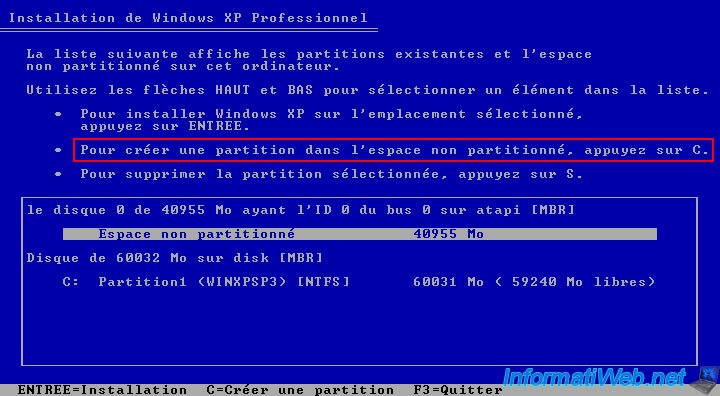
As you can see, in our case, our hard disk (disk 0) is blank (which is the case when you buy a new hard disk).
Hence the fact that the Windows XP installer tells you that it contains unpartitioned space.
Select this unpartitioned space (so that it's highlighted in gray) and press the "C" key to create a partition in this unpartitioned space.
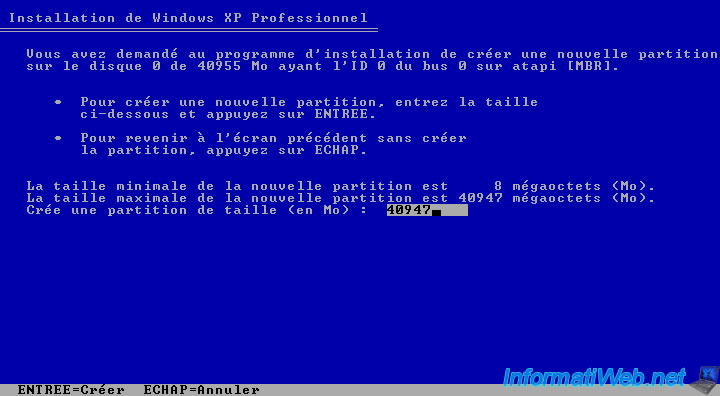
If you leave the default size, only one partition will be created and this one will have the size of your hard disk.
Otherwise, specify a smaller size, but sufficient to install Windows XP and your usual programs.
Note : 1024 Mo = 1 Go.
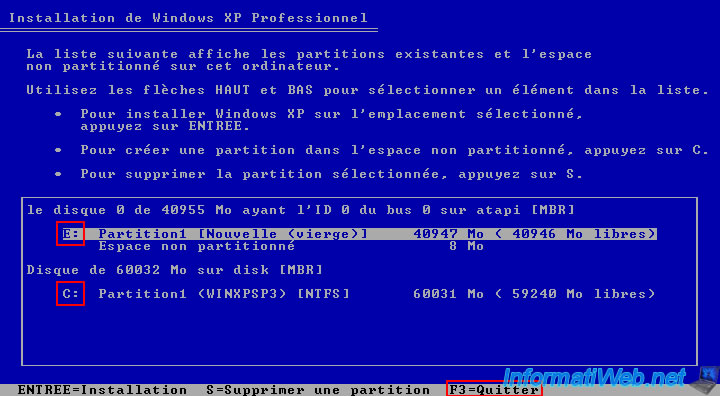
The partition created appears.
But, as you can see, the installer assigned :
- the letter "C" to your Windows XP installation USB key
- the letter "E" to the partition you just created on your internal hard disk
Warning : unlike recent versions of Windows which always assigns the letter "C" to the partition where you launch the installation of Windows, this is not the case with Windows XP.
If you launch the installation of Windows XP on this partition, the Windows folder will be accessible via the letter "E" instead of "C".
Which can be a problem in some cases. Indeed, some programs consider that Windows is always installed in "C:\WINDOWS" instead of using the environment variables which make sure that the path is correct.
In short, now that the partition for Windows XP is created (but empty), quit this installation program and restart your computer.
To do this, simply press the "F3" key (as indicated at the bottom of the screen).
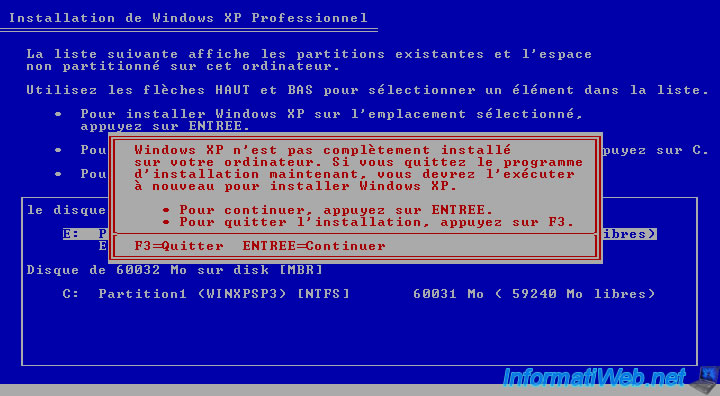
Confirm closing this installer by pressing F3 again.
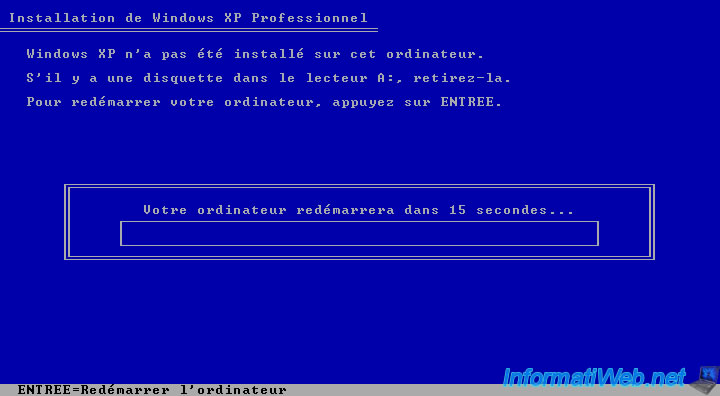
Press Enter to restart your computer.
3. Install Windows XP
Your computer restarts on your Windows XP installation USB key and the same messages about the Windows XP installer reappear.

Press Enter again when this screen appears.

As you can see, this time, the installer has correctly assigned the letter "C" to the 1st partition of your hard disk, then the next letter to your installation USB key.
Select this partition (which is currently empty) and press Enter.
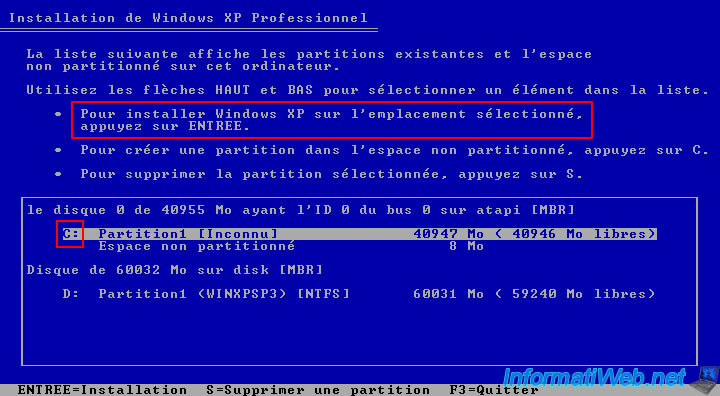
Select the option regarding the NTFS (quick) file system.
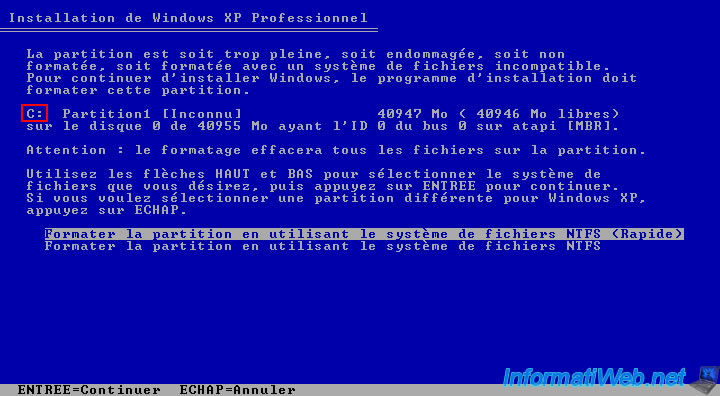
The Windows XP installer erases the contents of the selected partition (if needed) and creates the NTFS file system (selected previously) on it.
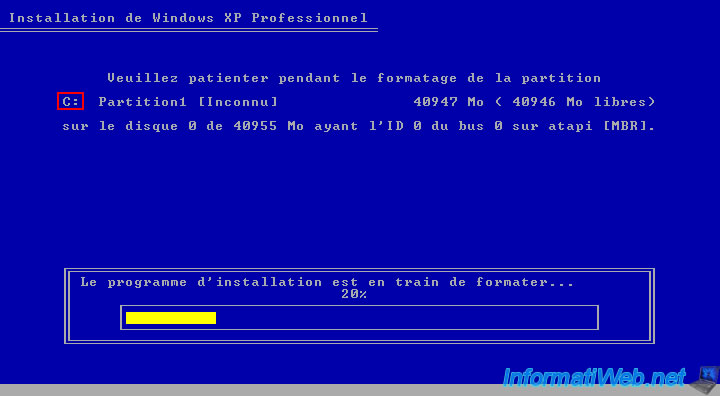
Then, the installation of Windows XP begins.
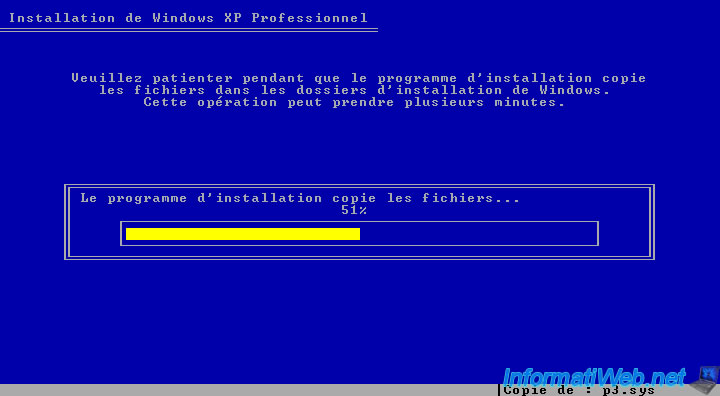
The rest of the Windows XP installation doesn't change.
So, if necessary, refer to our tutorial : Windows XP - Formatting and reinstallation.
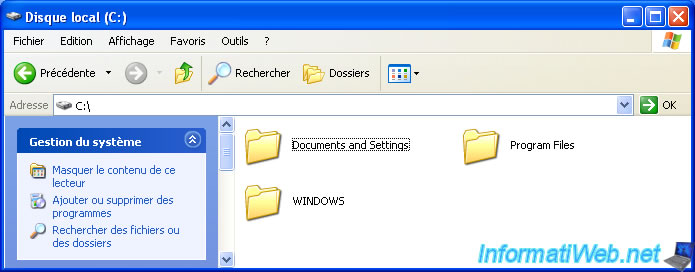
Once the installation of Windows XP is complete, you will see that you have at least one local disk (= a partition) with the letter "C".
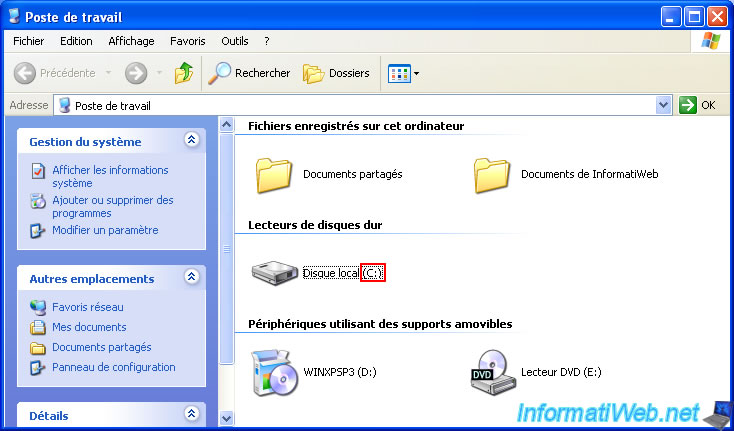
If you enter this "Local Disk (C:)", you will see that it contains the default Windows XP folders, including the "WINDOWS" folder.
4. Change drive letters
Now that Windows XP is installed, you can unplug your USB key.
However, as you can see, since Windows XP had assigned the letter "D" to our USB key and "E" to our CD/DVD drive, a letter is missing.
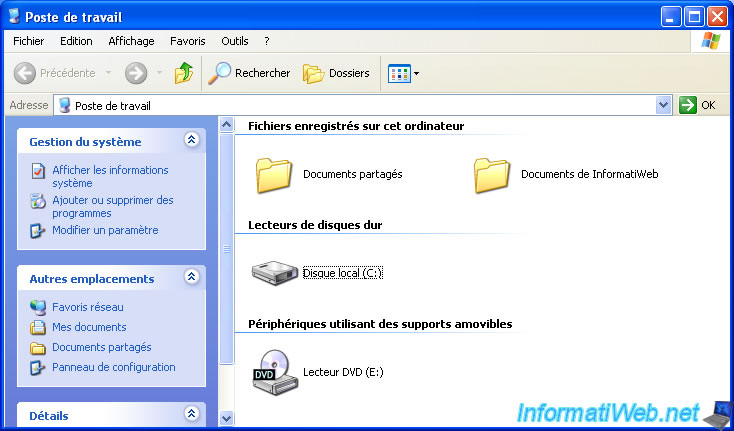
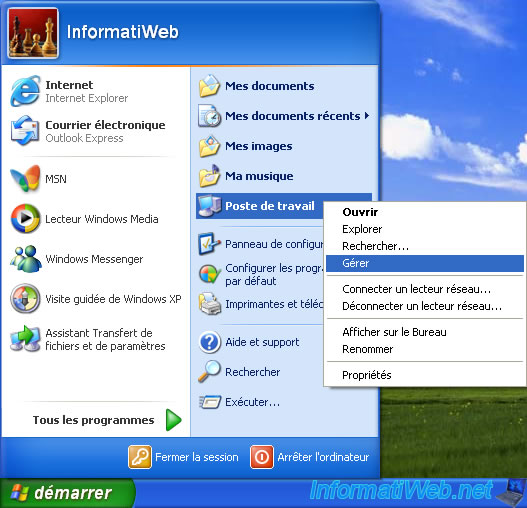
No problem, you can correct this problem by simply right-clicking "Manage" on "My Computer" from the start menu.
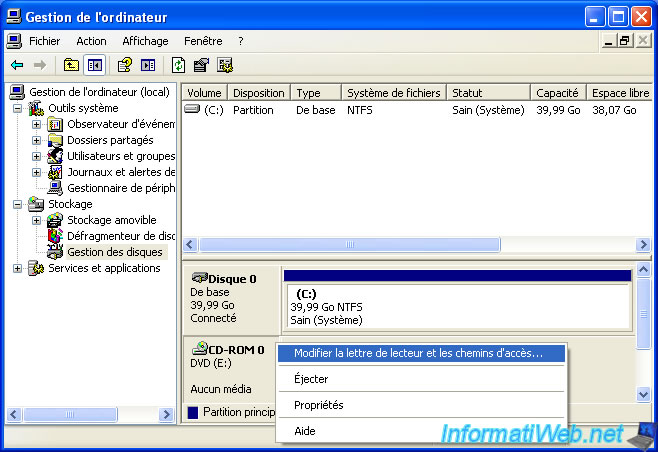
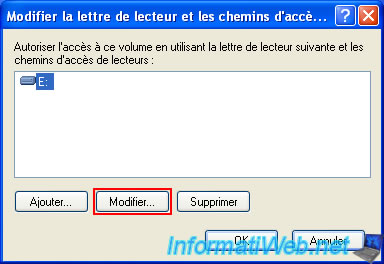
In the "Computer Management" console that appears, go to "Disk Management" and right-click "Change Drive Letter and Paths" on the CD/DVD drive (which you want to change the letter).
Click on the "Change" button.
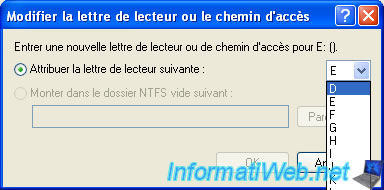
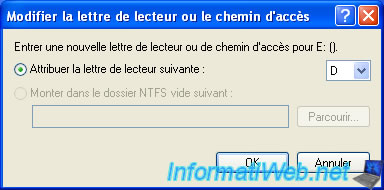
Select the new desired letter (in our case : D).
Then, click OK.
Confirm the letter change by clicking Yes.

The letter was changed in disk management.
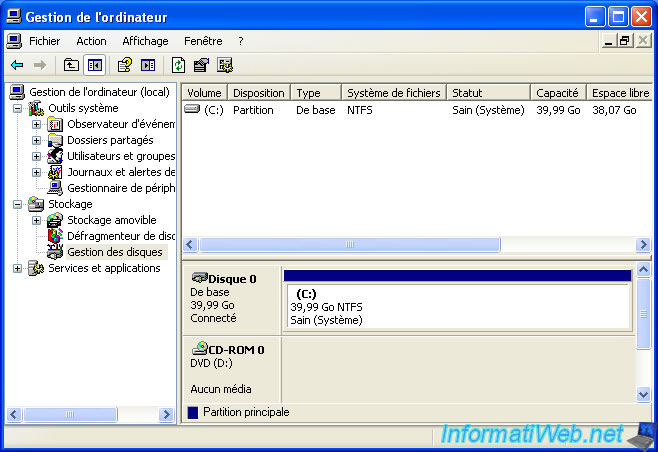
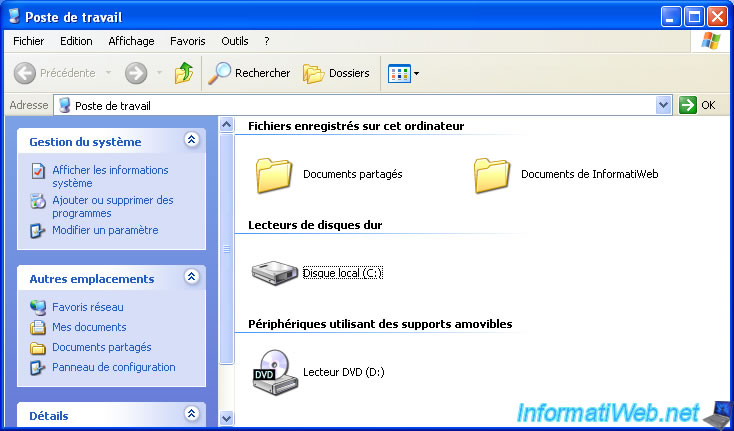
As well as in "My Computer".
Share this tutorial
To see also
-
MultiBoot 3/11/2024
Microsoft multiboot with Windows XP and Windows 7
-
Windows 11/27/2020
Upgrade from Windows XP to Windows 7
-

Windows 11/3/2013
Windows XP - Connect to a Wifi network
-
Windows 11/18/2012
Windows XP - Startup repair
You must be logged in to post a comment