- Virtualization
- 15 September 2018 at 15:26 UTC
-

- 1/2
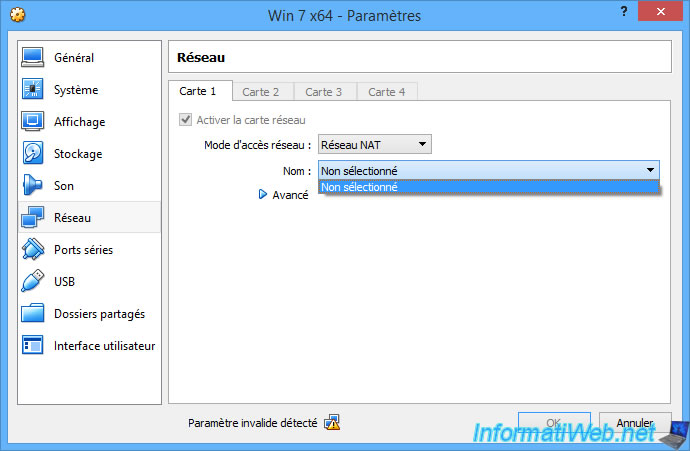
In the virtual machines settings created with VirtualBox, you can see that network adapters can be connected to the network in different ways.
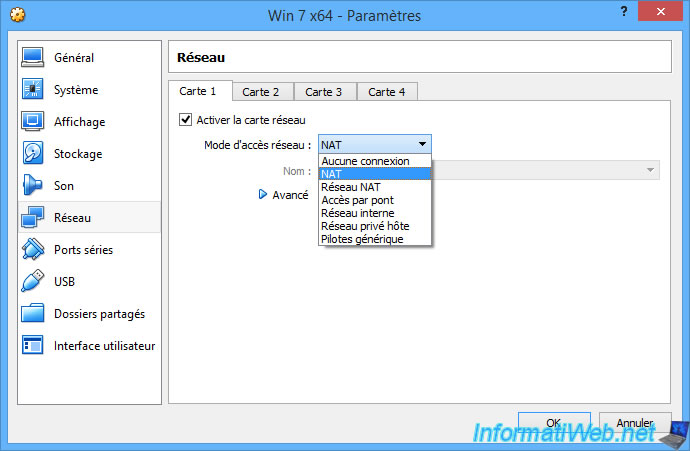
1. NAT
By default, virtual machines are configured to access the network through NAT mode.
This network access mode allows the virtual machine to access the network and the Internet without creating conflicts in your network.
Indeed, using NAT mode, IP addresses will be distributed to virtual machines by VirtualBox and not by the DHCP server of your network.
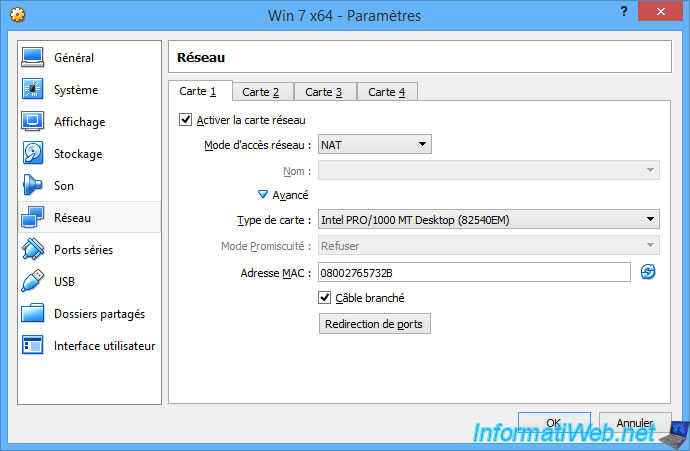
If you wish, you can change the type of network card that will be emulated by VirtualBox for the virtual machine.
This can resolve compatibility issues with some operating systems or some Live CDs that don't support the default one.

The only problem with NAT mode is that you will not be able to access the services of your virtual machine from a computer on your network because your virtual machine will be behind a gateway (emulated by VirtualBox).
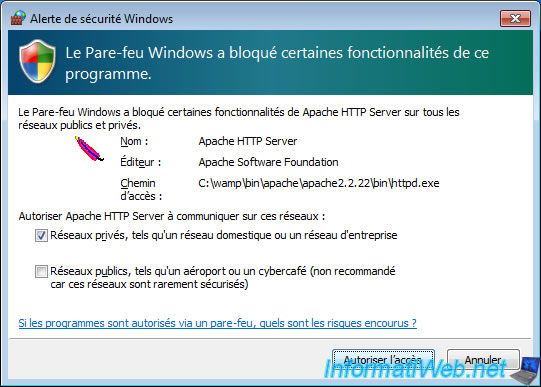
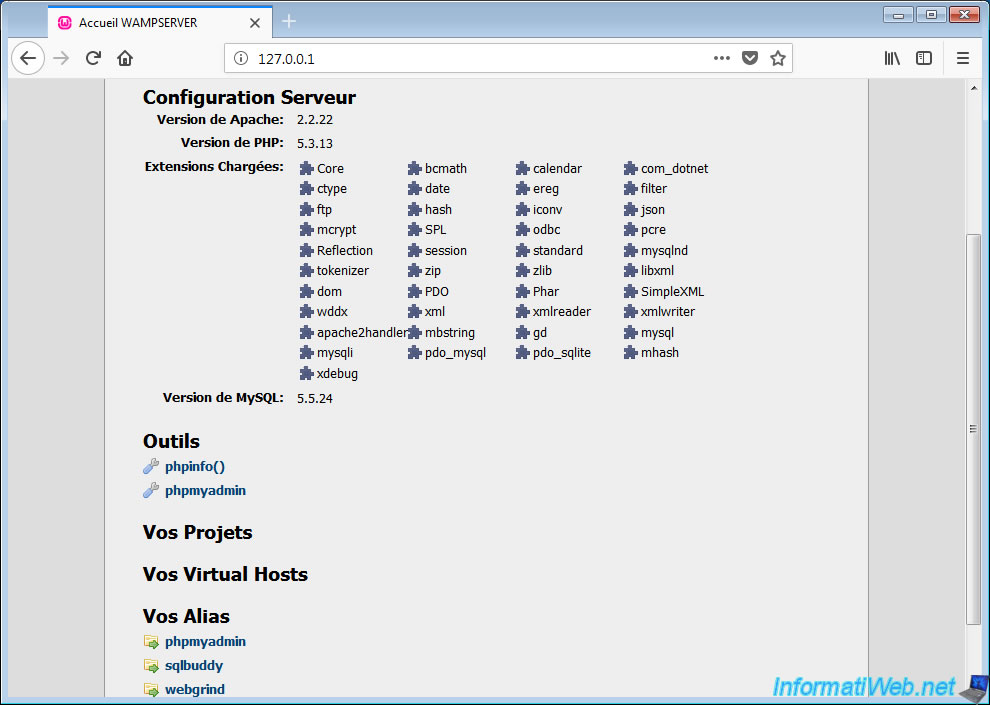
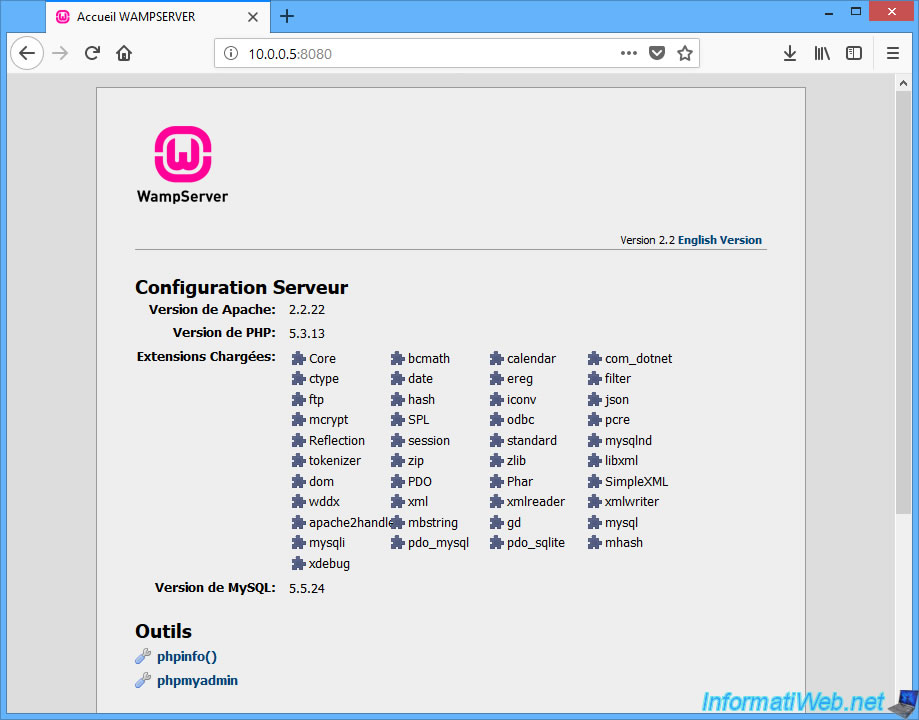
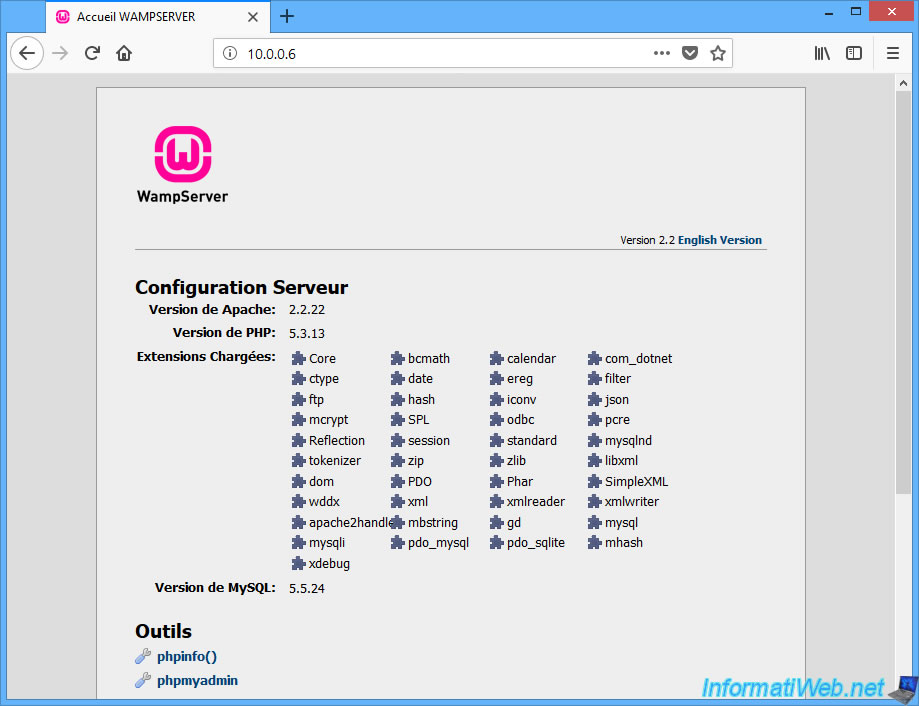
To prove it, we installed a web server (thanks to WAMP) on our virtual machine.
Once the web server is started, Windows asks us if we want to allow access to our web server from the network.
We click on Allow access.
In our virtual machine, we have access to our local site.
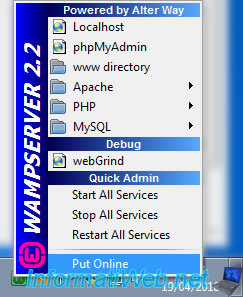
In order for the web server to be accessible from the network, we click on "Put Online" in the WAMP menu.
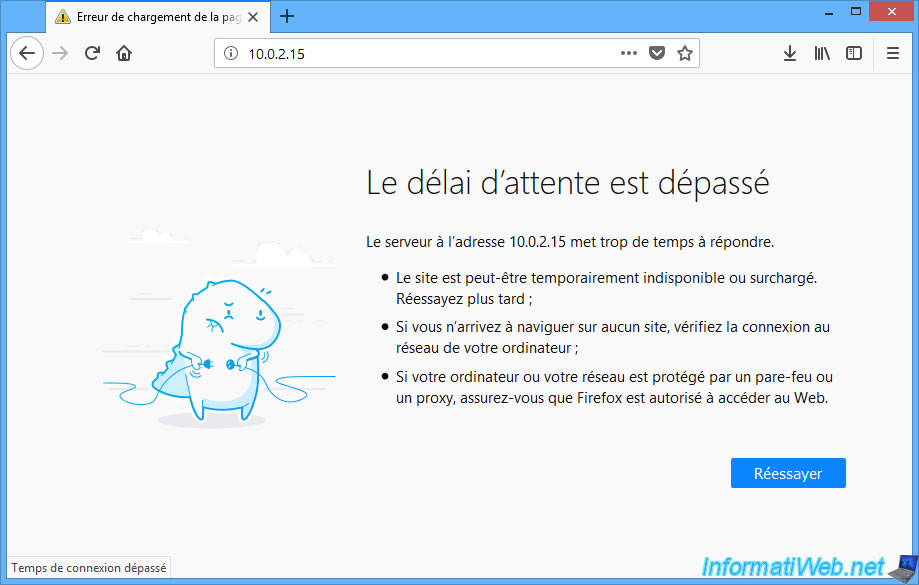
As you can see, our physical computer has the IP address "10.0.0.5" and the subnet mask "255.255.255.0".
So our PC is on the network : 10.0.0.x.
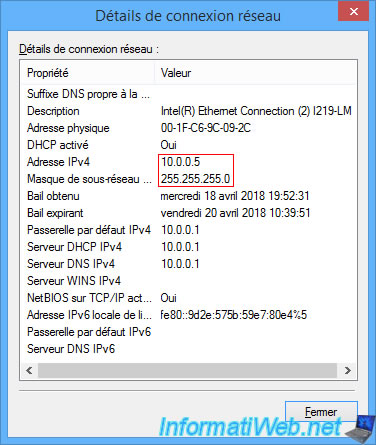
While the virtual machine is on the 10.0.2.x network and is behind the "10.0.2.2" gateway.
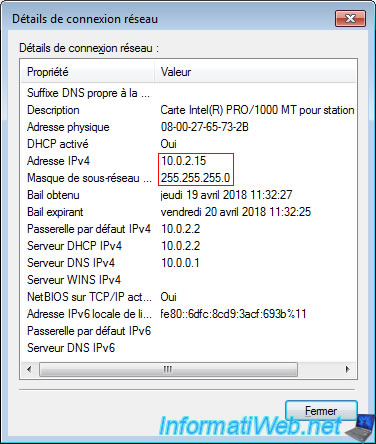
So, we can not access the server of our virtual machine by directly typing its IP address.
To solve this problem, the easiest way is to use the "Bridged Adapter" network access mode.
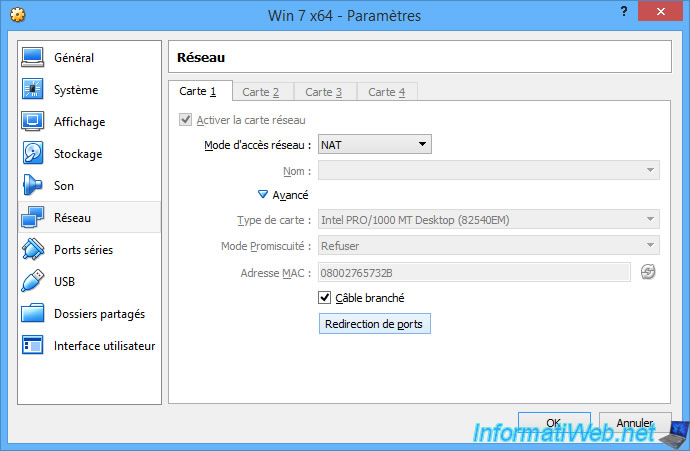
But, you can also configure the port forwarding of the virtual gateway created by VirtualBox to access the web server of your virtual machine from any PC on the network.
To do this, return to the network settings of your virtual machine and click : Port Forwarding.
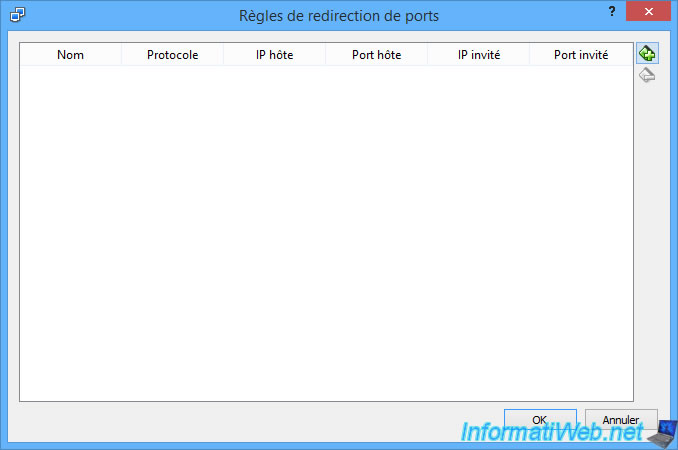
The "Port Forwarding Rules" window appears.
Click on the + icon on the right.
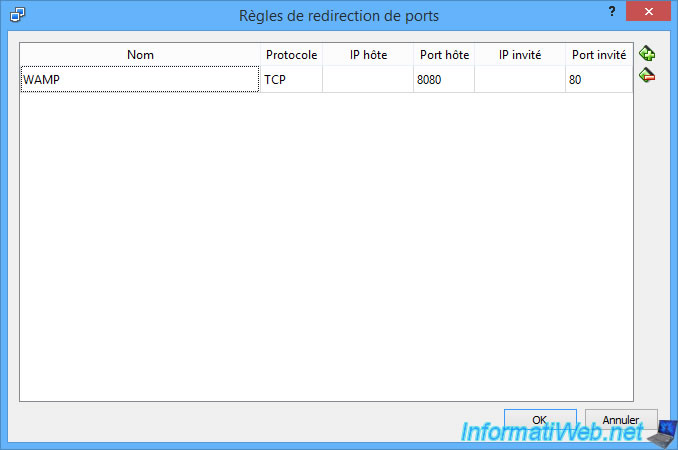
To create a new rule, you will need to specify :
- a name : WAMP (for example)
- the protocol used : TCP or UDP (for web servers, it's TCP)
- host IP : optional. This is useful if this rule is for a single network interface (network adapter)
- the host port : the host PC port through which other computers in the network can access the web server running in your virtual machine.
- guest IP : optional. The reason is the same as for the "Host IP" column.
- guest port : the destination port. Since our web server is listening on port 80 (HTTP) in our virtual machine, we have indicated : 80.
Click OK to validate this rule.
Now, we can access the web server of our virtual machine using :
- the IP address of our host PC
- the port specified in the "host port" column
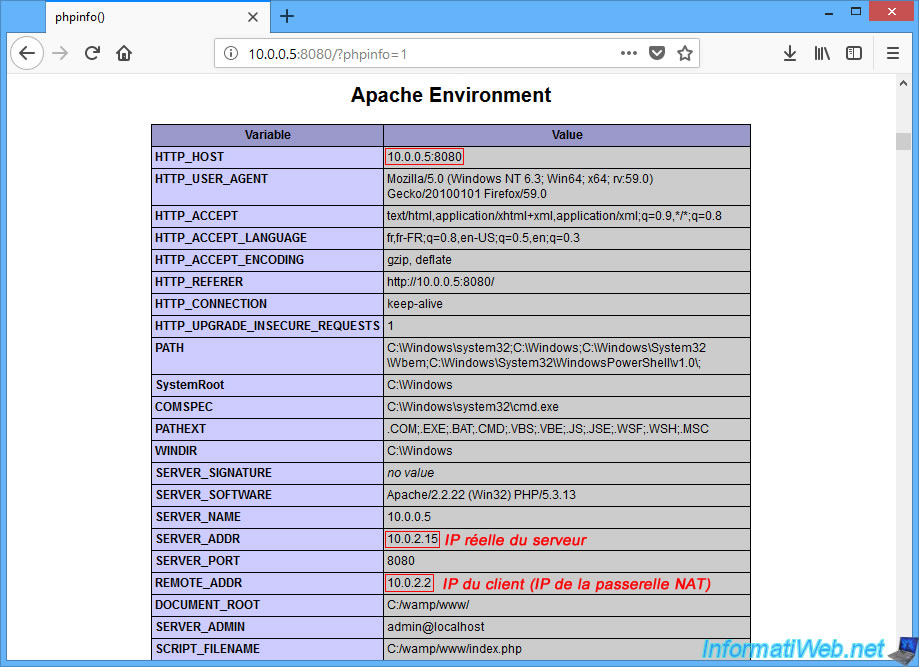
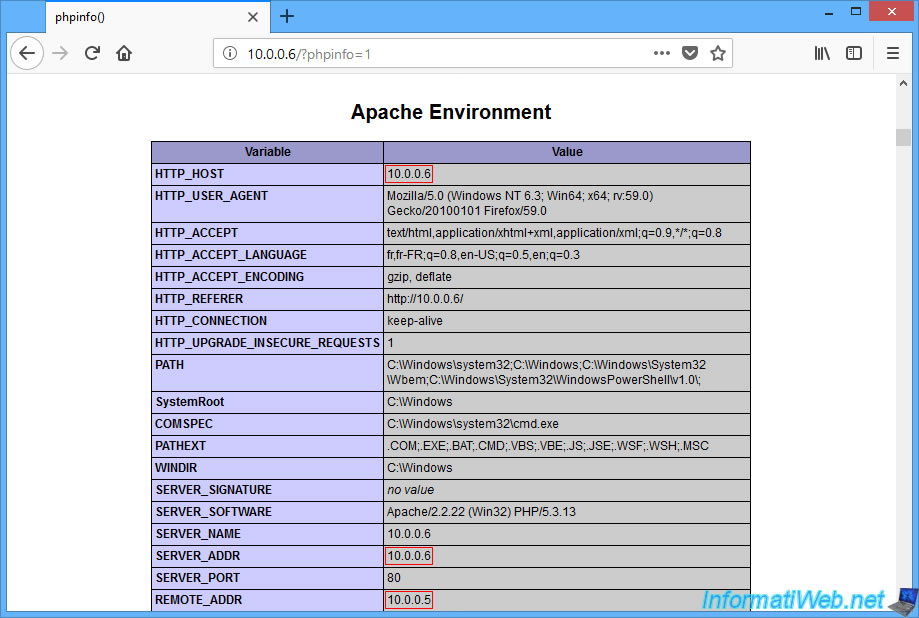
If you display PHP info (via phpinfo phpinfo), you will see that :
- we access the server via this address : 10.0.0.5:8080
- the real IP address of the server is "10.0.2.15" and not "10.0.0.5"
- the IP address of the client is not the right one. This is because the web server is behind a gateway.
2. NAT Network
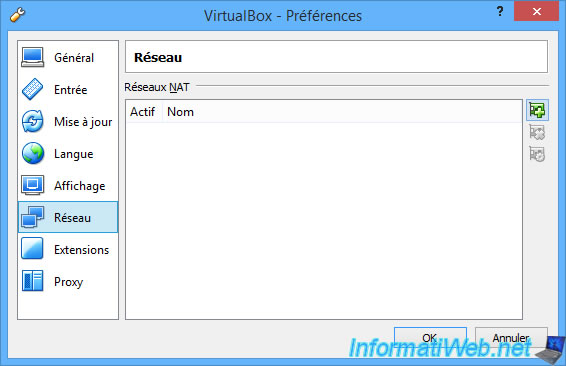
With VirtualBox, you can also create additional NAT networks.
However, by default, there is none created.
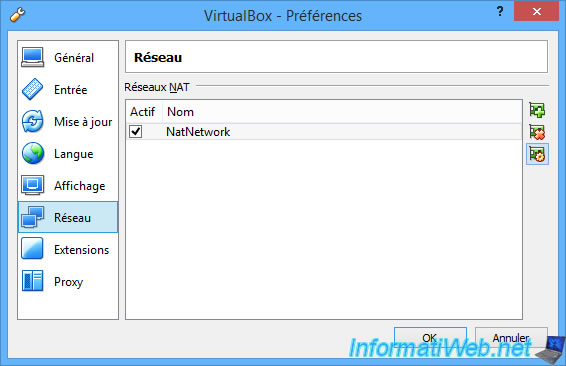
To create a new NAT network, go to the "File -> Preferences" menu.
Then, click on "Network" and then on the + icon.
By default, your new NAT network will be named : NatNetwork.
To configure it, select it and click on the gear icon.
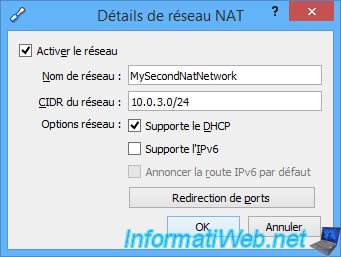
For each NAT network, you will be able to choose :
- the network ID to use (also called CIDR for Classless Inter-Domain Routing).
- if you want to enable or disable the VirtualBox DHCP server for this network. Disabling it can be useful for learning how to create a DHCP server on Linux or Windows Server.
- if you want to enable ou disable the IPv6 support or not
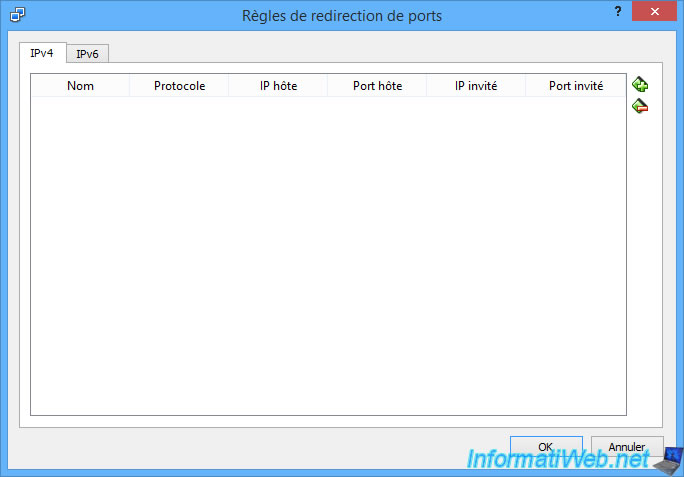
- to create ports forwarding as explained previously
In this case, you will be able to redirect IPV4 and/or IPv6 ports.
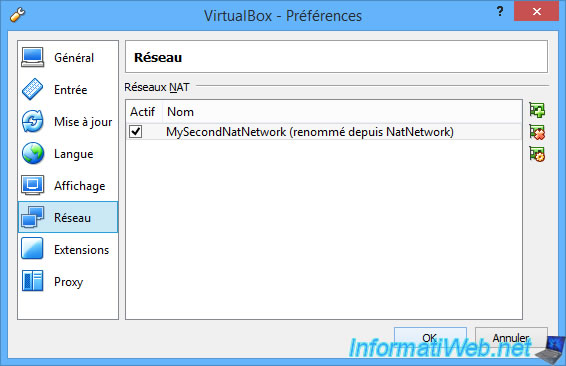
This is our new NAT network.
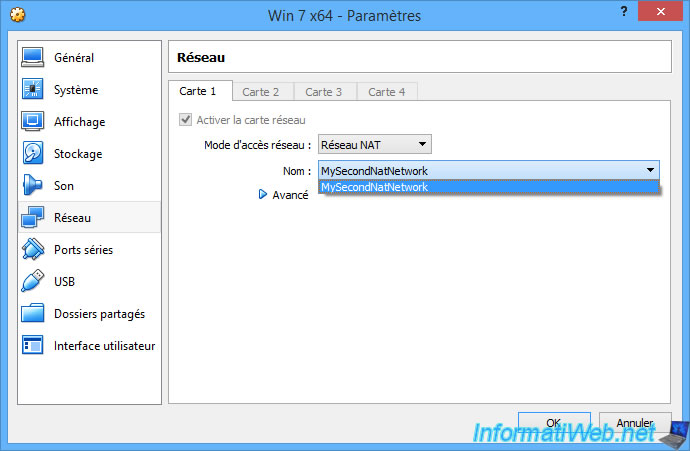
In the settings of your virtual machine, return to the "Network" section and select :
- network access mode : NAT Network
- the name of your new NAT network. In our case : MySecondNatNetwork.
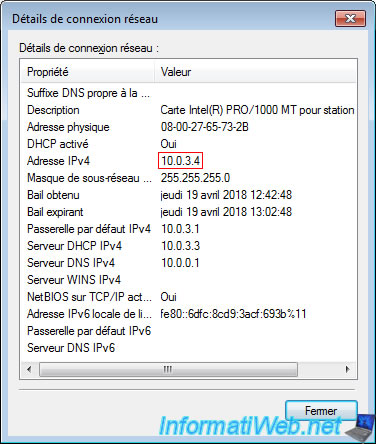
As you can see, our virtual machine has received an IP address that matches the previously configured network ID "10.0.3.0/24".
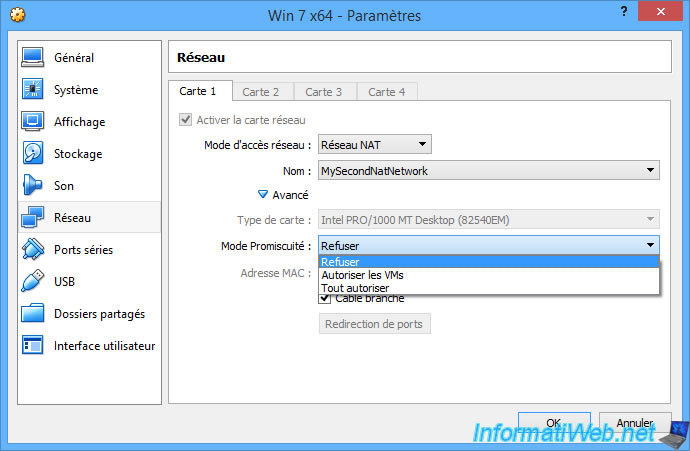
For promiscuous mode, it's best to disable it (deny) to not slow down the network speed for your virtual machine.
Enabling promiscuous mode is only useful for analyzing network traffic with sniffers.
3. Bridged Adapter
The "Bridged Adapter" mode allows you to virtually place your virtual machine in your physical network.
In other words :
- your virtual machine will receive an IP address from the DHCP server of your network (usually this server is in your box or router)
- your virtual machine will appear on your network as a full-fledged machine
- you will be able to access services hosted on your virtual machine as if your virtual machine was a real machine
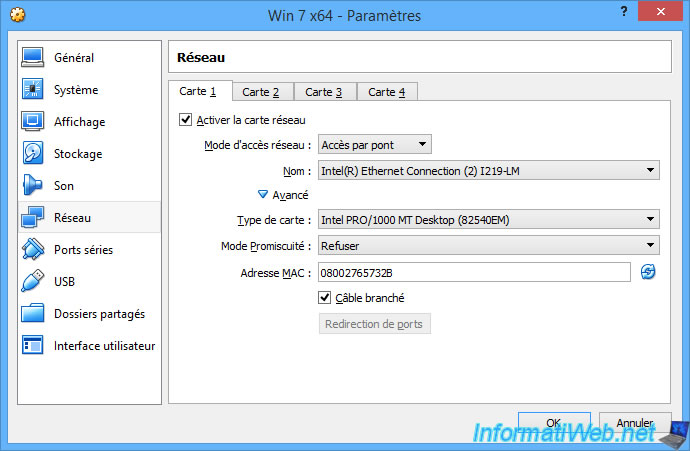
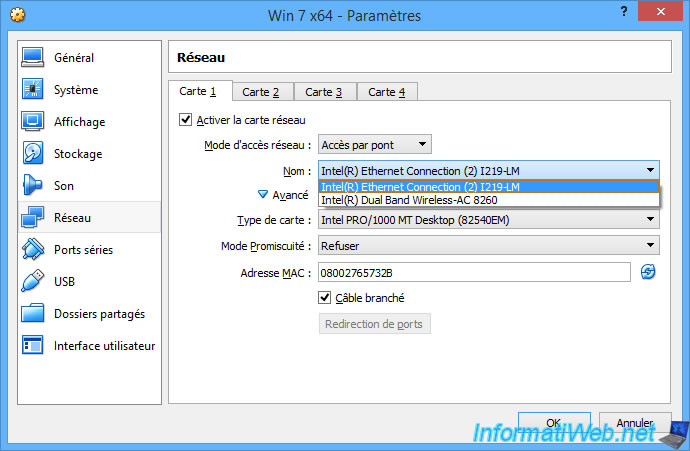
When you select the "Bridged Adapter" mode, VirtualBox will allow you to select which network interface it will use to connect this virtual machine to the desired physical network.
In our case, our computer has 2 network interfaces (network cards) :
- the wired network card : Intel(R) Ethernet Connection (2) I219-LM
- the wireless network card (Wi-Fi) : Intel(R) Dual Band Wireless-AC 8260
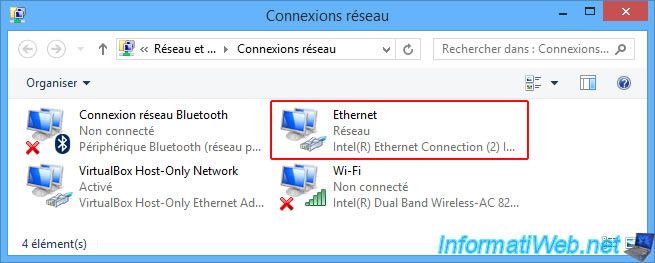
If you don't know which network adapter to select, go to the Windows Control Panel to view your network connections.
To display them, you have 2 possibilities :
- open the control panel and go to : Network & Internet -> Network & Sharing Center -> Change adapter settings
- or right-click on the network icon in the taskbar and click "Open Network and Sharing Center". Then, click on "Change adapter settings".
In short, as you can see below, our Ethernet network card is connected to the network, while the Wi-Fi card is not connected at the moment.
So, we selected the "Intel(R) Ethernet Connection (2) I219-LM" network adapter in the network settings of our virtual machine.
Now, our virtual machine has received an IP address from the DHCP server present in our real router.
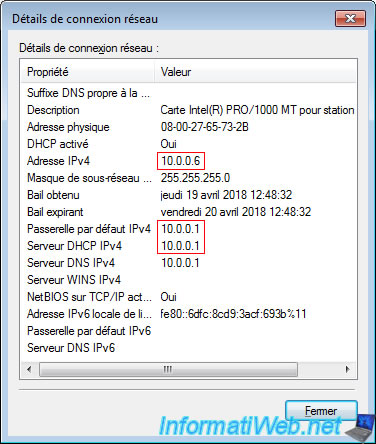
We can therefore access the web server of our virtual machine as if it were on a physical machine of our network.
This time, the IP address of the server (SERVER_ADDR) corresponds to the IP address used to access our web server and the IP address of the client (REMOTE_ADDR) corresponds to our local IP address.
Share this tutorial
To see also
-

Virtualization 8/30/2019
Hyper-V - Coexistence with VirtualBox or VMware Workstation
-
Virtualization 8/25/2018
VirtualBox - Clone a virtual machine (VM)
-
Virtualization 7/22/2018
VirtualBox - Configure settings of your VMs
-
Virtualization 11/6/2020
VirtualBox - Connect an USB key to a VM
You must be logged in to post a comment