- Backup
- Acronis True Image
- 16 June 2025 at 13:04 UTC
-

- 1/2
Acronis Cyber Protect Home Office (True Image) is a reliable backup software that allows you to back up your computer, certain partitions or folders to an external hard drive, a specific folder or even a network location.
If you have a physical NAS (such as a Synology NAS, for example), you can even store your backups directly on it.
In our case, we used a NAS: Synology DS920+.
Note that NAS detection is automatic. Hence the use of a known NAS in our case.
Source : Acronis True Image 2017 - User's guide.
- Synology NAS setup
- Configure Acronis backup for storage on Synology NAS
- Backup your entire PC to a Synology NAS
- Restore your entire PC from a Synology NAS
- Quick backup
1. Synology NAS setup
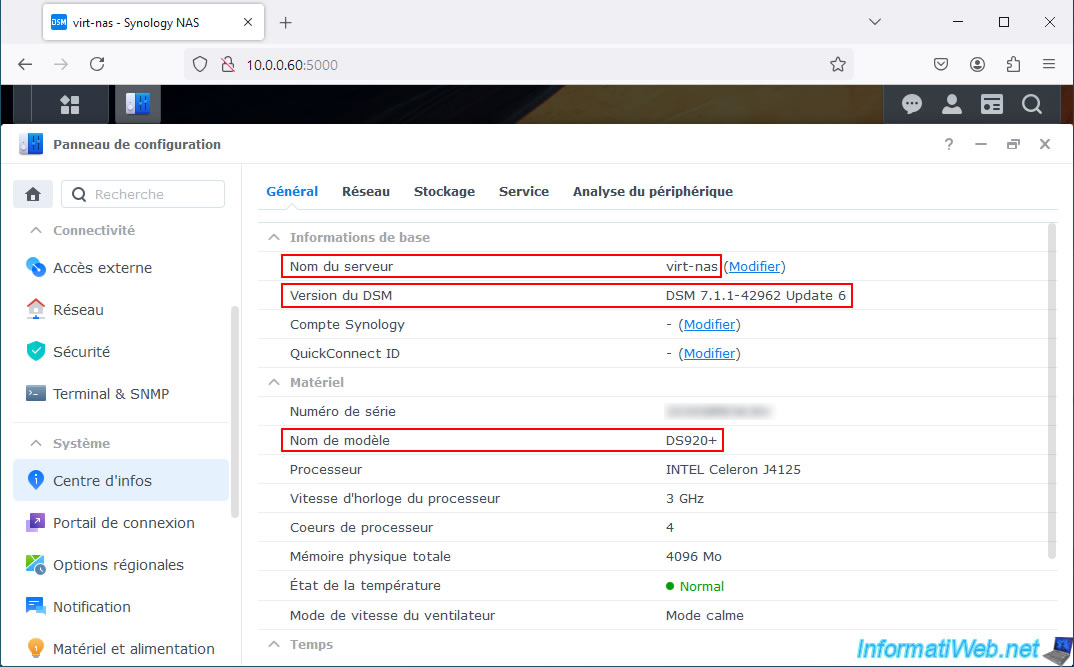
For reference, here is the NAS model and DSM version used:
- DSM Version: DSM 7.1.1-42962 Update 6
- Model Name: DS920+
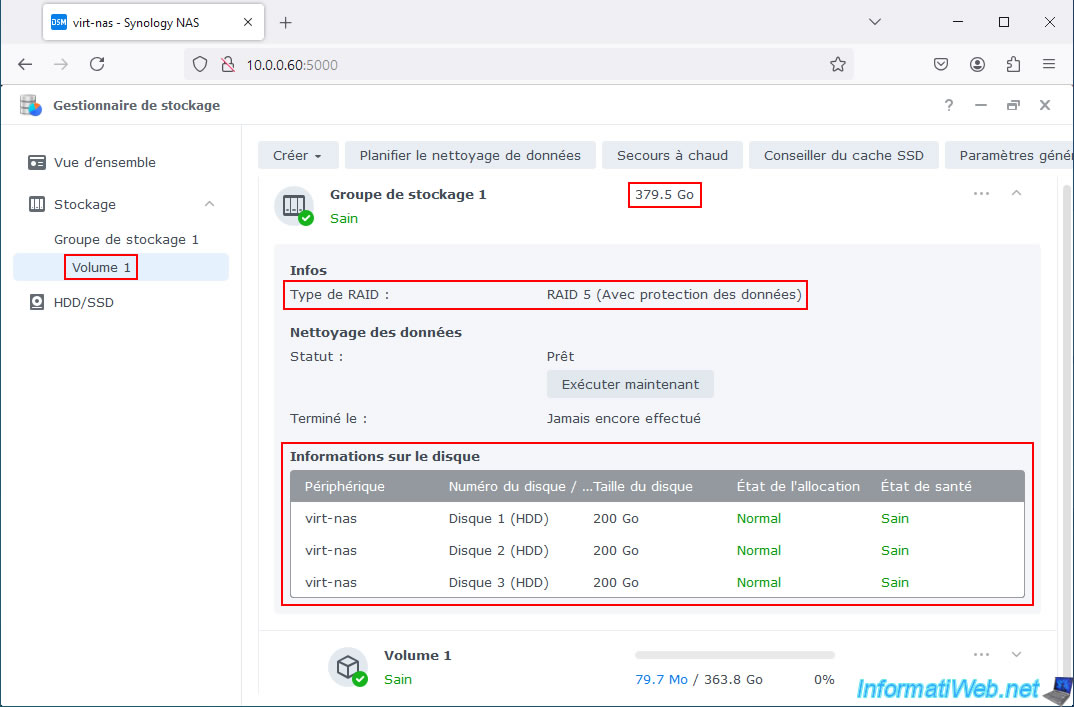
For storage, our Synology NAS has 1 RAID 5 volume with 3 disks of 200 GB each.
Which creates a storage of 379.50 GB.
To be able to store your Acronis backups on your NAS, you need to create a shared folder on it.
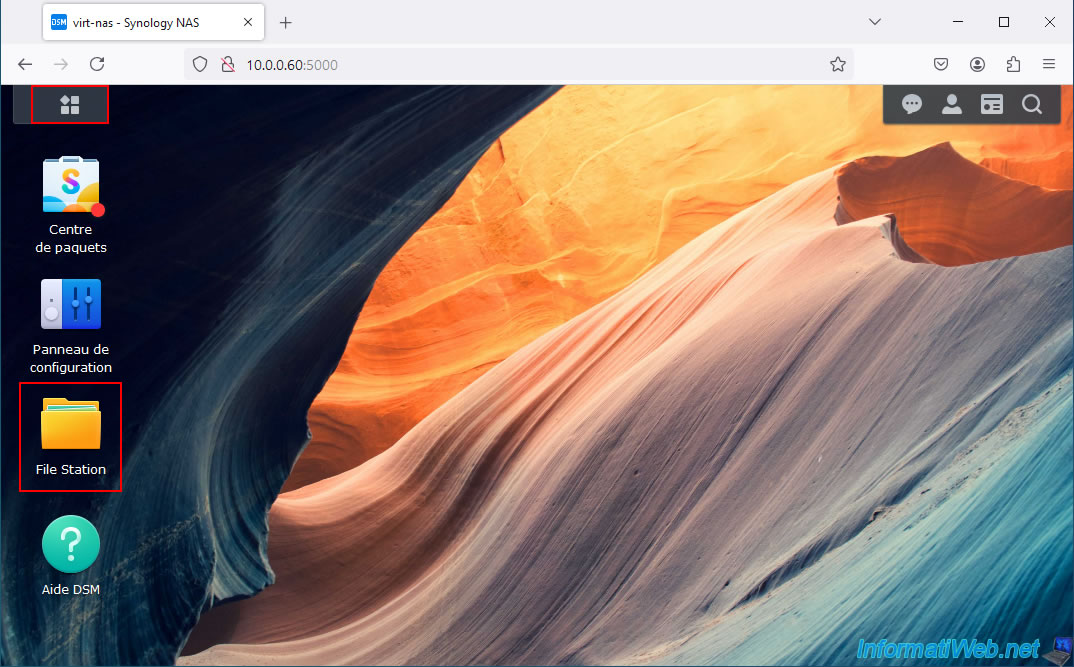
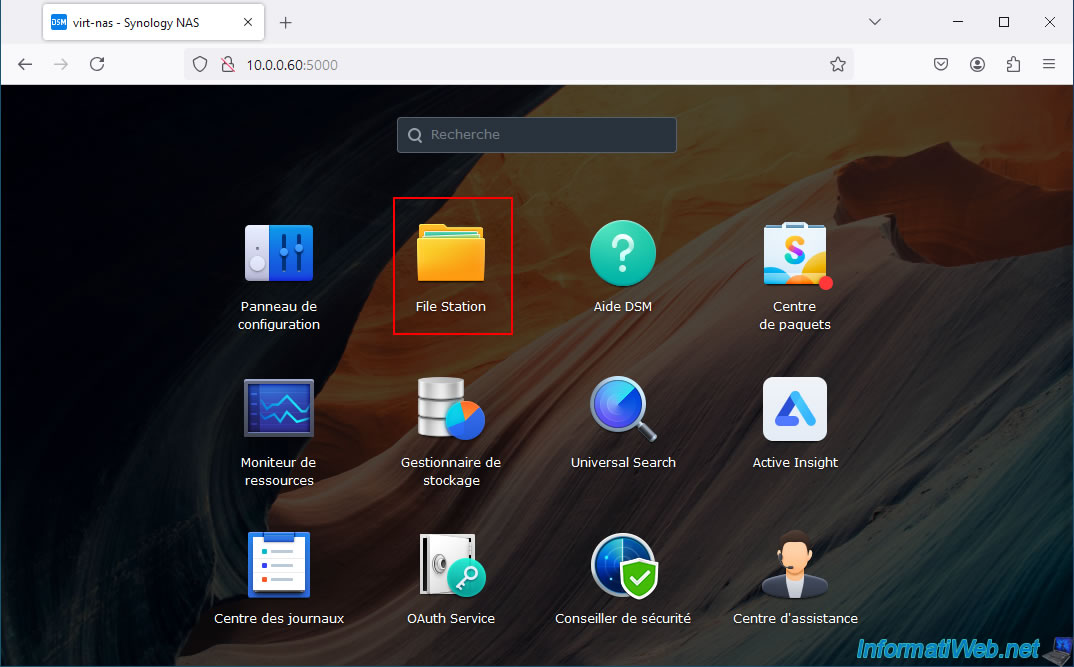
To do this, use the "File Station" shortcut on your NAS desktop (if applicable).
Otherwise, click on the icon at the top left with the squares.
Source : 60287:Acronis True Image 2018: how to back up your computer to NAS - Acronis Support Portal.
In the list of applications that appears, click on "File Station".
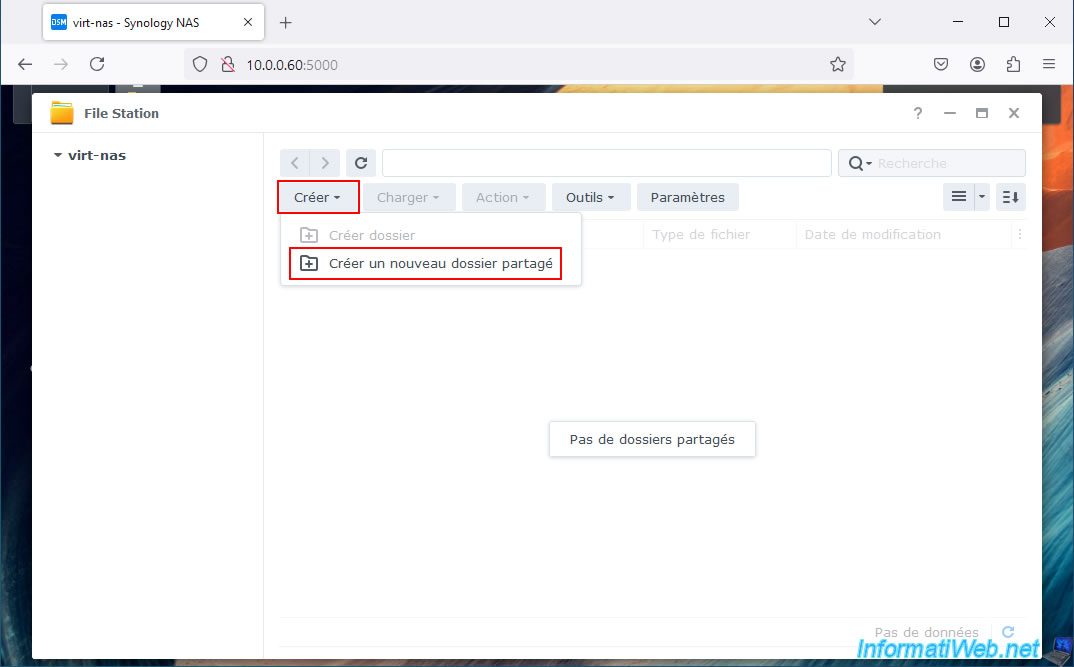
If the popup below appears in your case, click OK.

Otherwise, click "Create -> Create New Shared Folder" in the "File Station" application that appears.
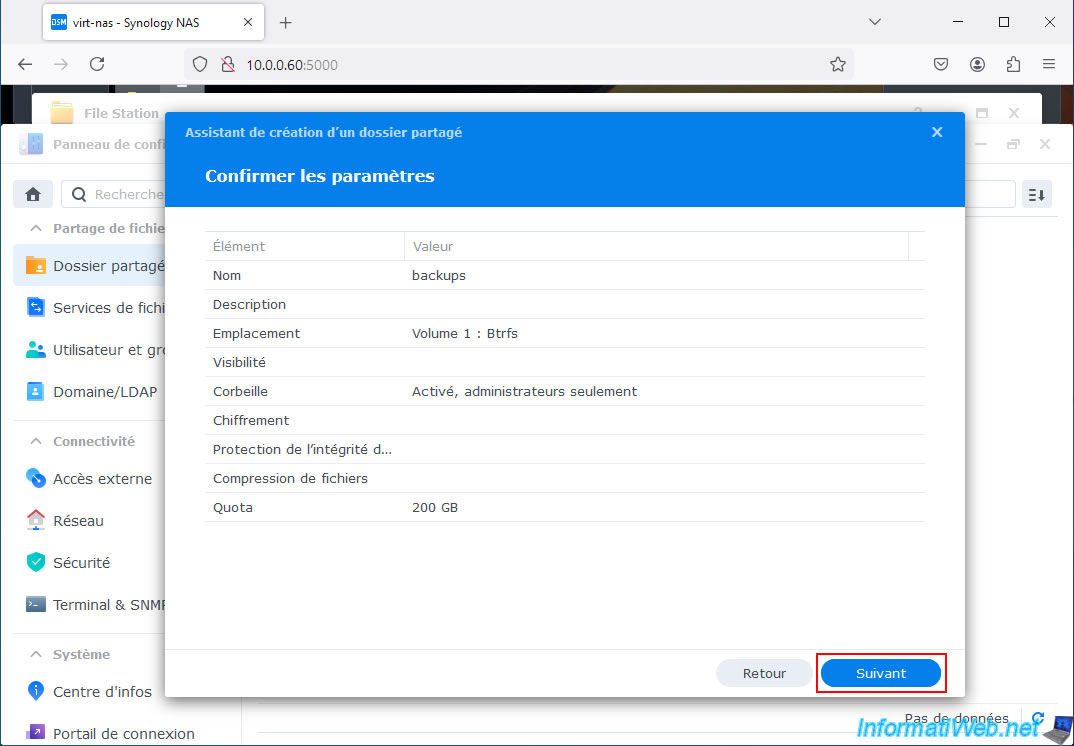
In the Create Shared Folder Wizard that appears, enter a name for your shared folder.
For example: backups.
Then, select the desired location.
In our case, our volume 1 (which refers to our RAID 5 storage mentioned above).
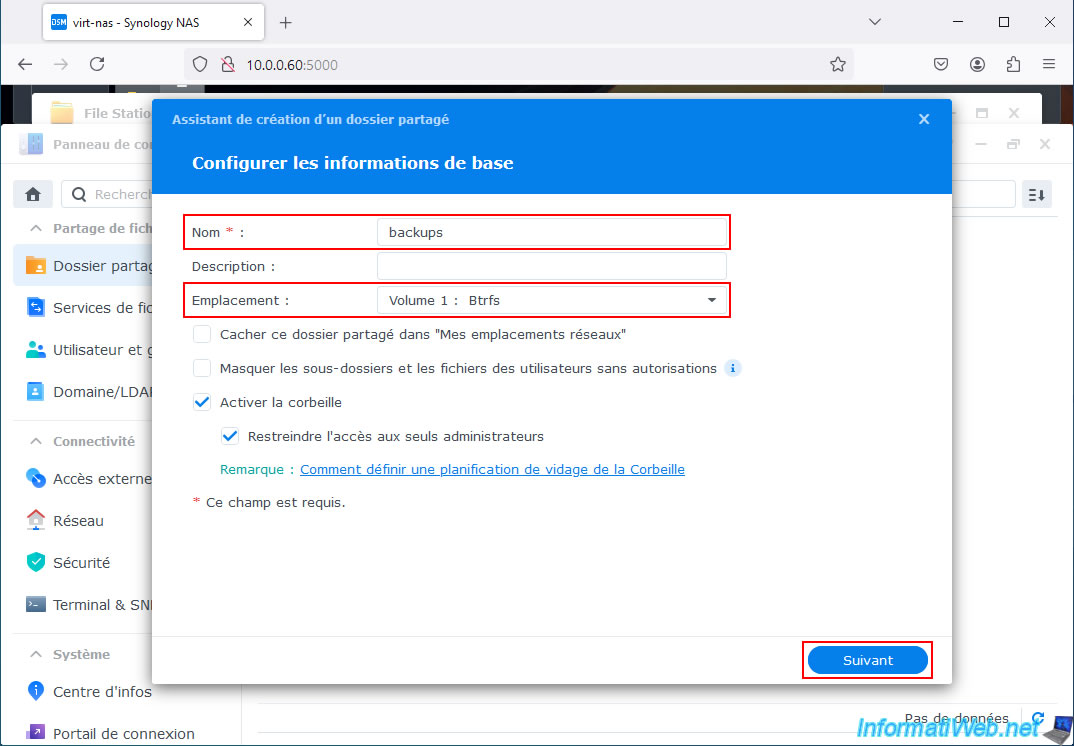
Skip shared folder encryption.

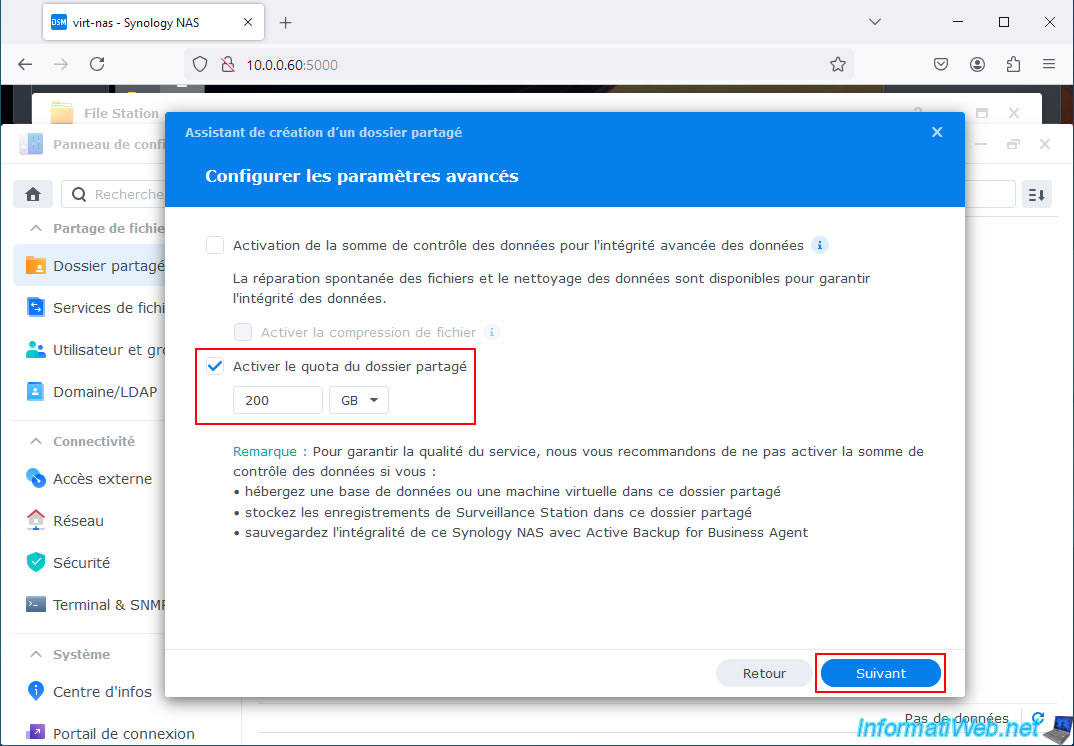
To prevent Acronis Cyber Protect Home Office (True Image) from filling up your NAS disk space with its backup files, we recommend enabling the quota for this shared folder.
To do this, check the "Enable shared folder quota" box, then specify the desired size.
In our case, our physical storage on the NAS is 379.50 GB.
So, we have limited the backup storage to 200 GB.
However, you can specify the size you want.
A summary of the settings for your future shared folder appears.
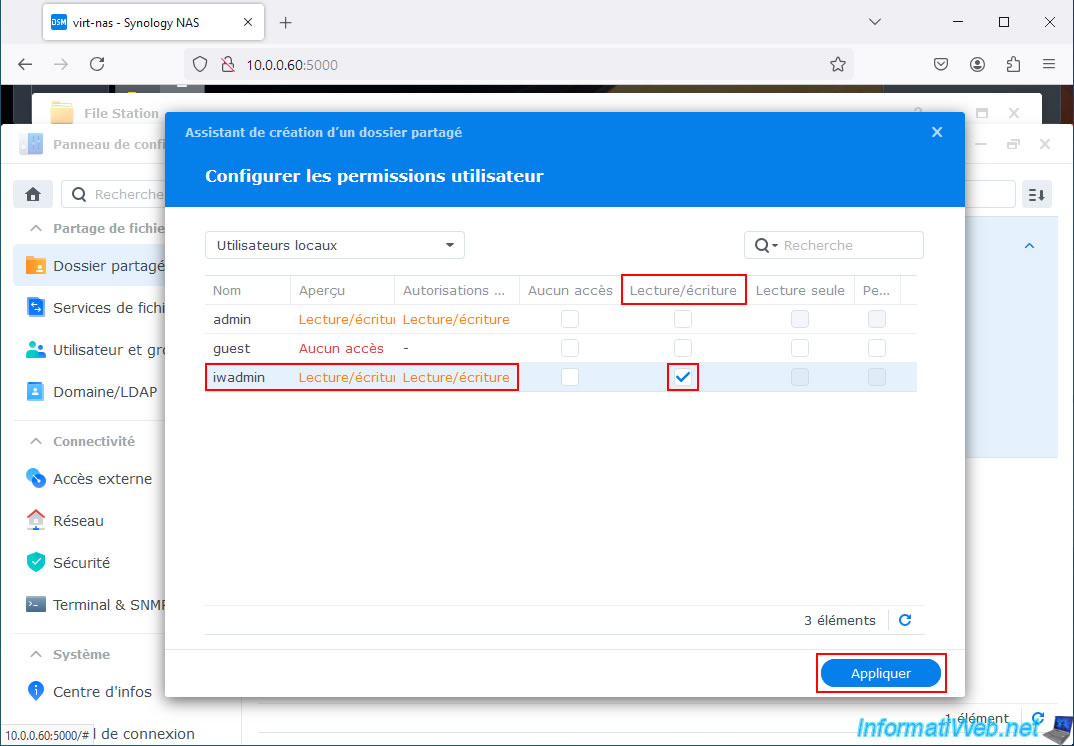
Give read and write permissions on this shared folder to the user you will specify when setting up your backup in Acronis Cyber Protect Home Office (True Image).
In our case, our administrator account is named "iwadmin".
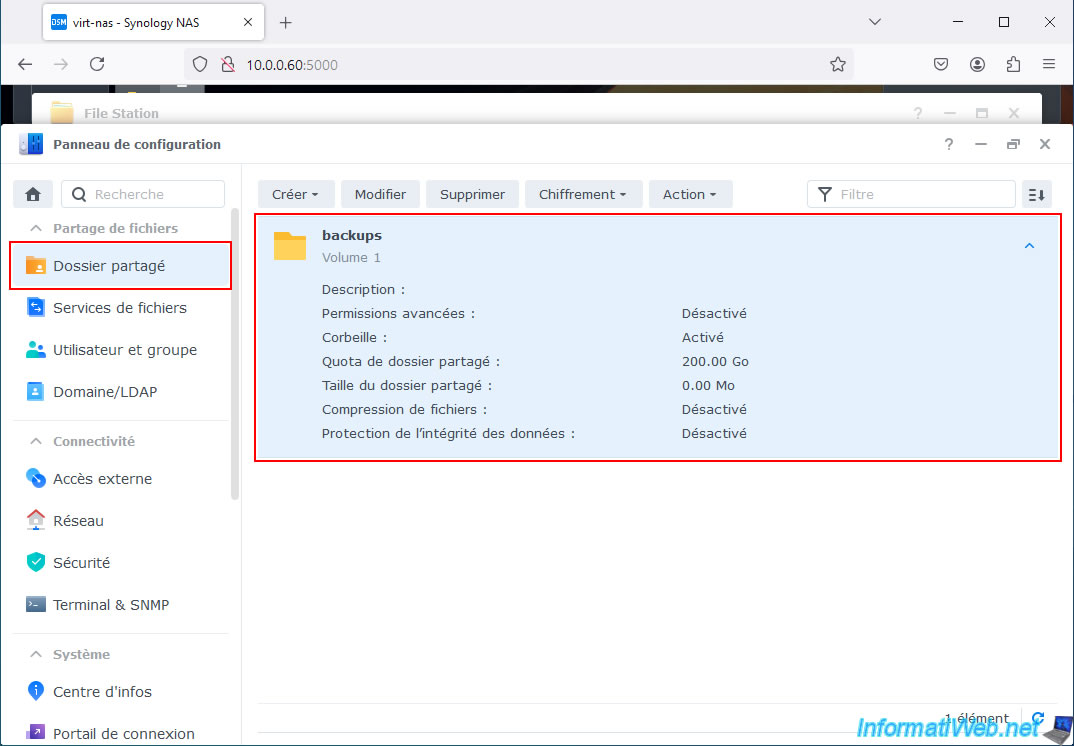
Shared folder settings appear via the control panel of your Synology NAS.
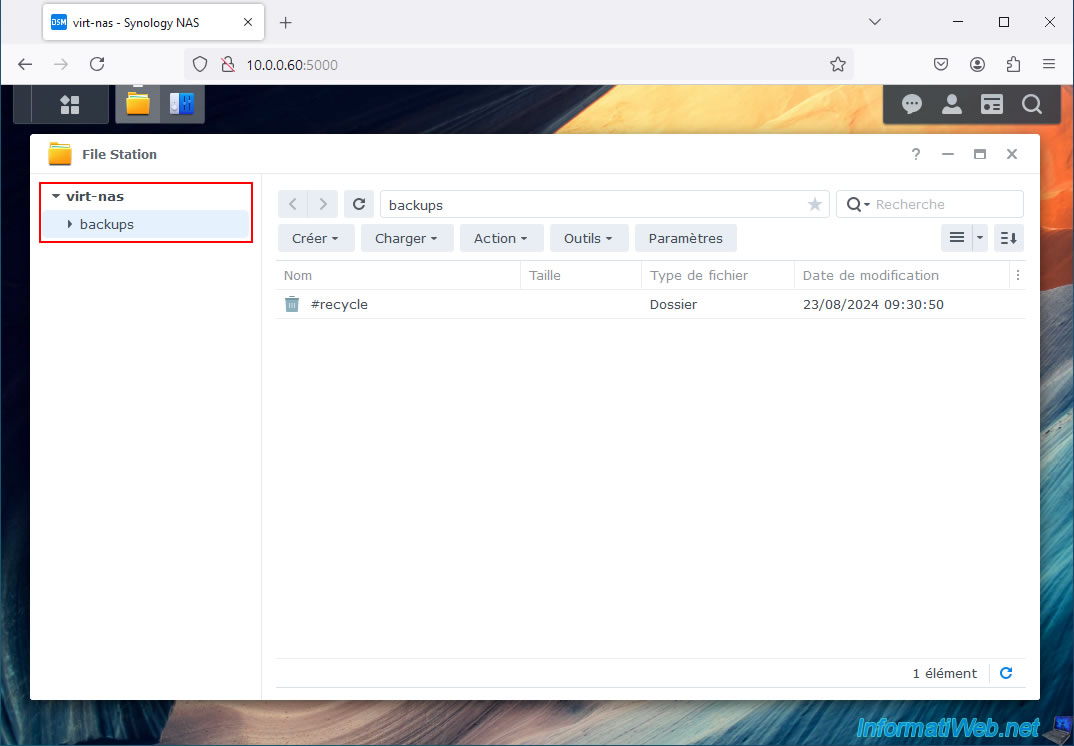
In the "File Station" application, you will see your shared "backups" folder.
2. Configure Acronis backup for storage on Synology NAS
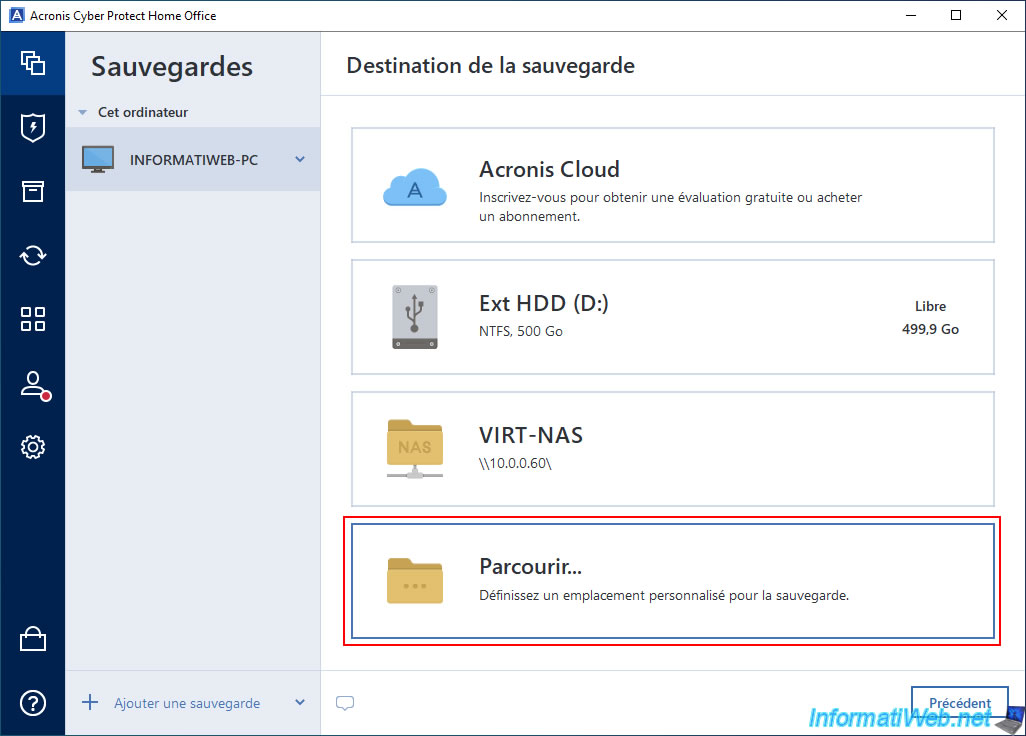
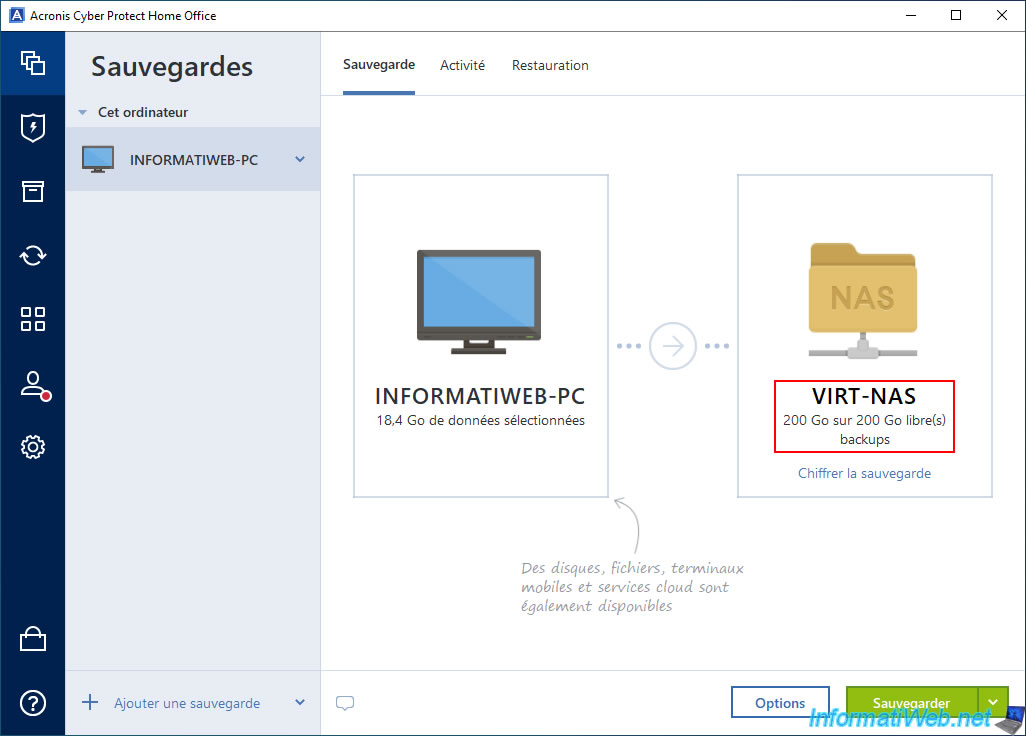
In Acronis Cyber Protect Home Office (True Image), click the right rectangle to change the backup destination.

In the "Backup Destination" list, you will see your NAS appear (if you only have one on your local network).
If so, select your NAS from this list.

Otherwise, click "Browse".
Then, expand the "My NAS Connections" section and click on the "+" to the left of your NAS (in our case: VIRT-NAS).
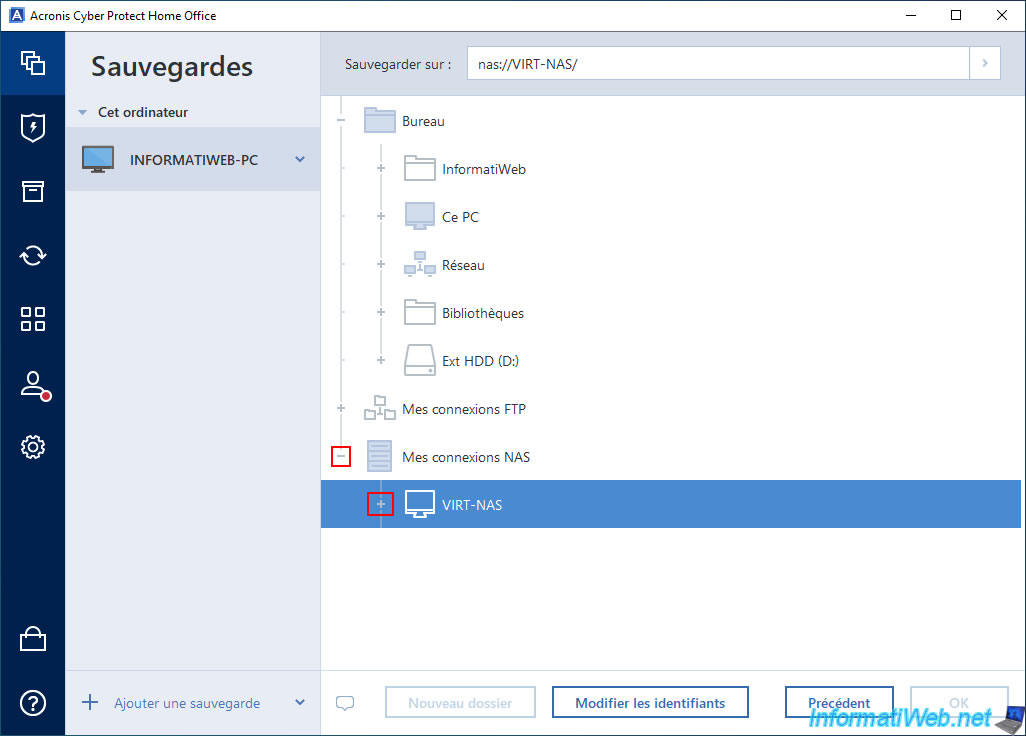
A "Login Settings" window will appear.
Specify the credentials of a user account on your NAS that has read and write rights to the shared folder created previously for storing your backups.
Then, click on "Connection Test".
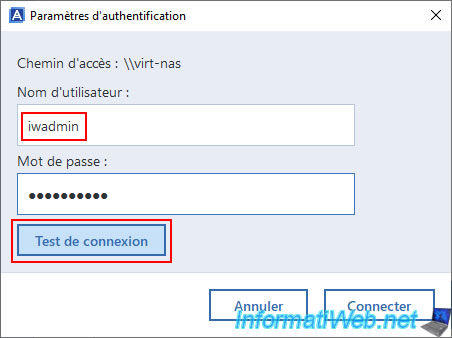
If the credentials are correct, the message "Connection established" will appear.
Click on "Connect".
Note: if an error appears, try again with the same credentials, it happens that the first attempt fails without valid reason.

You will see that Acronis Cyber Protect Home Office (True Image) will automatically detect the shared folder created earlier on your NAS.
In our case, the shared folder "backups".
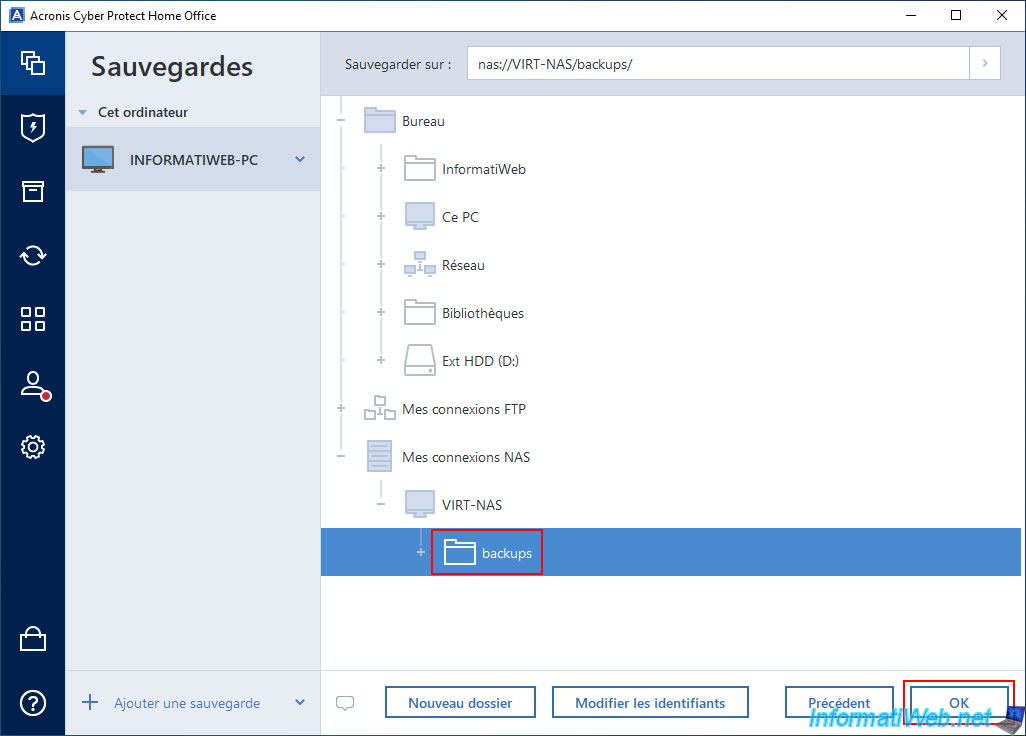
You can see that the destination is now:
- VIRT-NAS: the name of your NAS.
- 200 GB out of 200 GB free(s): the disk space available on it.
- backups: the name of the shared folder on your NAS where the backup will be stored.
Share this tutorial
To see also
-
Backup 11/3/2025
Acronis True Image - Archive your files on Acronis Cloud
-
Backup 6/30/2025
Acronis True Image - Backup disks or partitions
-

Backup 4/13/2026
Acronis True Image - Rescue Media - Create an incremental backup
-
Backup 11/20/2025
Acronis True Image - Synchronize a folder from Acronis Cloud
You must be logged in to post a comment