Virtualize a physical PC to VMware Workstation Pro (P2V) using Acronis True Image (Cyber Protect Home Office) and Acronis Universal Restore
- Backup
- Acronis True Image, Acronis Universal Restore
- 15 September 2026 at 07:02 UTC
-

- 3/8
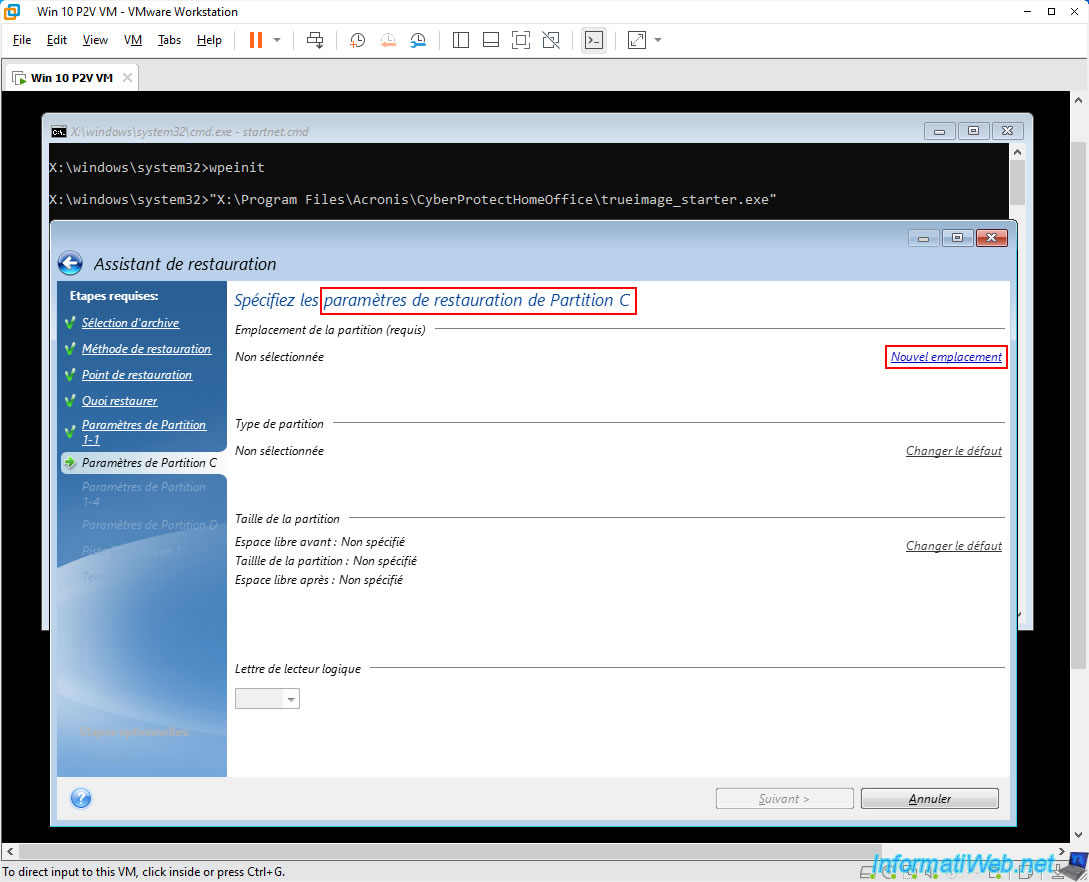
For restoring "Partition C", click "New Location" again.
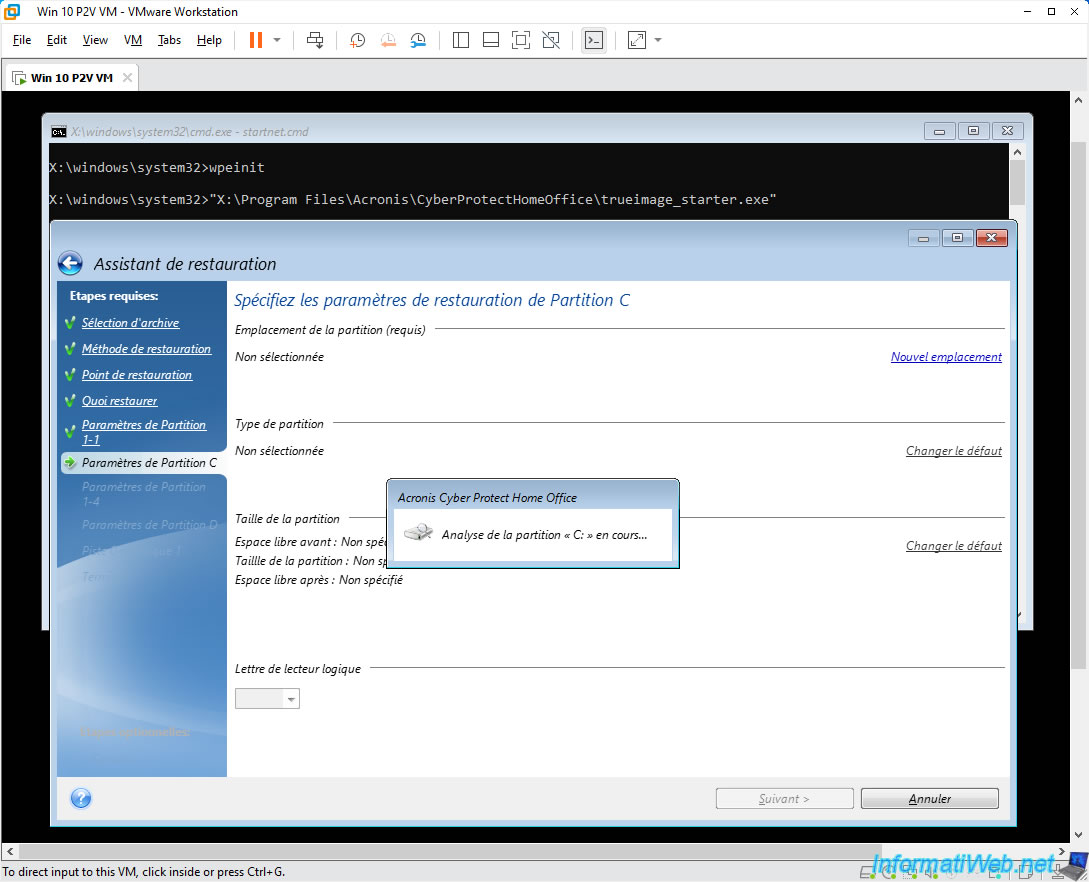
Please wait a little while Acronis scans the "C" partition.
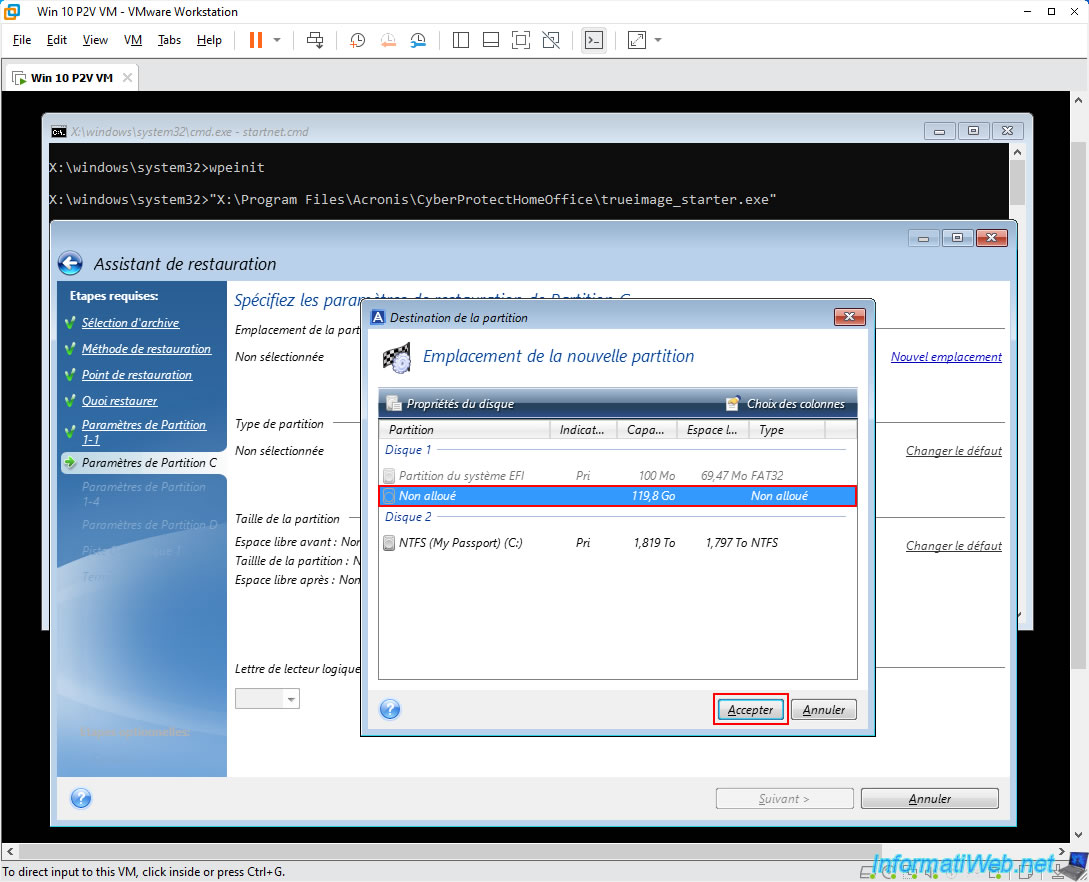
Again, select the "Unallocated" space of your disk 1 and click "Accept".
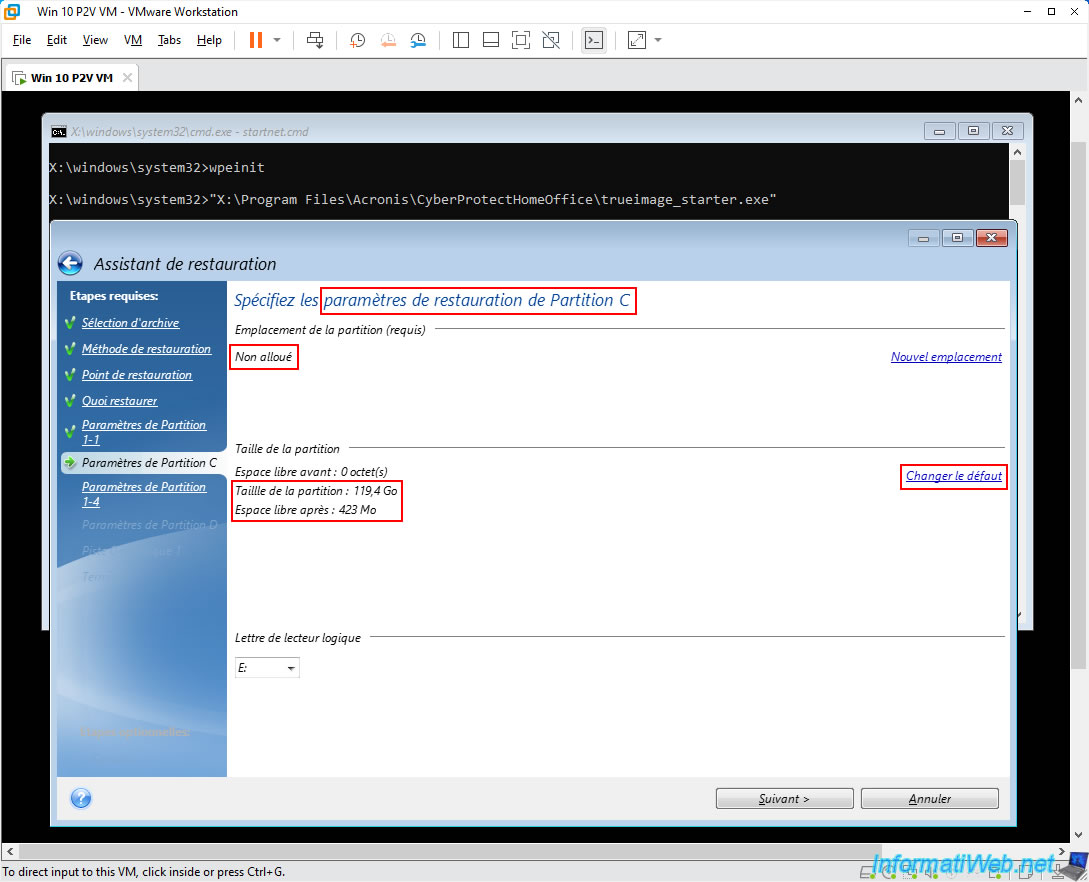
The destination of "Partition C" becomes "Unallocated".
Warning : as you can see, Acronis is trying to restore your "Partition C" using its original size.
Which may take up all the remaining space on your virtual hard disk. Which would prevent you from restoring the remaining partitions from your Acronis backup.
Click the "Change default" link (located to the right of this partition size).
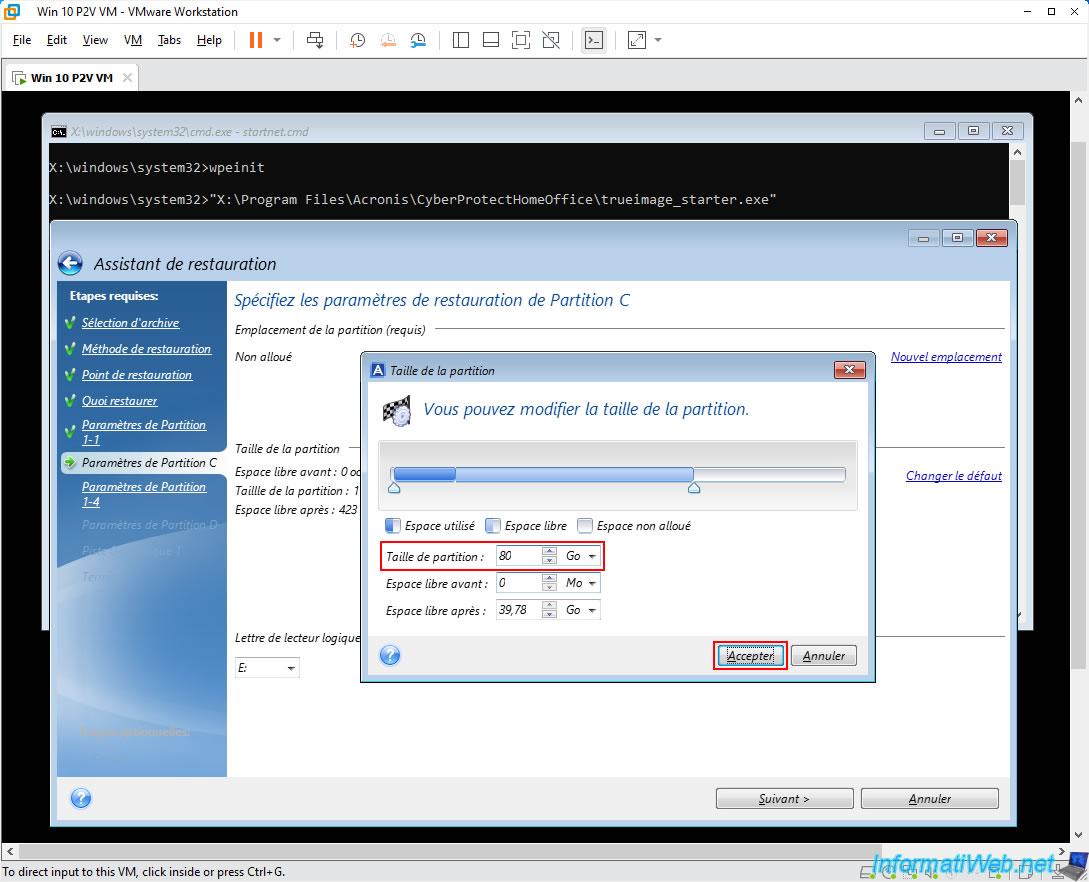
Change the partition size to fit the size of the virtual hard disk.
Then, click "Accept".
In our case, this "Partition C" will have a size of 80 GB on our virtual hard disk.
Which will leave about 40 GB free on it in our case.
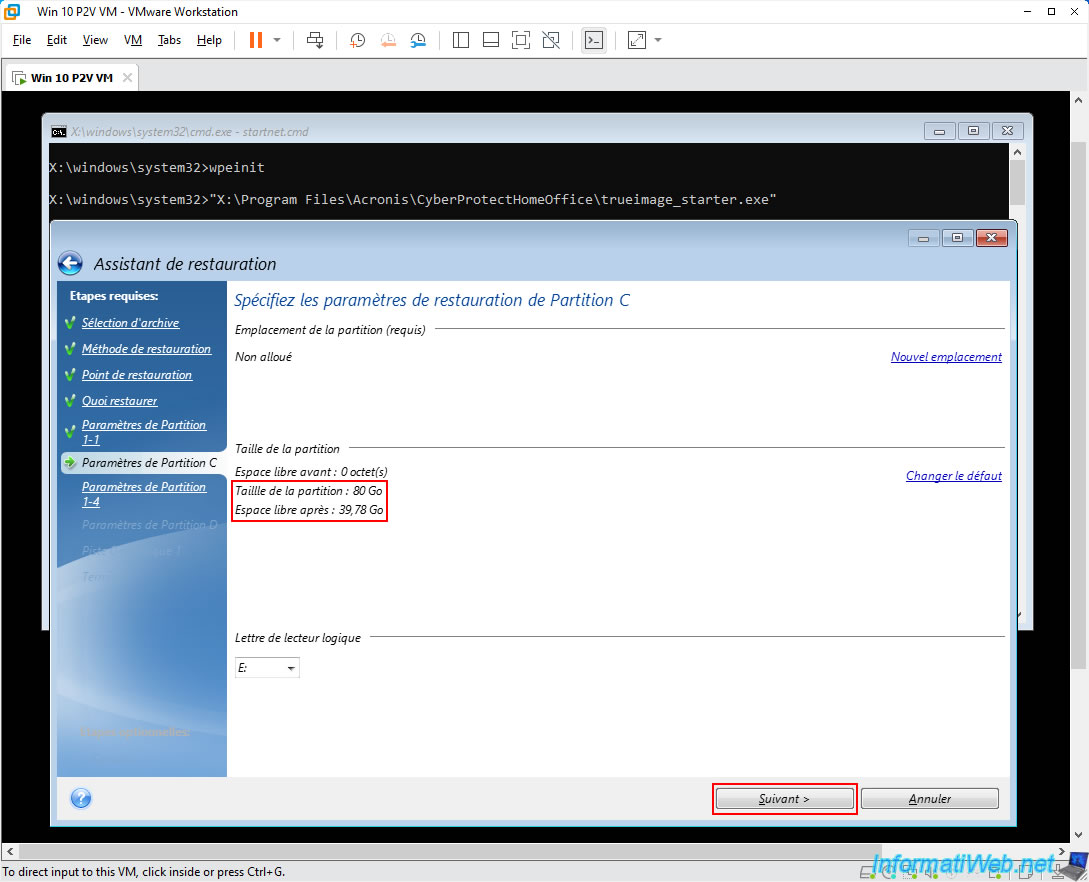
As expected, the size has been changed.
Which will leave free space after restoring this partition.
Click "Next".
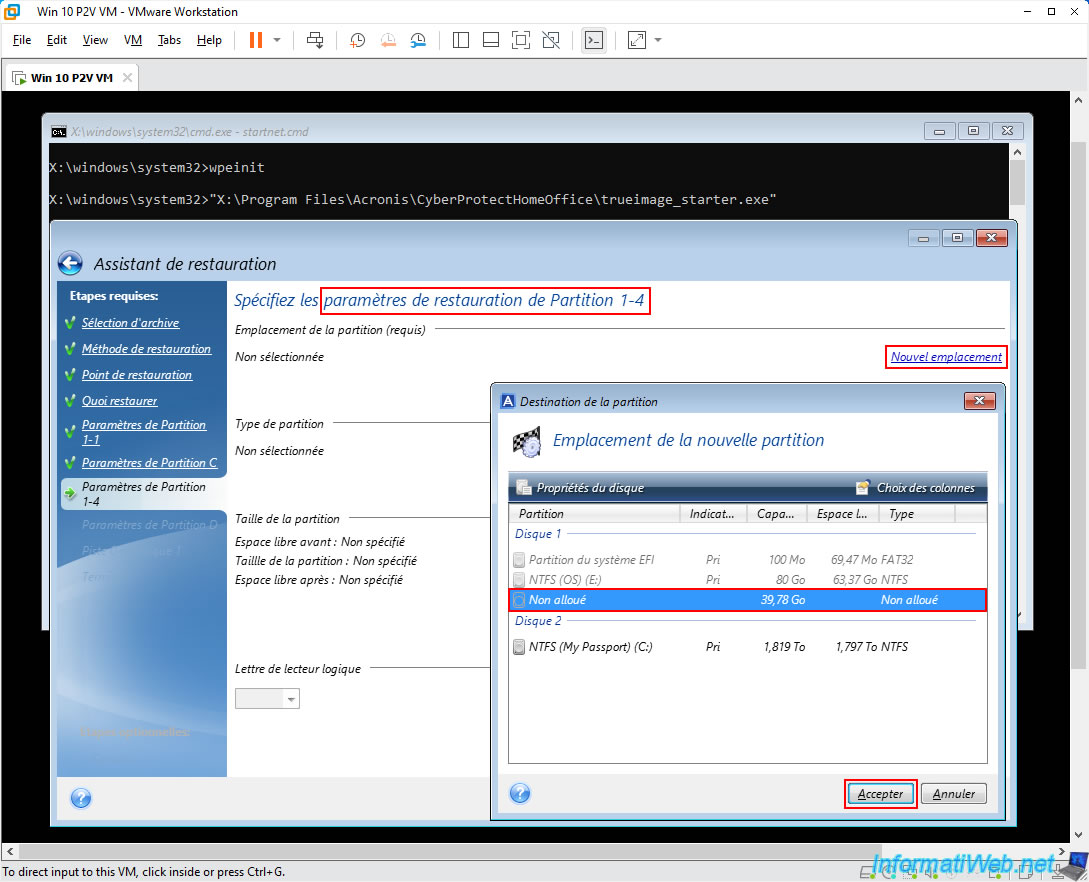
For "Partition 1-4", click the "New Location" link again, select the "Unallocated" space of your Disk 1 again and click "Accept".
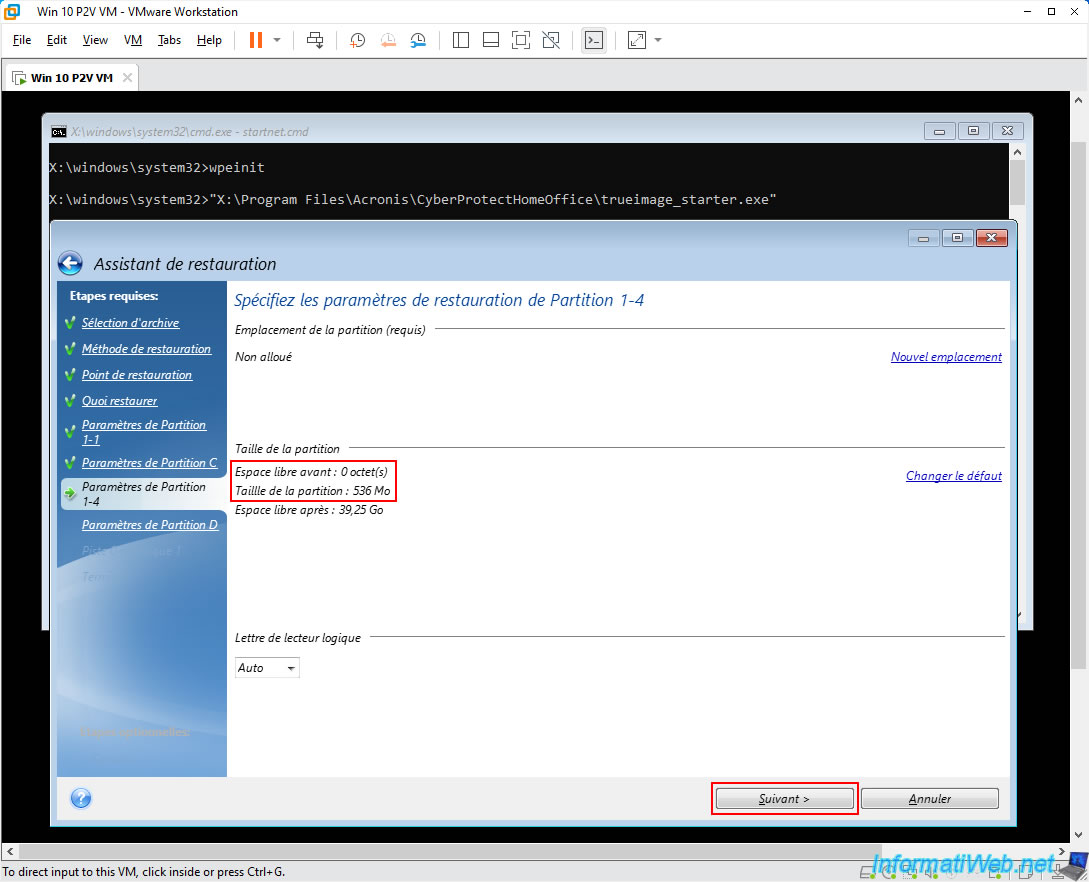
As you can see, it is a small partition (536 MB in our case).
Which will leave enough free space on your virtual hard drive.
So you can simply click on "Next".
Note: this small partition corresponds to the Windows 10 recovery partition in our case (as you can verify thanks to a previous image of this tutorial).
For our "Partition D" containing data, we click "New Location" again, select the "Unallocated" space of disk 1 again and click "Accept".
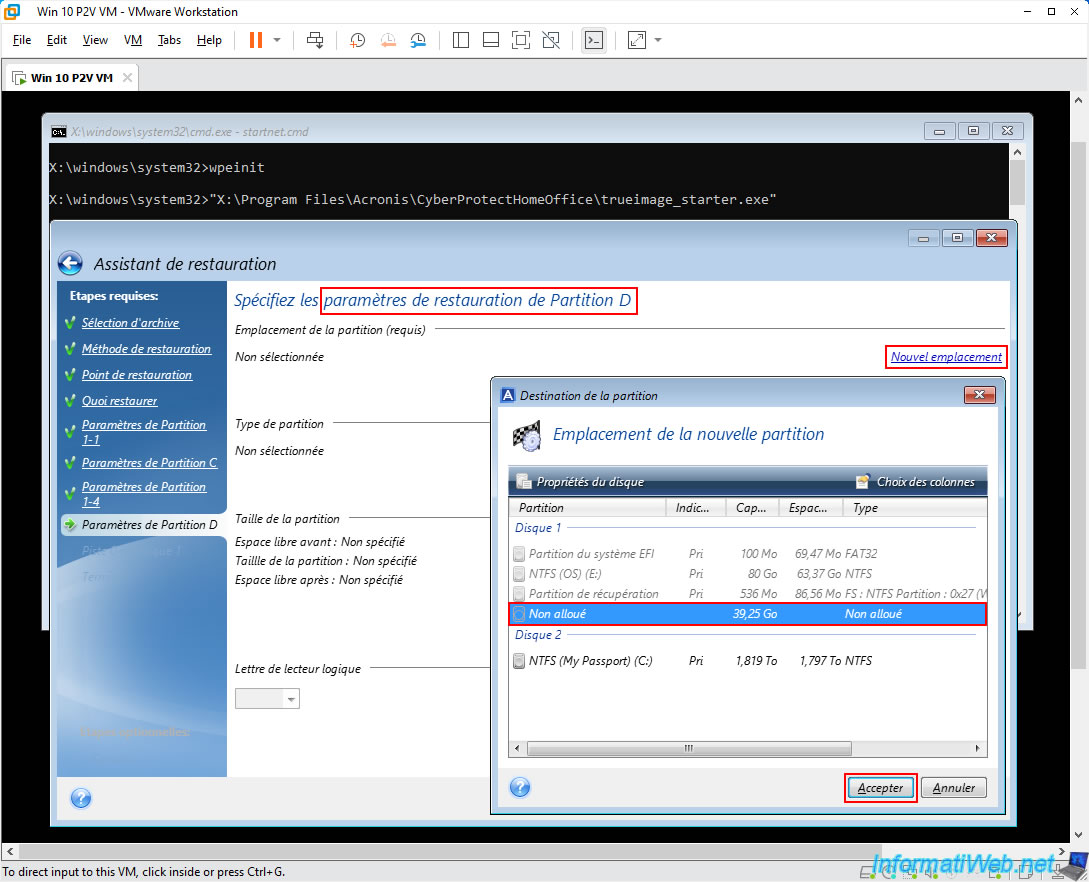
The "Partition D" is again a large partition.
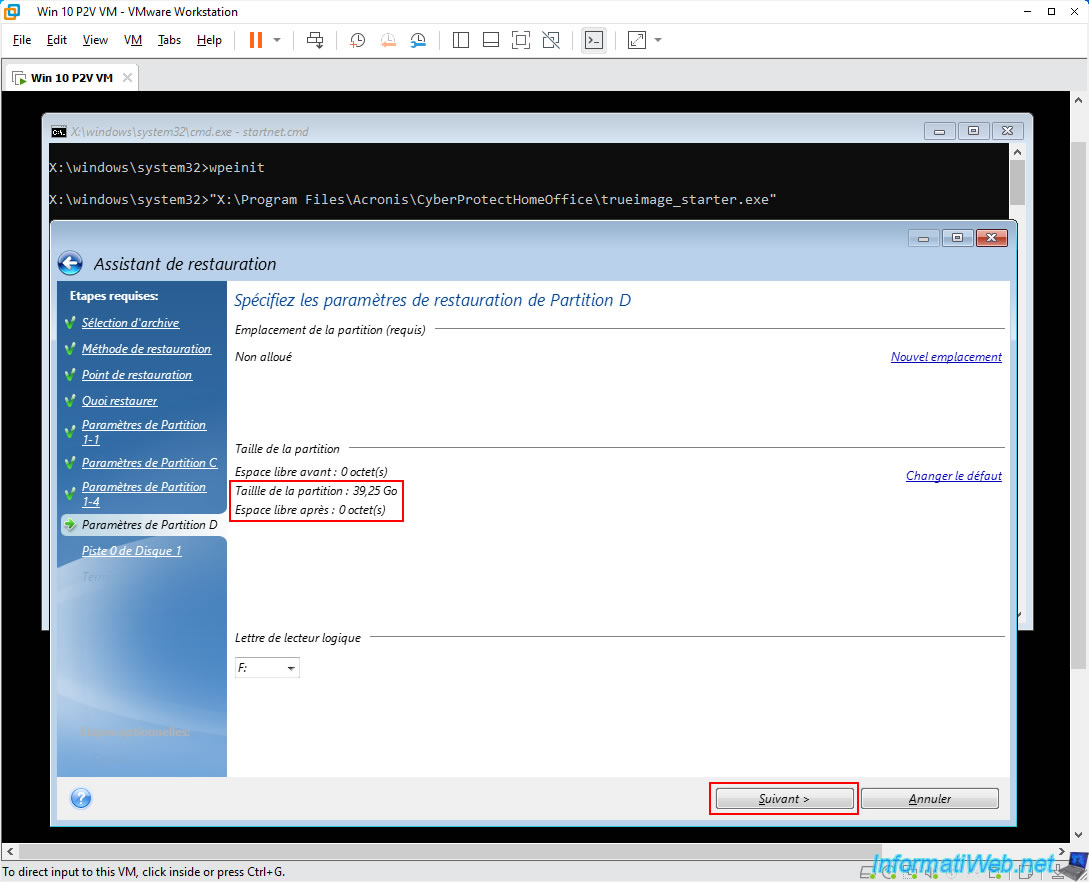
However, since this is the last partition to be restored, Acronis will simply use all the remaining space on your virtual hard disk.
So you don't need to change the size of this partition.
Just click "Next".
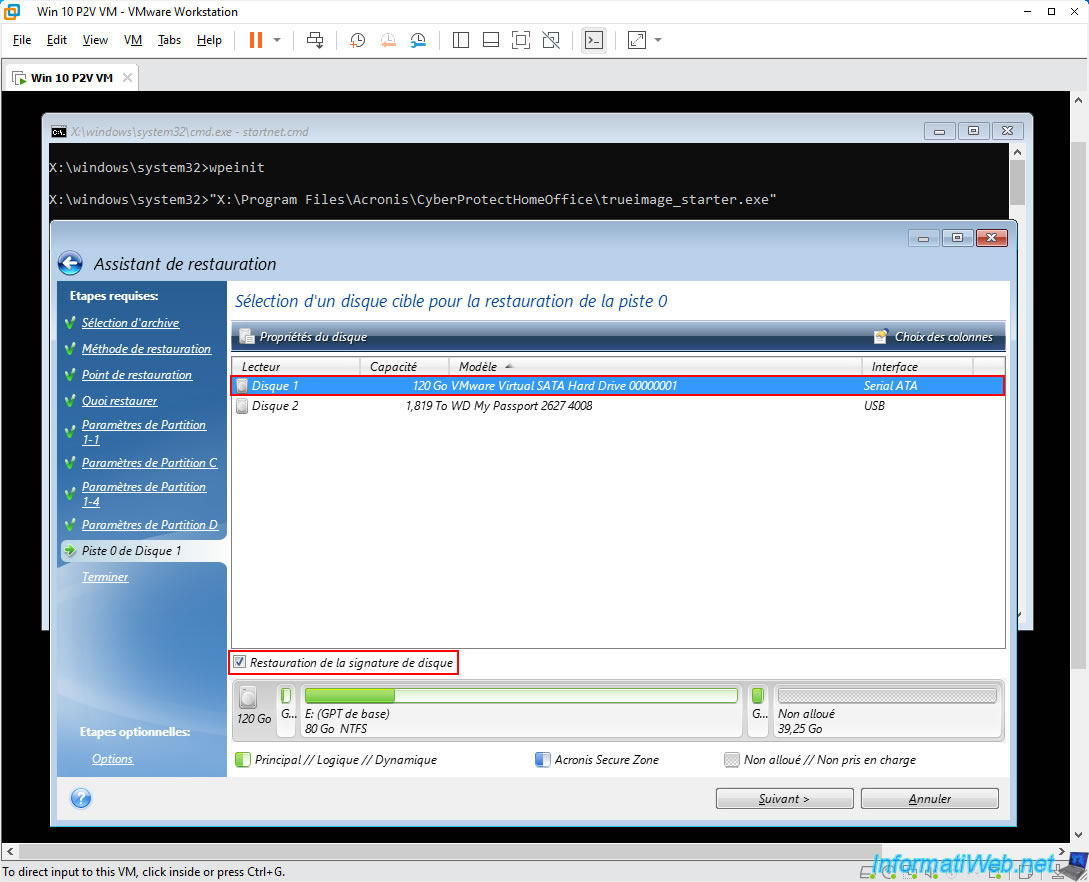
To restore "Track 0" (= MBR of the disk), select your disk 1 (of which you have selected each time the "Unallocated" space for the restoration of your partitions) whose model is also "VMware Virtual SATA Hard Drive" and check the "Disk Signature Restore" box.
When you plan to restore a backup containing a Windows installation, Acronis recommends selecting the "Disk Signature Restore" option. This step is essential for several reasons:
- Acronis Task Recovery: this allows Acronis Cyber Protect Home Office (True Image), installed on the physical PC being backed up, to automatically recover its tasks, as the disk signature is used to identify your disk.
- Application Licenses: some applications may have their license tied to your disk signature, making this restore necessary.
- Windows Restore Points: this also allows using Windows restore points, if available.
- VSS Snapshots: this makes it easier to use VSS snapshot restore, especially in the context of the "Previous Versions" feature present in Windows 7 and Vista.
Source : Selecting target disk for MBR recovery - Acronis True Image 2016.
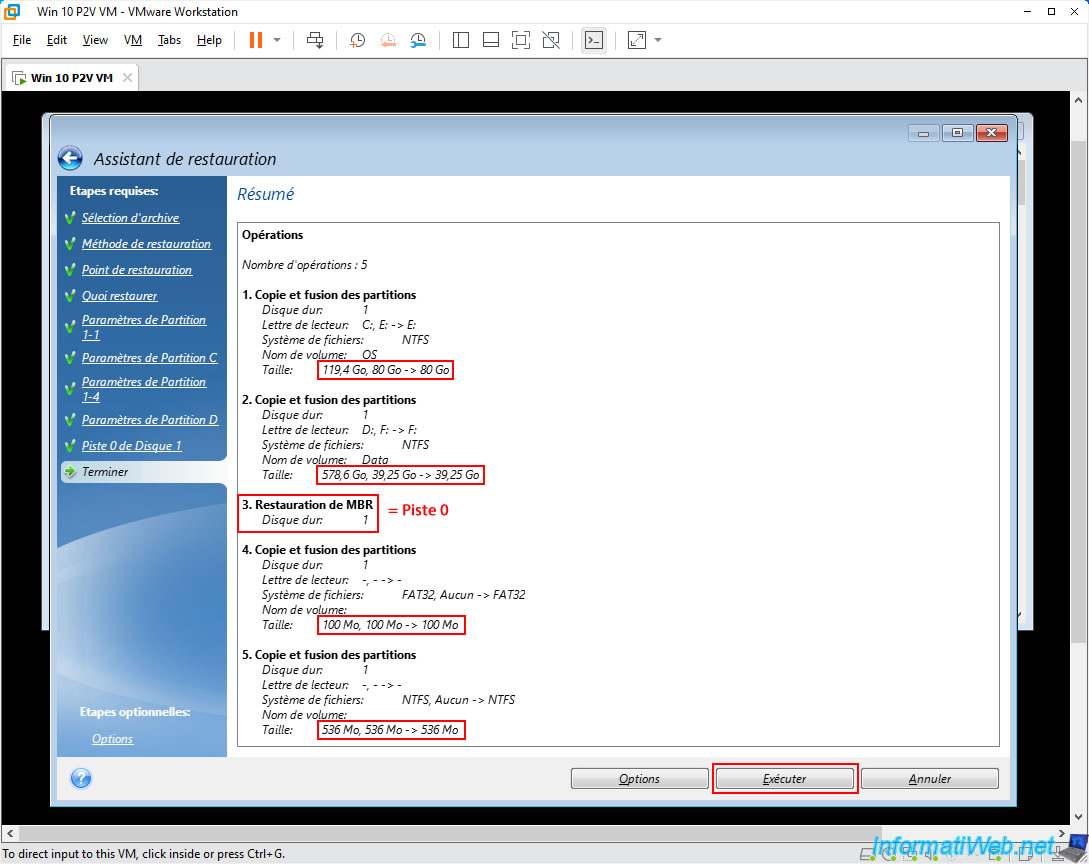
A summary of the recovery operations appears.
You can see that Acronis will recover your partitions by changing the size of some of your partitions (as you configured) and will also recover "Track 0" (which is the MBR of the virtual hard disk, which is needed for Windows to boot).
Click "Run".
Please wait while your partitions and "Track 0" are restored from your Acronis backup.
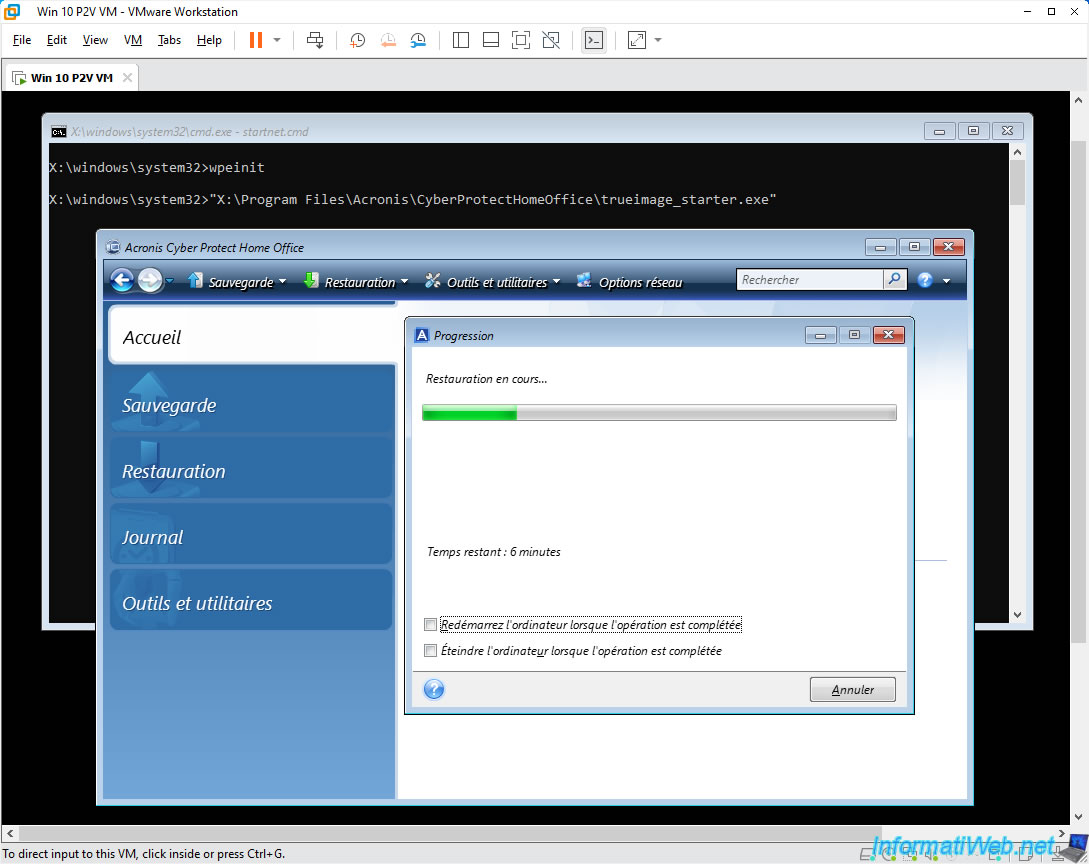
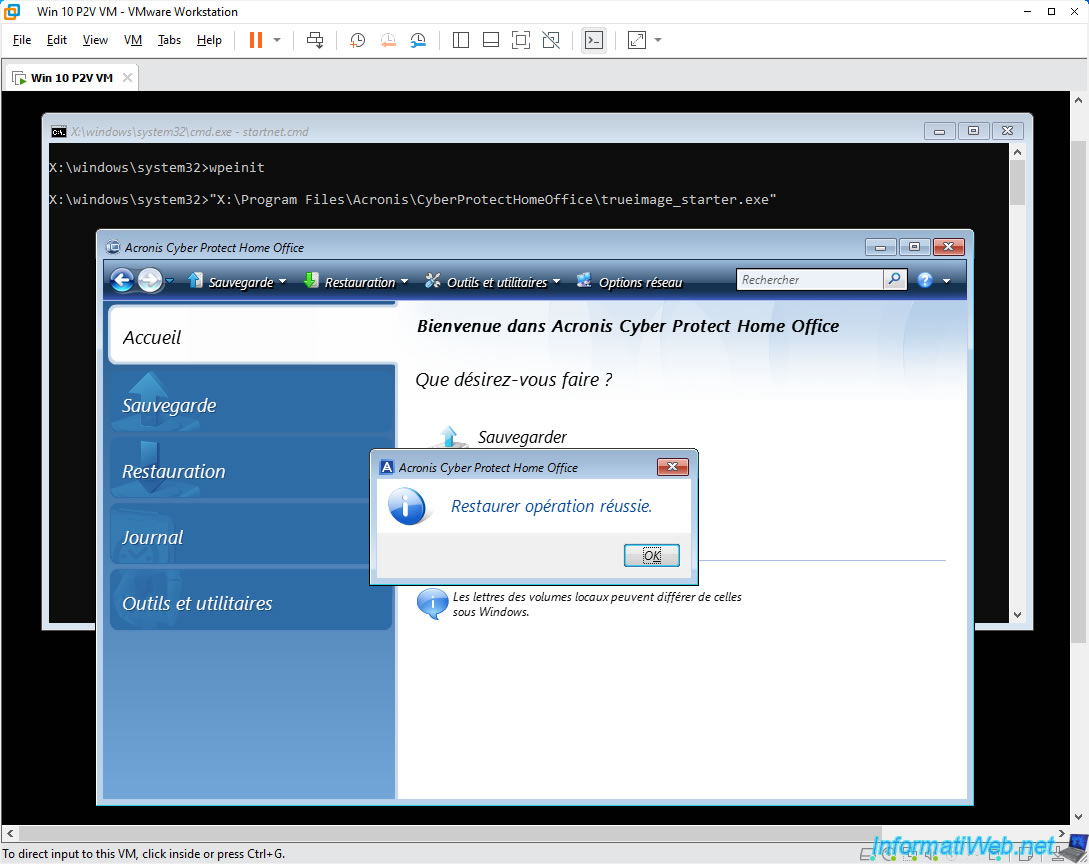
Once the restore is complete, the message "Restore operation successful" will appear.
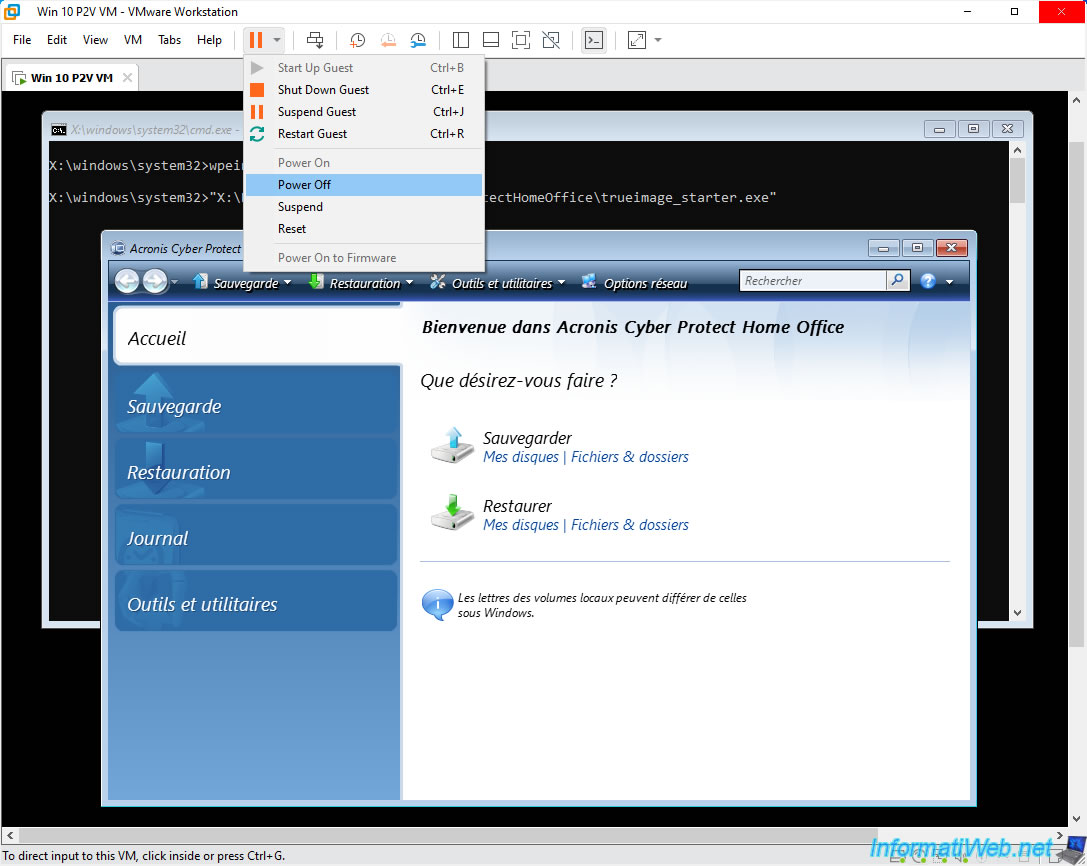
Turn off your virtual machine using the "Power Off" option.
Note: Windows is safe, because you are running Windows PE and it runs only in your computer's RAM.
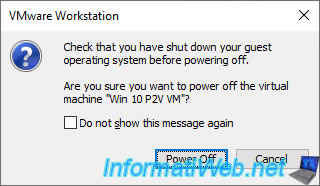
Confirm the abrupt shutdown of your virtual machine.
Share this tutorial
To see also
-

Backup 6/5/2025
Acronis True Image - Backing up your PC to Acronis Cloud
-
Backup 8/24/2026
Acronis True Image - Partition a new disk
-
Backup 2/2/2026
Acronis True Image - Rescue Media - Create media (Win PE version) on Win 8.1
-

Backup 11/17/2025
Acronis True Image - Synchronize a folder to Acronis Cloud
No comment