Backing up your PC to a FTP server from Acronis True Image (Cyber Protect Home Office) rescue media
- Backup
- Acronis True Image
- 20 April 2026 at 14:52 UTC
-

- 2/2
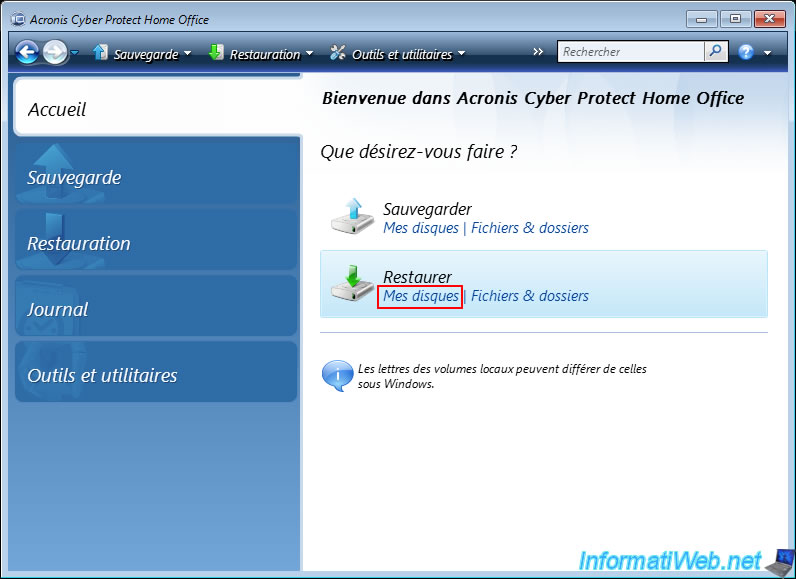
2. Restore your computer from an FTP server from your Acronis rescue media
To restore your computer from a backup on your FTP server, click on the "My Disks" link in the "Restore" option.
If you haven't restarted your computer in the meantime, the backup will be automatically detected.
However, it is very likely that this will never be the case for you since you will not restore your computer directly after backing it up.
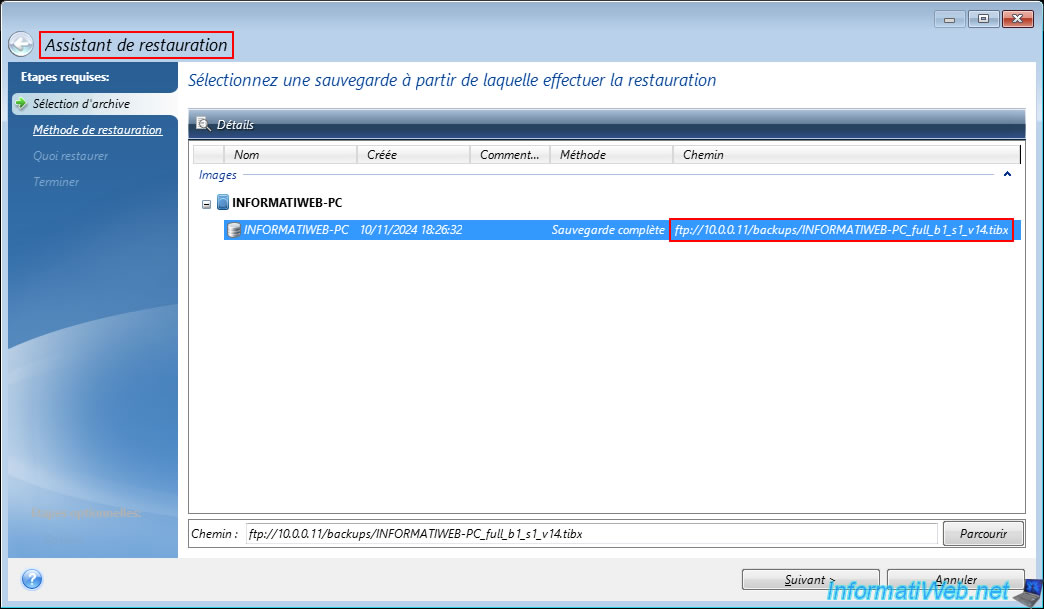
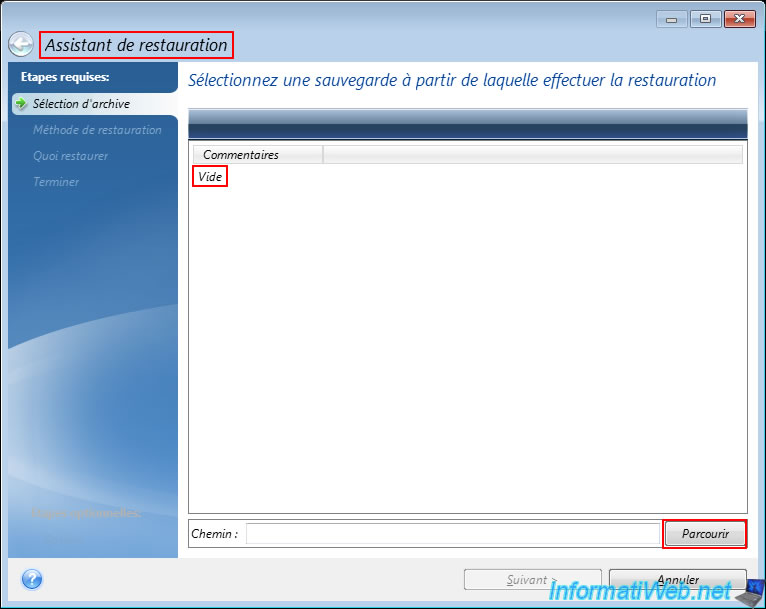
Once your computer restarts, if you run the restore wizard, you will notice that no backup has been detected.
This is because the FTP connection information you previously set was lost when you restarted your computer.
So, click on the "Browse" button.
Select the "My FTP Connections" section in the left column (as when backing up your computer) and click "Create FTP Connection" in the toolbar.
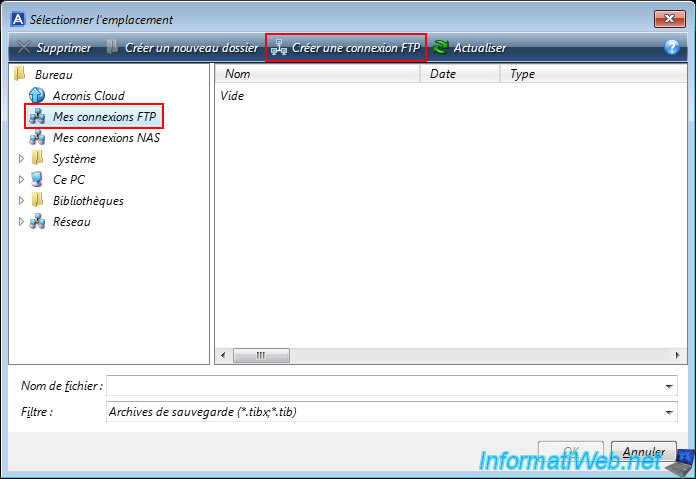
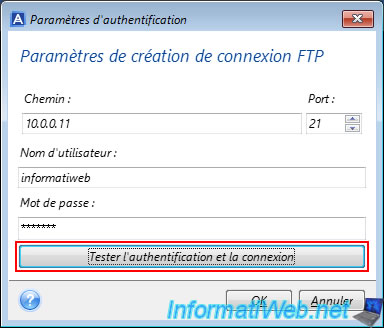
As when backing up your computer, enter the IP address of your FTP server, as well as the credentials of an account configured on it.
Then, click on "Test authentication and connection".
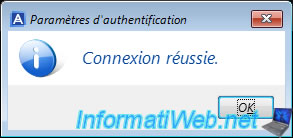
If the specified FTP settings are correct, the message "Connection successful" will appear.
Click OK to save these FTP settings.
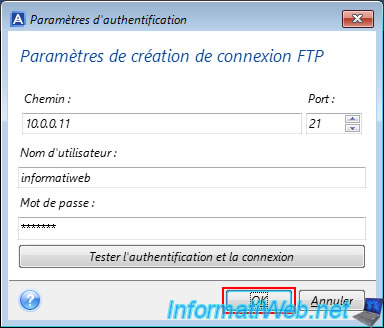
The same message will reappear.
Click OK.

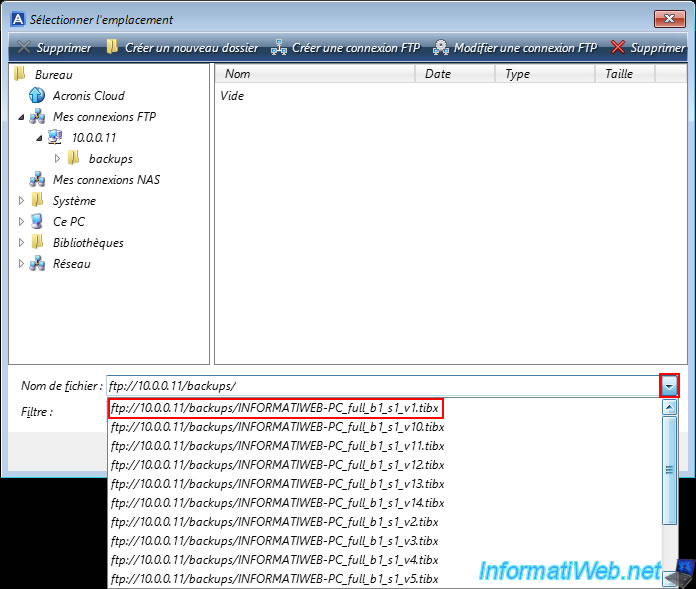
Enter the desired folder of your FTP server that appeared in the left column and you will notice that Acronis considers this folder as empty.

If you click the arrow to the right of the "File name" box, it is also possible that the list will be empty.
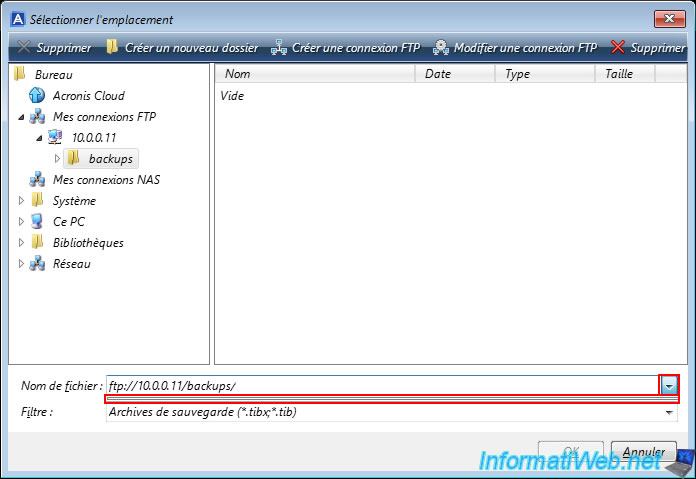
The little trick that allows you to see the list of files present in this folder of your FTP server is to remove the last "/" located at the end of the "File name" box and to type it again manually.
Magically, the list of files present in this folder will appear via the "File name" box.
All you have to do is select the desired file whose name ends with "_v1.tibx".
In our case "INFORMATIWEB-PC_full_v1_s1_v1.tibx".
Notes :
- the value "s1" means that this is the 1st version of this backup.
If you create an incremental backup later compared to this backup, the 2nd backup will have the value "s2". - the value "v1" indicates the file number of the same backup.
In our case, we can see that there are 14 files (from "_v1.tibx" to "_v14.tibx" for our backup).
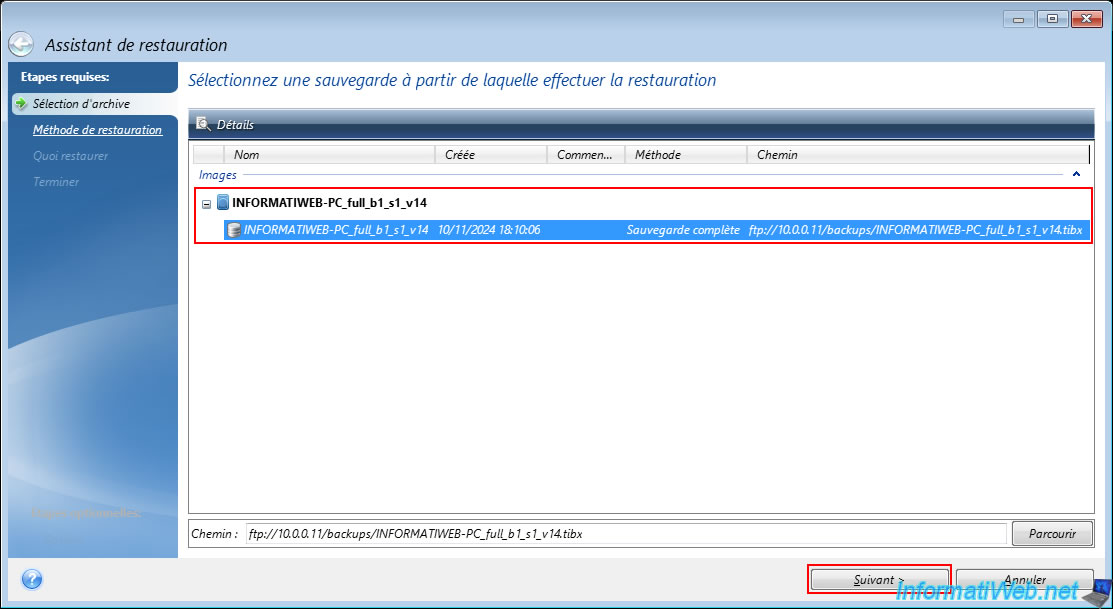
Wait a bit and the desired backup will eventually appear in the list of available images.
As you can see below, Acronis automatically detected what the latest file of this backup was.
In our case: INFORMATIWEB-PC_full_v1_s1_v14.tibx.
Select this backup and click "Next".
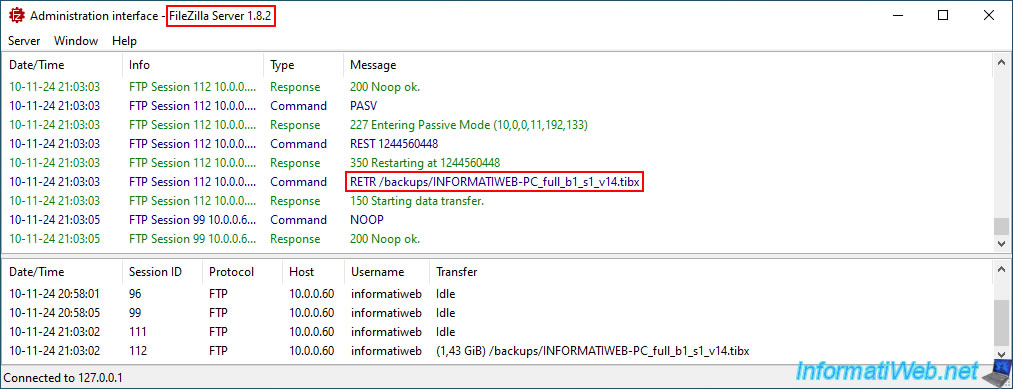
On your FTP server, you will be able to see that the last ".tibx" file was indeed accessed.
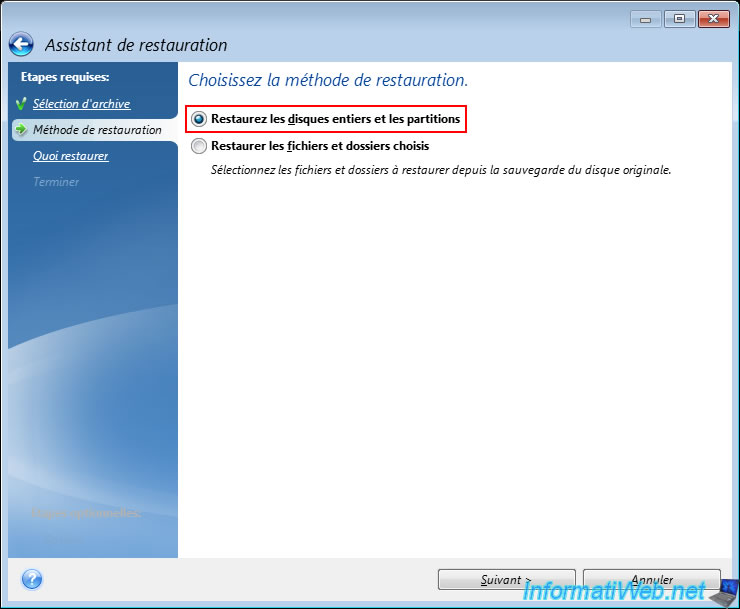
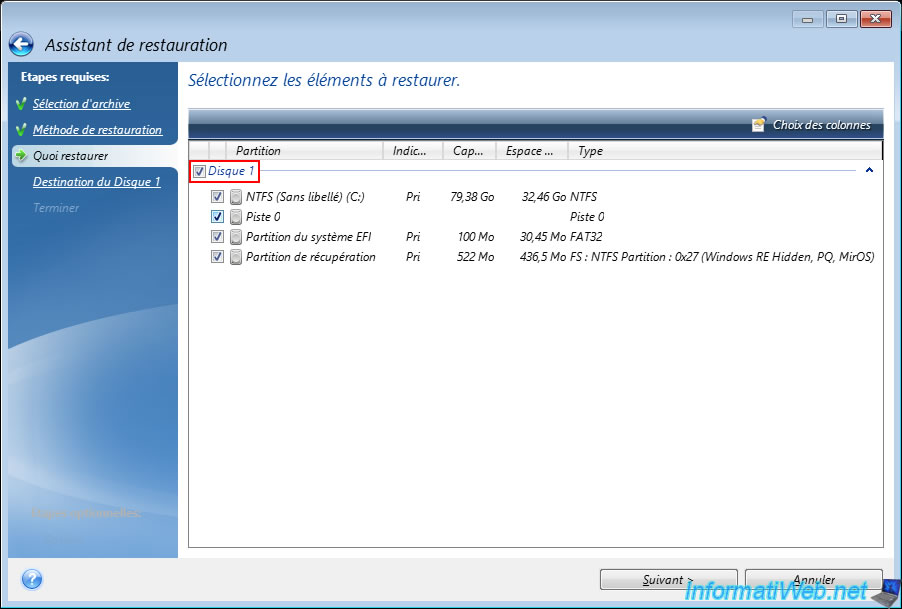
Select "Restore entire disks and partitions" to restore a disk or partitions from your backup stored on your FTP server.
Select the disk to restore from the backup stored on your FTP server.
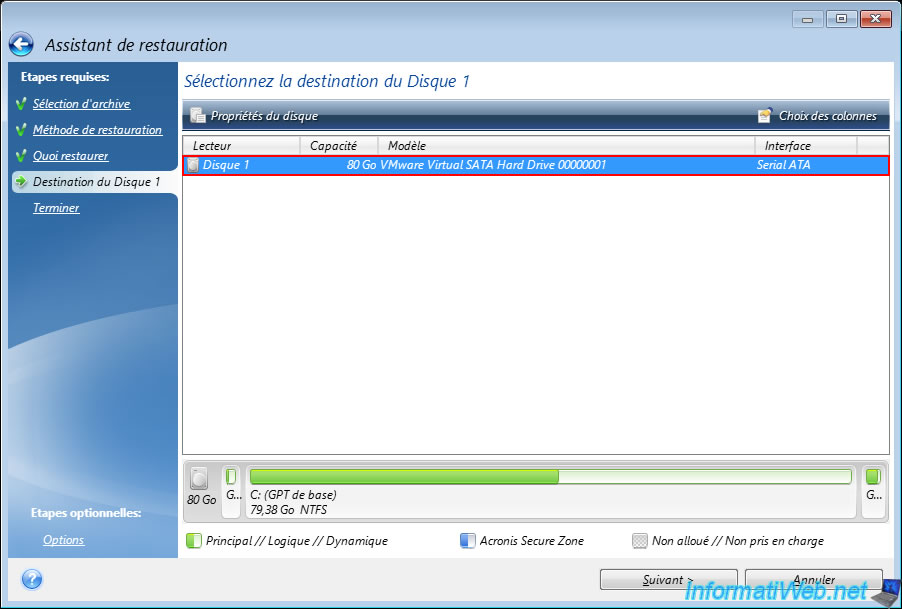
Select the physical disk on your computer to restore this backup to.
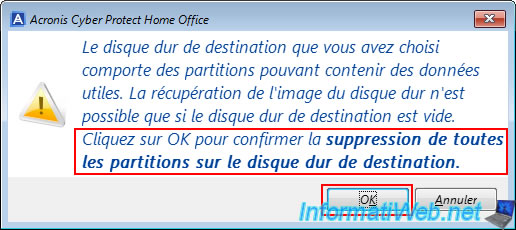
Ignore the warning that appears telling you that the partitions on your physical disk will be deleted so that you can restore your backup data to the selected physical disk.
To do this, click OK.
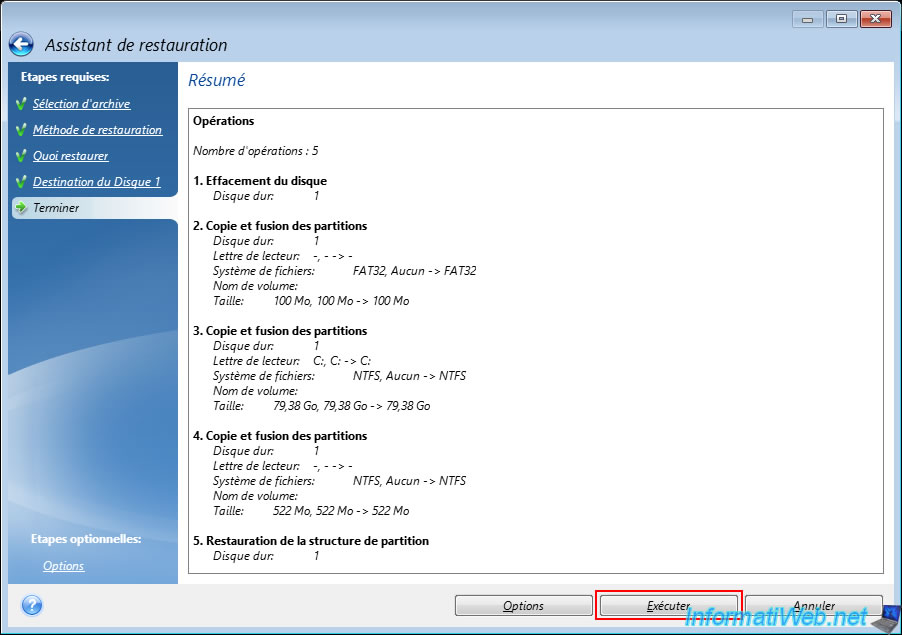
A summary of the restore operation is displayed.
Click "Run".
The restoration begins.
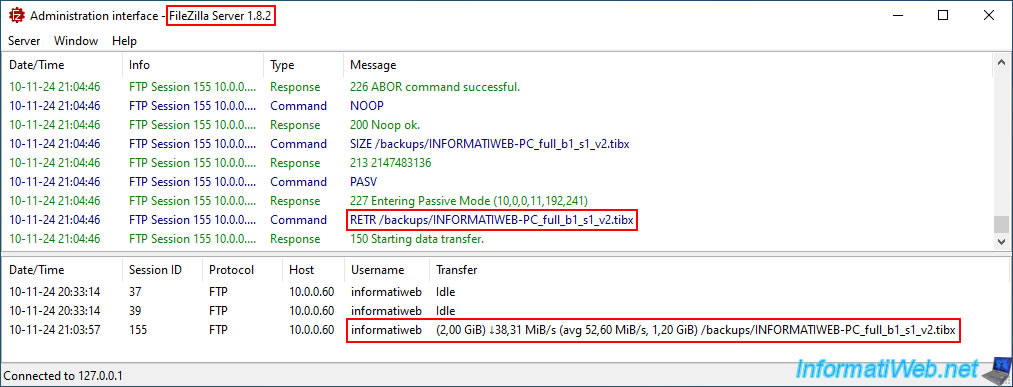
On your FTP server, you can see that your computer is downloading the 1st file of your backup (_v1.tibx) stored on your FTP server.
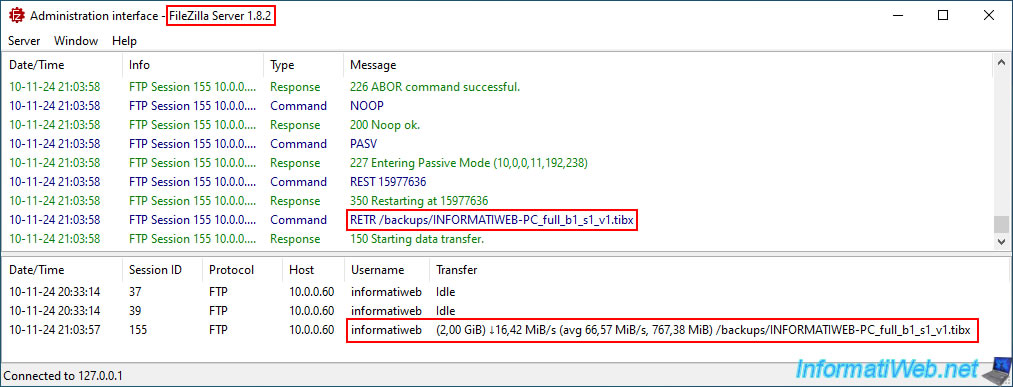
Then, it will download the following file (_v2.tibx, ...).
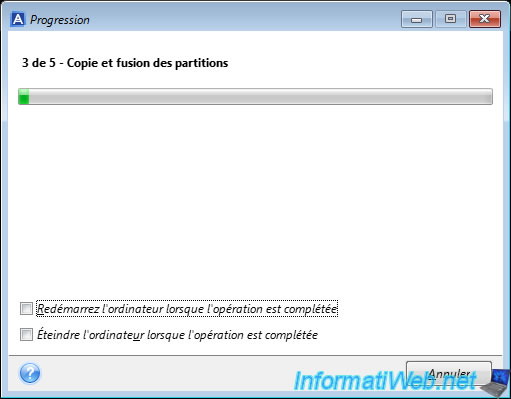
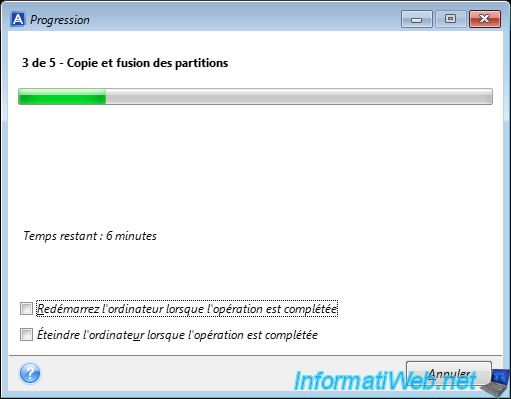
On your computer, you will just see the progress bar moving forward and the message "Copying and merging partitions".
Your computer continues to download the following files one by one.
Currently, the 12th file in our case.

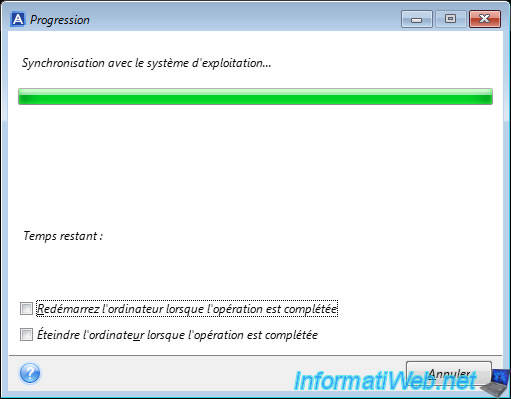
Towards the end of the restore, you will see the message "Synchronizing with operating system" appear.
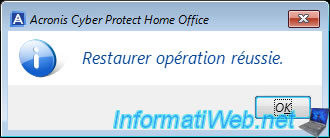
Once the restoration of your computer from the backup stored on your FTP server is complete, the message "Restore operation successful" will appear.
As expected, file transfers are completed on your FTP server.
![]()
Share this tutorial
To see also
-

Backup 6/30/2025
Acronis True Image - Backup disks or partitions
-
Backup 7/24/2025
Acronis True Image - Create differential backups
-

Backup 4/6/2026
Acronis True Image - Rescue Media - Backing up your PC to an external hard drive
-
Backup 5/18/2026
Acronis True Image - Universal Restore Media - Create media (Win PE version based on Win ADK)
No comment