Repair a two-way mirror storage space (software RAID 1) on Windows 8 to 11
- Windows
- Windows 8 / 8.1, Windows 10, Windows 11
- 24 March 2025 at 14:31 UTC
-

- 2/2
4. Rebuild missing disk of two-way mirror storage (software RAID 1)
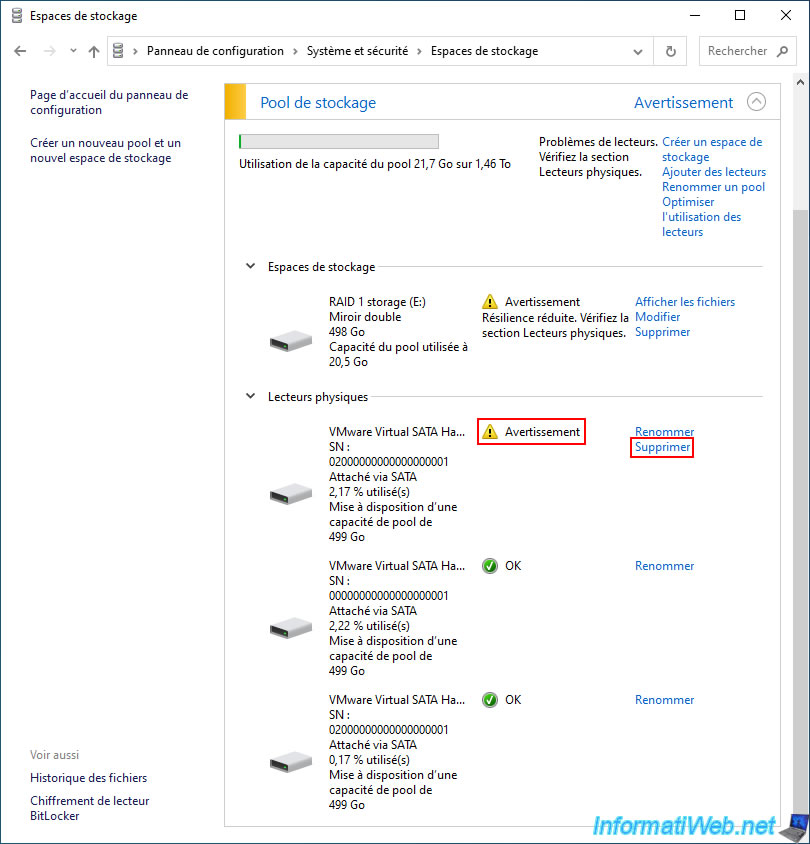
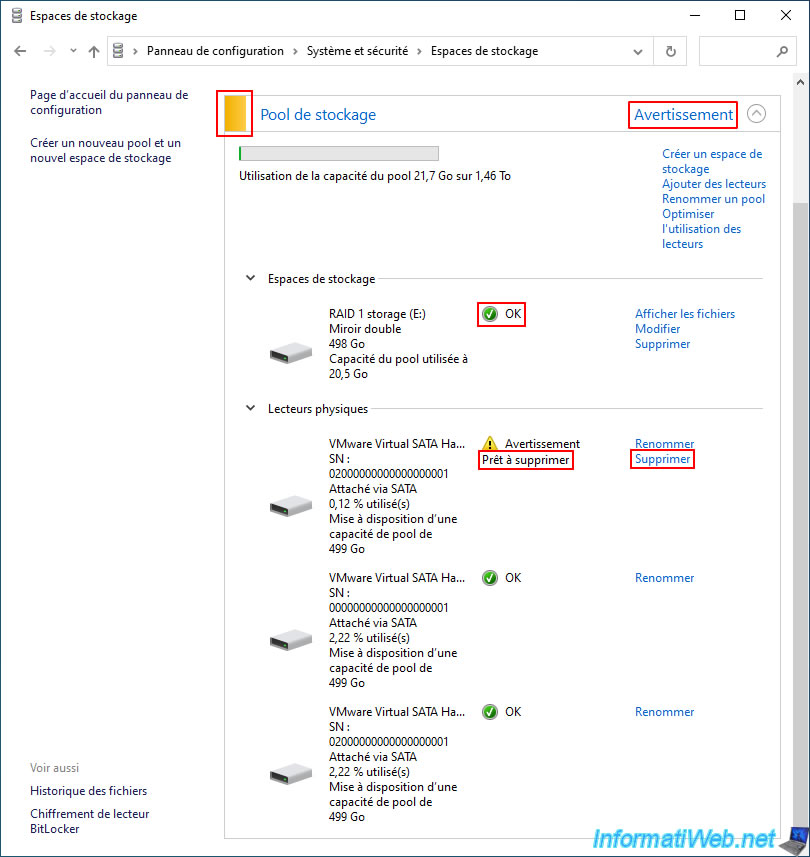
To start rebuilding the missing disk for your "two-way mirror" storage space (software RAID 1), you must try to delete the physical disk with the "Warning" status (which you physically disconnected in the previous step of this tutorial).
To do this, click on the "Delete" link located to the right of this defective and missing physical disk.
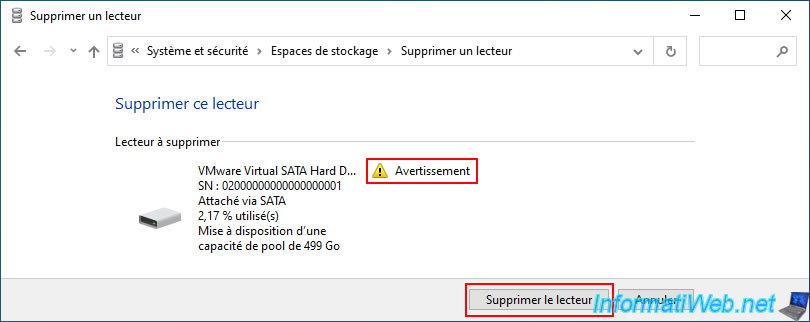
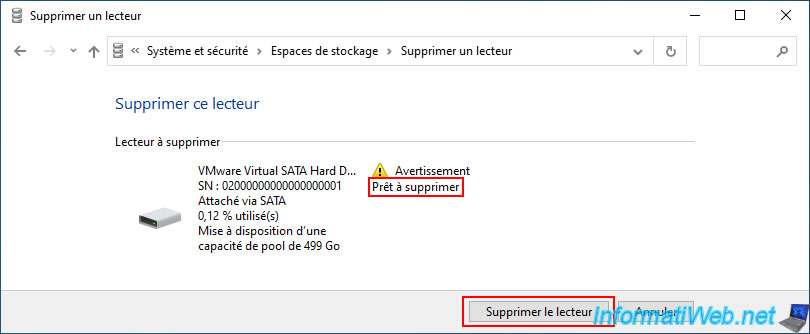
Your physical disk with "Warning" status appears.
Click the "Remove drive" button.
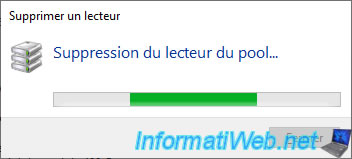
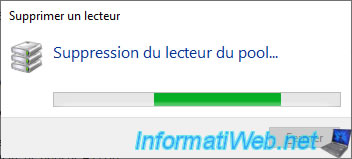
Please wait a moment while we try to remove this physical disk from your pool.
Then the error "Unable to remove drive from pool" will appear.
If you click on "Show details", you will see this appear:
Plain Text
Unable to delete the drive because not all data could be reallocated. Add a drive to this pool and try this operation again.
As this error tells you, to fix the problem, you must first add a drive to this pool (which you just did before) and then try again.
Windows also tells you that the drive removal is not possible because the data has not yet been reallocated.
However, this attempt to remove the faulty disk will cause your storage space to be repaired and therefore the missing data to be rebuilt on the new disk added to your storage pool.

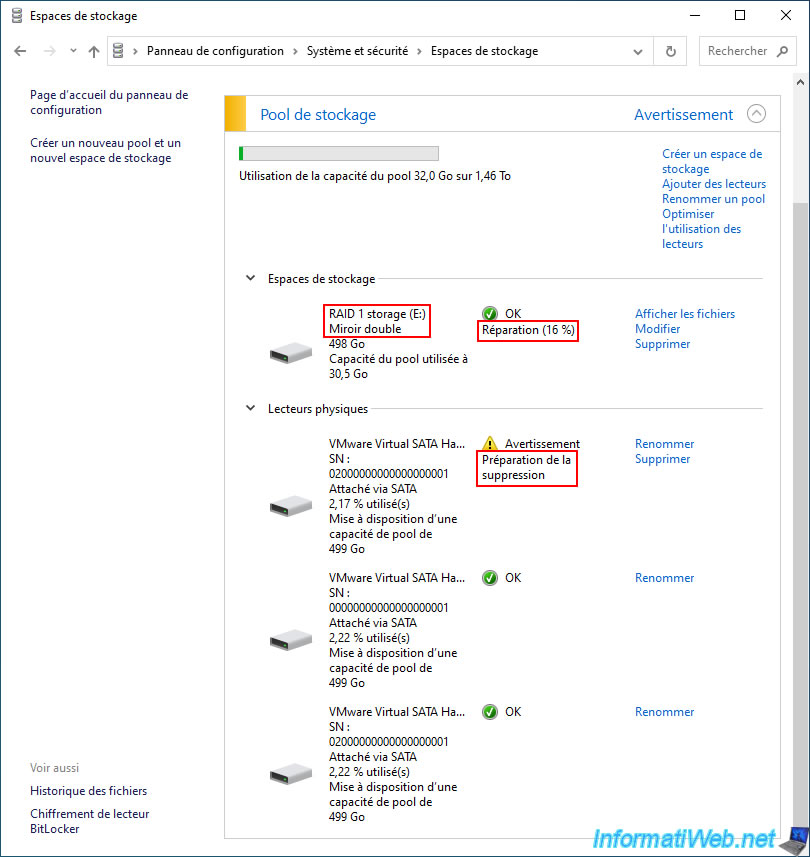
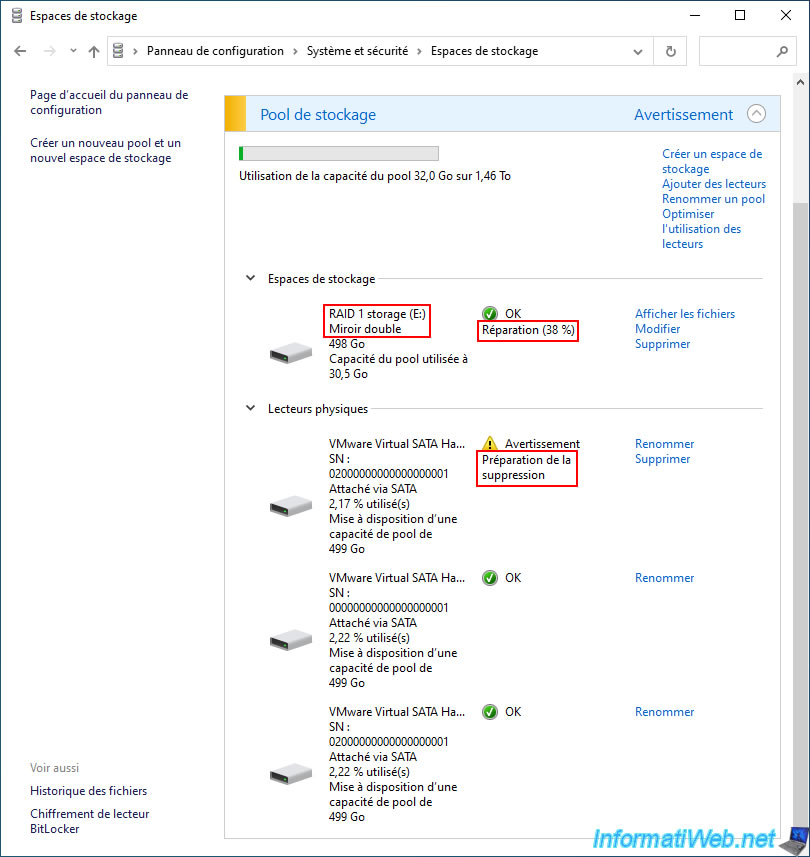
As you can see:
- your storage status has changed to "Repairing (xx%)"
- your failing physical drive status has changed to "Warning - Preparing for deletion" instead of just "Warning".
This status will change again once the repair is complete.
Note that on Windows 8, the behavior is slightly different:
- your storage status will be "Warning - Repairing (xx%)"
- the faulty physical drive you just deleted will disappear directly.
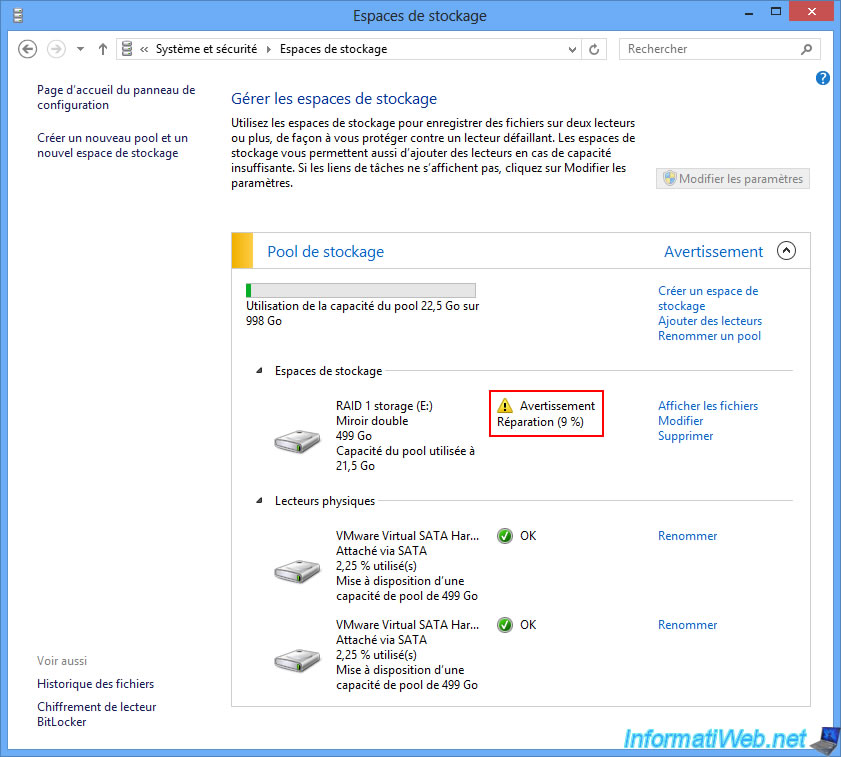
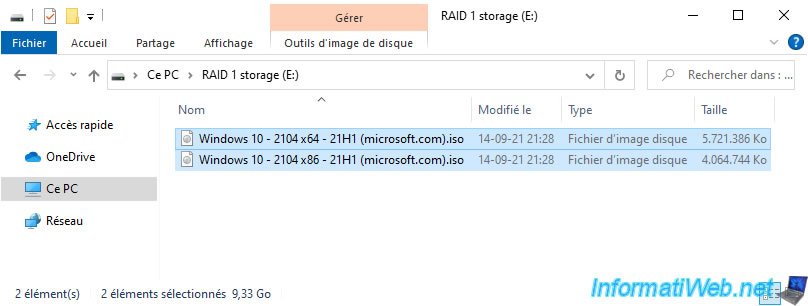
Since there are always enough healthy (functional) physical disks for this type of storage space, the files in your "RAID 1 storage" storage space are still accessible via the file explorer.
Important : you should avoid using the files in this storage space until the repair is complete.
Indeed, you are no longer protected against the failure of a physical disk until the repair is complete.
In addition, using this storage space while it is being repaired will necessarily slow down the repair process (which is not recommended for the reason mentioned above).
The repair continues.
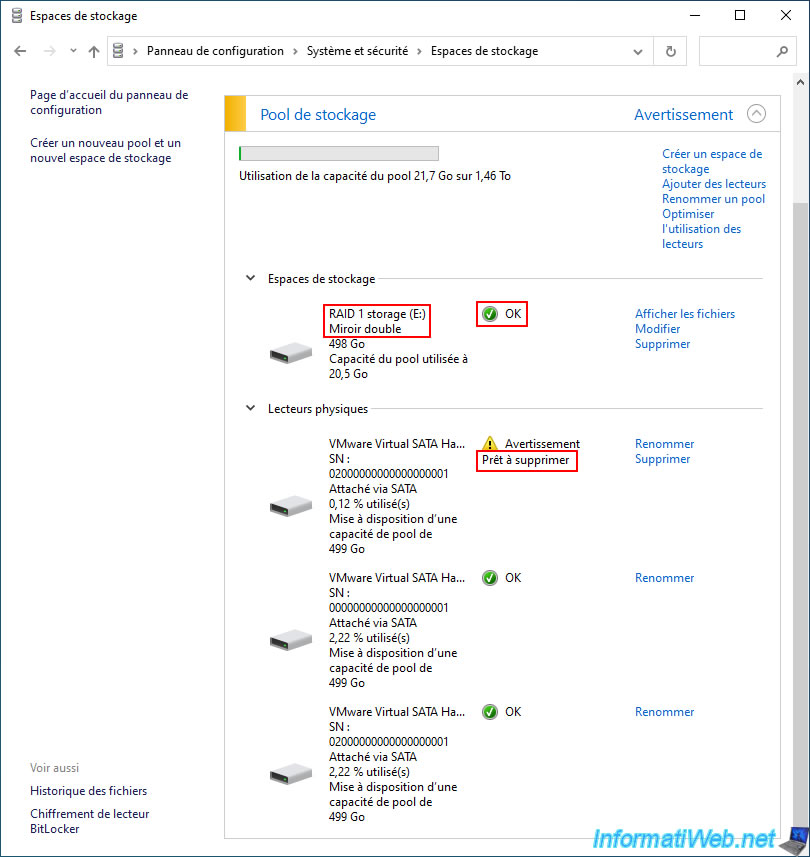
Once your "Two-way mirror" storage space repair is complete:
- your storage status "RAID 1 storage" will change to "OK" and the repair progress will disappear.
- your physical disk status will change to "Ready to delete" instead of "Preparing to delete".
On Windows 8, once the repair is complete, you don't need to do anything else (since the failed physical drive has already been completely removed).
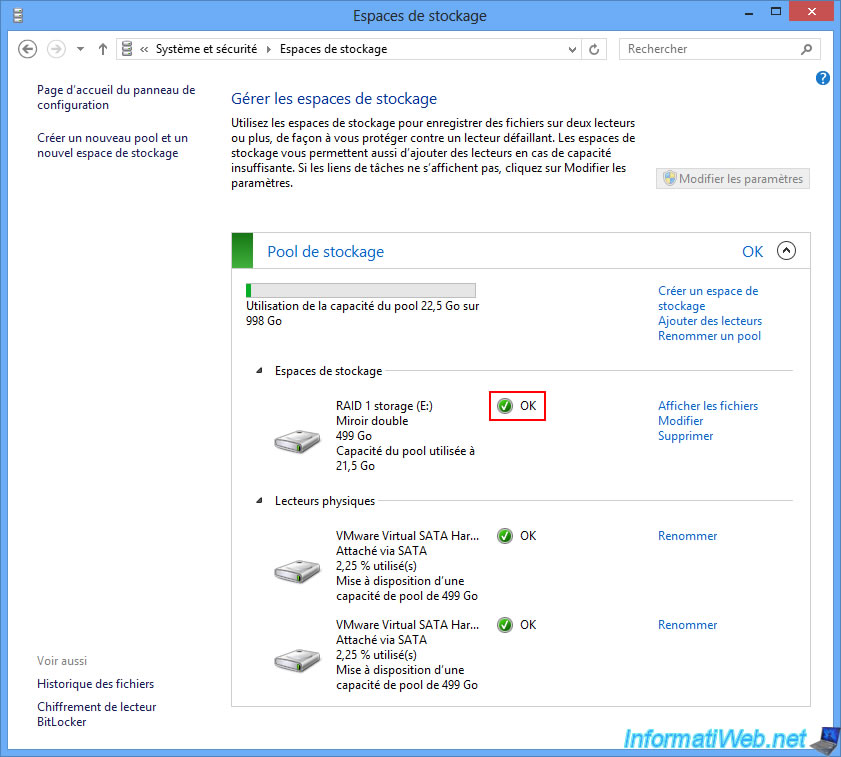
5. Remove the faulty physical disk from a two-way mirror storage (software RAID 1)
Now that your storage space has been repaired, all we have to do is delete the defective physical disk that is no longer useful.
To do this, click on the "Delete" link located to the right of your physical disk with the status "Ready to delete".
Note: the warning status still appearing for your storage pool while the storage space has an "OK" status is simply due to the presence of this defective physical disk.
Your physical disk with the new status "Ready to remove" appears.
Click "Remove drive".
Please wait while the drive is removed from the pool.
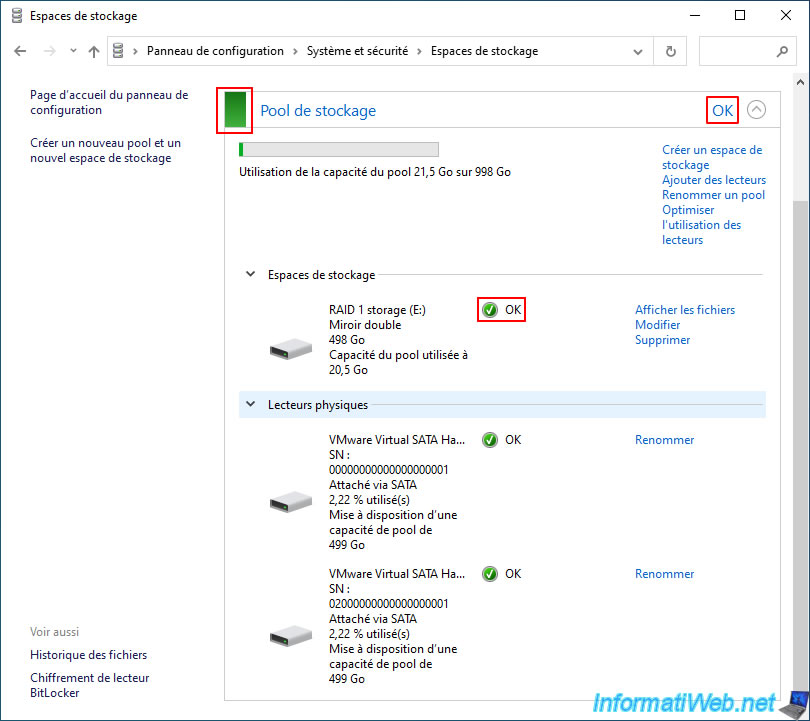
Once this faulty physical disk is removed, your storage pool status, as well as your storage space status will be "OK".
Share this tutorial
To see also
-
Windows 8/24/2021
Upgrade from Windows 8 to Windows 8.1 (from DVD)
-
Windows 10/17/2022
Windows 10 - Fresh start (format and reinstall Windows)
-
Windows 4/12/2022
Windows 11 - Delete an old network profile
-
Windows 10/6/2021
Windows 7 / 8 / 8.1 - Help a remote user without third-party software
No comment