- Windows
- Windows 10, Windows 7, Windows 8 / 8.1, Windows Vista, Windows 11
- 20 May 2016 at 17:37 UTC
-

On Windows, there is a program called "Remote Desktop Connection" (or RDP) that allows you to connect to a remote computer to take control of it.
This is legal and it's possible only if this feature is enabled on the remote PC and if you are authorized to do it.
Note that this program differs from other programs like TeamViewer, Logmein, via VNC protocol, ... Indeed, it's very easy to use Remote Desktop in an internal network, but additional configuration is required to use it over the Internet. Nevertheless, the RDP has the advantage of not using a gateway (unlike TeamViewer, Logmein, ...).
Important : Windows RDP server is only available from Windows Pro edition.
However, the RDP client (Remote Desktop Connection) is available in all editions of Windows.
Source : Remote Desktop - Allow access to your PC.
1. Enabling remote access over RDP
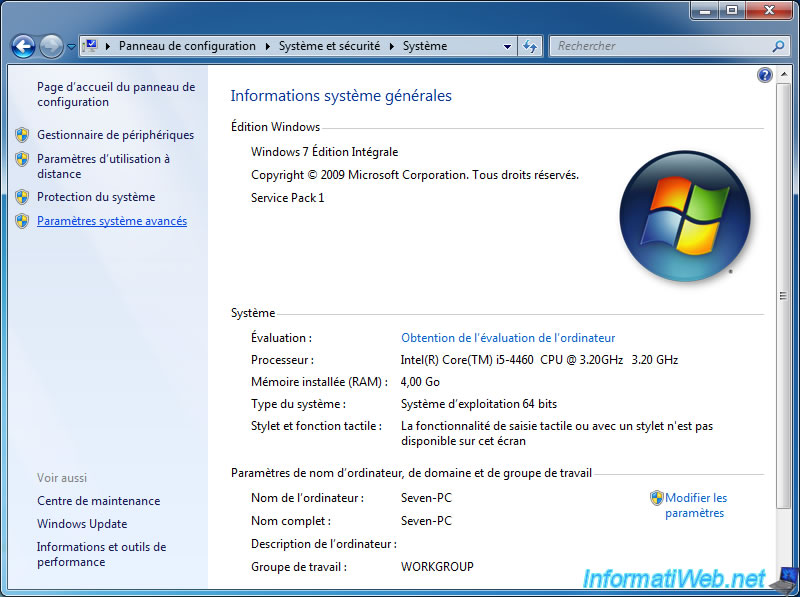
On Windows Vista, 7, 8, 8.1, 10 and 11, go to the Control Panel -> System and Security -> System.
You can also use the shortcut "Start Menu -> Right click on "Computer" (or "This PC") -> Properties" or the keyboard shortcut "Windows + Pause / Break" on any version of Windows.
Then, click on "Advanced system settings" in the left menu.
On Windows 11, click on the "Advanced system settings" link.
Go to the "Remote" tab and select the "Allow connections from computers running any version of Remote Desktop ..." in the lower part of the window.
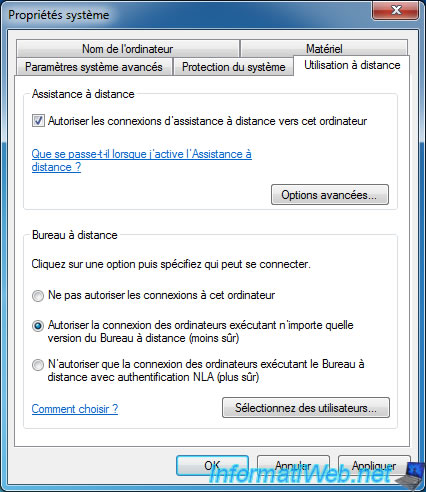
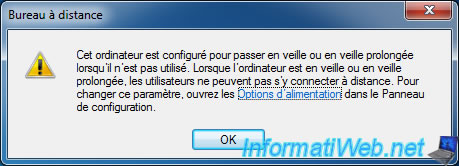
It's possible that Windows notifies you that your computer is set up to go to sleep or hibernation, which is the case by default, and which may make your computer unreachable if he goes to sleep before you connect to it.
We will fix this detail later. Click OK.
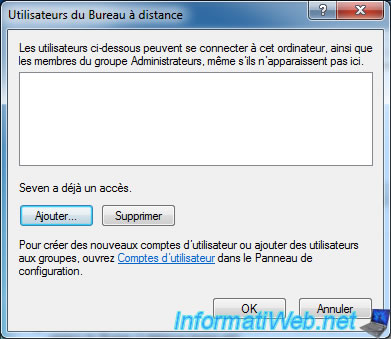
If you click on the "Select Users" button, you will see that by default, your user account has already an access for the RDP.
This means that you can connect remotely to your computer with this account.
Warning : by default, Windows does not allow remote access over Remote Desktop with an account without password. The password will be considered as incorrect.
If your Windows user account is not protected by a password, you will need to create one in order to use this user account for remote access.
To do this, go to the Control Panel -> User Accounts and Family Safety -> User Accounts : Create your password.
Then, if you want to allow other users and/or groups of users for remote access to your computer, click on the "Add" button.
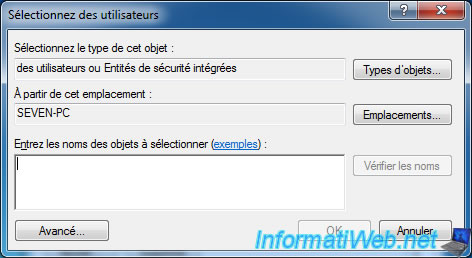
To add a user or a group, specify its name in the box and click on the "Check Names" button.
Alternatively : click on the "Advanced" button to search and find all user accounts and groups present on your computer.
After enabling the remote access, don't forget to click on "Apply -> OK" or OK to save the changes.
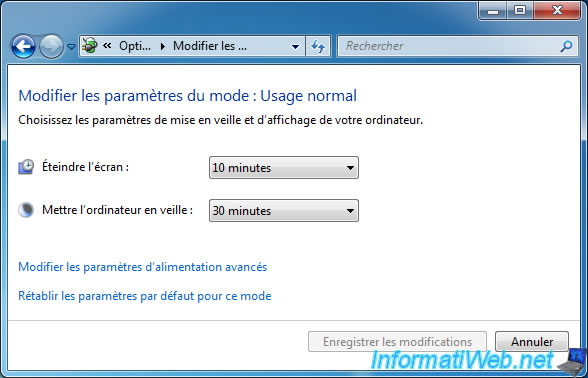
If you had received the warning about standby, don't forget to turn off the computer's standby by going to the Control Panel -> System and Security -> Power Options -> Change when the computer sleeps.
To turn off the "Put the computer to sleep" option, select "Never" for these 2 options or at least for the "Put the computer to sleep" option.
Click "Save Changes".
2. Connection over RDP
Now that the Remote Desktop is enabled, try to remotely access to your computer.
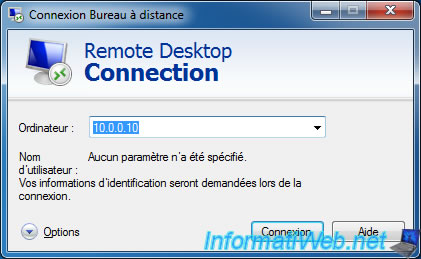
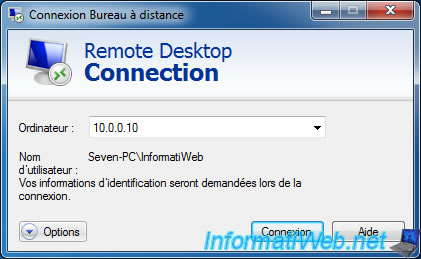
To do this, run the "Remote Desktop Connection" program present in the start menu -> Accessories -> Remote Desktop Connection.
To connect to the remote computer (on the same network as your computer), simply indicate the name (also called the NetBIOS computer name) or its local IP address (LAN IP).
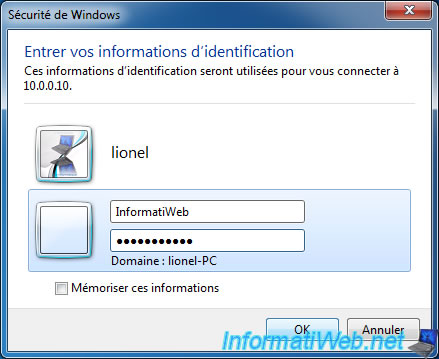
If the connection to the remote computer is successful, a login window will appear.
Enter the credentials of a user authorized the remote access on the remote PC and click OK.
If you are authorized to access the remote computer and the password for the user account is not empty, the connection will be made.
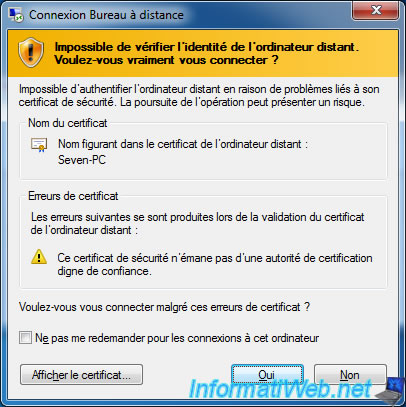
When you connect to a computer running a client version of Windows (such as Win. XP, 7, 8.1, ...), it is quite possible that a warning appears about the certificate of the remote computer.
This is quite normal because the default certificate is self-signed.
Check the "Don't ask me again for connections to this computer" and click "Yes".
If you want to use a valid certificate on a client versions of Windows, you will need to go through the Windows registry, because no program with graphical interface exists for client versions of Windows.
Source solution : support.microsoft.com
But, for server versions of Windows, you can use these programs : "tsconfig.msc" and "tsadmin.msc".
As you can see, by default, the wallpaper will be disabled and will be black.
Nevertheless, it's possible to change the default settings of the RDP as we will see in the next step of this tutorial.
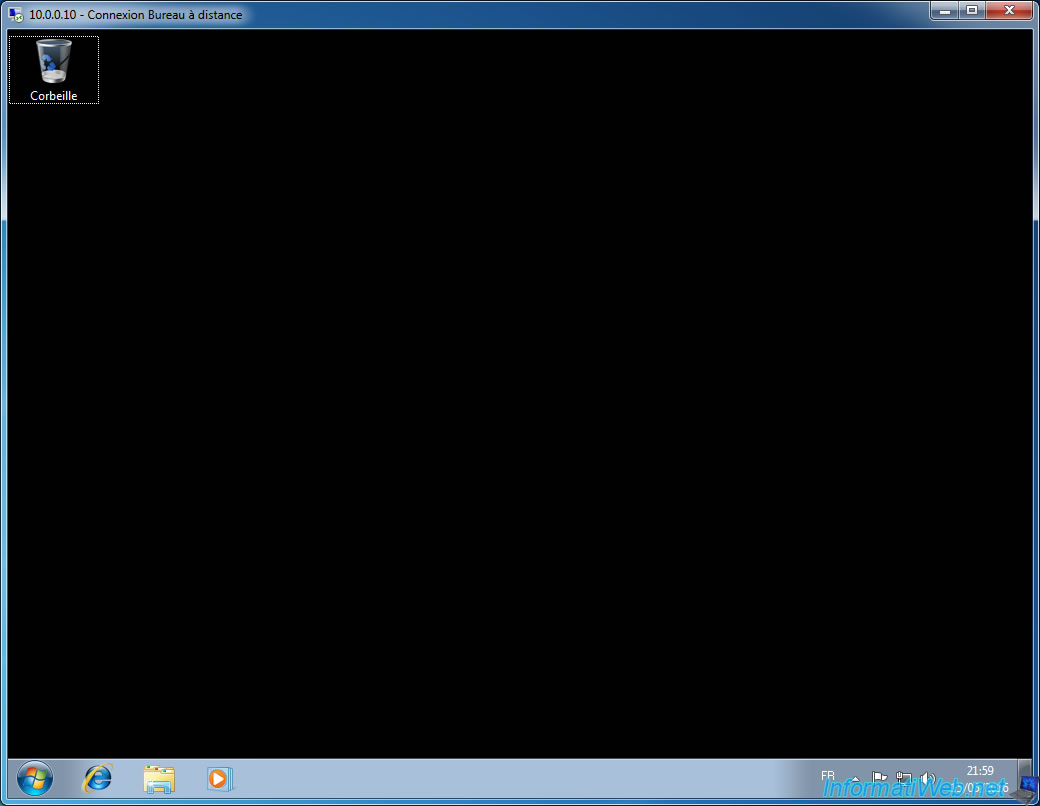
Finally, if you go in the start menu, you'll see that you can close your session, but not shutdown or restart your computer remotely.
However, the Windows security strategy doesn't block these functions (shutdown and restart), so we'll use a little trick to be able to shutdown or restart the computer remotely.
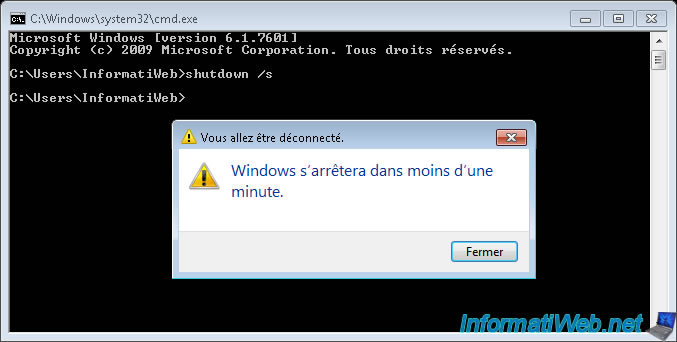
The trick is very simple : just use the "shutdown.exe" program present by default in Windows, in command line.
To do this, open a command prompt (cmd.exe) and type one of these commands :
- turn off the computer : shutdown /s
- restart the computer : shutdown /r
Then, a window "Windows will shut down in less than a minute" appears.
Wait about ten seconds, and the computer will shut down or restart depending on the command used.
Warning : if you shutd own the remote computer, it will no longer possible to connect remotely to the PC because he's turned off.
3. Available options
When you start the "Remote Desktop Connection" program, you will see the "Options" option (at the bottom left). Click it.
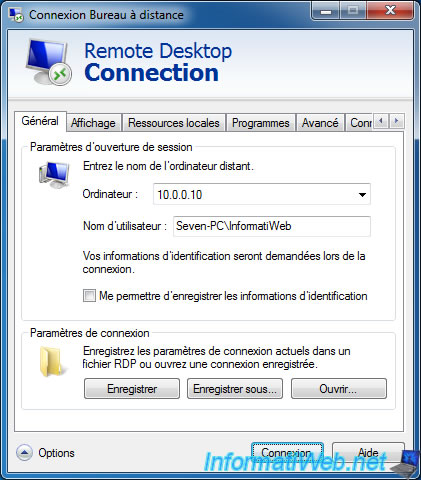
Now, the full version is displayed.
In this version, you'll find the options :
- General
- Display
- Local Resources
- Programs
- Experience
- Advanced
Note that the available options may differ from a version to another version of Windows.
In the "General" tab, you will find the connection information :
- the computer name or the IP address of the remote computer to which you want to connect.
- the user account to use on the remote PC to connect over Remote Desktop.
- the ability to save these settings to a rdp file.
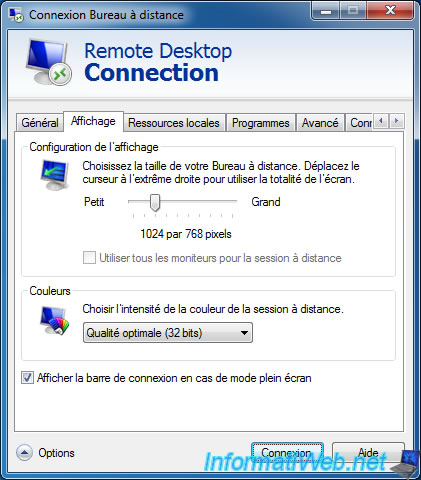
In the "Display" tab, you can :
- select the screen resolution to use for the remote desktop. (For full screen mode, move the cursor to the right end : Large)
- choose the colors depth to use for the remote desktop
Note : if you lower the resolution, it can help you to improve performance because the image to be transferred over the network will be smaller and less heavy.
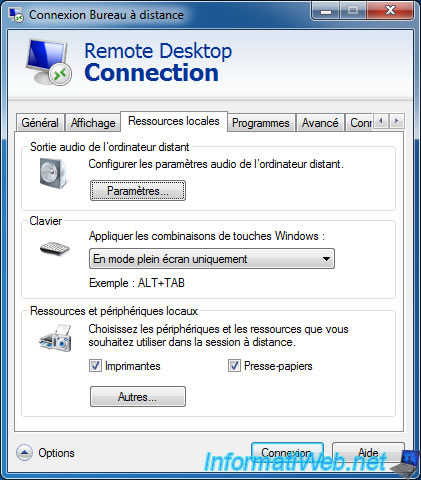
In the "Local Resources" tab, you can :
- change settings for audio of the remote computer
- change the behavior of key combinations
- choose whether the printer and the clipboard must be connected / shared with the remote computer.
- with the "Others" button : allow or deny access to your computer's partitions from the remote computer.
But be careful, because if a virus is on the remote computer, he can arrive on your computer if you allow access to your partitions and / or plug-and-play (PnP).
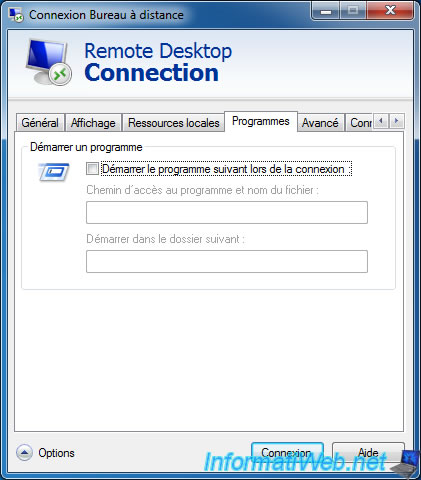
In the "Programs" tab, you will be able to launch a program when connecting to the remote computer.
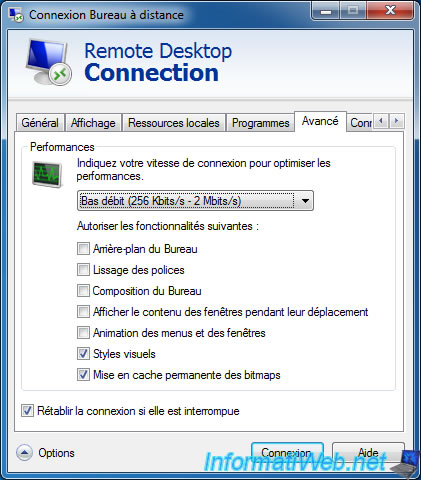
In the "Experience" tab, you can improve performance or the user experience by enabling or disabling some features.
As you can see, by default :
- the desktop background is disabled : This displays the black screen that you currently have when you connect to a remote computer
- the font smoothing is disabled
- the desktop composition is disabled. Which turns off the aero effects (transparency of windows) of Windows Vista and Seven.
- some animations are disabled to improve performance
- visual styles are enabled. If you disable them, you will have a user interface similar to the server versions of Windows or to Win 95 and 98 user interfaces (if you know them)
- bitmap caching is enabled for better performance
In short, to improve performance or the user experience for Remote Desktop, you have 2 options :
- enable / disable the desired options
- or select your connection speed in the top list
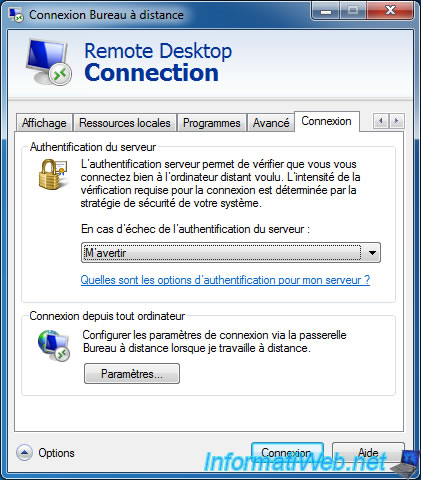
In the "Advanced" tab, you will have the settings for :
- the server authentification (credentials, security issues ...)
- configure the Remote Desktop Gateway server.
Allows you to take remote control of a computer in your company from the outside through the RDS gateway that you have configured in your company network.
To learn more about Microsoft's RDS solution, refer to our complete course : Learn how to deploy RDS on WS 2012 and 2012 R2.
4. Connection over Internet
Finally, if you want to connect to a remote desktop using the program integrated in Windows, you will need to :
- Enable access using remote desktop as we have just done
- Verify that the Remote Desktop is allowed in the firewall of the remote PC.
By default, Windows will automatically allow it when you enable the Remote Desktop.
If this is not the case, allow the TCP port 3389 in the firewall of the remote PC : Configure the Windows Firewall and the Firewall of Internet Security solutions - Redirect the TCP port 3389 to the remote PC in the router on which the remote computer is connected. To do this, follow this tutorial : Making a server available from the Internet
- Optional : For security reasons, you can if you wish, change the listening port for the Remote Desktop. For that, you only need to change a value in the registry : How to change the listening port for Remote Desktop
Share this tutorial
To see also
-
MultiBoot 7/15/2024
VHD/VHDX multiboot - Upgrade Windows 8 to Windows 8.1
-

Windows 5/3/2022
Windows 11 - Return to a local account
-
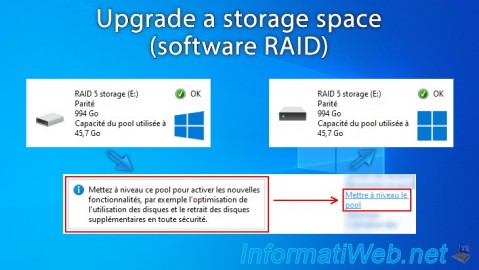
Windows 4/14/2025
Windows 11 / 10 / 8.1 / 8 - Upgrade a storage space (software RAID)
-
Windows 2/26/2021
Windows 7 - Fix Windows Defender updates issue
You must be logged in to post a comment