Convert Acronis backup (.tibx) to Hyper-V format (.vhdx) using Acronis True Image (Cyber Protect Home Office)
- Backup
- Acronis True Image
- 31 August 2026 at 07:21 UTC
-

- 2/4
5. Create a virtual machine from the virtual hard disk (.vhdx) created by Acronis
If you haven't already, install the Hyper-V feature on Windows.
Then, once Hyper-V is installed:
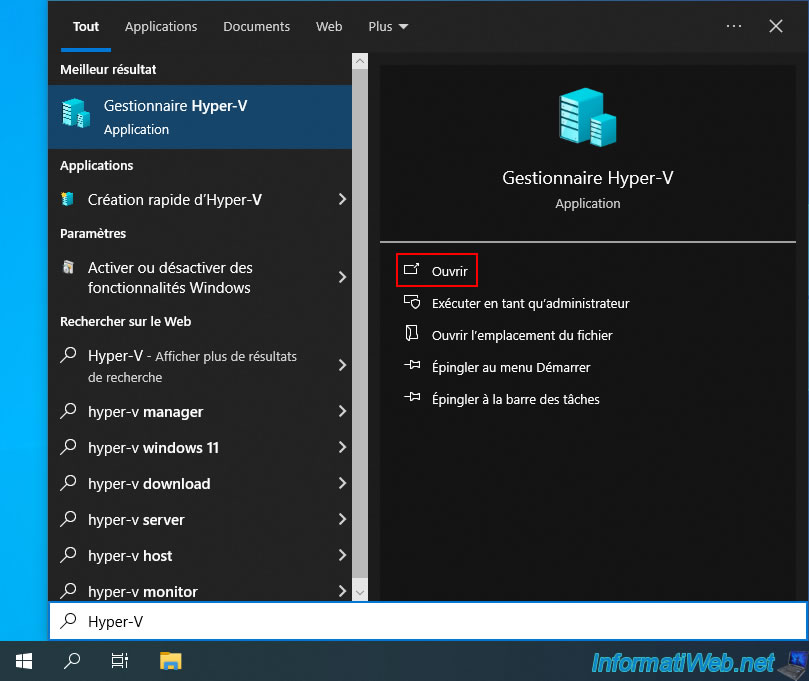
- open the start menu
- type "Hyper-V"
- launch the "Hyper-V Manager"
Notes :
- Hyper-V is also available on Windows Server
- The choice of Hyper-V is the one referenced by Acronis and the "VHDX" format is the native one of Hyper-V.
Although it is also possible to use a ".vhdx" hard disk by creating a VirtualBox virtual machine.
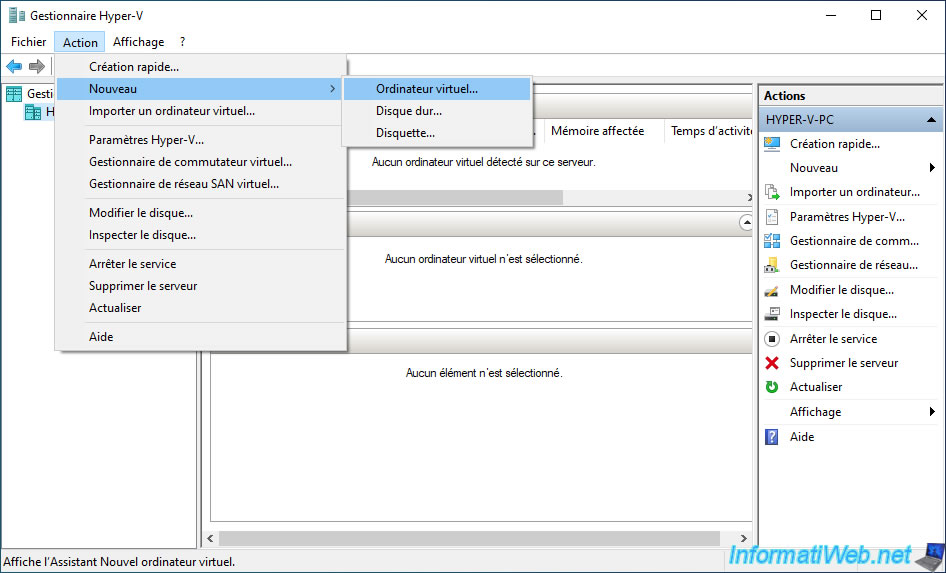
In the Hyper-V Manager that appears, go to: Actions -> New -> Virtual Machine.
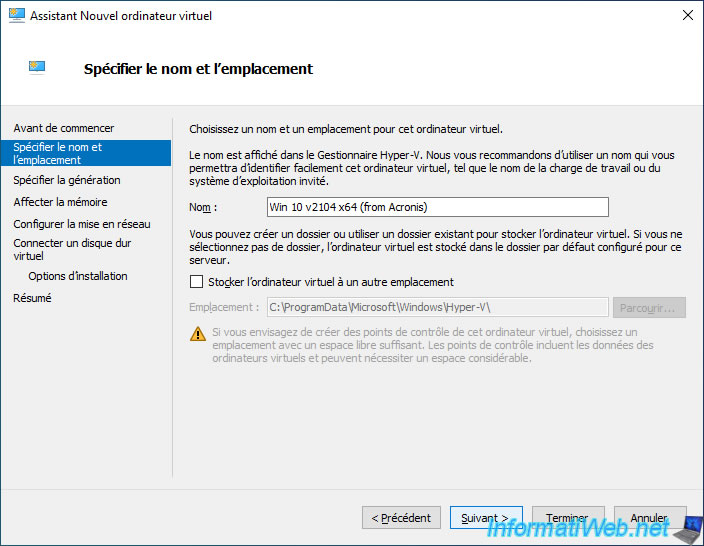
Type a name for your virtual machine.
In our case: Win 10 v2104 x64 (from Acronis).
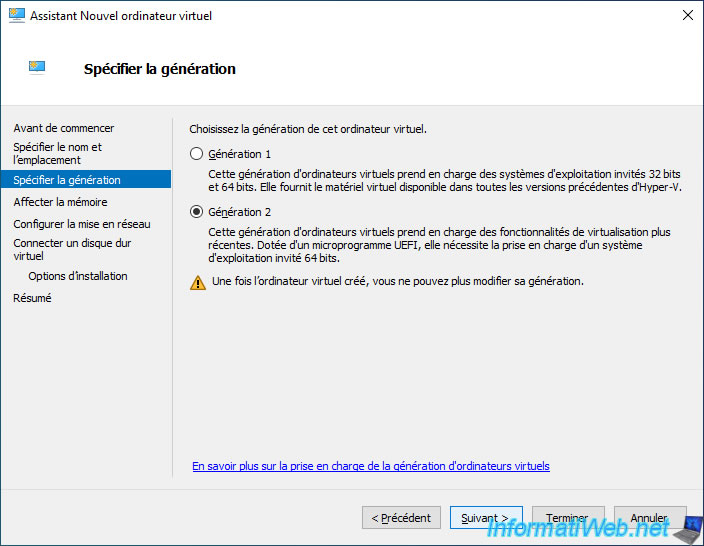
Select the generation of virtual machine that is appropriate for your case.
To do this, refer to the explanations given in the previous step of this tutorial.
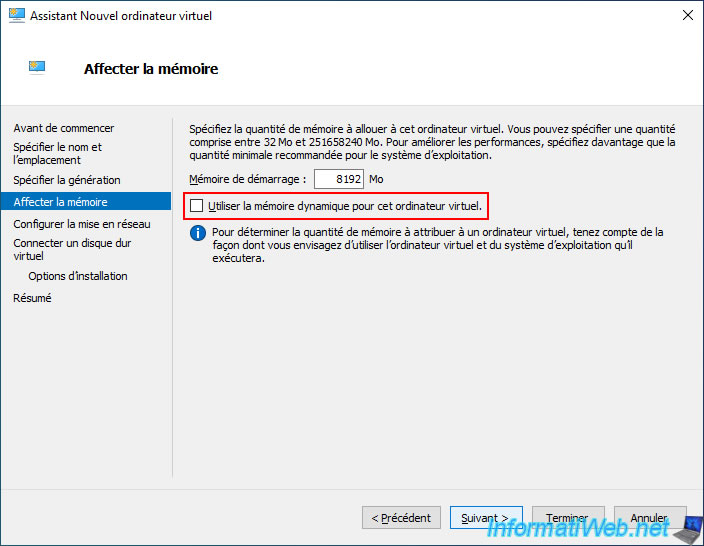
For the RAM to allocate, allocate enough RAM so that Windows can run smoothly in the virtual machine, but leave enough RAM for the host PC (physical PC) as well.
In our case, we have a PC with 32 GB of RAM (random access memory), so we allocated 8 GB (8192 MB) of RAM to our virtual machine.
Note that Windows 10 can run smoothly with 4 GB, but for recent versions of Windows 10, it is better to allocate 8 GB to make it run smoothly.
Important : uncheck the "Use dynamic memory for this virtual machine" box, as you will not need it.
When this option is disabled, Hyper-V will simply allocate the amount of RAM indicated here to your virtual machine.
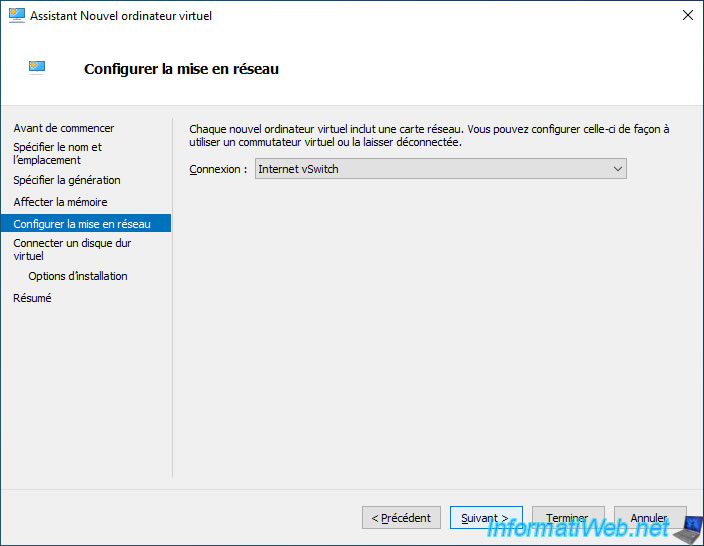
Select your virtual switch created on Hyper-V that allows access to your local network and the Internet.
In our case, we have selected our virtual switch "Internet vSwitch" that allows virtual machines to access the external network (physical network).
Warning :
- if you are using a client version of Windows (such as: Windows 11 or 10), the virtual switch created by default connects your virtual machines to an internal virtual network
So you will not have access to the Internet from your virtual machine with the default virtual switch.
To fix the problem, refer to step "4. Virtual switch created by default on Windows 10 and 11" of our tutorial to enable the "Hyper-V" feature on Windows. - if you are using Windows 8 or 8.1, there is no virtual switch created by default.
To create it, refer to step "3. Virtual switch not created by default on Windows 8" of our tutorial to enable the "Hyper-V" feature on Windows. - if you are on Windows Server, you can use the default virtual switch (if it exists), because this will allow your virtual machine to access the external network (= your local network and the Internet).
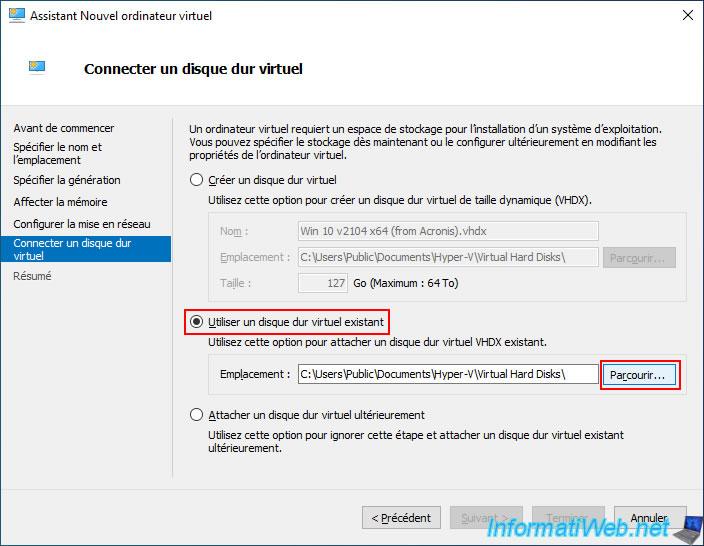
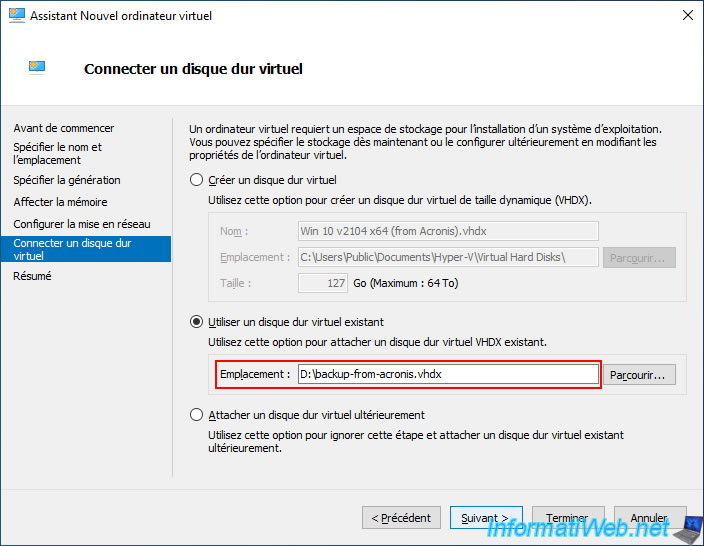
For your virtual machine's virtual hard disk, select "Use an existing virtual hard disk" and click the "Browse" button.
Select the ".vhdx" file created earlier by Acronis Cyber Protect Home Office (True Image) and click "Open".
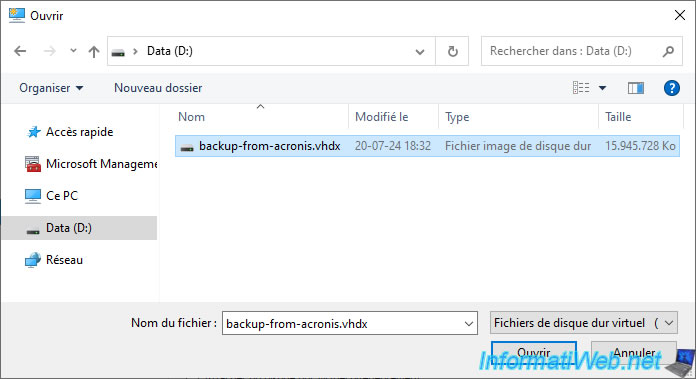
The path to your virtual hard disk ".vhdx" appears in the "Location" box.
Click "Next".
Once you reach the end of the "New Virtual Machine" wizard, click "Finish".
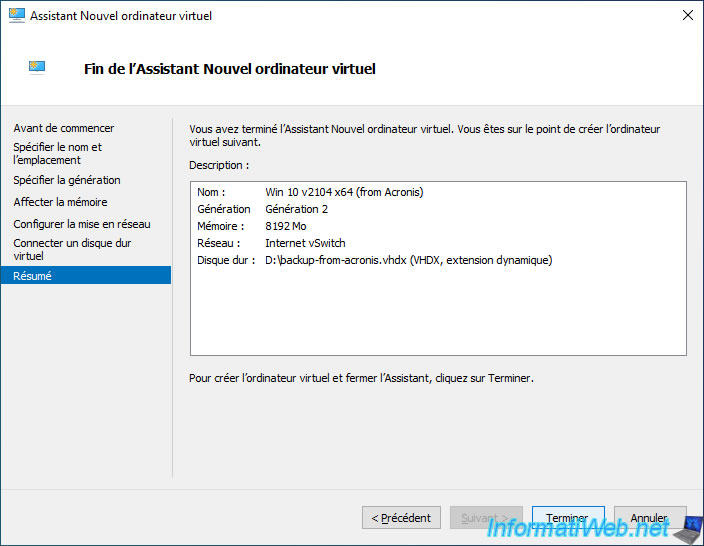
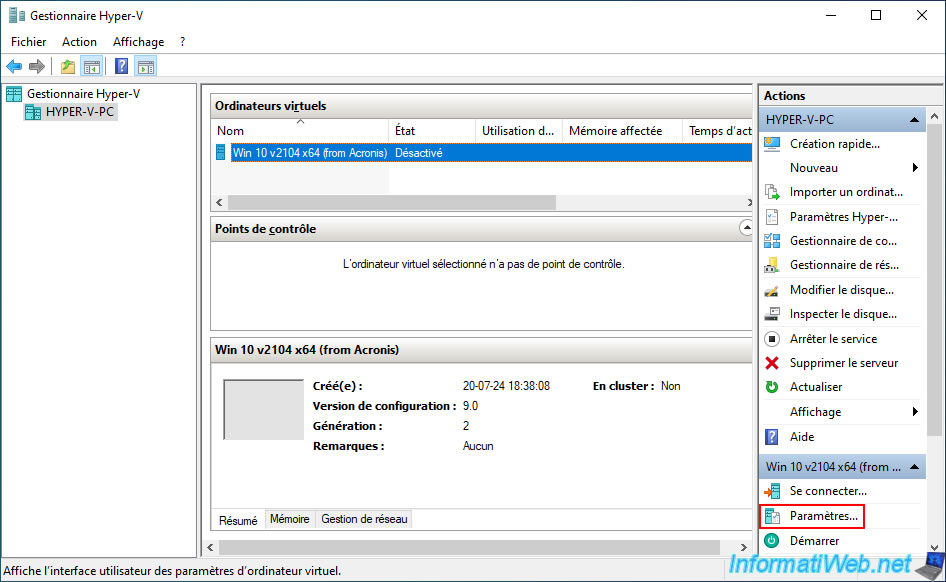
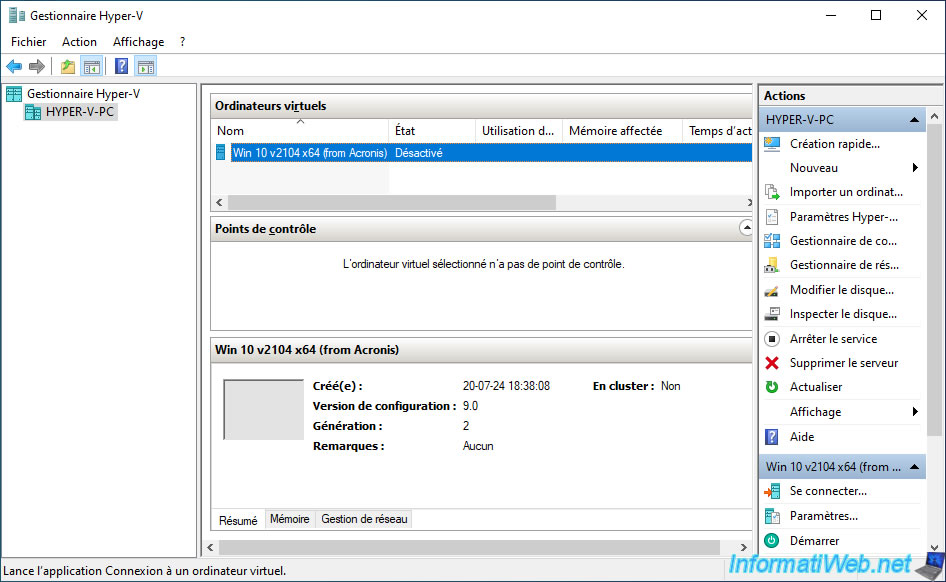
Your new virtual machine appears in the list.
Select it and click on "Settings" (bottom right).
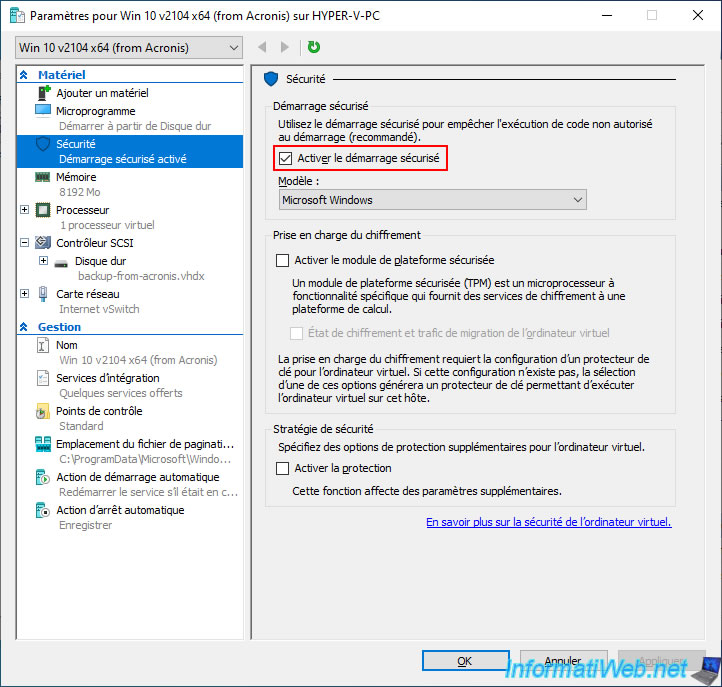
In the "Security" section, if it is a generation 2 virtual machine (which will therefore boot in UEFI mode with an EFI firmware), check the "Enable secure boot" box if the version of Windows present in the virtual hard disk is Windows 8 or later (more recent).
Warning : although Windows 7 supports booting in UEFI mode, it does not support secure boot.
Indeed, secure boot is only supported since Windows 8.
If you wish, adjust the number of virtual processor cores allocated to your virtual computer.
In our case, we have an "Intel i9-10900" processor with 10 physical cores (= 20 logical cores with hyperthreading).
So we have allocated 2 cores to this virtual computer.
Again, this depends on the number of cores of your physical processor (CPU) and the version of Windows that will run in your virtual computer.
Click "OK" (at the bottom of the window) to save the change.
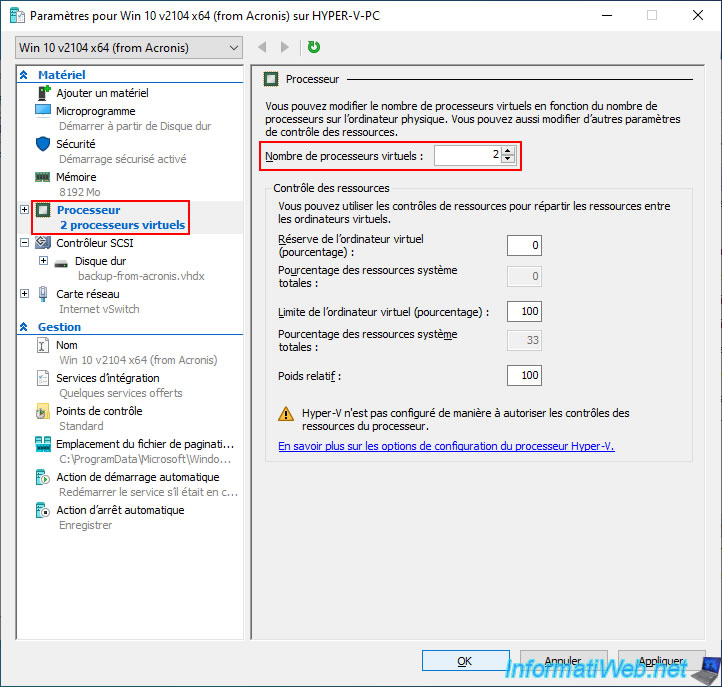
Your virtual machine is created and configured.
Share this tutorial
To see also
-
Backup 9/15/2026
Acronis True Image - P2V - Virtualize a physical PC to VMware Workstation
-
Backup 3/30/2026
Acronis True Image - Rescue Media - Check network configuration
-

Backup 11/17/2025
Acronis True Image - Synchronize a folder to Acronis Cloud
-
Backup 5/11/2026
Acronis True Image - Universal Restore Media - Create media (Win PE version based on Win RE)
No comment