- Backup
- Acronis True Image
- 31 August 2026 at 07:21 UTC
-

- 1/4
When you back up your computer with Acronis Cyber Protect Home Office (True Image), the created backup files are always in the ".tibx" (formerly ".tib") format.
However, Acronis Cyber Protect Home Office (True Image) allows you to easily convert your backups from the ".tibx" format to the ".vhdx" format to be able to use them in a "Hyper-V" virtual machine (for example).
- Overview of an Acronis backup
- Convert Acronis backup (.tibx) to Windows virtual disk (.vhdx)
- Open .vhdx file on Windows 10
- Find out which generation of virtual machine to create on Hyper-V
- Create a virtual machine from the virtual hard disk (.vhdx) created by Acronis
- Boot the virtual machine from the virtual hard disk (.vhdx) created by Acronis
1. Overview of an Acronis backup
By default, when you back up your computer via Acronis Cyber Protect Home Office (True Image), a ".tibx" file is created on your external hard drive or in the desired folder.
Note: in older versions of Acronis True Image (which is the same program as Acronis Cyber Protect Home Office (True Image)), the format used was ".tib".
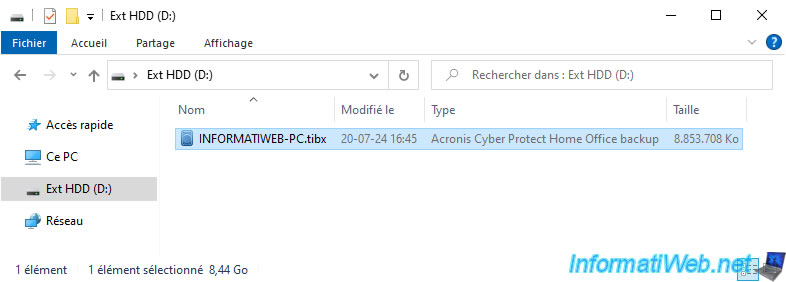
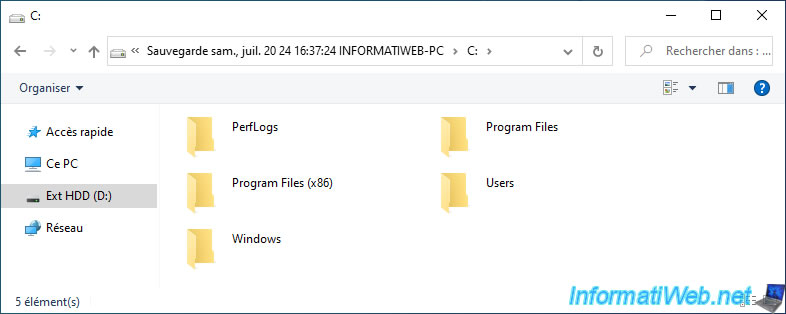
If you double-click on this ".tibx" file, you can easily see the versions available for this backup from the file explorer.
However, this is only possible if Acronis Cyber Protect Home Office (True Image) is installed on your computer.
Indeed, by default, Windows does not natively support this file format.
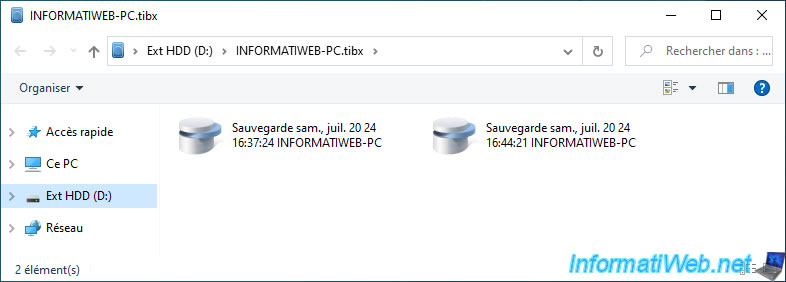
If you double click on one of these versions, you will be able to see the scores that are there.
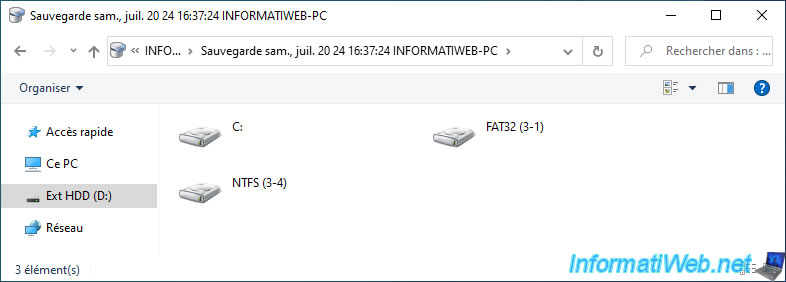
If you enter one of the backed up partitions, you will find the folders and files that were there at the time of that backup.
2. Convert Acronis backup (.tibx) to Windows virtual disk (.vhdx)
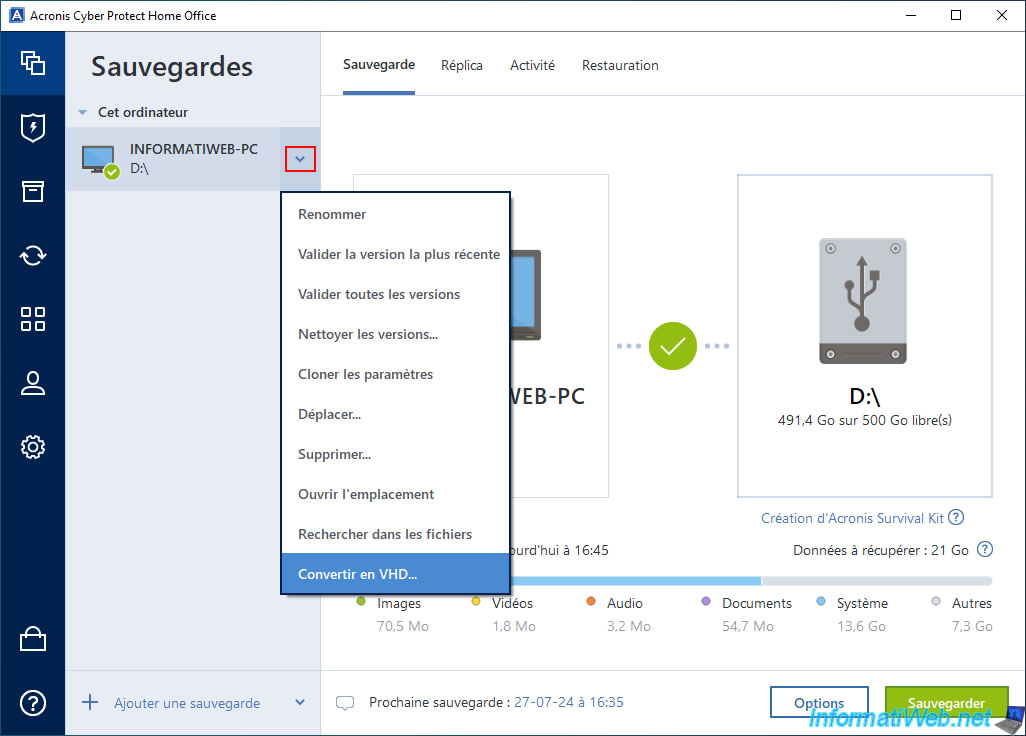
To convert an Acronis backup (.tibx) to a Windows virtual disk (.vhdx), simply click the arrow to the right of your Acronis backup and then click "Convert to VHD".
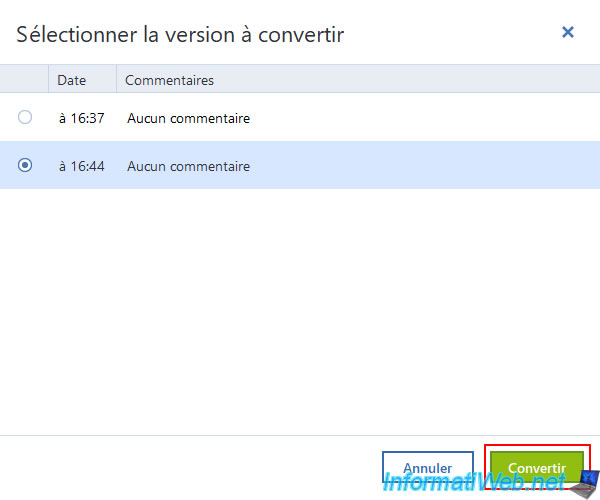
In the "Select version to convert" window that appears, select the version of this backup that you want to convert to ".vhdx" format, then click "Convert".
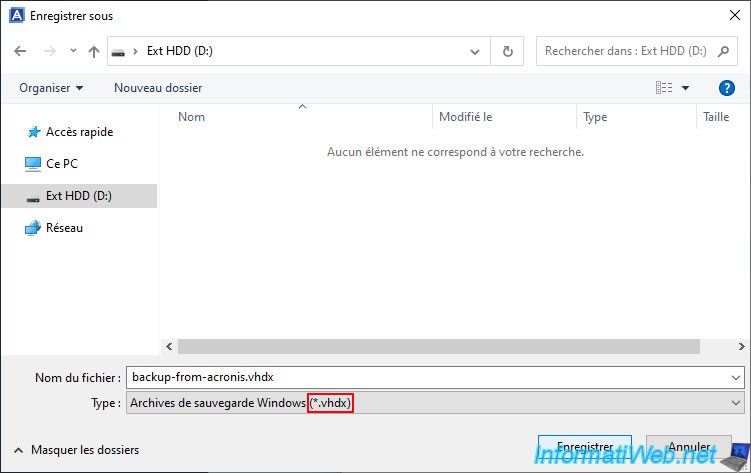
As you can see at the bottom of the "Save As" window that appears, the format used will be "Windows Backup Archive (*.vhdx)".
In our case, we will save this virtual disk under the name "backup-from-acronis.vhdx".
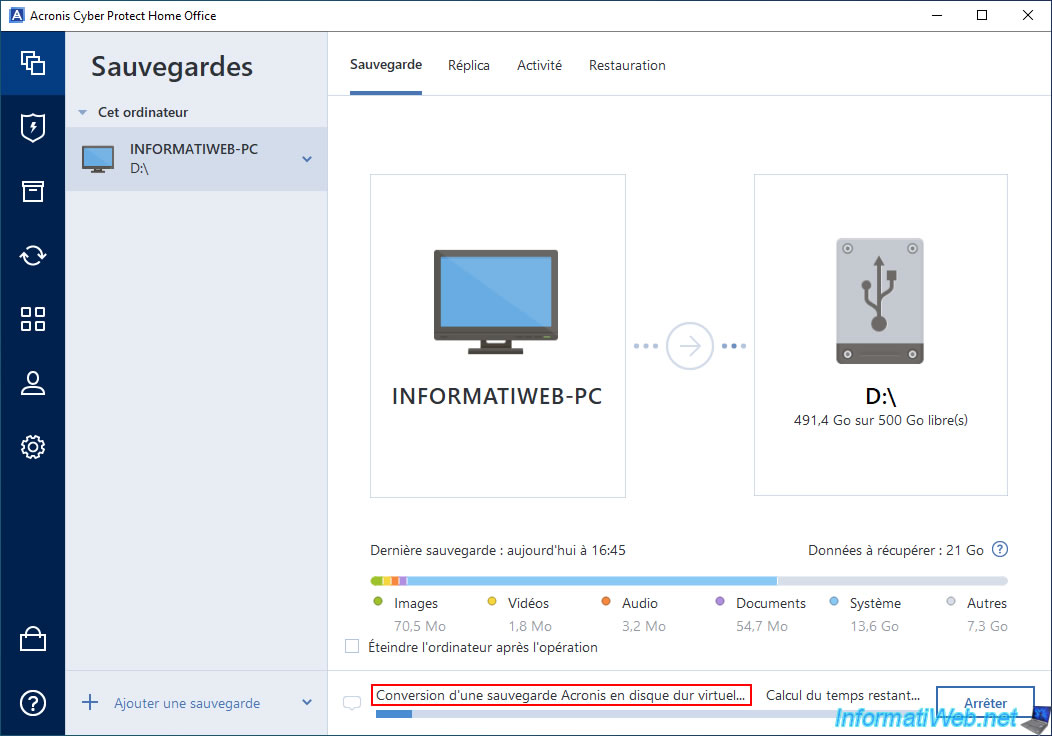
In the "Backup" tab, the message "Converting Acronis backup to virtual hard disk" will appear.
Wait while the desired version of your backup is converted to the ".vhdx" format.
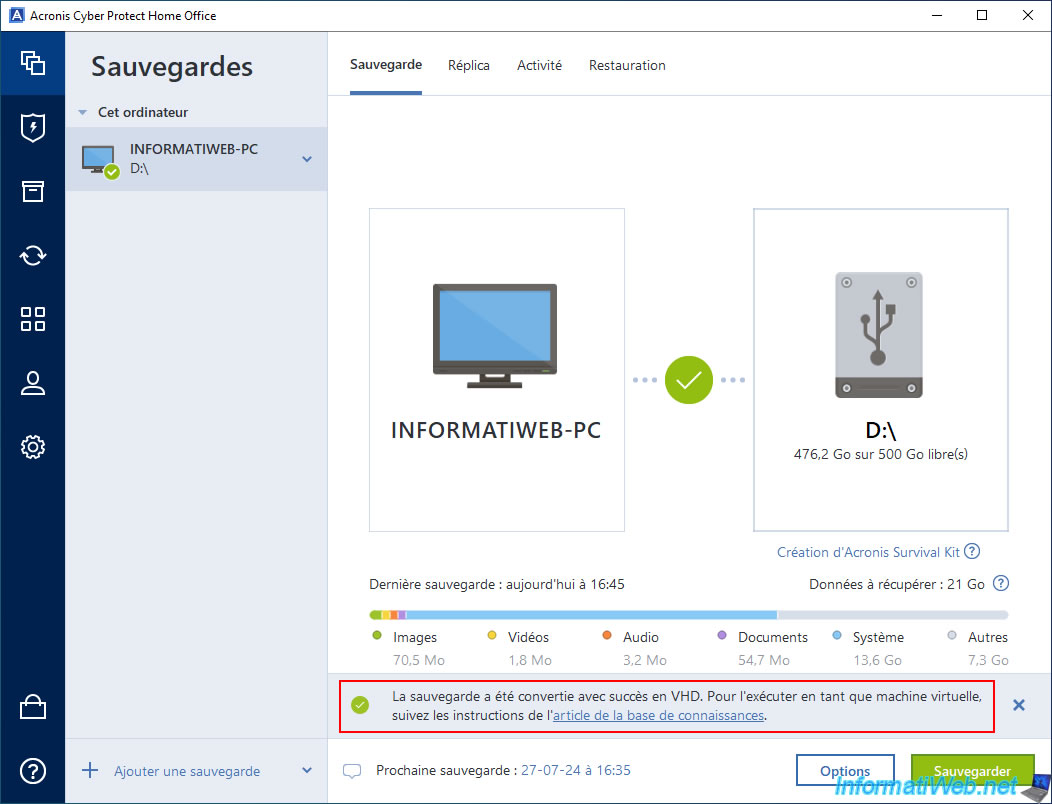
Once the conversion to ".vhdx" format is complete, the message below will appear in the "Backup" tab.
The backup has been successfully converted to VHD. To run it as a virtual machine, follow the instructions in the knowledge base article.
Note : the link referenced by Acronis Cyber Protect Home Office (True Image) is "59986: How to create a virtual machine with an existing virtual hard disk - Acronis Support Portal".
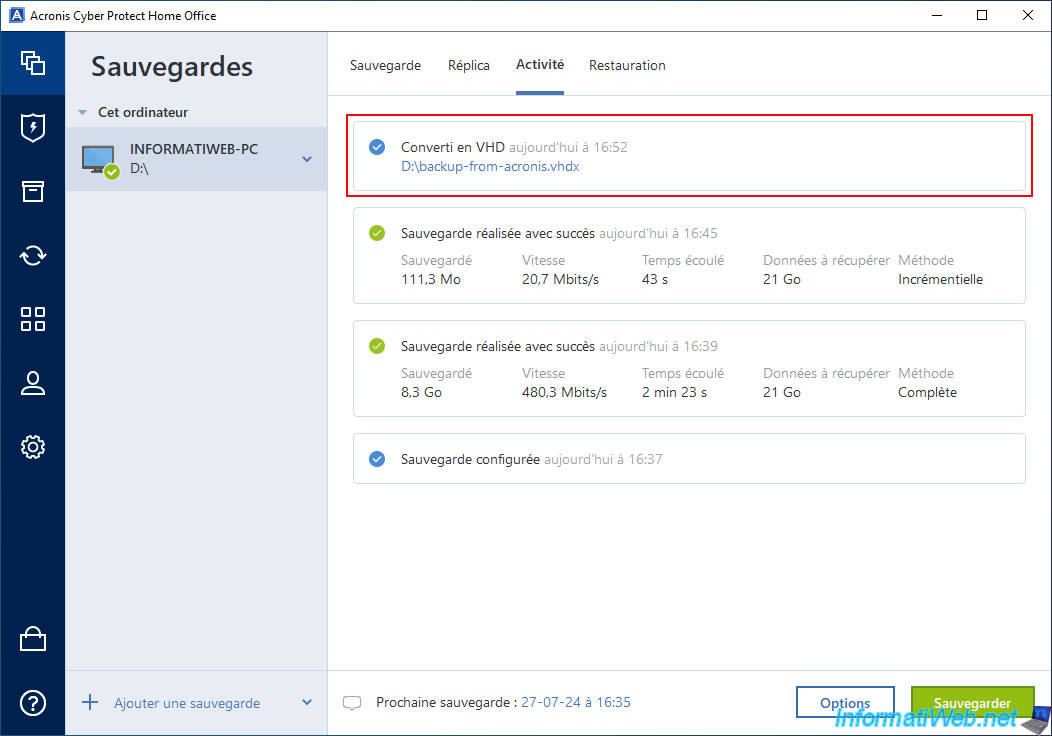
In the "Activity" tab, you will see the message "Converted to VHD" appear with the link to the created ".vhdx" file.
3. Open .vhdx file on Windows 10
To open a .vhdx file in Windows, double-click on it.
Important : Windows natively supports the ".vhdx" format since Windows 8.
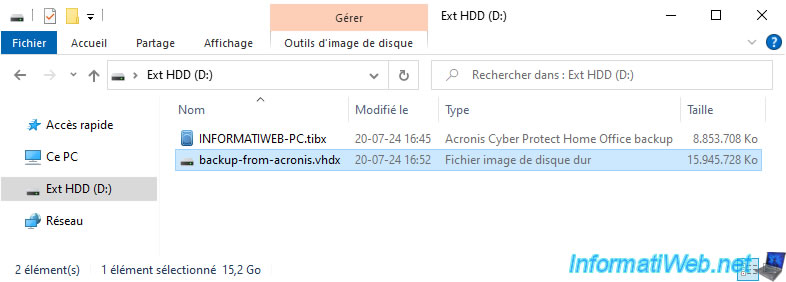
A few seconds later, you will see the contents of the virtual disk appear.
In our case, there is only one partition visible from the file explorer once this VHDX virtual hard disk is mounted by Windows.
Indeed, the other 2 partitions are system partitions that do not have a letter assigned and are therefore not displayed by default in the file explorer.
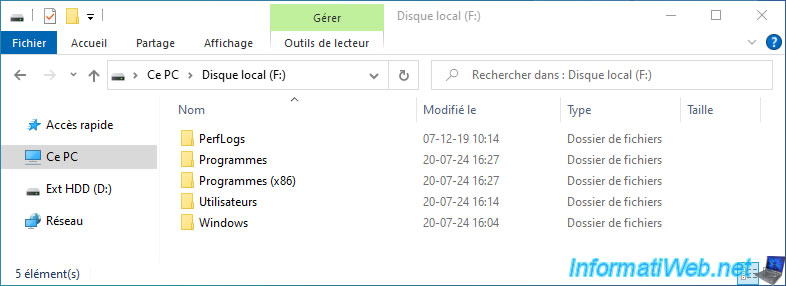
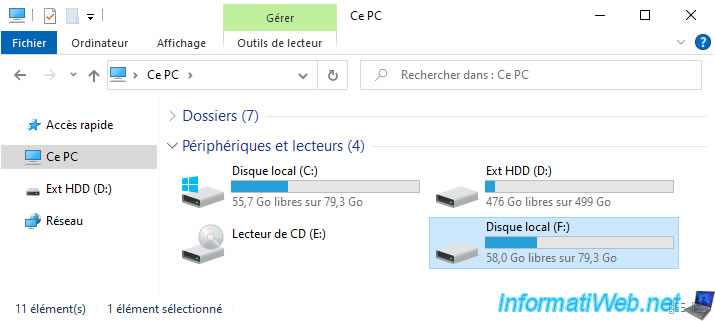
If you go to "This PC", you will notice that one or more partitions have appeared.
These partitions are the ones present on the virtual hard disk that you just opened.
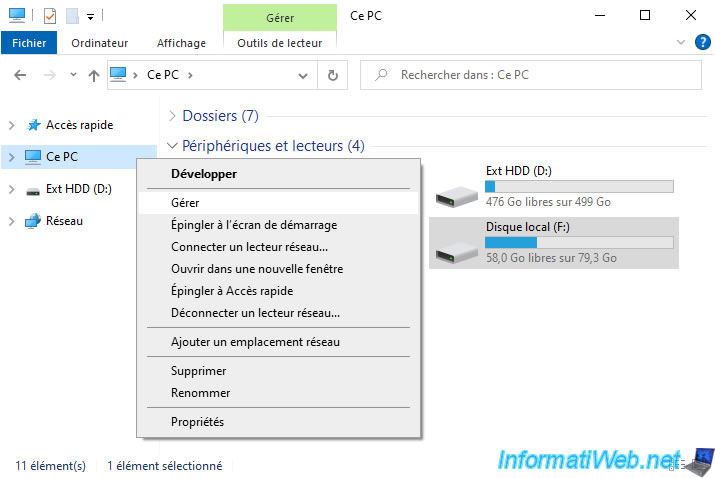
To better see what's going on, right-click "Manage" on "This PC".
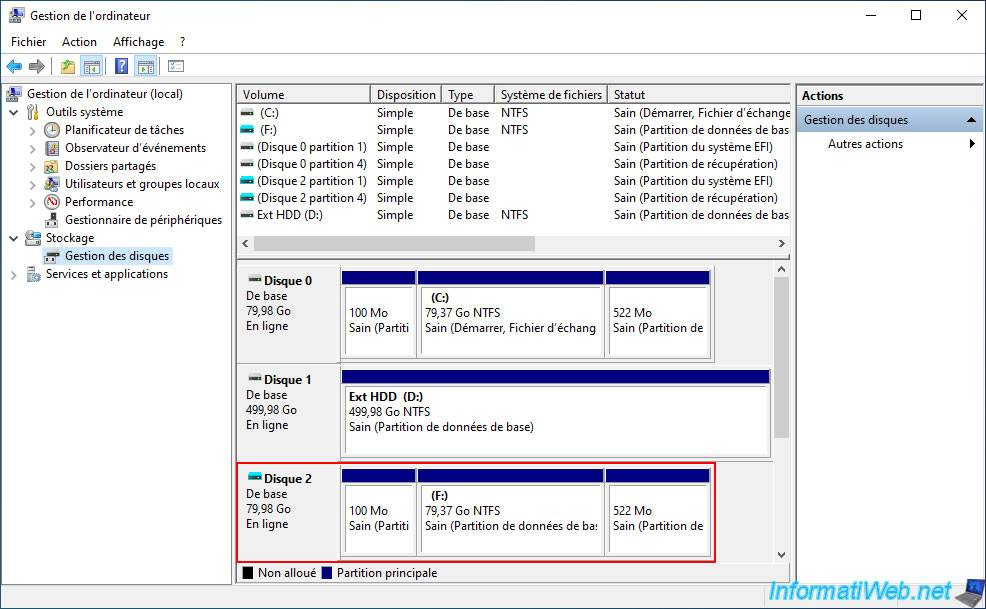
Go to "Disk Management" and you will notice that an additional disk has appeared and its icon is "turquoise" (sky blue).
Which means that it is a virtual disk (VHDX).
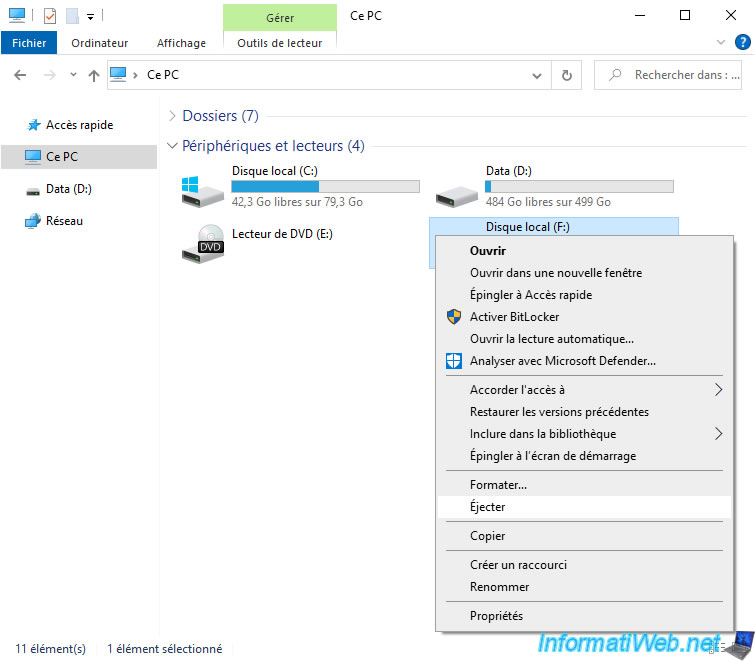
To be able to use this virtual hard disk (VHDX) with Hyper-V (as instructed by Acronis support), you need to eject it from your current Windows installation.
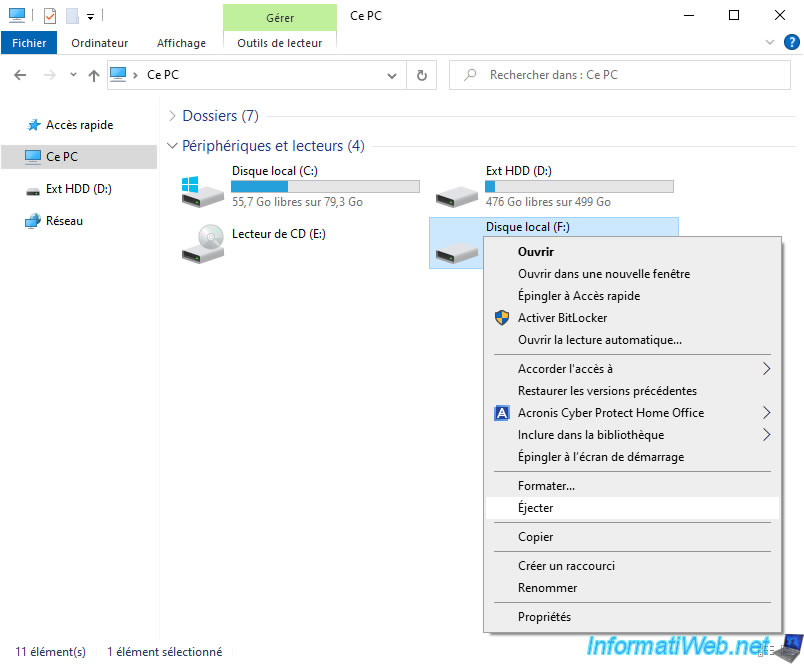
To do this, right-click "Eject" on the virtual hard disk partitions.
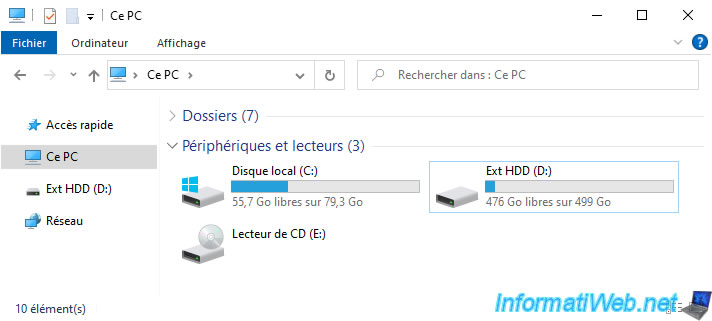
Ejected partitions disappear from file explorer in "This PC".
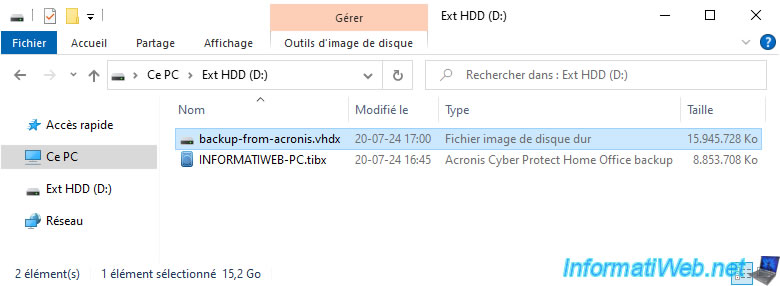
Now, you can use the ".vhdx" file from Hyper-V, for example.
4. Find out which generation of virtual machine to create on Hyper-V
When you want to create a virtual machine on Hyper-V, you have the choice between 2 generations:
- generation 1: for older versions of Windows and for 32-bit versions of Windows.
In this case, the partition table used on the virtual disk must be an MBR. - generation 2: for recent versions of Windows (starting with Windows 7) if Windows is installed to boot in UEFI mode.
In this case, the partition table used on the virtual disk must be a GUID partition table (GPT).
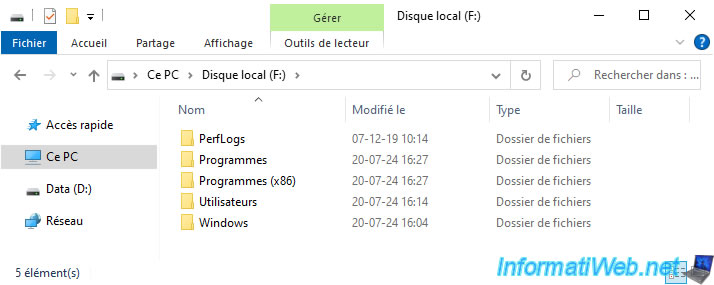
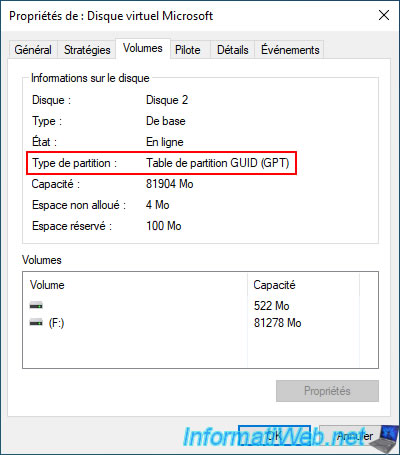
To find out which partition table is used on your virtual hard disk (VHDX), double-click on it to mount it automatically.
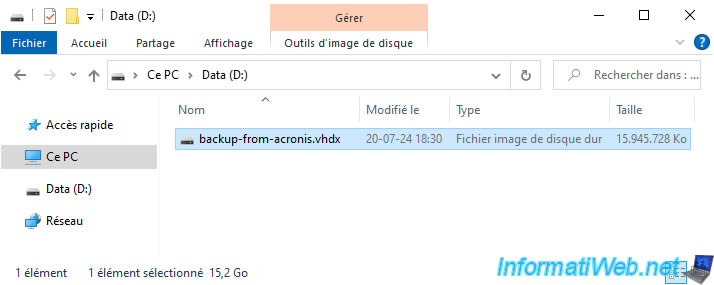
The contents of the partitions located there will be displayed automatically.
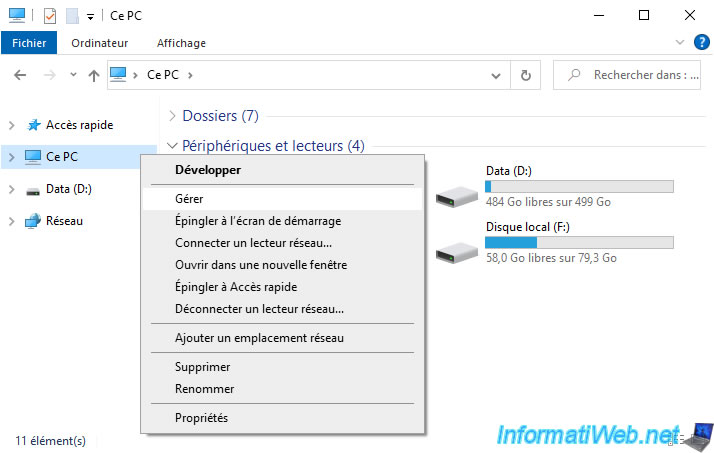
Then right click "Manage" on "This PC" in file explorer.
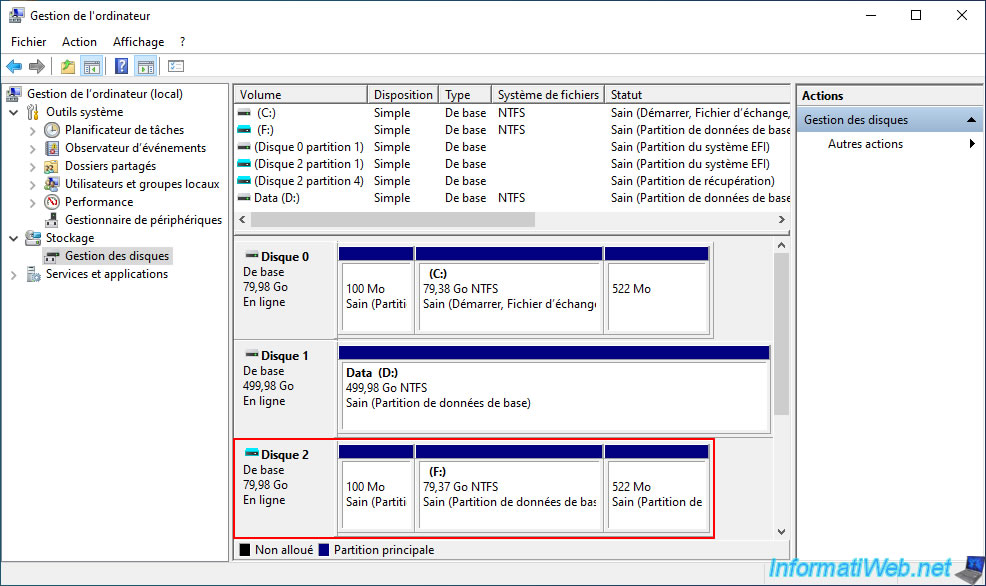
Go to disk management and locate the disk that has a turquoise icon (which corresponds to your VHDX virtual hard drive).
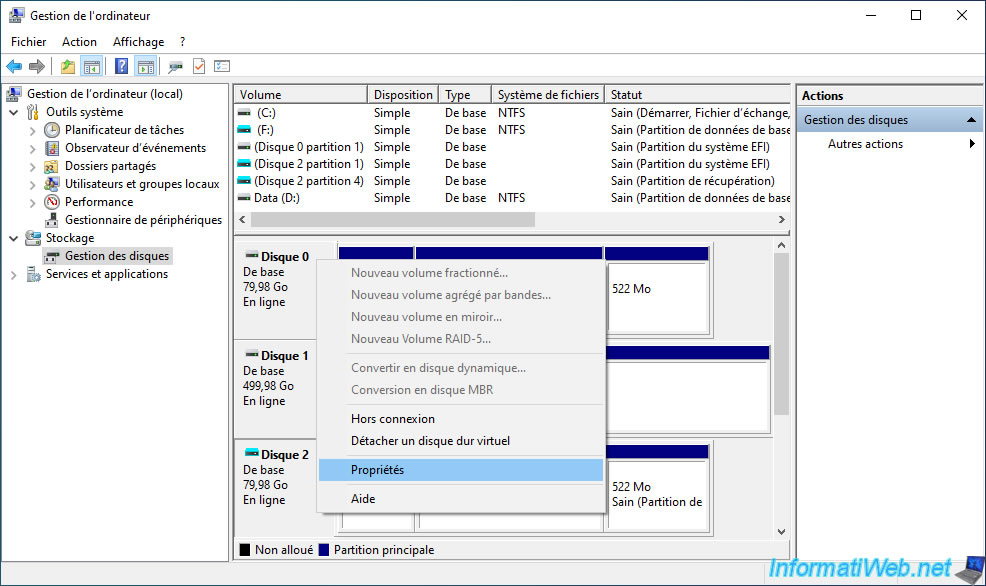
Right click "Properties" on it.
Go to the "Volumes" tab of the "Properties for: Microsoft Virtual Disk" window that appears and look at the partition type displayed.
- Master Boot Record = MBR = Virtual machine generation 1.
- GUID Partition Table (GPT) = GPT = Virtual machine generation 2.
Once you know what type of partition is used on your virtual hard disk (VHDX) and therefore what generation of virtual computer you will need to use under Hyper-V, eject the partitions of this virtual hard disk from the file explorer.
To do this, in "This PC", right-click "Eject" on these partitions.
Share this tutorial
To see also
-
Backup 9/25/2025
Acronis True Image - Backup your Microsoft account to Acronis Cloud (encrypted backup)
-
Backup 8/25/2025
Acronis True Image - Create backups and authenticate your files
-
Backup 3/23/2026
Acronis True Image - Rescue Media - Clone a disk
-

Backup 11/17/2025
Acronis True Image - Synchronize a folder to Acronis Cloud
You must be logged in to post a comment