Create backups and authenticate your files using Acronis True Image (Cyber Protect Home Office) to verify their authenticity
- Backup
- Acronis True Image
- 25 August 2025 at 13:15 UTC
-

- 2/4
4. Verify file authenticity via Acronis Notary Console
4.1. View the certificate of a saved file
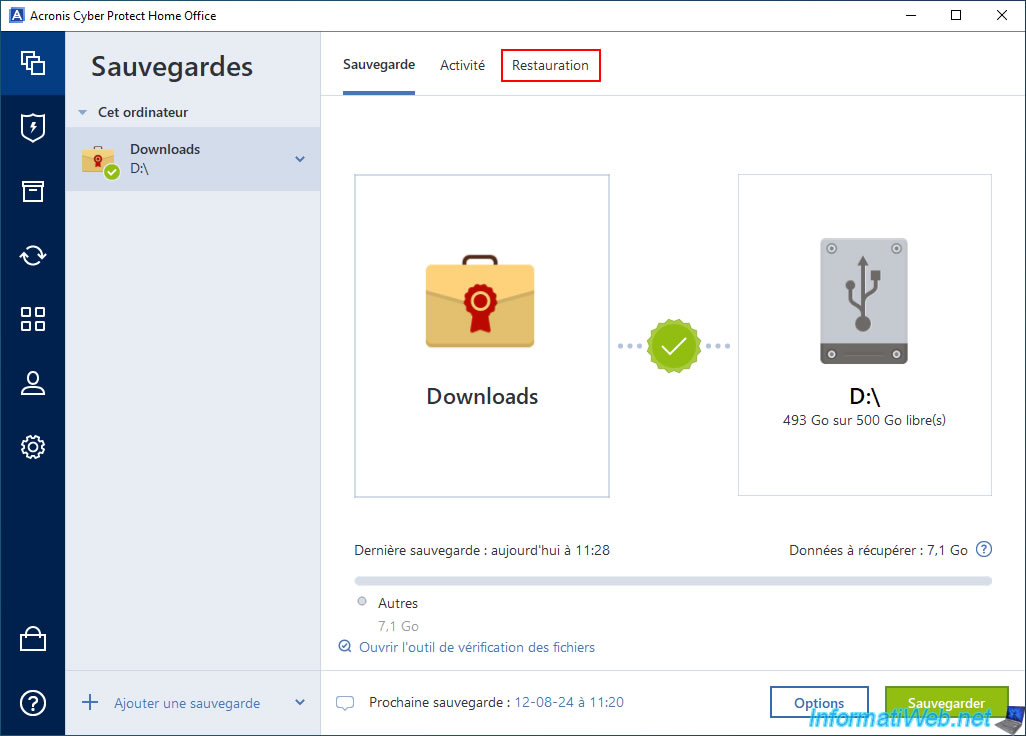
To verify the authenticity of a file via Acronis Notary Console, you will need the file to be verified, as well as the ID of the associated certificate generated by Acronis Cyber Protect Home Office (True Image). To do this, go to the "Recovery" tab.
Navigate to the folder containing the file you want to verify the authenticity of.
Warning : as you can see, Acronis Cyber Protect Home Office (True Image) does not generate certificates for all file types.
For example: the exe file does not have a certificate.
If a certificate has been generated for the desired backed up file, then a medal will appear on the icon of this file in Acronis Cyber Protect Home Office (True Image).
In addition, an icon with 3 dots will appear to the right of it, allowing you to view the certificate or launch verification of the desired file from Acronis Cyber Protect Home Office (True Image).
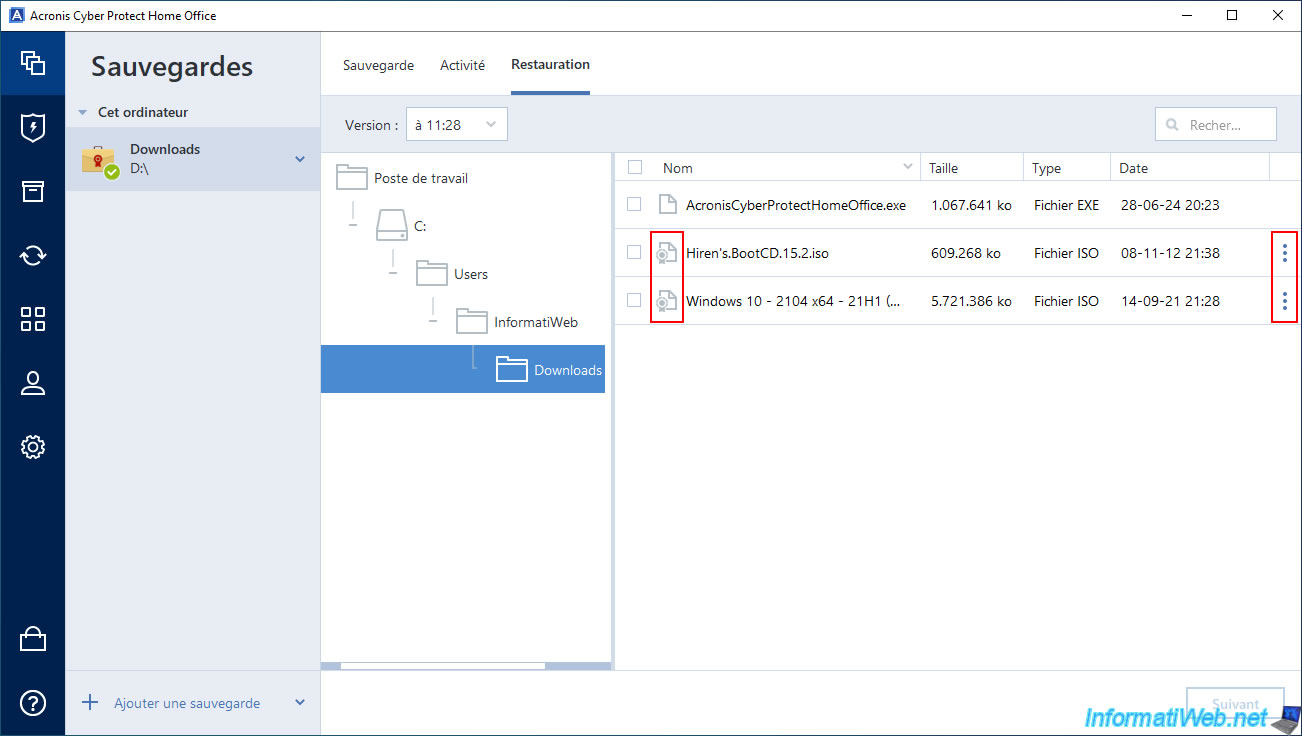
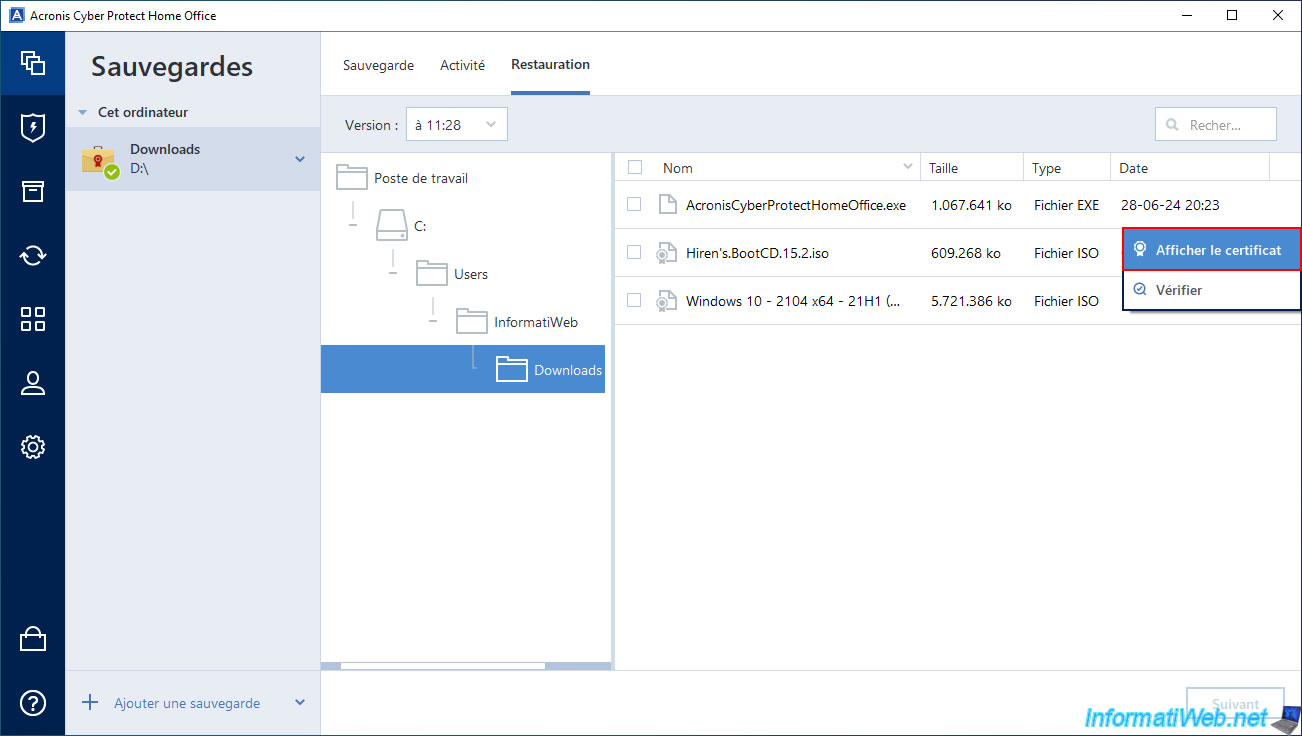
In this case, click on the icon with 3 dots located to the right of the file whose authenticity you want to verify, then click on "Show certificate".
If you try to view a file's certificate directly after you have completed saving it, you may see the message "Certificate Pending".
Plain Text
Your certificate is now pending. Please try again or refresh the page in a few minutes.
If so, wait and refresh or open this window again later from the Acronis Cyber Protect Home Office (True Image) interface.
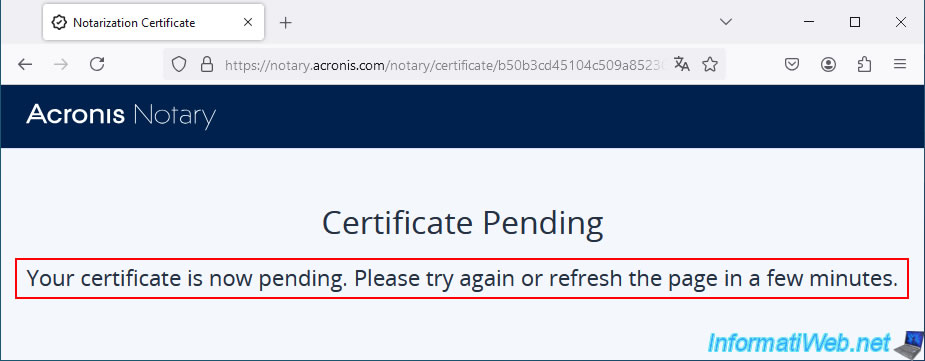
Later, maybe after a few hours, your Acronis Notary certificate will be automatically generated and available.
The most important information in this case being:
- File name: the name of the file concerned by this certificate of authenticity.
- File hash (SHA-256): the hash used to verify the integrity of the file via any locally installed program that can calculate the "SHA-256" hash of a file.
- Certificate ID: the identifier you will need to verify that the desired file contained in your Acronis backup is authentic and has not been altered.
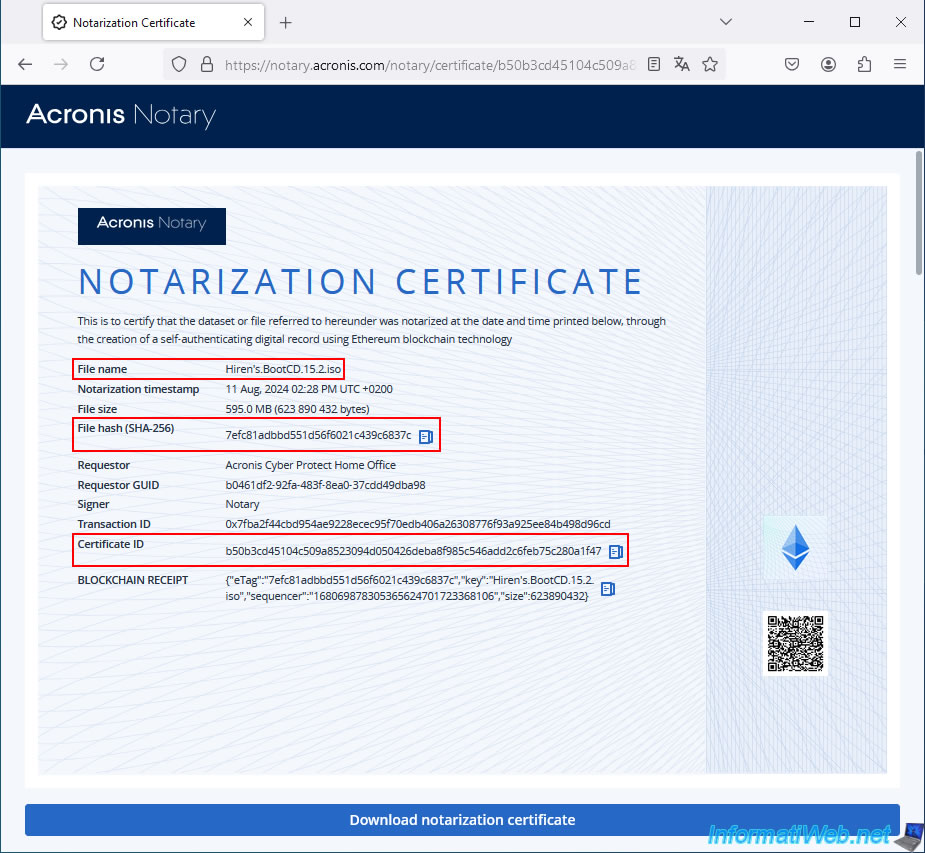
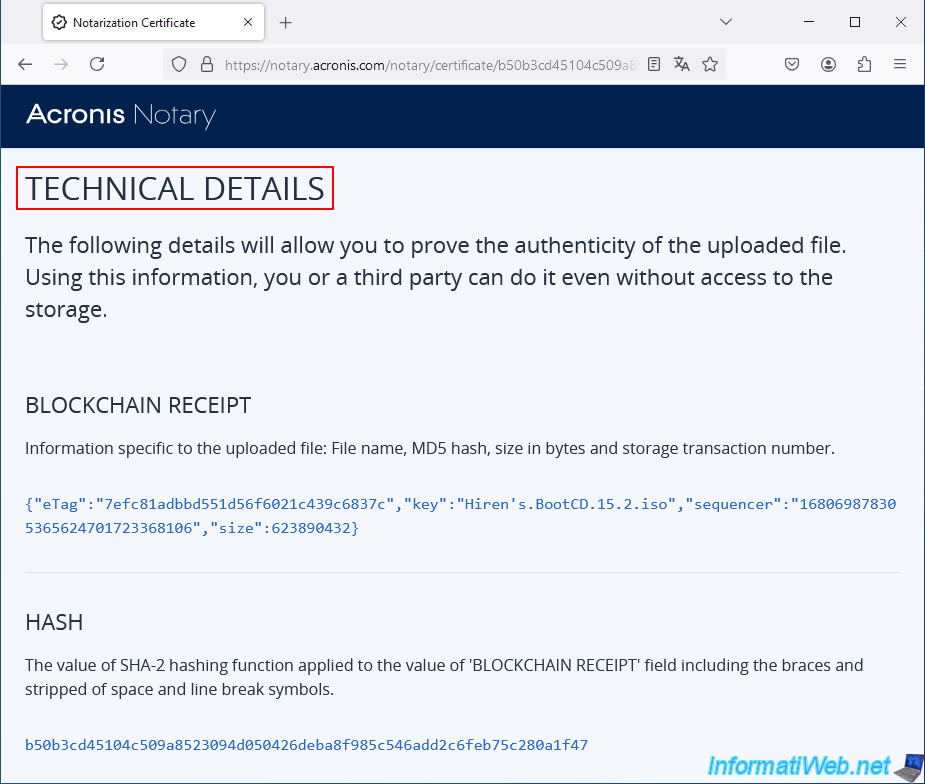
Below, you will find some technical information (if you wish):
- the blockchain receipt
- the SHA-2 hash of the saved file
- and more.
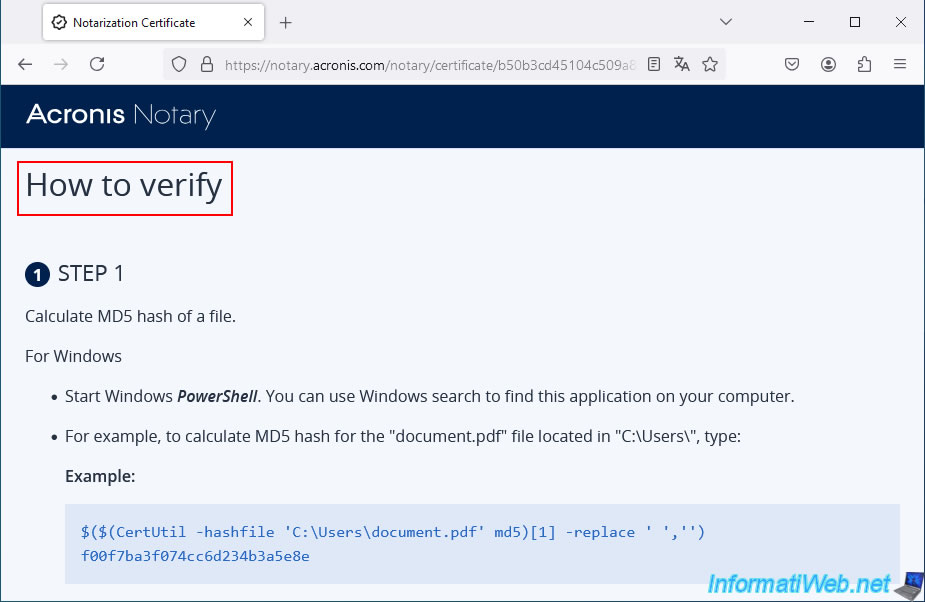
You will also see a "How to verify" section to check the hash of the file concerned, as well as the identifiers used on the blockchain.
In particular by searching for the transaction ID on the "etherscan.io" site.
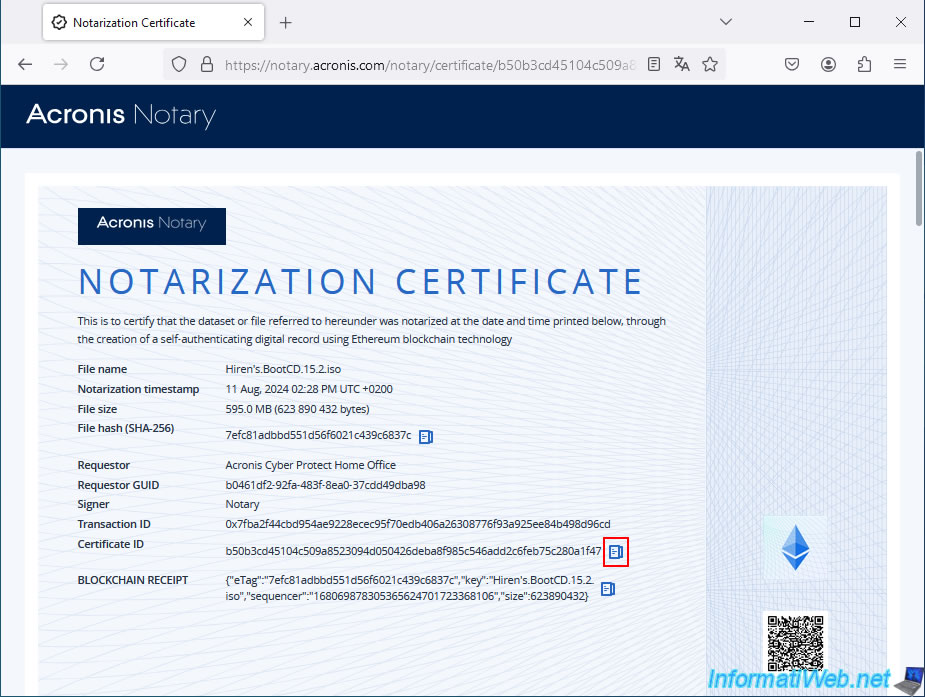
In this case, the information you need is the Certificate ID.
To do this, click on the blue icon located to the right of the "Certificate ID" value.
4.2. Extract a file to verify from your Acronis backup
To verify a file via Acronis Notary Console, you are required to extract the file from your backup in order to then send it to this Acronis site.
Notes:
- it is not possible to click on the "Browse" button of the "Notary Console" site, then browse the ".tib" file in the "Send File" window that will be opened by your favorite web browser.
The content of the chosen ".tib" file is always opened in another window, therefore outside the web browser. - dragging and dropping from the file explorer when you are inside a ".tib" backup file does not seem to work.
Trying to drag a file from your ".tib" backup to the window of your web browser where the "Notary Console" site is open is very likely to freeze.
The open folder no longer reacts to the mouse click and the same goes for your web browser window. The 2 programs concerned should therefore be restarted abruptly.
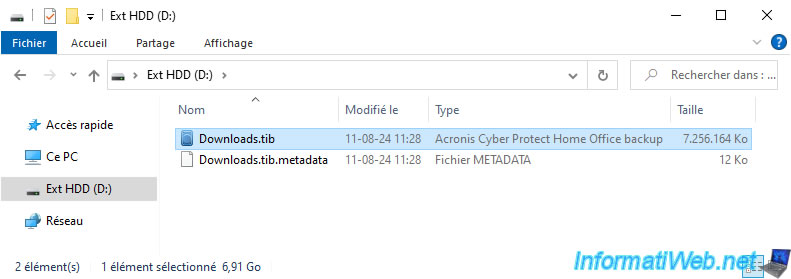
In short, in the file explorer, double-click on your ".tib" backup file.
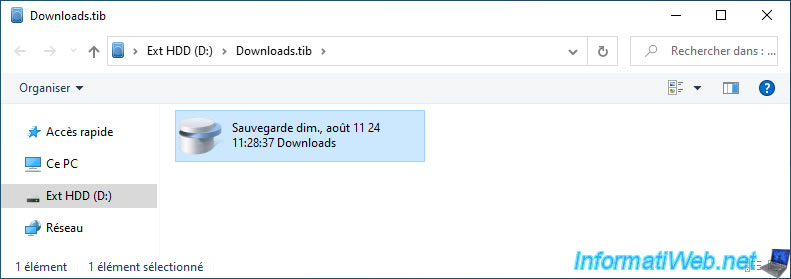
Double-click on the desired backup version.
In our case, there is only one.
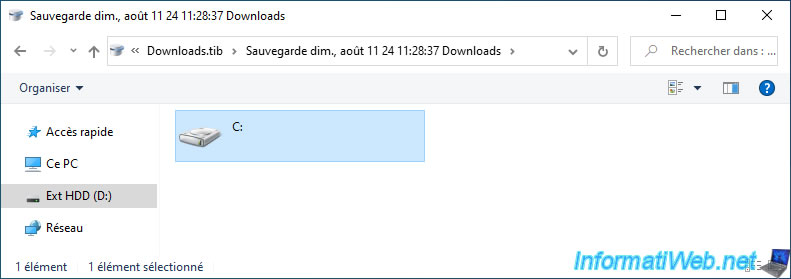
Double-click on the displayed partition (concerned by the folder previously backed up via Acronis).
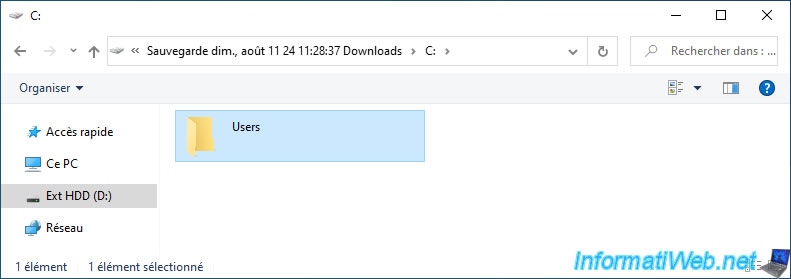
Navigate to the desired folder.
In our case, we will verify the authenticity of our file "Hiren's.BootCD.15.2.iso" (of which we know the certificate ID retrieved earlier).
To do this, right-click "Copy" on the desired file.
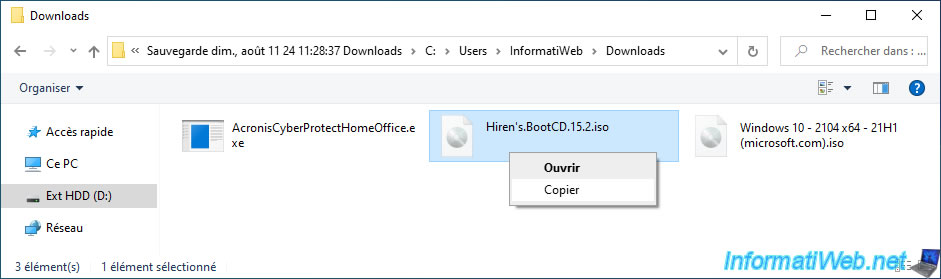
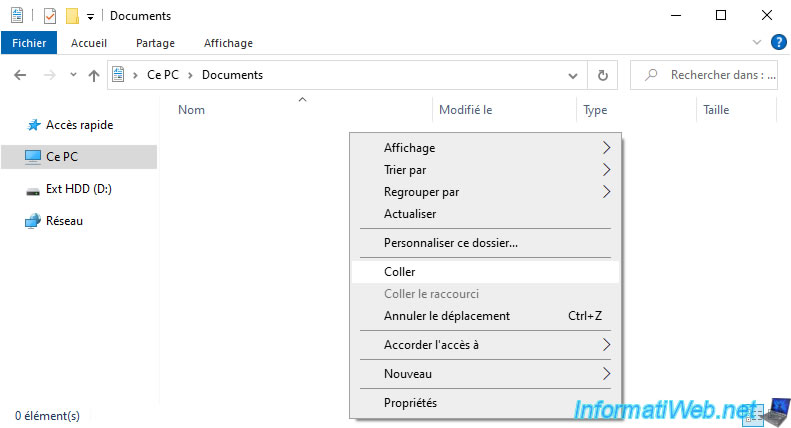
Then right click "Paste" in a folder on your computer.
The chosen location does not matter. The important thing is that the file to check is outside your ".tib" backup file to be able to access it from your web browser.
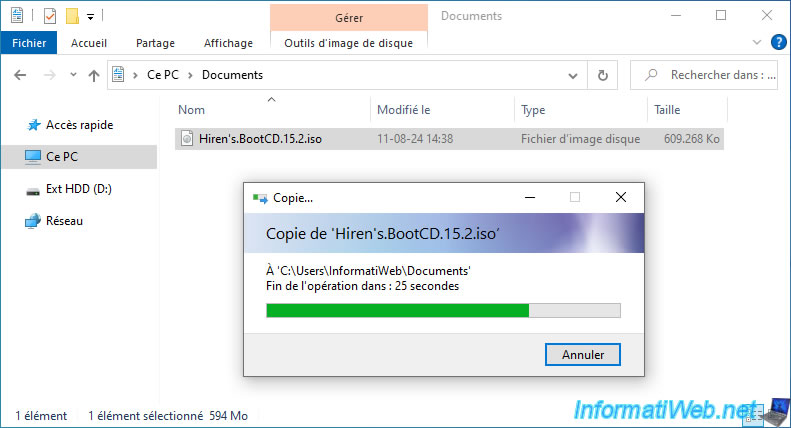
Please wait while this file is copied from your backup.
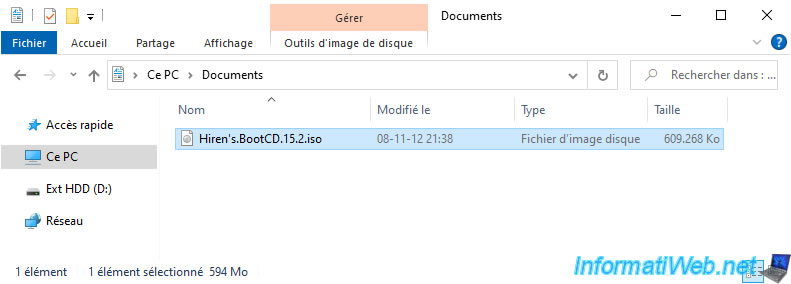
The file to be saved has been copied locally.
Share this tutorial
To see also
-
Backup 11/10/2025
Acronis True Image - Archive your files on Acronis Cloud (encrypted archive)
-
Backup 9/25/2025
Acronis True Image - Backup your Microsoft account to Acronis Cloud (encrypted backup)
-
Backup 8/11/2025
Acronis True Image - Create Acronis Survival Kit media
-
Backup 5/11/2026
Acronis True Image - Universal Restore Media - Create media (Win PE version based on Win RE)
No comment