Create backups and authenticate your files using Acronis True Image (Cyber Protect Home Office) to verify their authenticity
- Backup
- Acronis True Image
- 25 August 2025 at 13:15 UTC
-

- 3/4
4.3. Send the file to be verified to Acronis Notary Console
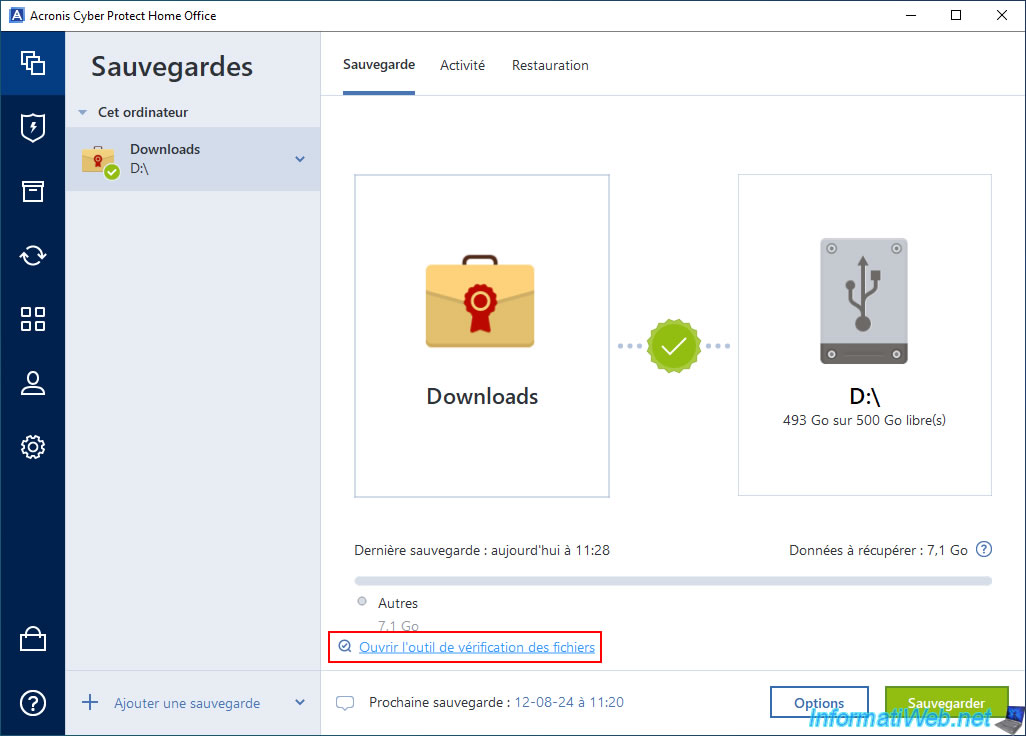
To access the Acronis Notary Console site, click the "Open file verification tool" link in the "Backup" tab.
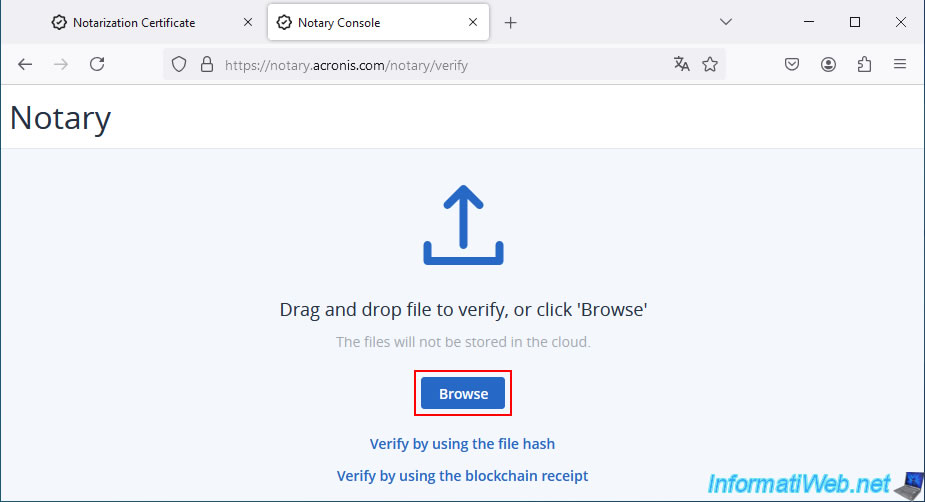
On the "Notary Console" site, click the "Browse" button.
Note: if you wish, you can drag and drop the file to be verified onto this page instead of clicking the "Browse" button.
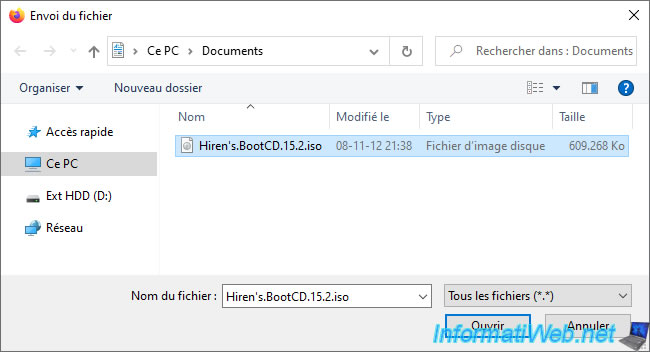
Be sure to drag and drop the file to be verified and not the ".tib" file that corresponds to the entire backup.
In the "Upload file" window that appears, navigate to the folder where you pasted the file copied from your backup, select it and click "Open".
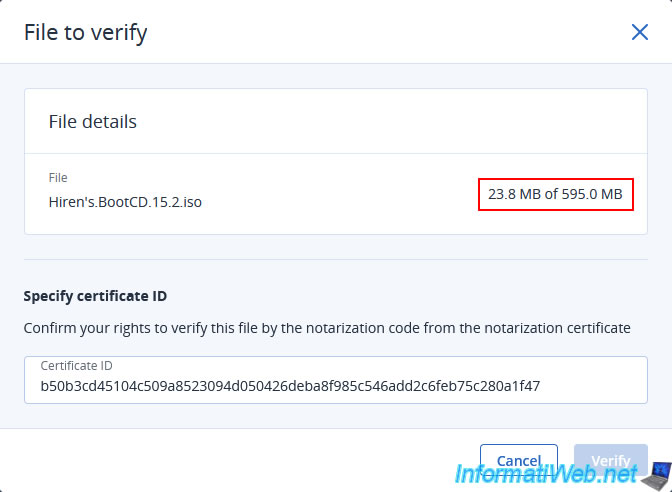
A "File to verify" popup appears with the name of the selected file, as well as its size.
As you can see, the size of this file is less than 1 GB.
Warning : this "Notary Console" site does not support files larger than 1 GB.
If you want to verify the authenticity of a file larger than 1 GB, you will need to use the following technique explained in this tutorial.
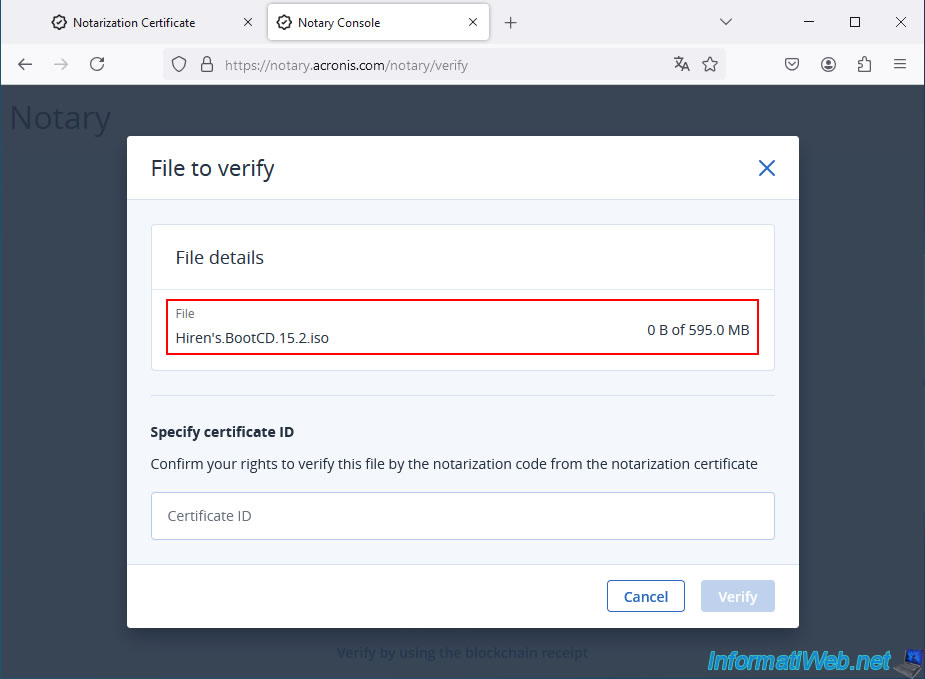
As you can see, to be able to verify the authenticity of a file in your backup, you also need the certificate ID that is in the certificate generated for you by Acronis Notary. Paste the previously retrieved certificate ID corresponding to the file you want to verify, and then click the "Verify" button.

Please wait while the file is being sent to "Notary Console".
You can see the progress of the file being sent by looking at the amount of data being sent compared to the size of the file being sent.
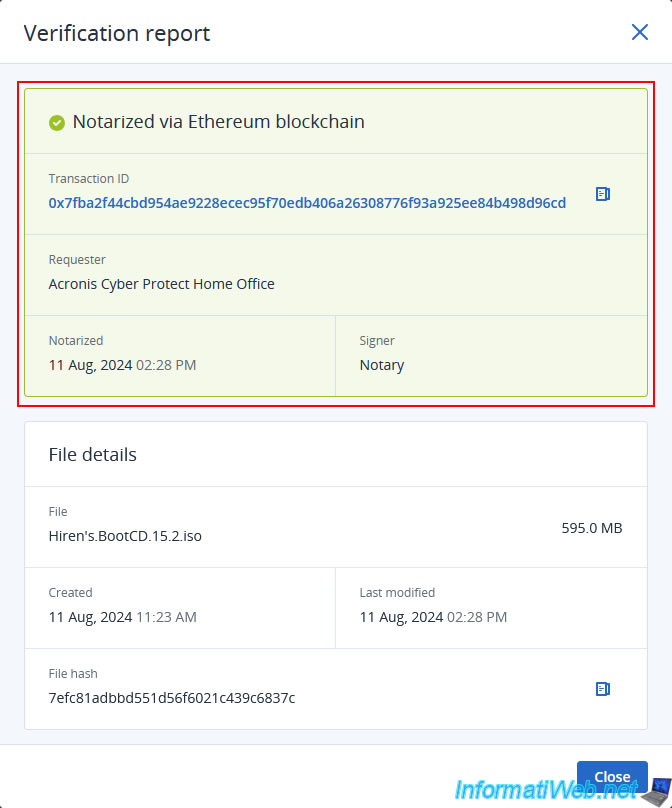
Once the file is sent, a verification report will appear with:
- Status: Notarized via Ethereum blockchain.
- Transaction ID: the associated transaction ID.
- Requester: the name of the requester (which is necessarily "Acronis Cyber Protect Home Office").
- Notarized: the date this file was authenticated.
- Signer: the signer (which is necessarily "Notary" and refers to the "Acronis Notary" service).
You will also find some basic information about the desired file, including its hash (which allows you to easily and locally verify the integrity of a file).
In this case, it is the "SHA-256" type hash (if you compare it to that of the certificate generated by Acronis Notary).
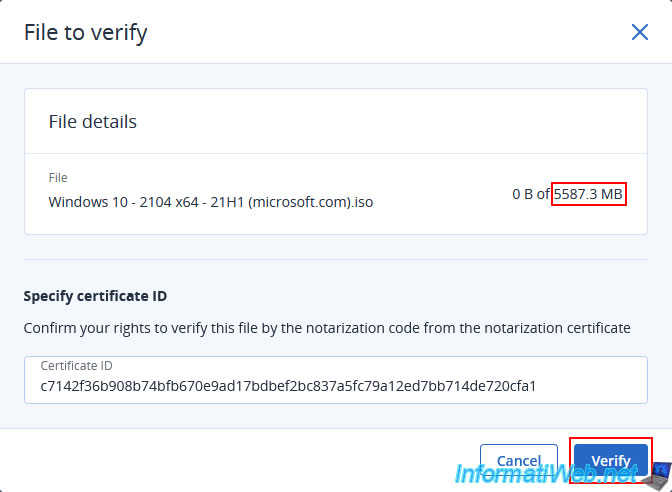
Warning : as previously stated, this site does not support files larger than 1 GB.
This is particularly the case for the other file authenticated by Acronis and which is approximately 5 GB in size.
Once the file is selected and the certificate ID is indicated, you can click on the "Verify" button.
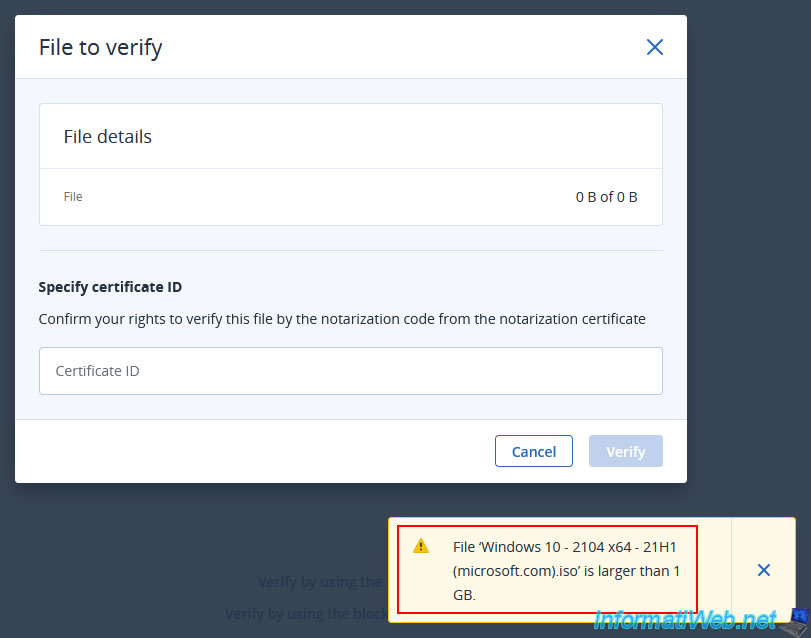
However, a warning "File '[large file name]' is larger than 1 GB" will automatically appear and the specified information will automatically disappear.
To select another file, refresh the page (or press the F5 key on your keyboard).
5. Verify the authenticity of a file from Acronis Cyber Protect Home Office (True Image)
Rather than manually copying the file to be verified out of your backup file and manually retrieving the associated certificate ID to verify the authenticity of the file via the Acronis "Notary Console" site, you can simply launch the verification of a file contained in your backup via the Acronis Cyber Protect Home Office (True Image) interface.
To do this, go to the "Recovery" tab and navigate to the folder containing the file to be verified.
Then, click on the icon with the 3 dots located on its right and click on "Verify".
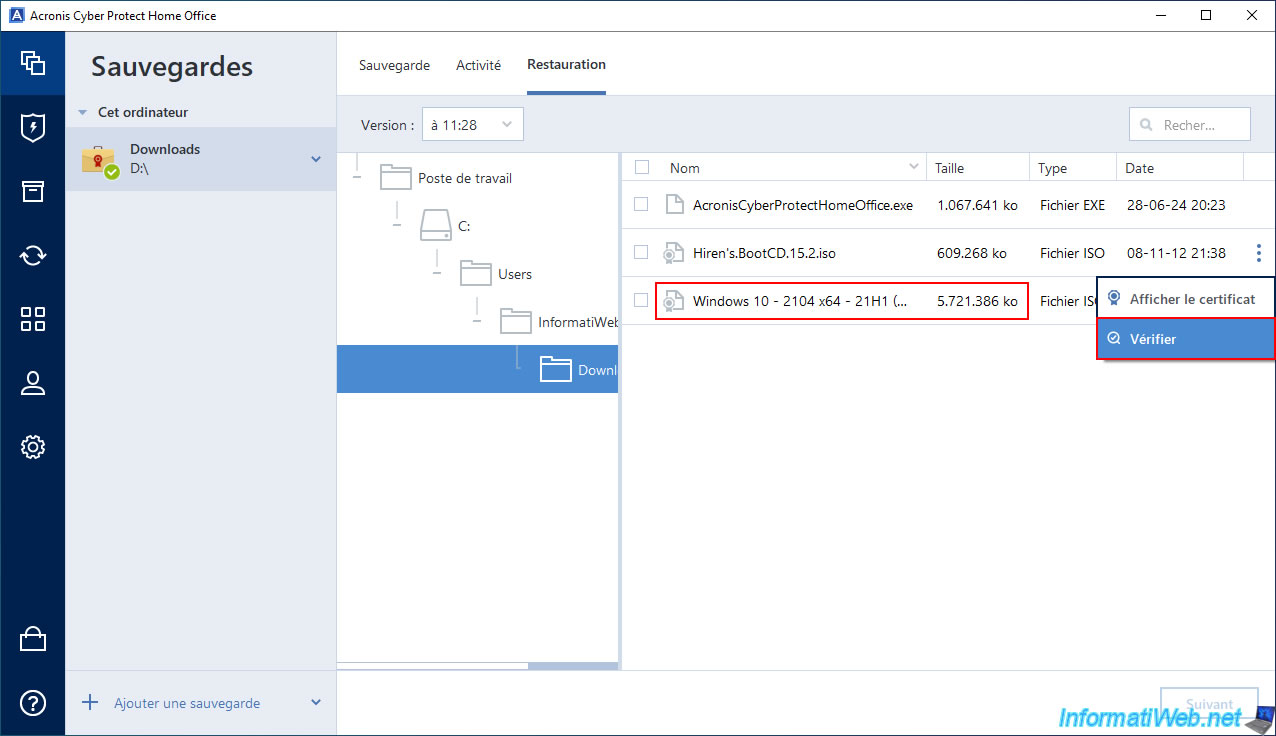
A popup with the message "Verifying" will appear with the name of the file being verified.
In the background, Acronis will send the file to be verified over the Internet.
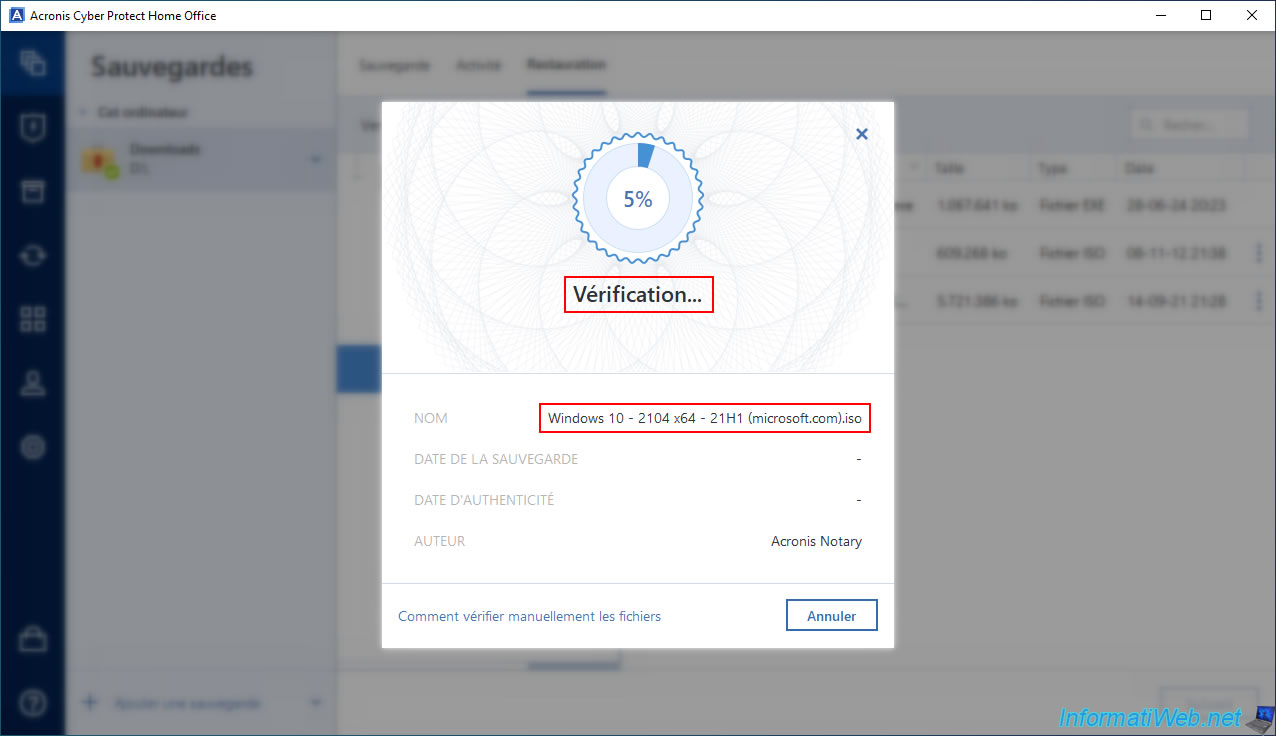
Once the file is uploaded over the Internet, the message "The file is authentic" will appear if the file in your backup has not been altered (modified) in the meantime.
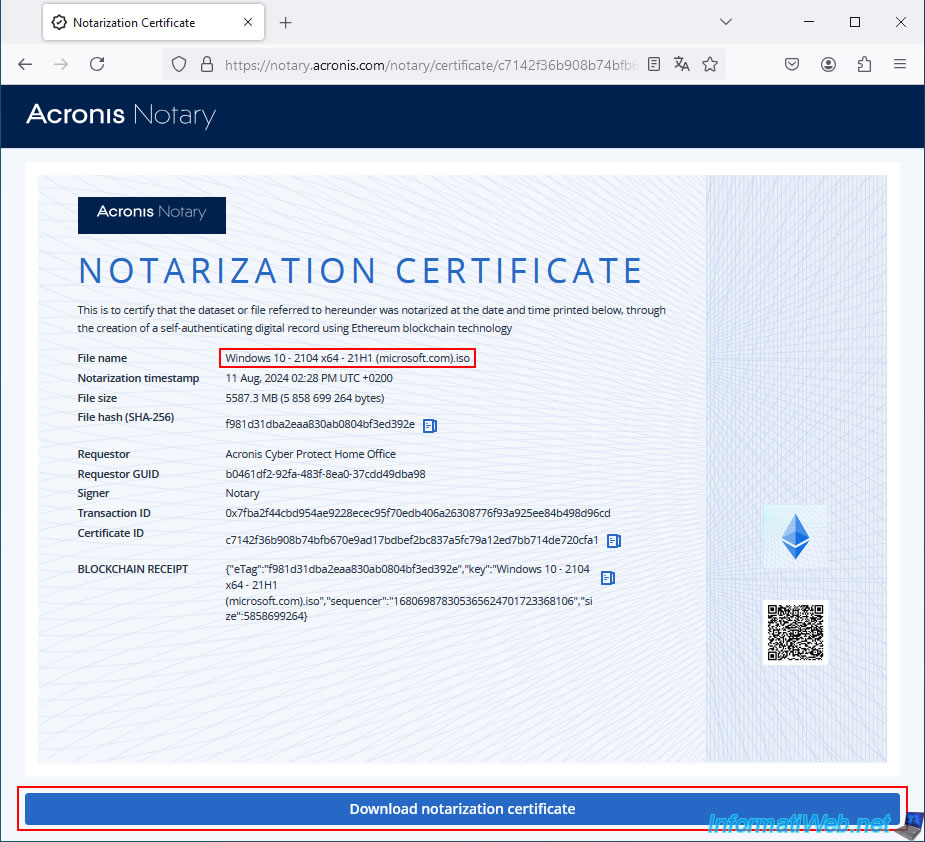
If you want, you can click the "View certificate" link displayed to see the certificate generated for you by Acronis when backing up this file (certificate that was used in the background to ensure that the file in the backup is still authentic).

As expected, the "Acronis Notary" site appears with the certificate generated for this file of your backup.
If you wish, you can download this certificate in PDF format by clicking on the "Download notarization certificate" button.
The downloaded PDF file may open automatically if you are using Mozilla Firefox.
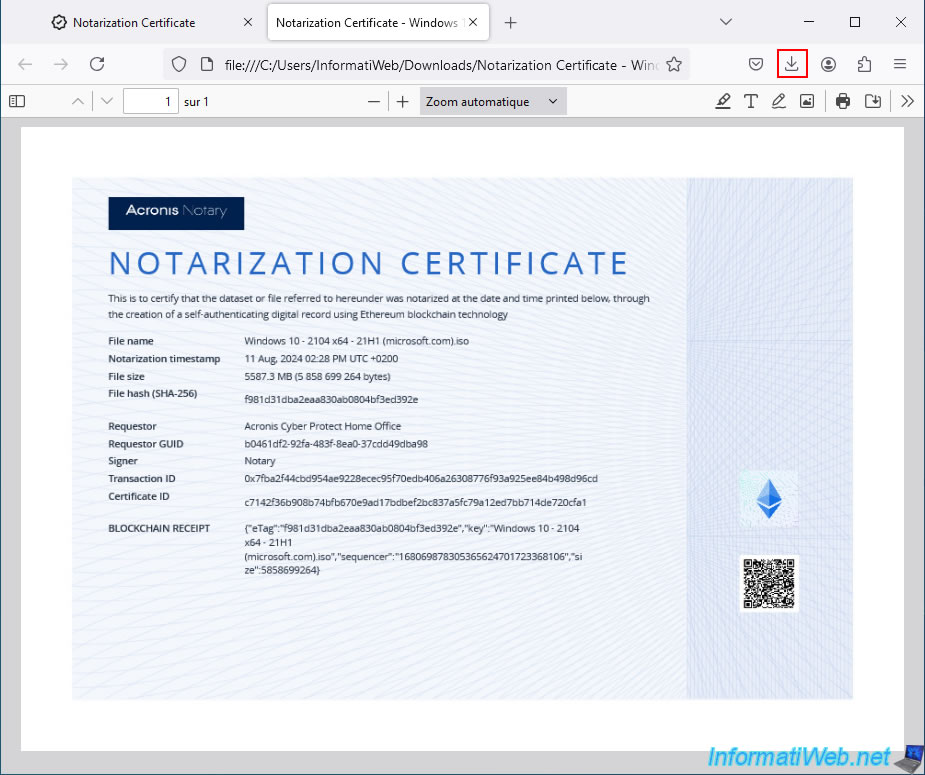
However, the PDF file has been successfully downloaded to your computer.

Share this tutorial
To see also
-
Backup 6/30/2025
Acronis True Image - Backup disks or partitions
-
Backup 7/24/2025
Acronis True Image - Create differential backups
-
Backup 6/12/2025
Acronis True Image - Delete an FTP connection
-
Backup 2/9/2026
Acronis True Image - Rescue Media - Create media (Win PE version) on Win 8
No comment