Virtualize a physical PC to VirtualBox (P2V) using Acronis True Image (Cyber Protect Home Office) and Acronis Universal Restore
- Backup
- Acronis True Image, Acronis Universal Restore
- 07 September 2026 at 13:50 UTC
-

- 2/8
4. Create a VM on VirtualBox (where to restore your Acronis backup)
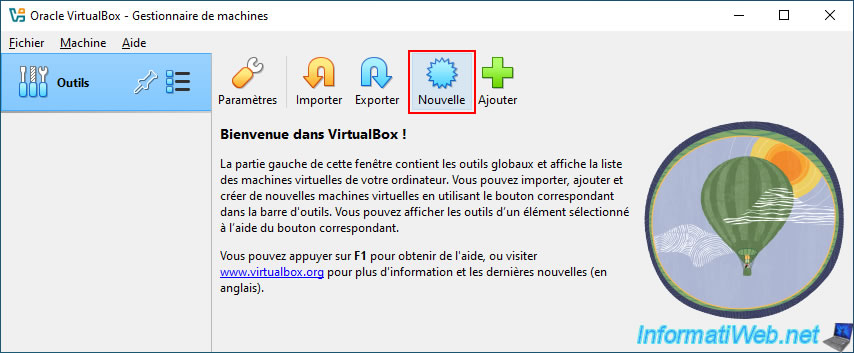
On a sufficiently powerful PC where you have installed VirtualBox (which is an open-source and free solution) widely used by individuals, launch VirtualBox and click on "New".
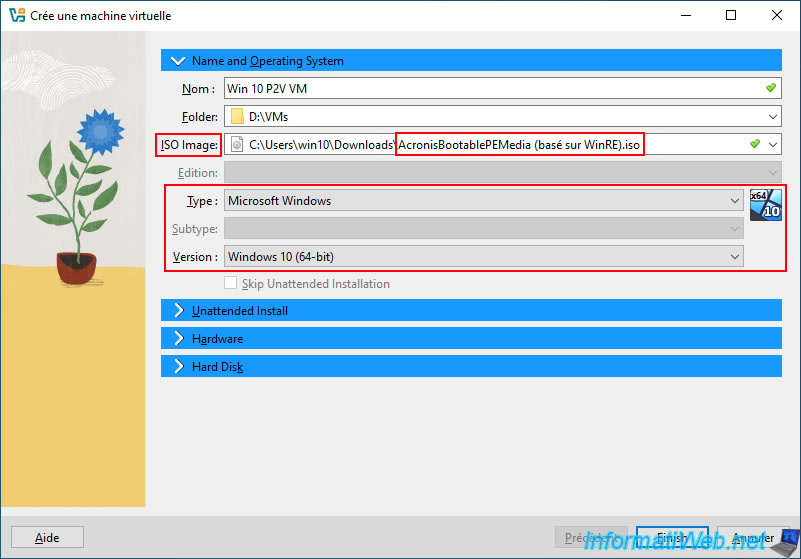
In the "Create Virtual Machine" window that appears, first fill in the fields in the "Name and Operating System" section:
- Name: the name of the virtual machine (VM) to create.
For example: Win 10 P2V VM. - Folder: the folder where to store this virtual machine.
In our case: "D:\VMs". - ISO Image: the ISO file to insert by default into the CD/DVD drive of this virtual machine.
In this case, the ISO file of your Acronis rescue media (so the same one used to back up your previous physical computer).
In our case, it is therefore the file "AcronisBootablePEMedia (based on WinRE).iso". - Type: the type of operating system of the physical PC whose disk you backed up.
So, choose "Microsoft Windows" in the case of Windows. - Version: the version of Windows installed on the physical PC that you backed up via Acronis.
In our case: Windows 10 (64-bit).
Ignore the "Unattended Install" section (which is grayed out anyway), as it only applies to installing Windows in a VirtualBox virtual machine.
Which is not the case here, since you're simply restoring an existing Windows installation via Acronis.
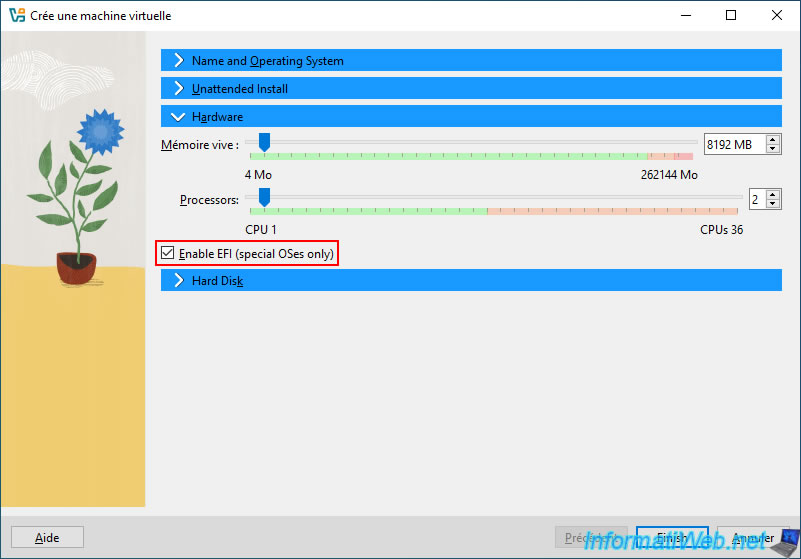
In the "Hardware" section, allocate enough RAM and CPU cores so that Windows can run properly in your virtual machine.
But don't allocate too many resources to your virtual machine so that your physical computer (where VirtualBox is installed) can continue to run properly.
In short, as long as you stay in the green, you should be good to go.
For Windows 10 and 11 in 64-bit, allocate 8 GB of RAM (for recent versions of Windows 10) or 4 GB (for older versions of Windows 10 and for Windows 7 to 10).
For the number of processor cores, 2 cores are enough. But if you have the possibility, you can allocate 4 so that Windows can be a little more efficient in this virtual machine.
Important : if the Windows of the physical PC you just backed up was installed in UEFI mode (which is the case if its disk used a "GPT" partition table), check the "Enable EFI (special OSes only)" box so that your virtual machine uses UEFI firmware.
If the disk of the backed up Windows used an MBR, then uncheck this "Enable EFI (special OSes only)" box to use an old BIOS and boot in Legacy BIOS mode on the Windows that you are going to restore in your virtual machine.
In our case, Windows was installed in UEFI mode and the backed up disk therefore used a "GPT" partition table.
So, we checked the "Enable EFI (special OSes only)" box.
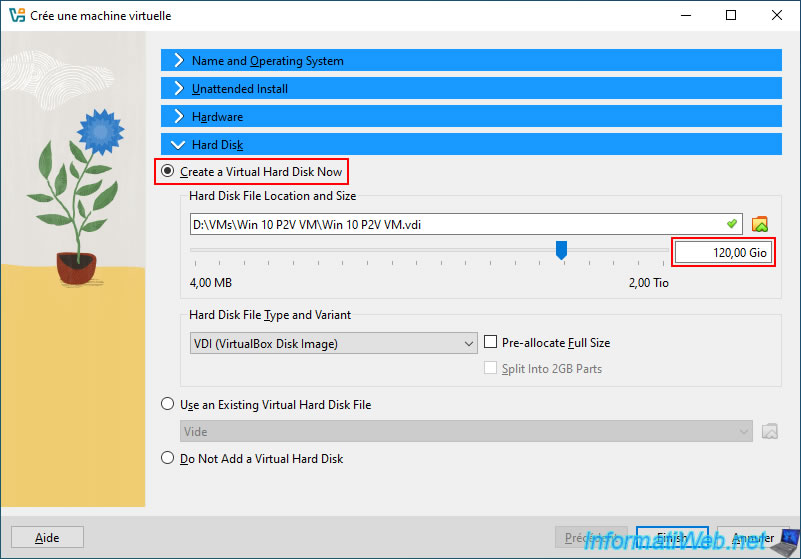
Finally, in the "Hard Disk" section, select "Create a Virtual Hard Disk Now".
Warning : when you try to virtualize a physical PC to use it under VirtualBox, you can probably guess that the physical PC necessarily has a hard disk (or a physical SSD) with a fairly high capacity.
However, you should never create virtual hard disks with too high a capacity (and therefore higher than the size of the physical disk where this virtual hard disk file will be stored).
Creating a disk that is too large risks saturating the physical disk where your VM will be stored, which will crash your virtual machine instantly when the physical disk is full.
In addition, it is possible to enlarge a virtual hard disk, but not to reduce its size.
For the size of the virtual hard disk to create for your VM, specify a size sufficient for the space actually used on the backed up physical disk, leaving enough margin for Windows to function properly in the virtual machine, as well as to be able to add data to it if necessary later.
Warning : the size of the ".tibx" backup file created by Acronis on your external hard disk is smaller than the size of the data that will actually be restored in your virtual machine.
This is most likely due to compression of the data backed up by Acronis for the creation of this ".tibx" file.
In our case, we indicated a size of 120 GiB for this virtual hard disk, knowing that the space used in our case was:
- 100 MB for the EFI partition (of Windows 10 installed in UEFI mode).
- 33.23 GB for the "OS (C:)" partition (containing Windows and the programs installed on the backed-up PC).
- 453.4 MB for the recovery partition (Windows RE).
- 15.29 GB for our data partition "Data (D:)".
That's 49.07 GB of used disk space on the MSI laptop we backed up via Acronis.
Click "Finish".
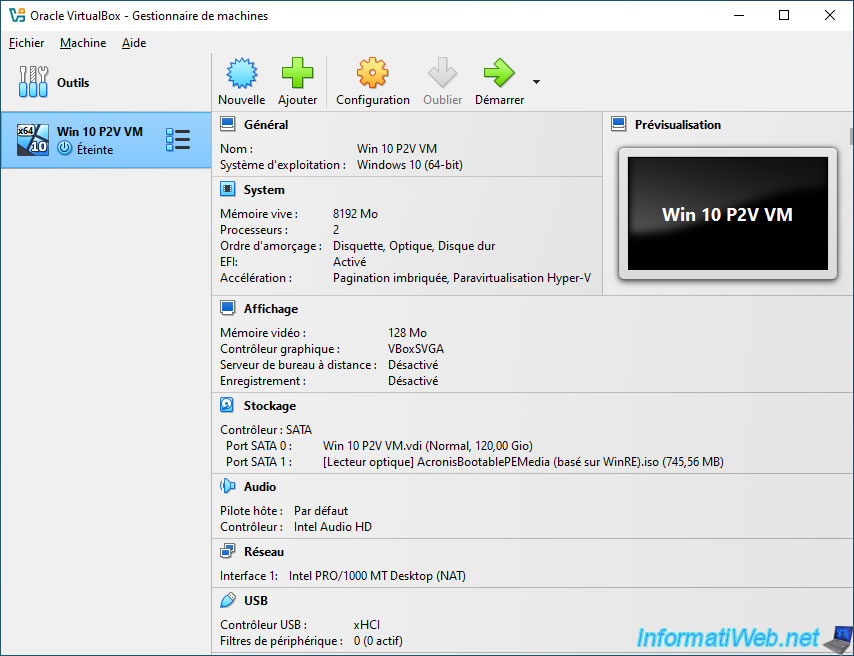
Your new virtual machine (in our case "Win 10 P2V VM") appears in VirtualBox.
5. Connect your external hard drive to your virtual machine (VM)
To be able to restore your backup in your virtual machine (to obtain a virtual machine corresponding to the physical PC previously backed up), first connect your external hard drive to the computer where VirtualBox is installed.
Preferably, connect your external hard drive to a USB 3.0 (or 3.1) port on this computer so that data restoration is faster.
In our case, it is our external hard drive "WD My Passport".
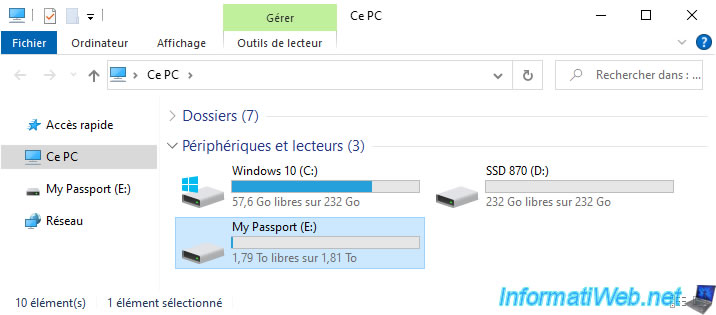
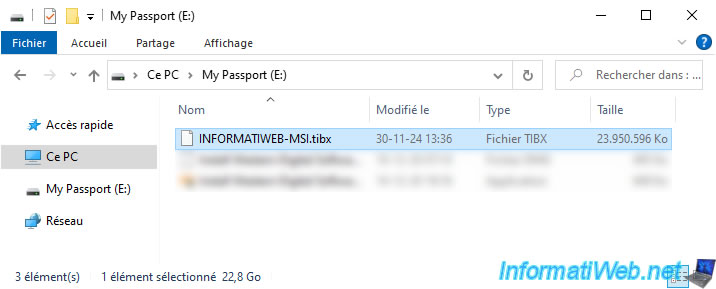
As you can see, in our case we find our backup file "INFORMATIWEB-MSI.tibx".
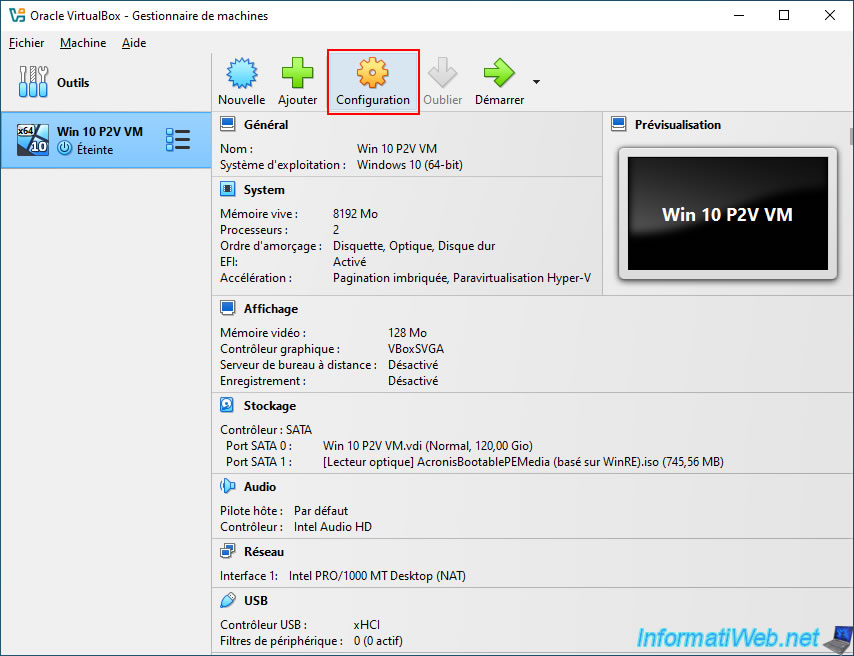
To make this external hard drive visible from your virtual machine, you must configure your virtual machine so that VirtualBox automatically connects it to your virtual machine when it starts.
To do this, click on the "Configuration" button of your virtual machine.
In the "USB" section, click on the "+" icon on the right and click on the name of your external hard drive.
In our case, we have added our external hard drive "Western Digital My Passport 2627".
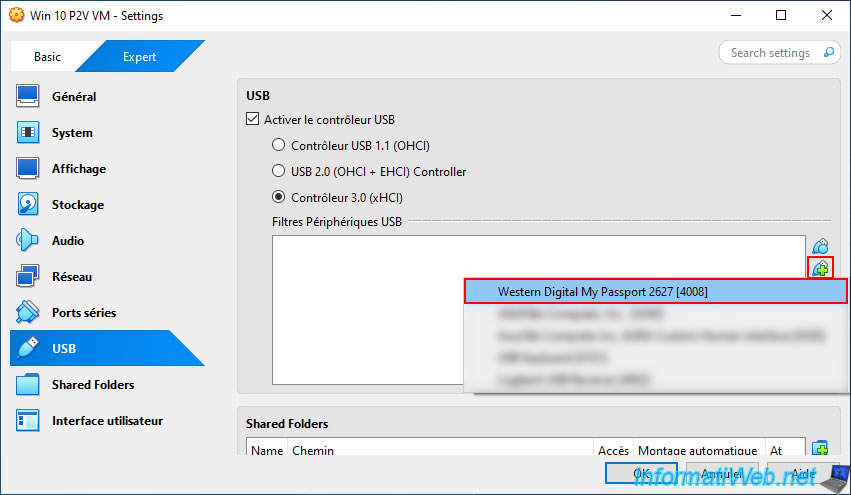
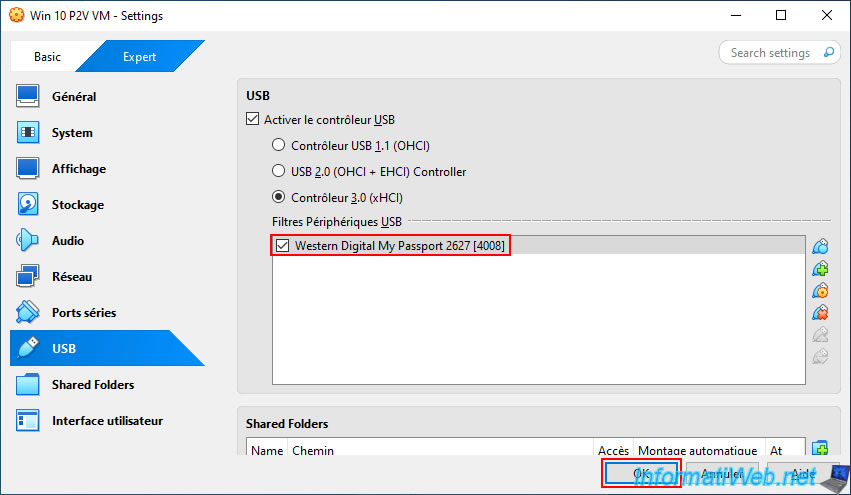
Your USB external hard drive appears in the list "Western Digital My Passport 2627".
Click OK to save this change.
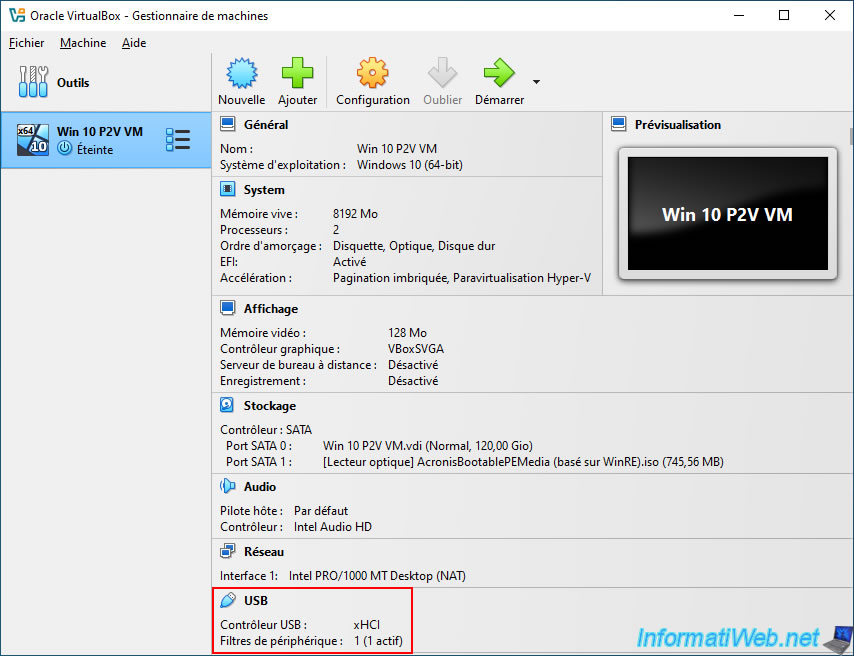
In the "USB" section of your virtual machine, you will see that a device filter is active.
6. Restore physical PC disk to your VirtualBox VM via Acronis Cyber Protect Home Office (True Image)
6.1. Initialize your VM's virtual hard disk before restoring via Acronis
Start your virtual machine created on VirtualBox by clicking on the "Start" button.
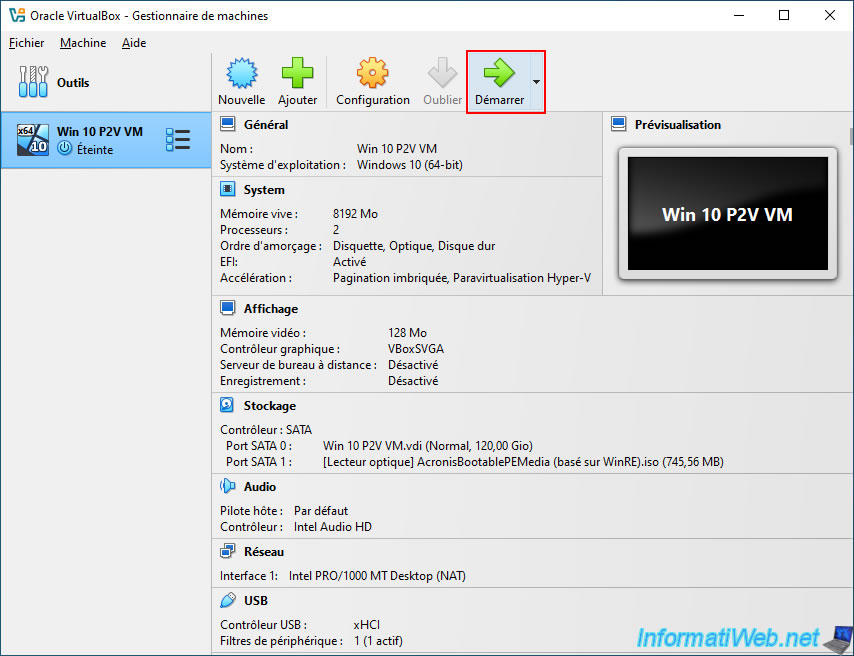
Since your virtual machine's virtual hard disk is blank at the moment, your virtual machine will necessarily boot from the Acronis rescue media that you inserted into your virtual machine's CD/DVD drive.
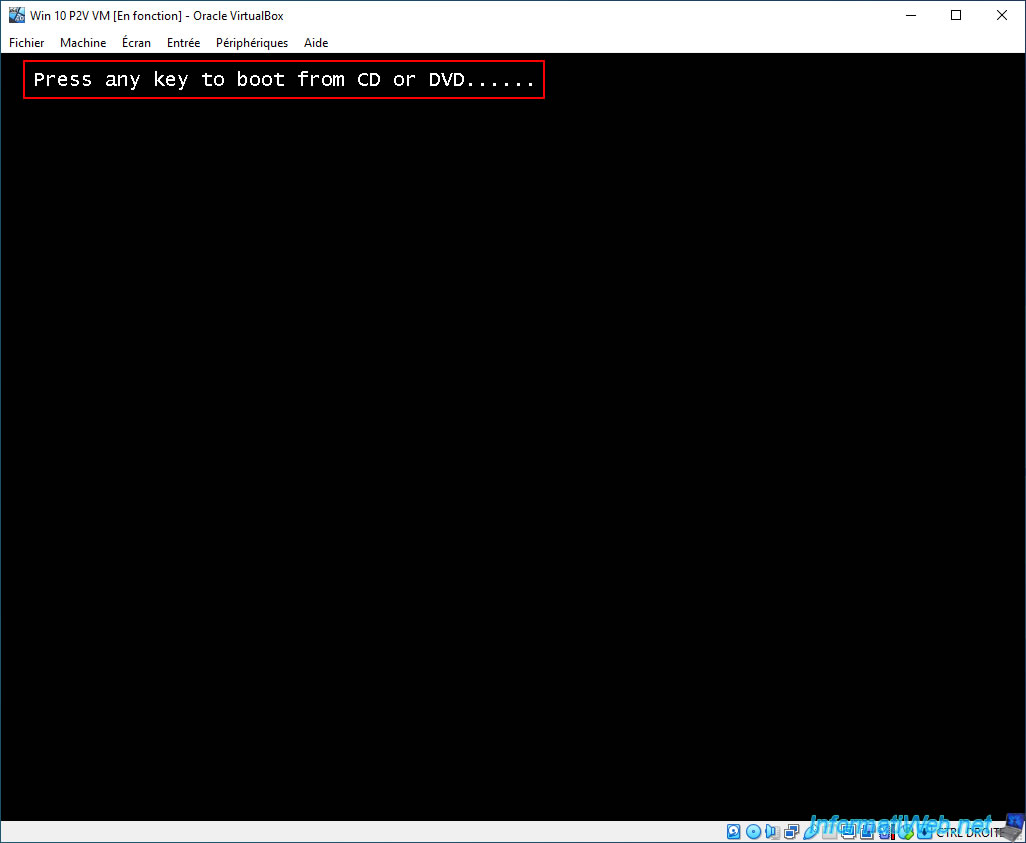
Click once on your virtual machine's screen to act in your virtual machine, then press Enter when the message "Press any key to boot from CD or DVD" appears.
The VirtualBox logo appears with a loading icon (if the VM has started in UEFI mode).
Otherwise, the Windows logo will appear.
Warning : since the size of the backed up physical hard disk is completely different and much larger than the size of the virtual hard disk of your virtual machine, you will not be able to restore the entire disk from your backup.
If you try to do so, you will notice that some partitions (including the one where Windows will be) will be directly full and there will be no free bytes left on them. This will prevent Windows from working in your virtual machine.
You will find an overview of this problem at the end of this tutorial (in step 12) just for reference.
Important : to restore the data from the physical computer to your virtual machine with the possibility to resize the partitions to be restored, you will need to restore all the backed up partitions (including the "track 0" which corresponds to the MBR of the disk needed for Windows to boot) and NOT the entire disk.
This means initializing the virtual hard disk with the right partition type (GPT or MBR) before starting the data restoration from your Acronis backup.
In short, nothing complicated here. You just need to restore all the desired partitions (i.e., select the partitions to restore from the backup) instead of just restoring the entire disk (by selecting the entire disk directly).
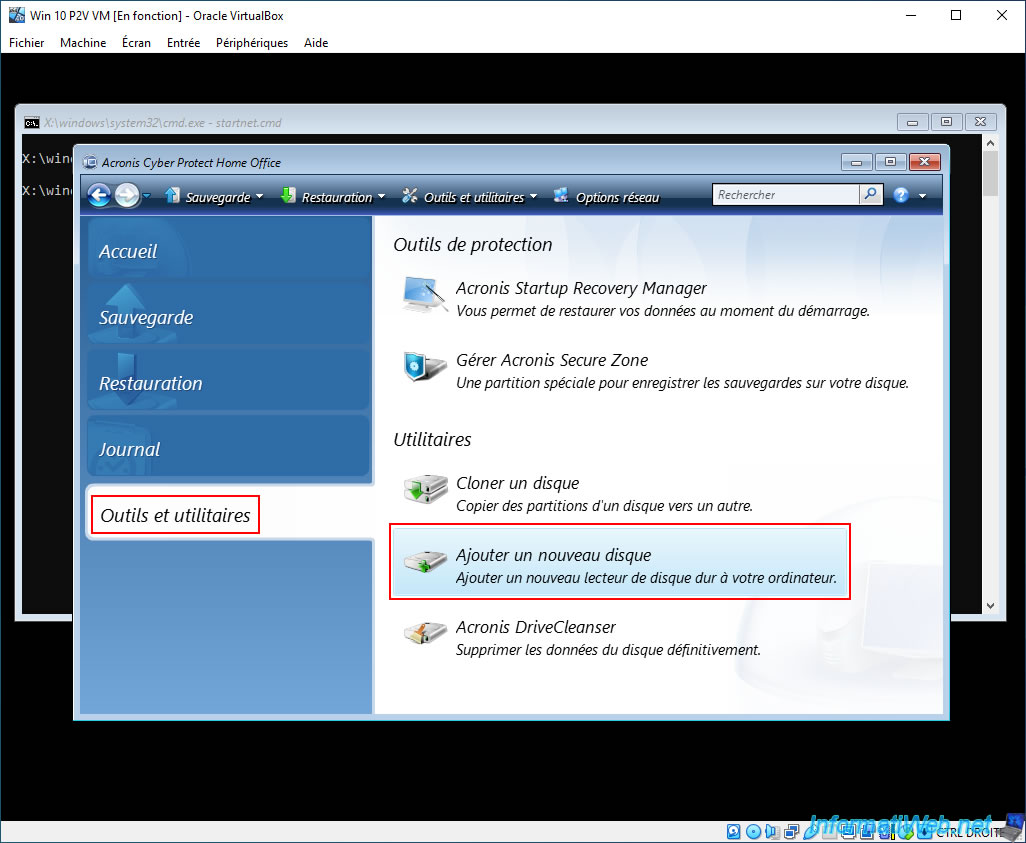
To start, go to the "Tools and Utilities" section of Acronis Cyber Protect Home Office (True Image) and click "Add New Disk".
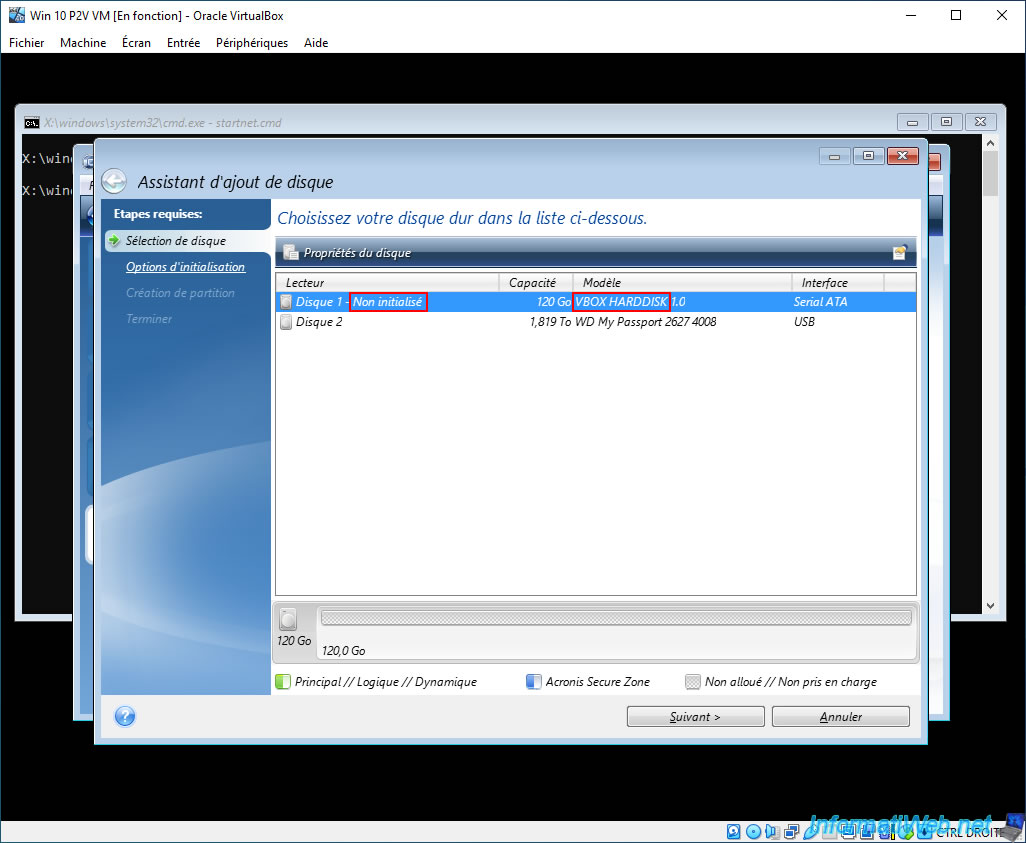
Select the disk whose model is "VBOX HARDDISK ..." (which corresponds to the virtual hard disk (.vdi) of your virtual machine) and click "Next".
Note: you can also see that, by default, the virtual hard disk of your virtual machine is "Not initialized".
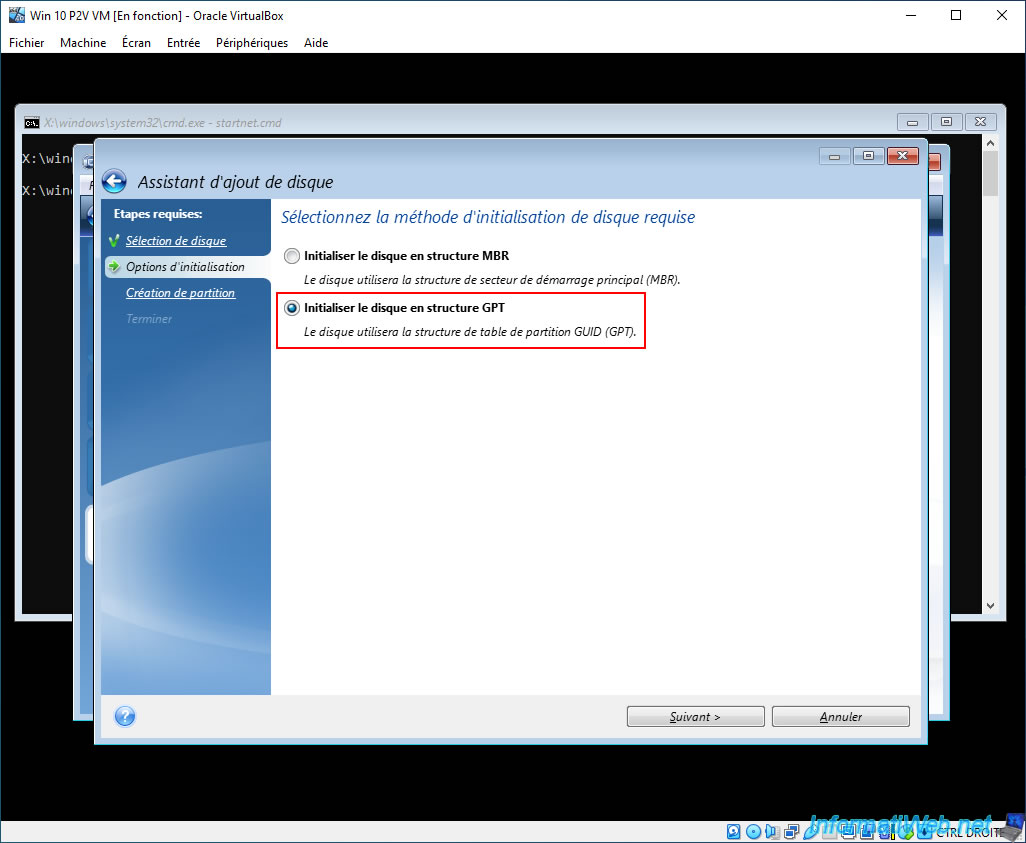
Select the option corresponding to the type of partition to create.
In step "1. Physical PC to virtualize" of this tutorial, we showed you how to know the type of partition to select here.
In our case, we saw that our physical hard drive (in our MSI laptop) used a "GPT" partition type.
Which is normal since Windows 10 had been installed in UEFI mode.
So, we selected "Initialize the disk in GPT structure", then we clicked "Next".
Warning : this choice is important, because Windows will not start in the virtual machine if you select the wrong option.
For example, saving a Windows installation performed in UEFI mode (which requires the use of the "GPT" partition type) and restoring it on a virtual hard drive initialized in MBR mode will cause a blue screen with the message "A required device isn't connected or can't be accessed - Error code: 0xc000000e".
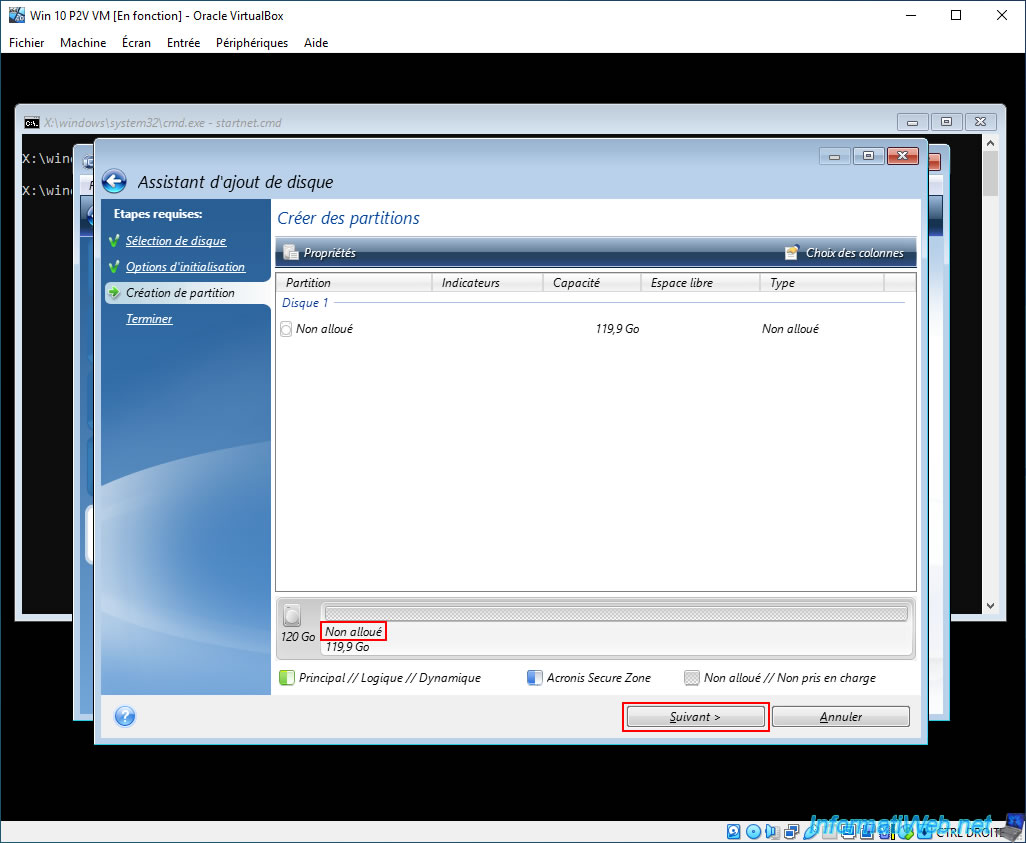
By default, there is only unallocated (unpartitioned) space on this new virtual hard disk.
Leave this unallocated space displayed and simply click "Next".
Note: when restoring partitions (which you will see later in this tutorial), you will only need to select this unallocated space as the destination for restoring each partition present in your Acronis backup.
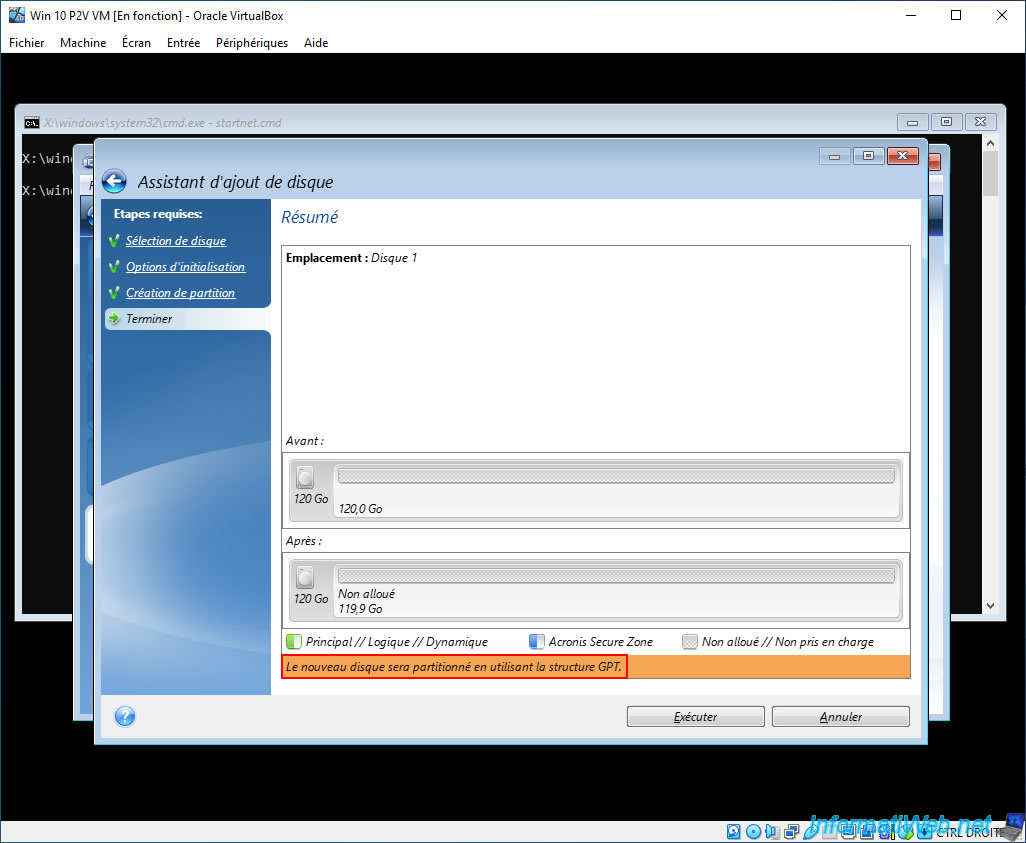
At the bottom of the window, you will see that the new disk will be partitioned using the GPT structure (or MBR, depending on the choice made at the beginning of this wizard).
Click "Done".
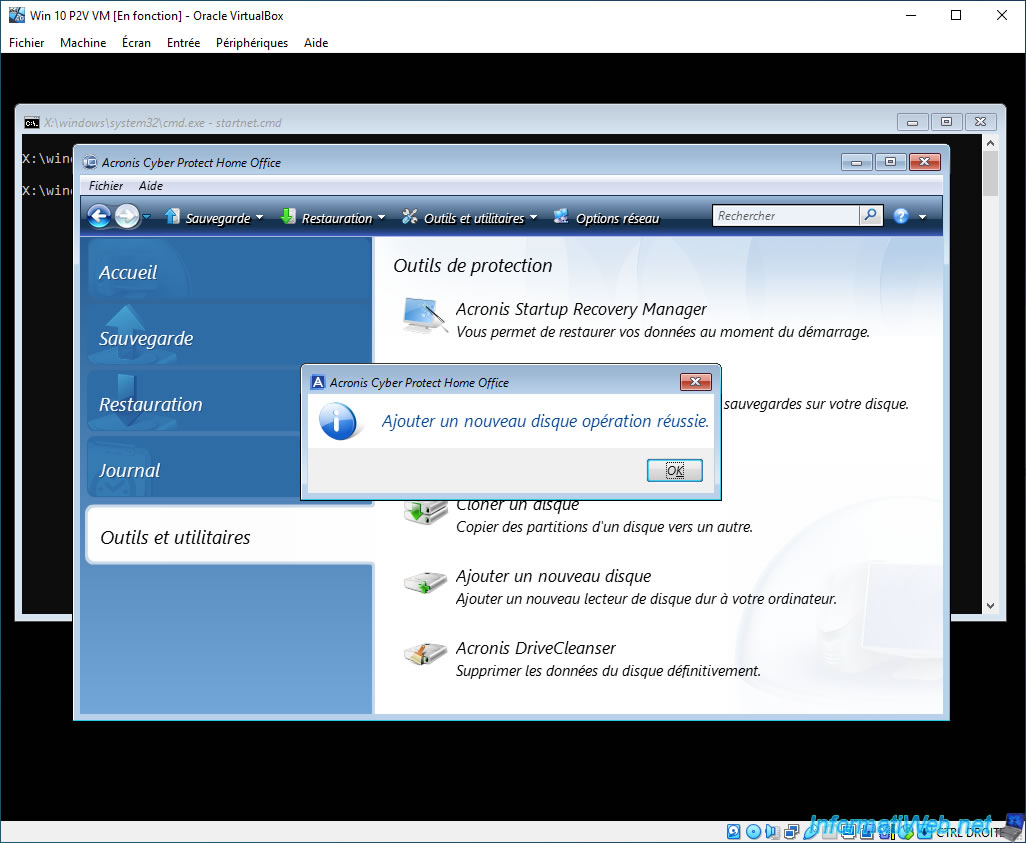
Once the (very quick) initialization is done, the message "Add new disk operation successful" will appear.
Share this tutorial
To see also
-
Backup 6/16/2025
Acronis True Image - Backing up your PC to a Synology NAS
-
Backup 8/24/2026
Acronis True Image - Partition a new disk
-
Backup 2/23/2026
Acronis True Image - Rescue Media - Secure disk erase
-
Backup 8/7/2025
Acronis True Image - Search for files in a Cloud backup
No comment