Virtualize a physical PC to VirtualBox (P2V) using Acronis True Image (Cyber Protect Home Office) and Acronis Universal Restore
- Backup
- Acronis True Image, Acronis Universal Restore
- 07 September 2026 at 13:50 UTC
-

- 3/8
6.2. Restore physical PC partitions from your Acronis backup
Now that your virtual machine's virtual hard disk is initialized with the correct partition type (partition table), go to the "Home" section of Acronis Cyber Protect Home Office (True Image) and click the "My Disks" link of the "Restore" option.
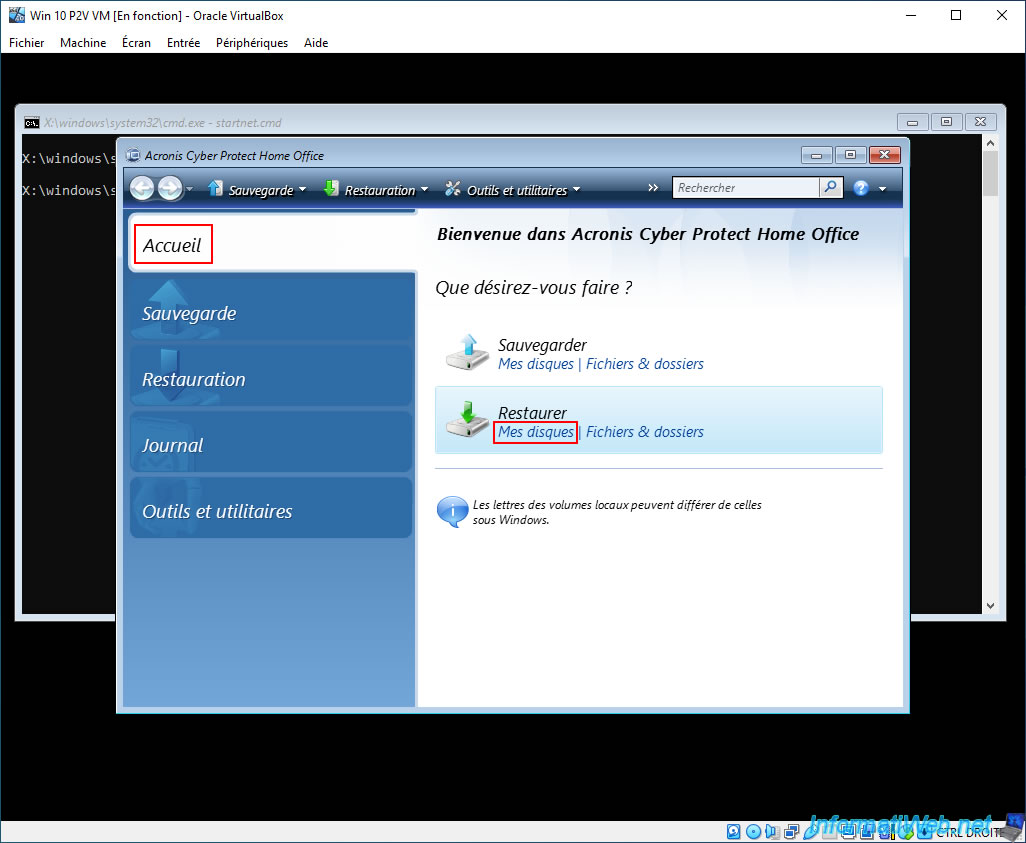
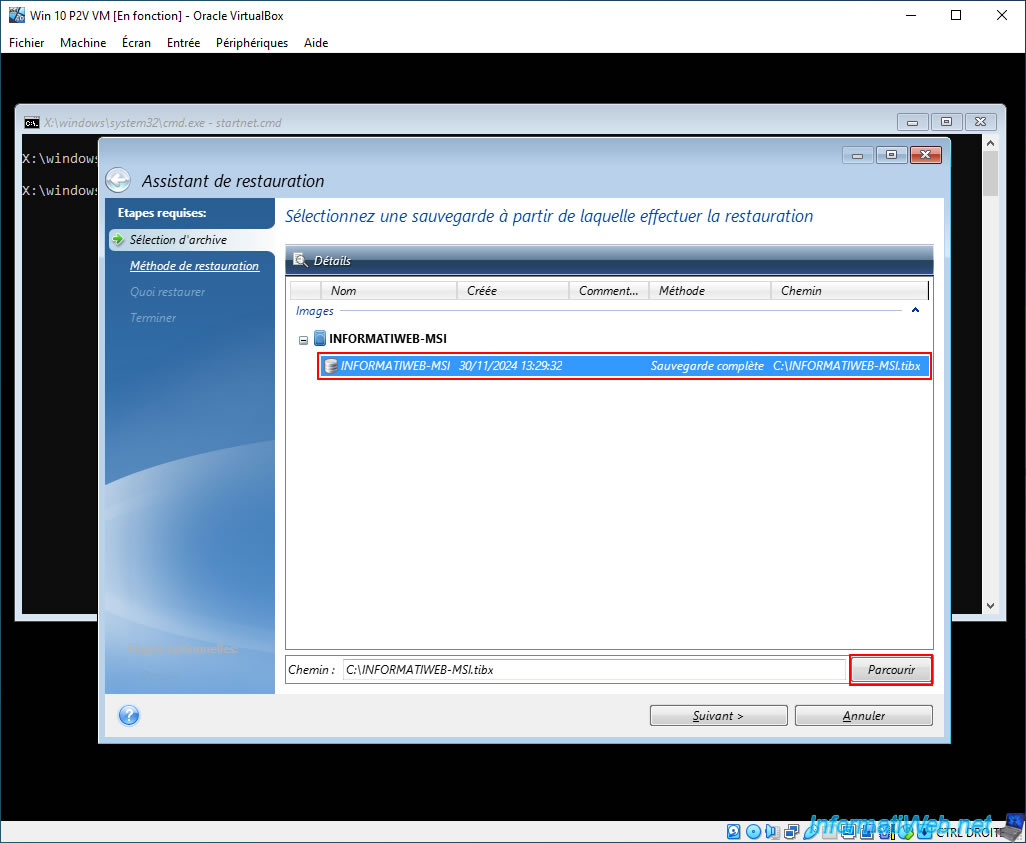
In our case, the Acronis Cyber Protect Home Office (True Image) Restore Wizard automatically detected the ".tibx" backup file present on our external hard drive.
However, if this is not your case, then click on the "Browse" button.
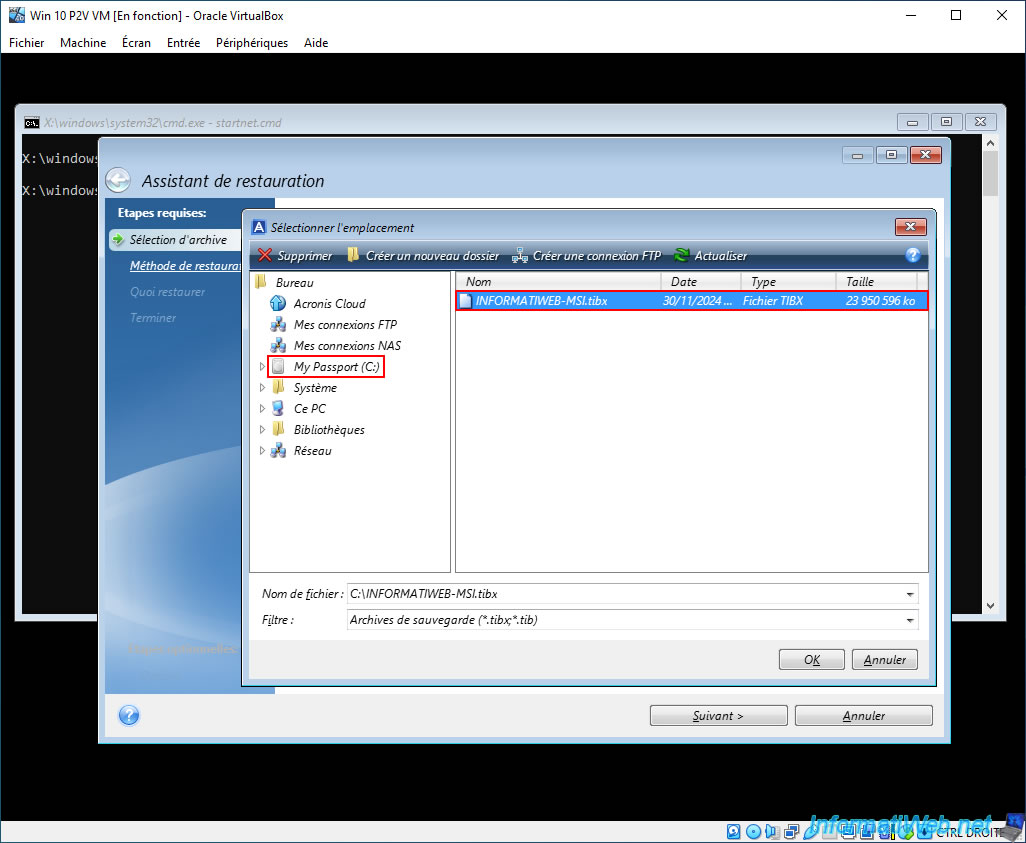
In the "Select Location" window that appears:
- select your USB external hard drive (in our case: My Passport) connected to your virtual machine.
- select the backup file ".tibx" located there.
In our case: INFORMATIWEB-MSI.tibx. - click OK.
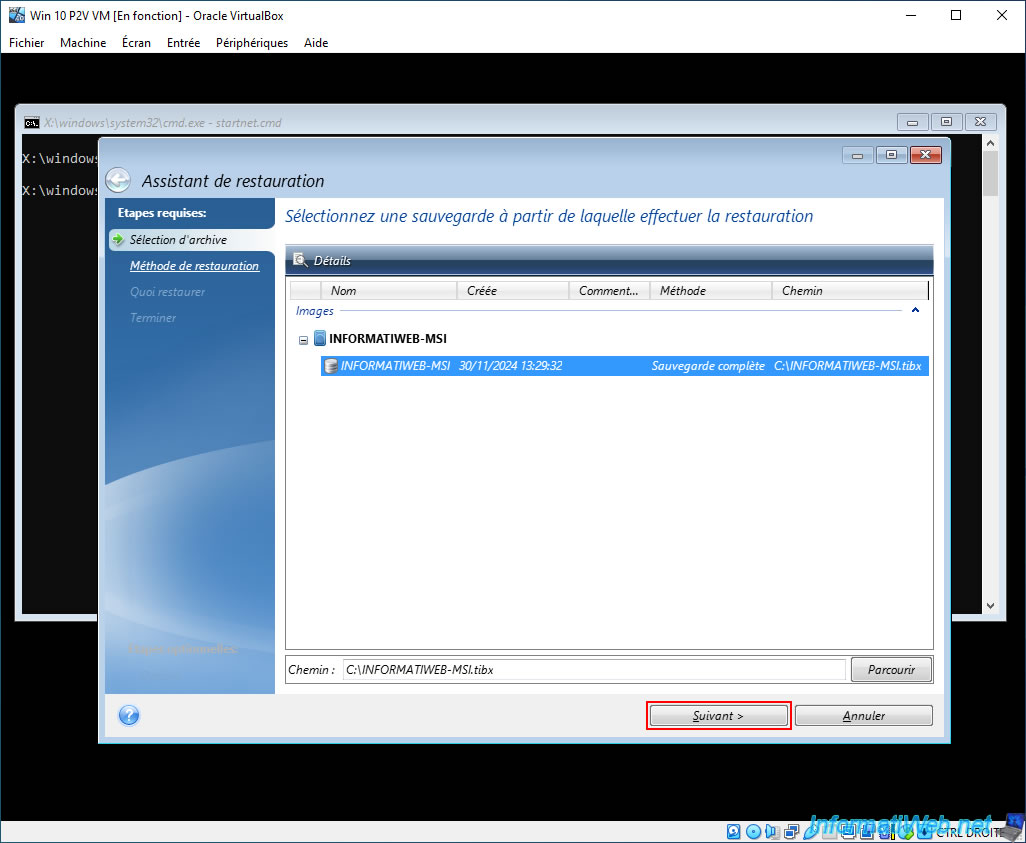
Your Acronis backup appears in the list.
Click "Next".
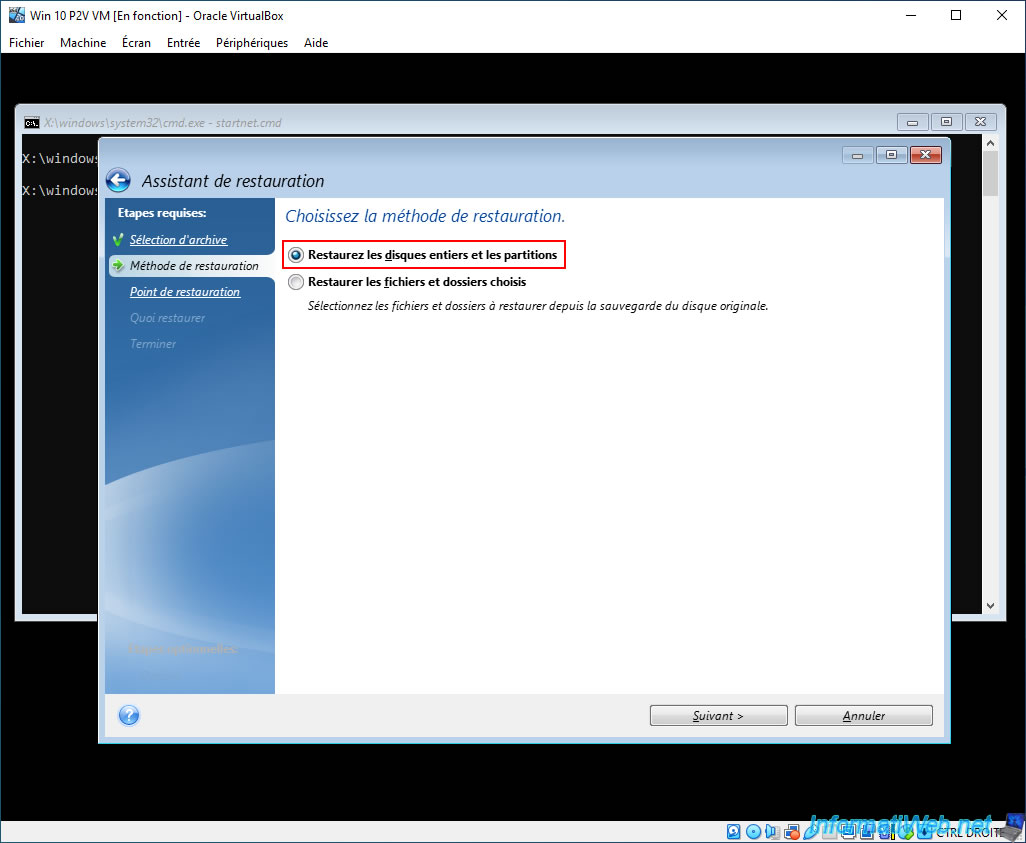
Choose the restore method "Restore entire disks and partitions" and click "Next".
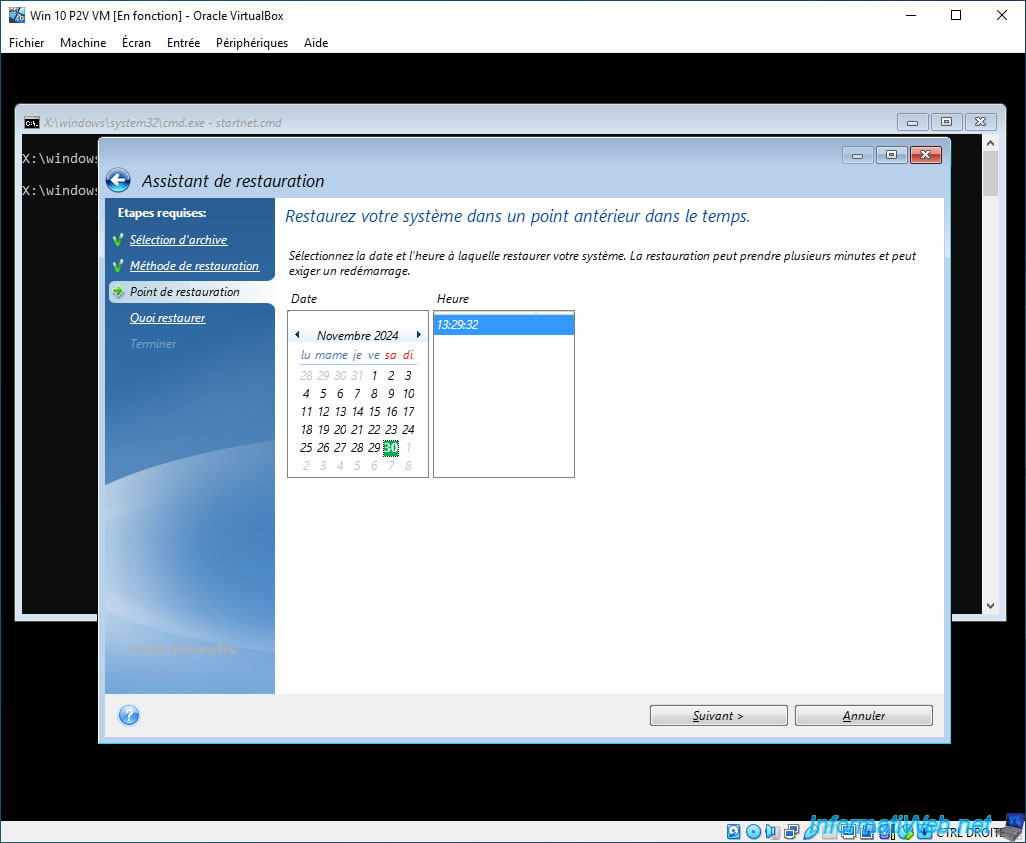
Select the date/time you want to return to for this virtual machine.
By default, there is only one date if you have backed up your physical PC once to the previously selected ".tibx" backup file.
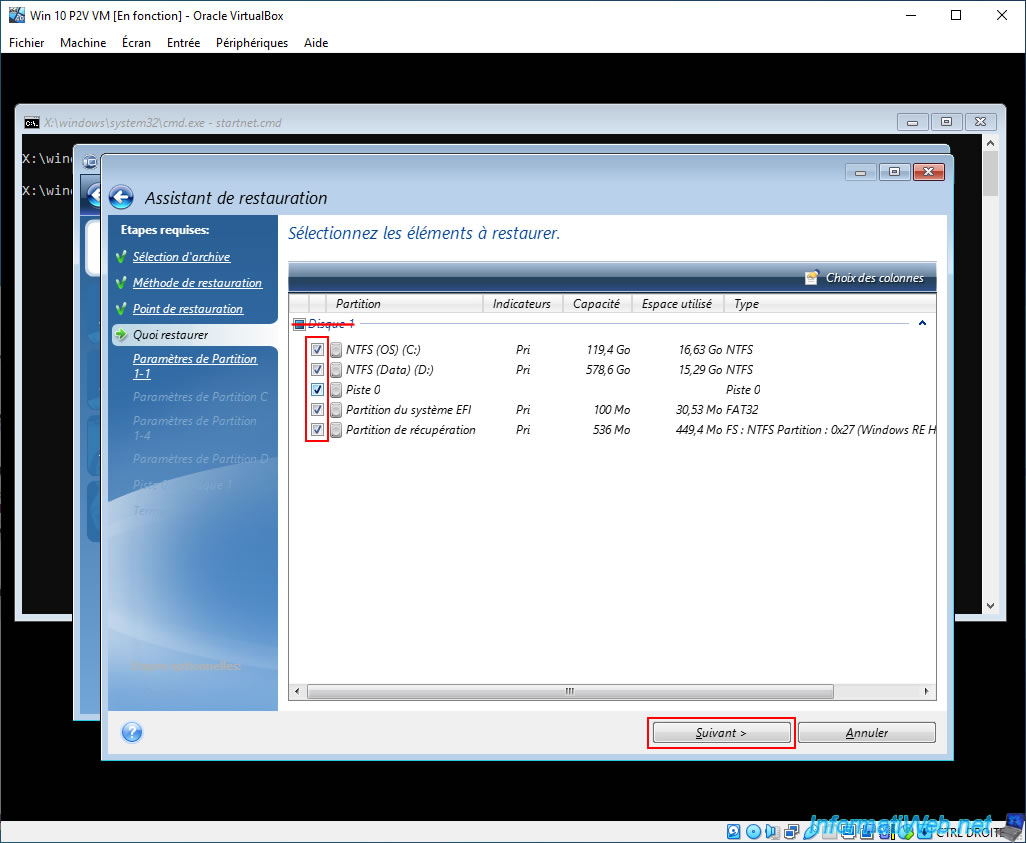
Warning : do not select the entire disk for restoration, otherwise the restoration wizard will resize the partitions itself.
This is problematic when the size of the backed up disk is much larger than the size of the virtual hard disk on which the data will be restored.
Which is the case here. In short, a restored partition (usually the one where Windows is installed) will be completely full (because the size of this partition will be much too small). This will prevent Windows and your VM from working.
In short, uncheck the box of the disk present in this backup and simply check all the partitions that are present in this disk.
Check the boxes in the order of preference, so that it is easier for you to follow with our tutorial.
Important : for Windows to work, it is important that all its partitions, as well as "Track 0" are restored to the virtual hard disk of your virtual machine.
In our case, we should therefore restore the partition "NTFS (OS) (C:)" where Windows is located, but also the system partitions "EFI System Partition" and "Recovery Partition" (Windows RE), as well as the "Track 0" (which allows to restore information at the beginning of the virtual hard disk that will tell the VM where Windows is located on this virtual hard disk).
In our case, we have restored all the partitions.
So you should see that the box for "Disk 1" is completely blue instead of having a blue "V".
Then, click "Next".
Since you have selected only the partitions and "Track 0", the restore wizard will allow you to select the destination and size of each partition to restore on your virtual machine's virtual hard disk.
Which would not be possible if you had simply checked the "Disk 0" box.
For each partition, you will simply need to click on the "New location" link (located at the top left).
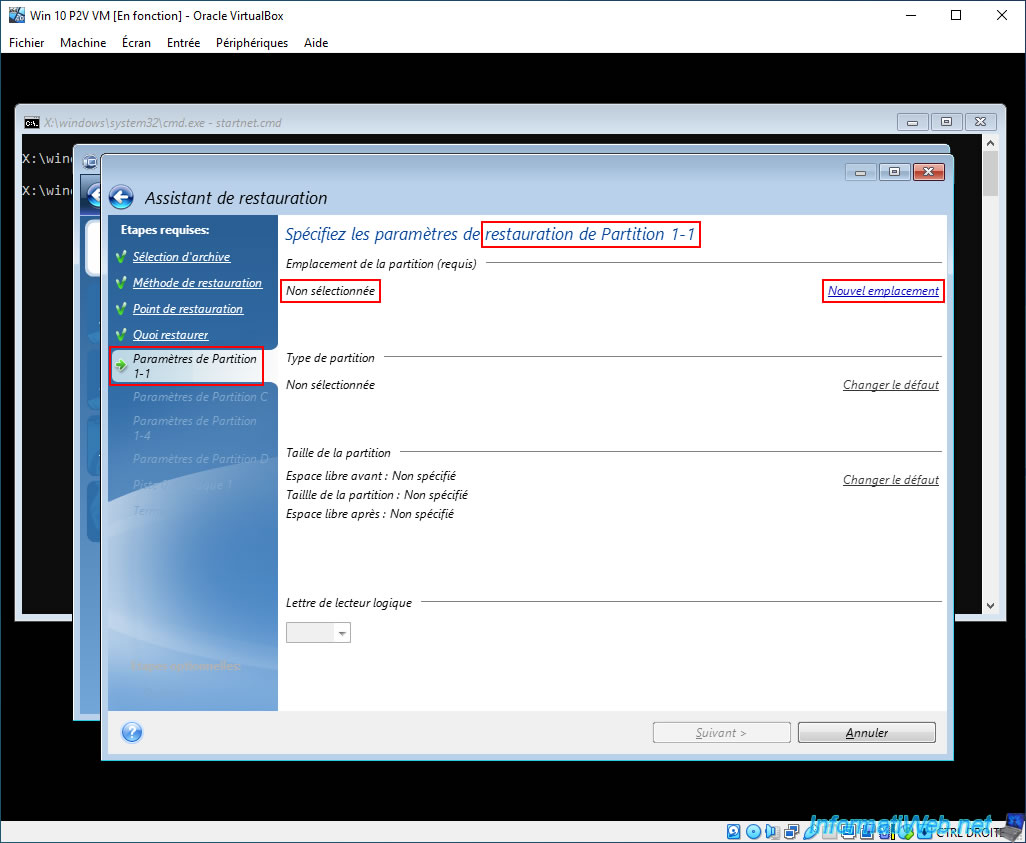
For each partition, select the "Unallocated" space of disk 0 each time and click "Accept".
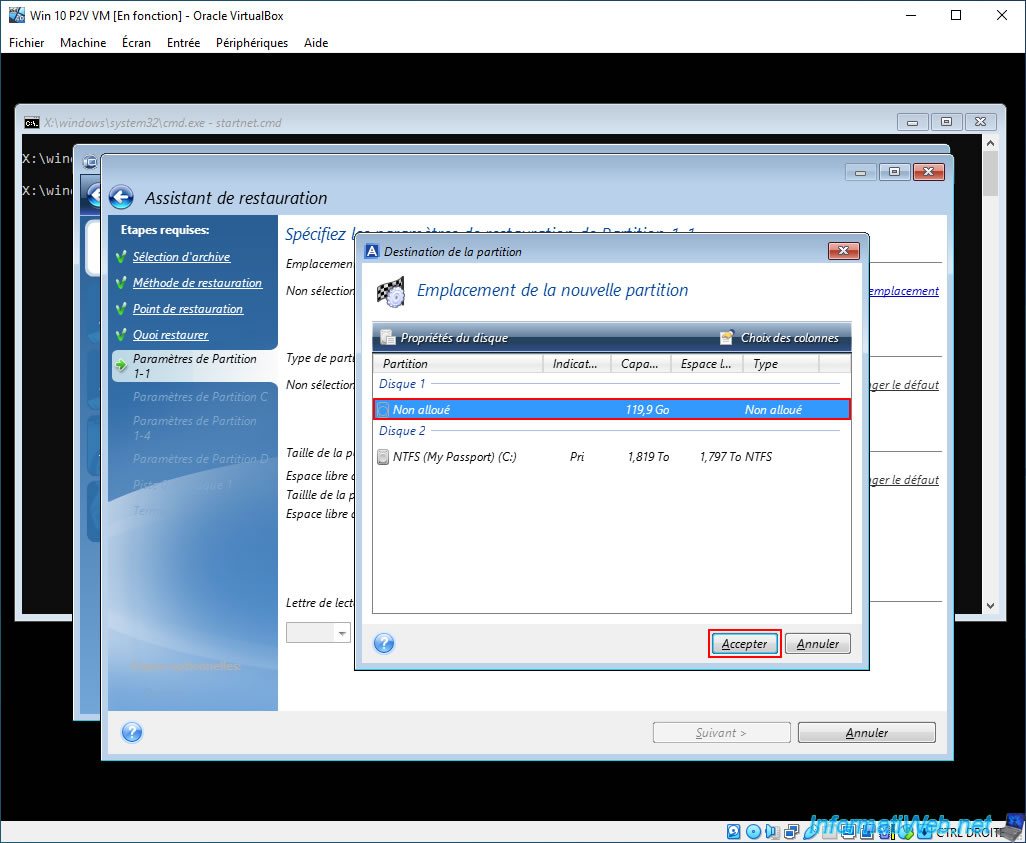
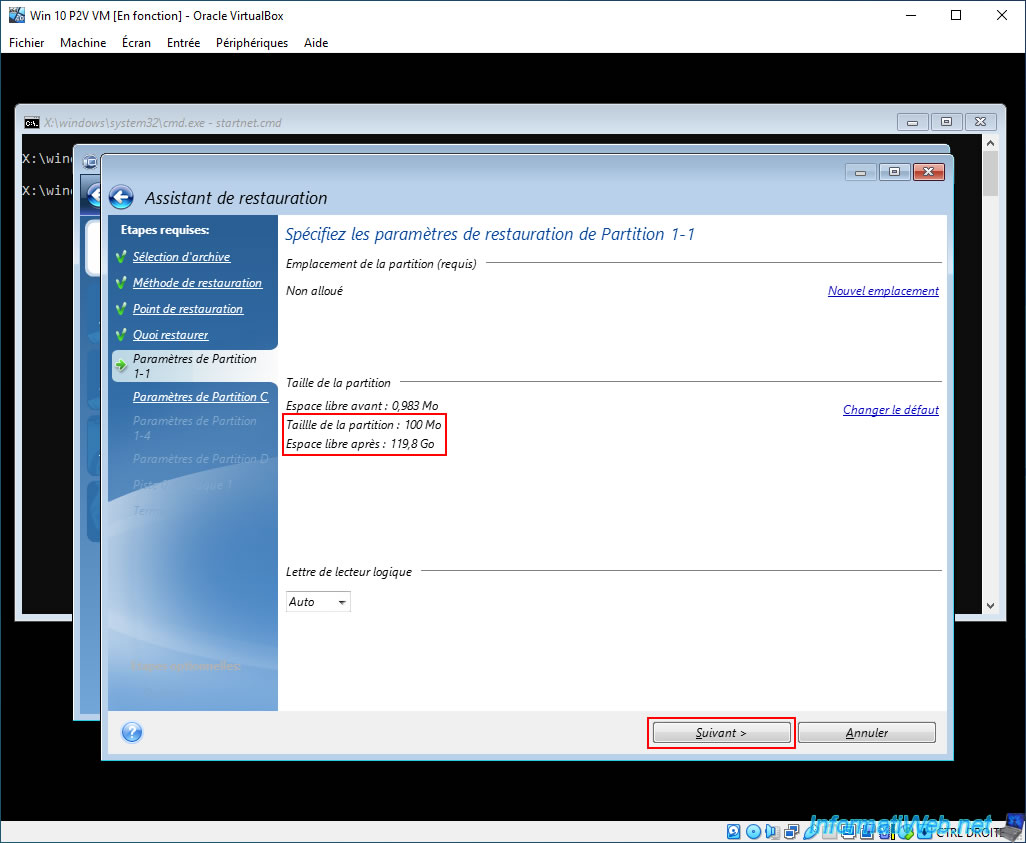
As you can see, the 1st partition to restore (Partition 1-1) is the 100 MB partition of Windows 10.
In other words, the "EFI System Partition" which has a fixed size of 100 MB and is only present when Windows 10 is installed in UEFI mode.
For this partition, you can see that Acronis already indicates that the restored partition will be 100 MB in size and that there will therefore be many gigabytes (GB) available on your virtual hard disk.
So you can directly click on "Next".
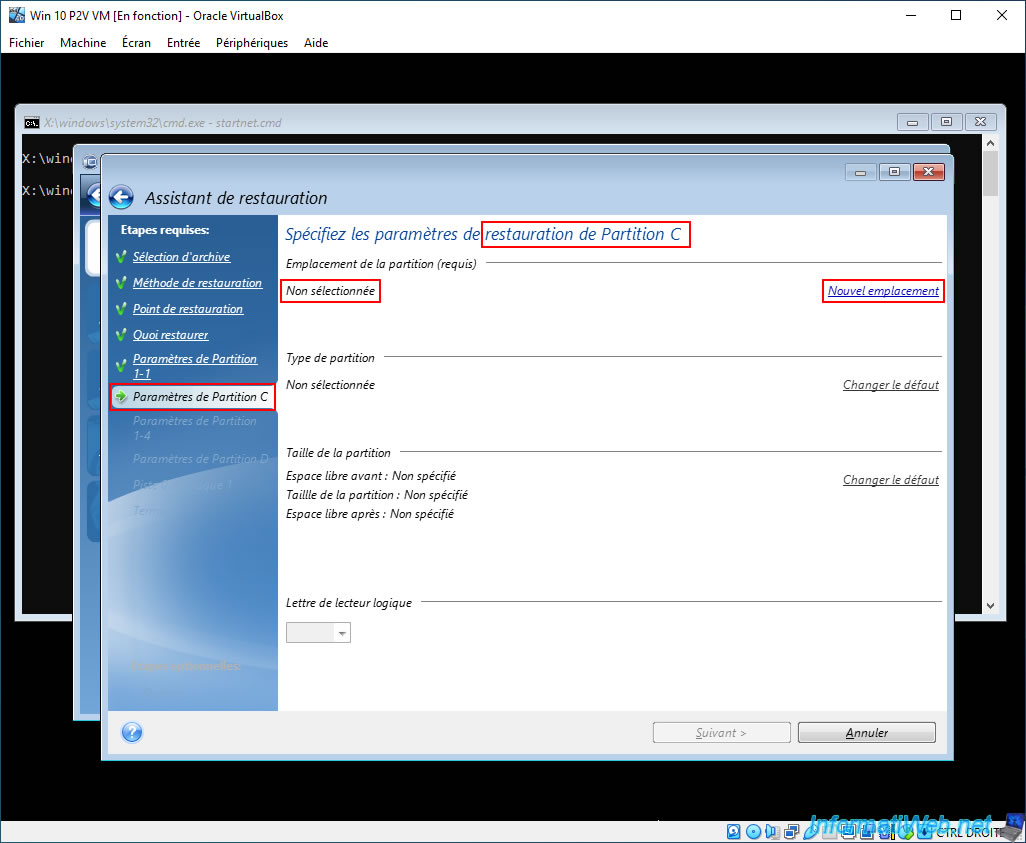
For the 2nd partition to restore (Partition C), click the "New location" link again.
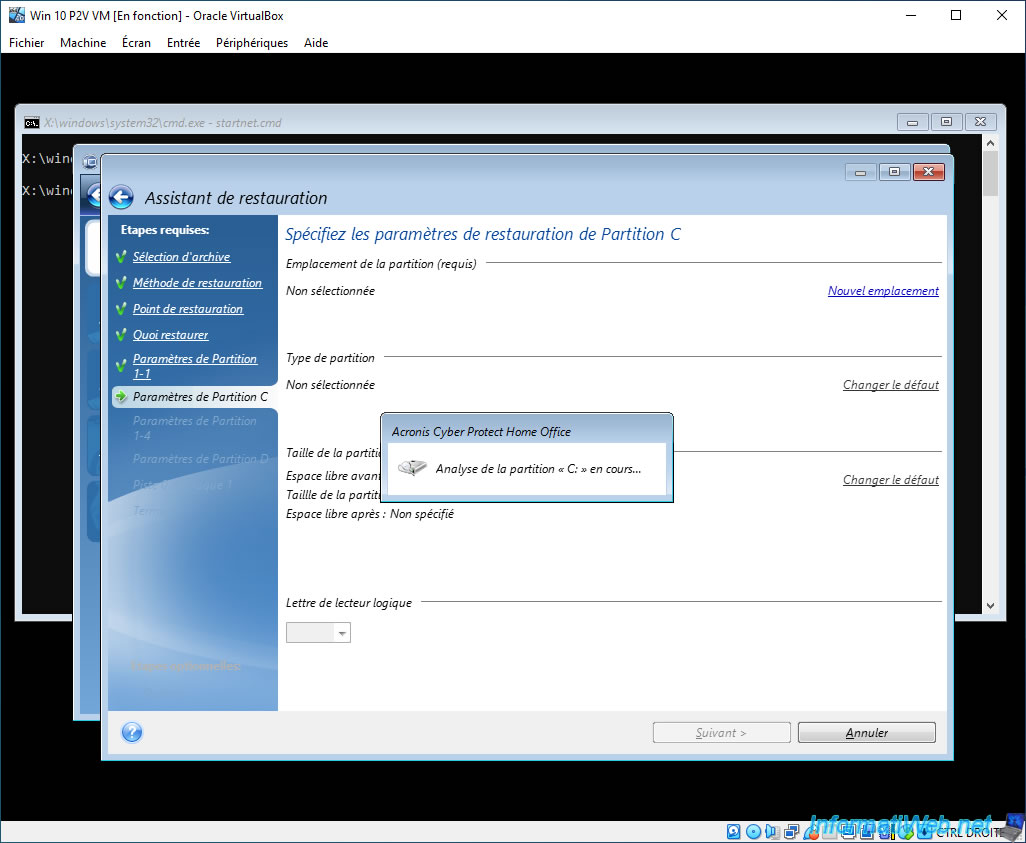
Please wait a little while Acronis scans this "C:" partition.
Plain Text
Analyzing partition "C:"...
Then, again just select the "Unallocated" space of Disk 1 and click "Accept".
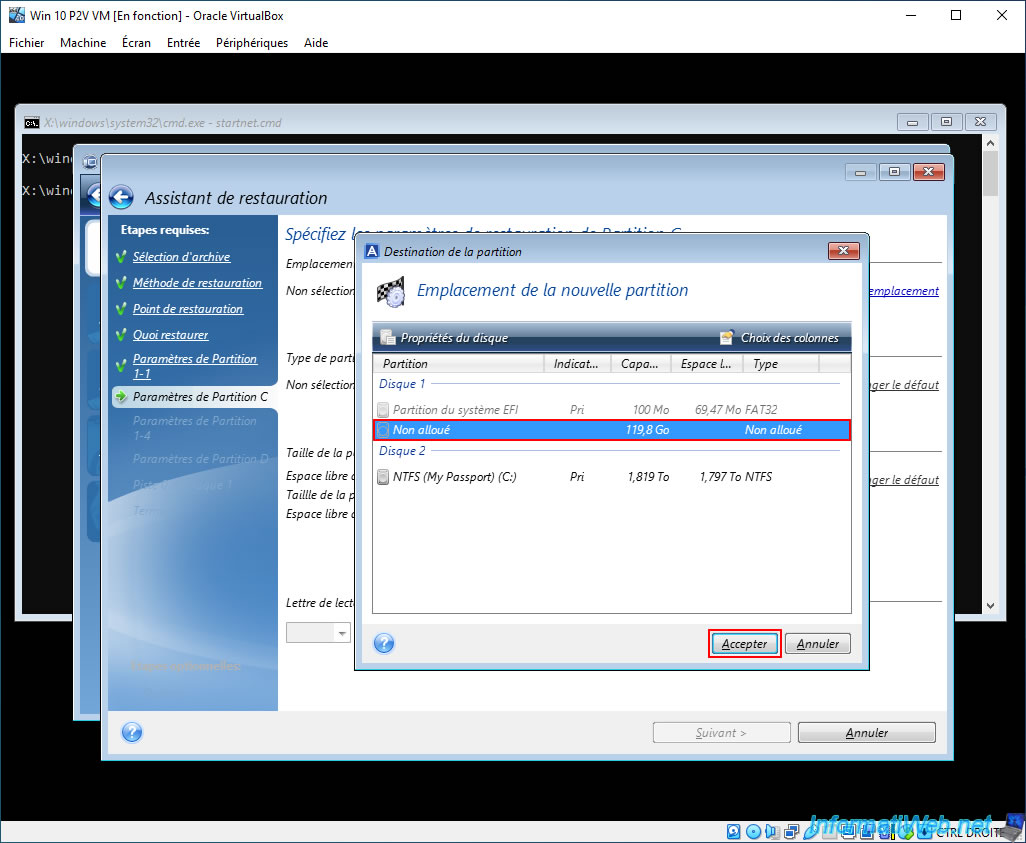
Warning : Since Acronis keeps the size of the source partitions of your backup in mind, it is necessary to change the size of the large partitions to restore.
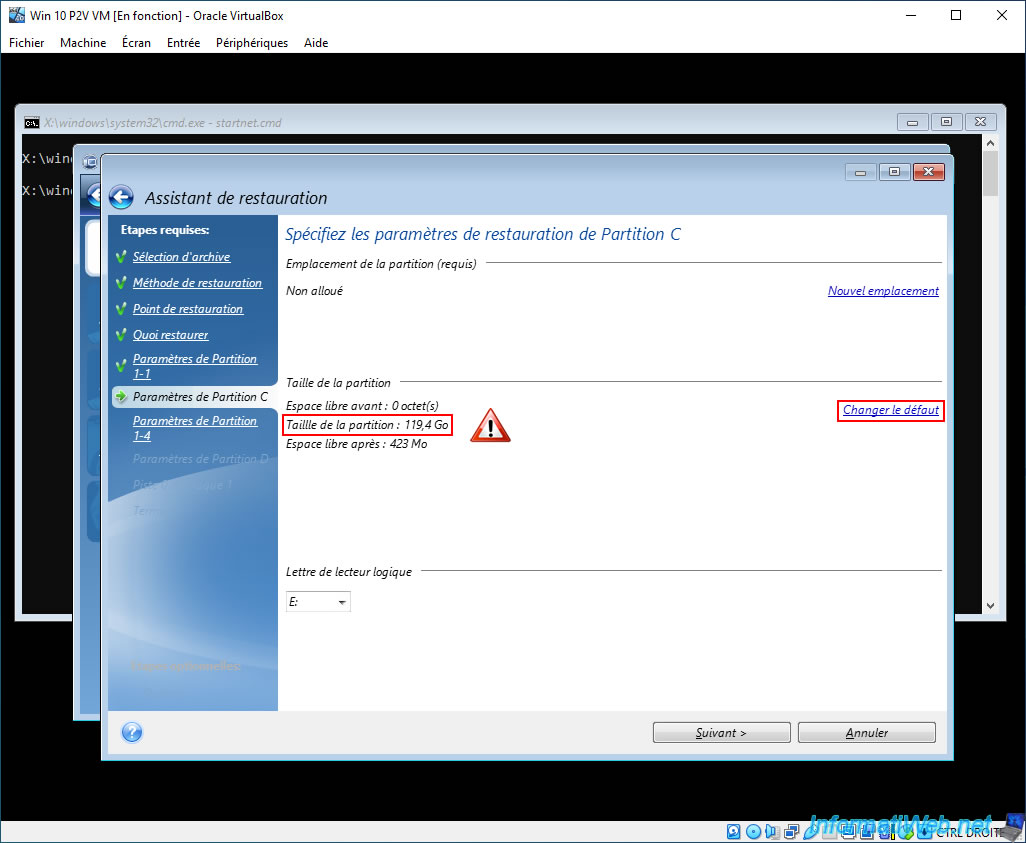
In our case, Acronis tries to restore this "Partition C" with a size of 119.4 GB. Which, in our case, would leave only 423 MB free on our virtual hard disk. Which is clearly insufficient to be able to restore the other partitions to restore from our backup.
For this "Partition C", click on "Change default".
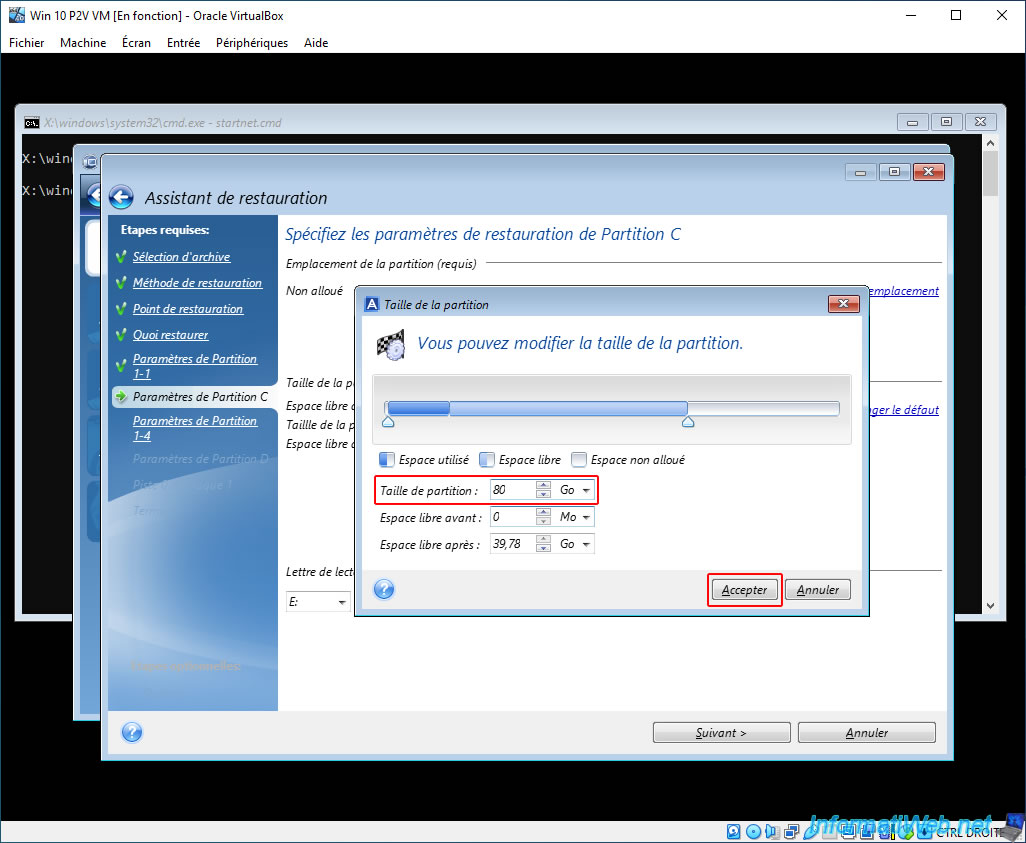
Specify the new desired size for this partition and click "Accept".
In our case, we will restore this "Partition C" with a size of 80 GB in our virtual hard disk.
Note: as a reminder, in our case, there was only about 33 GB of disk space used on this partition.
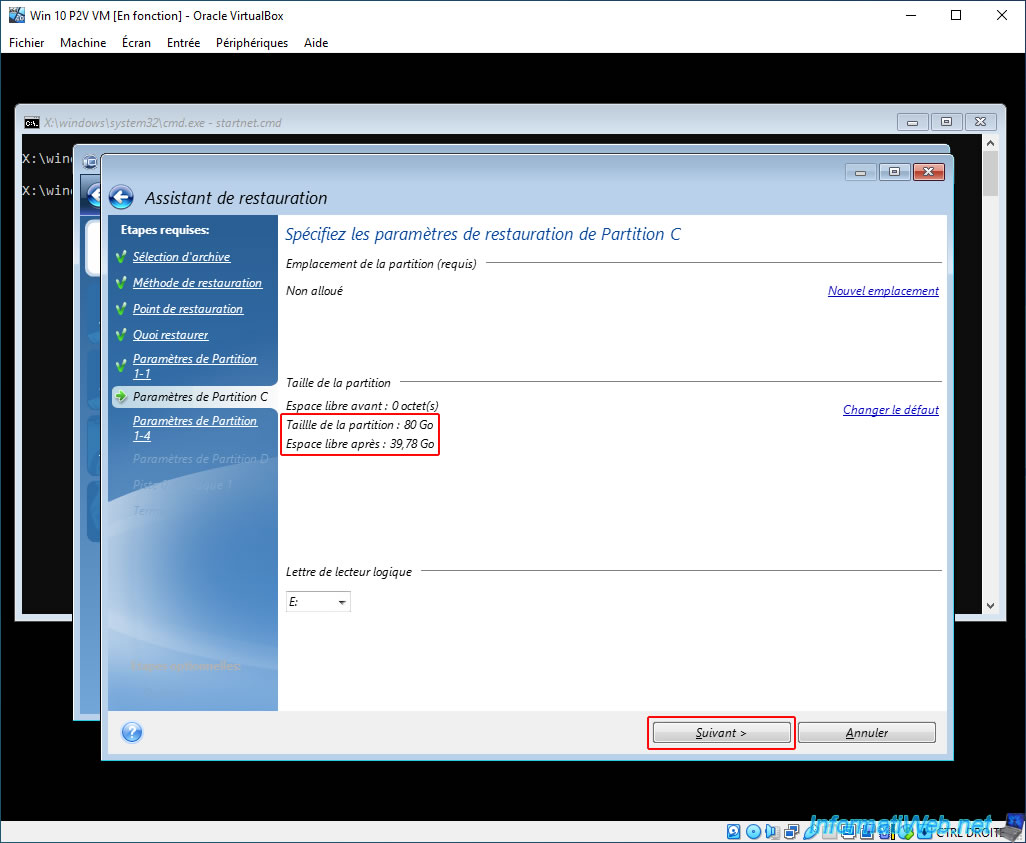
Now, we can see that Acronis will restore our "Partition C" with a size of 80 GB.
Which will leave, in our case, 39.78 GB of free disk space on our virtual hard drive for now.
Click "Next".
Share this tutorial
To see also
-
Backup 6/9/2025
Acronis True Image - Backing up your PC to a FTP server
-
Backup 8/11/2025
Acronis True Image - Create Acronis Survival Kit media
-
Backup 8/10/2026
Acronis True Image - Enable recovery option
-
Backup 3/30/2026
Acronis True Image - Rescue Media - Check network configuration
No comment