Access Acronis logs, get detailed information, ... with third-party tools for Acronis True Image (Cyber Protect Home Office)
- Backup
- Acronis True Image
- 29 June 2026 at 16:17 UTC
-

- 4/5
3.4.2. Create Acronis ISO via WinPE-based Media Builder based on Windows ADK
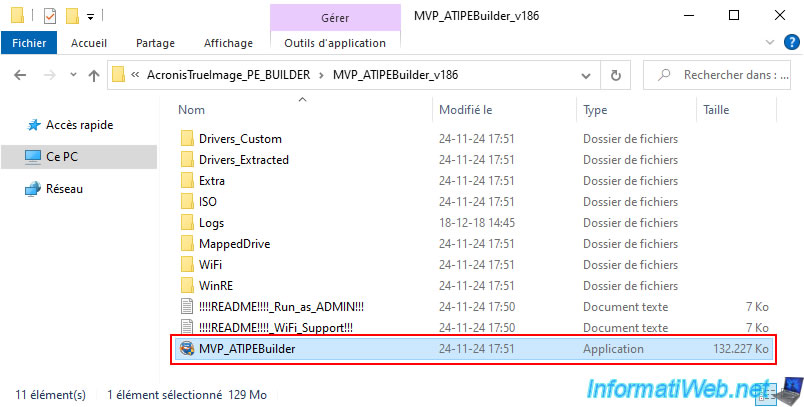
To create an Acronis ISO via this "WinPE-based Media Builder" tool using the Windows ADK, run the "MVP_ATIPEBuilder.exe" file of this tool as an administrator.
To do this, right-click "Run as administrator" on this file.
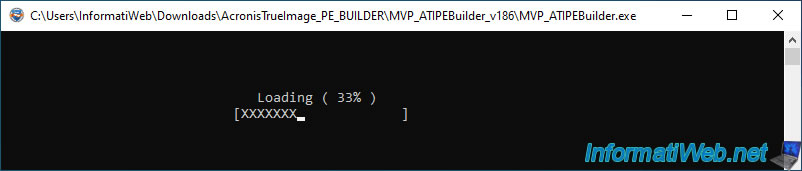
The "Loading" message will appear for a few seconds on a black background.
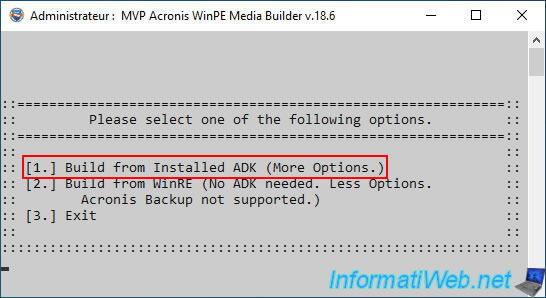
Then, the window will turn gray and resize automatically.
Choose the option "1. Build from Installed ADK (More Options)" by pressing the number "1" on your keyboard.
The "You Chose [1.] ADK Media Builder" message will appear.
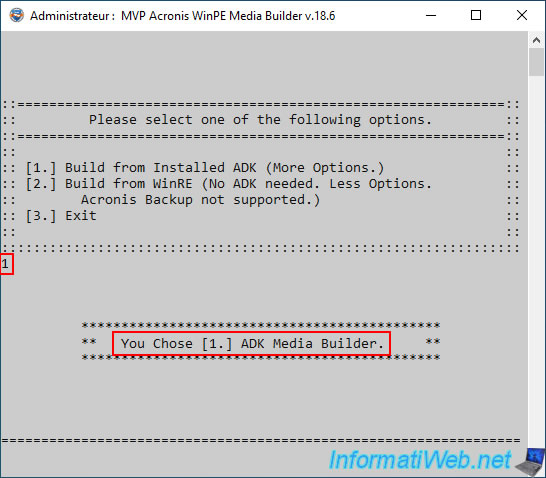
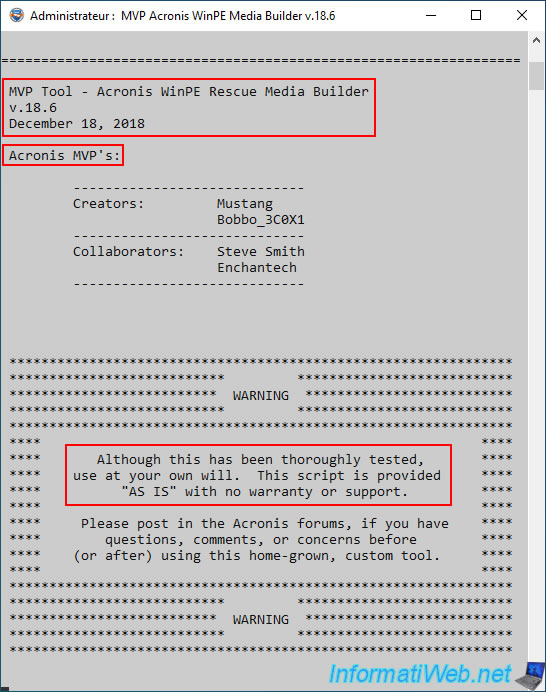
Then, you will see that this tool "MVP Tool - Acronis WinPE Rescue Media Builder" is from the end of 2018.
Which explains why it does not support recent versions of Acronis True Image or its equivalent "Acronis Cyber Protect Home Office".
On the other hand, you can see that it was created by Acronis professionals: Mustang, Bobbo_3C0X1, Steve Smith and Enchantech.
Warning : as stated here, although the tool has been tested, these authors do not take any responsibility in case of problems with it.
Which is normal.
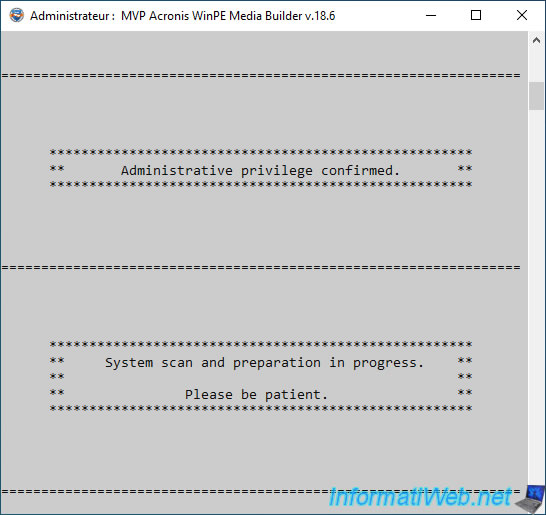
The tool checks that it has administrator rights and it scans your system to prepare some things it needs to work.
Plain Text
Administrative privilege confirmed.
System scan and preparation in progress.
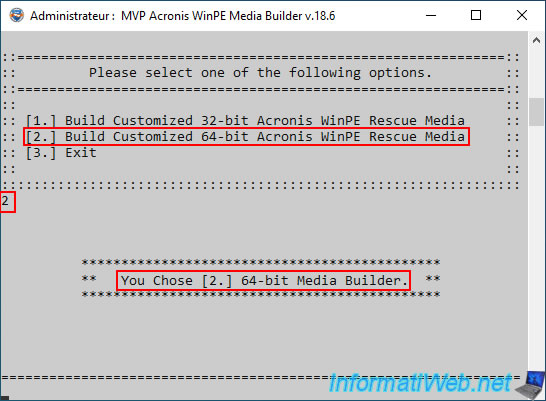
As you can see, you can create an ISO in 32-bit (x86) or 64-bit (x64).
- the 32-bit version will run on all computers, even the oldest ones (which probably have an x86 processor).
- the 64-bit version will run only on recent PCs, because it requires an x64 processor.
However, it will be more efficient than the 32-bit (x86) version.
In our case, we chose the option "[2.] Build Customized 64-bit Acronis WinPE Rescue Media" to create a 64-bit version of this ISO.
Thus, the Windows PE environment that will be used will be 64-bit (x64).
Plain Text
You Chose [2.] 64-bit Media Builder.
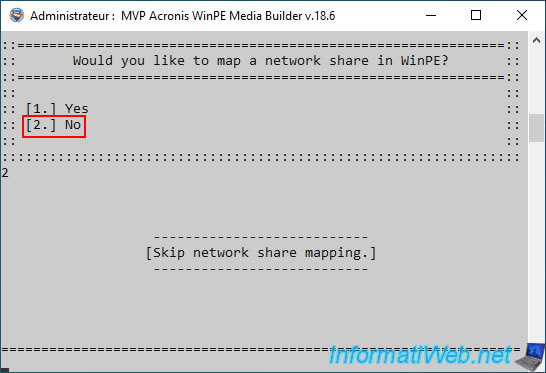
If you want, you can map a network share in the WinPE environment that will be used by this ISO.
In our case, we answered "No".
Plain Text
Would you like to map a network share in WinPE?
Skip network share mapping.
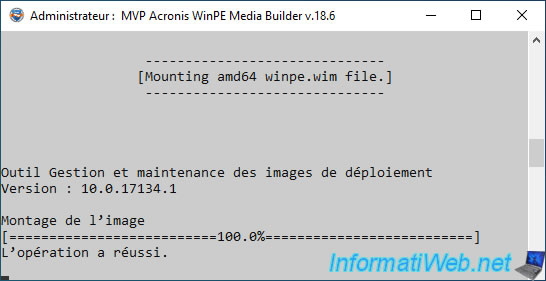
Then, this tool "MVP Acronis WinPE Media Builder" will mount the image "winpe.wim" (in the desired version, in our case "amd64") to be able to modify it.
Plain Text
Mounting amd64 winpe.wim file.

Mounting image.
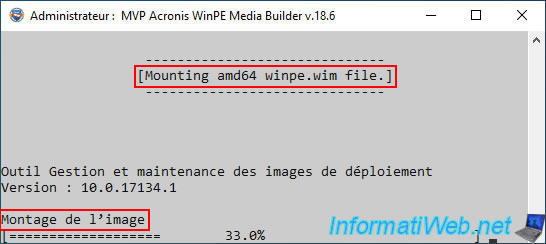
Once the mounting of this image is complete the message "The operation was successful" will appear.
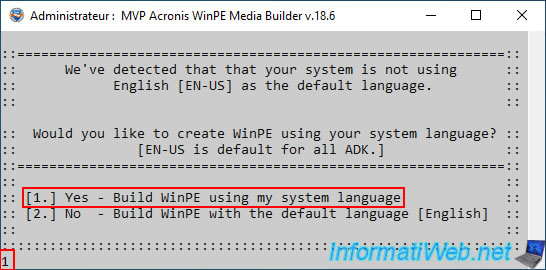
By default, the Windows PE environment would be in English (EN-US).
However, to make it in your language, you just need to choose the option "[1.] Yes - Build WinPE using my system language".
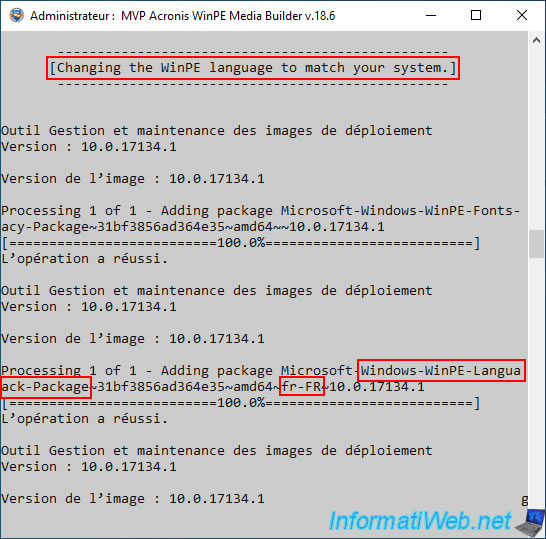
This tool will change the language of Windows PE by adding 2 packages, one of which is specific to your language and 2 of which are specific to the version of Windows ADK you have installed.
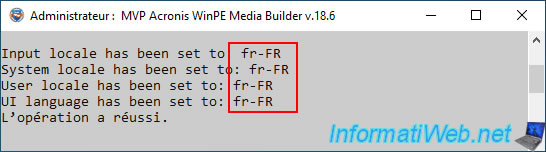
In our case : "fr-FR" for French.
Plain Text
Processing 1 of 1 Adding package Microsoft-Windows-WinPE-Fonts-Legacy-Package~...~amd64~~...

Processing 1 of 1 Adding package Microsoft Windows-WinPE-LanguagePack-Package-...~amd64~fr-FR-...
Next, several regional settings will be configured to best match your language.
Plain Text
Input locale has been set to: fr-FR
System locale has been set to: fr-FR
User locale has been set to: fr-FR
UI language has been set to: fr-FR
L'opération a réussi
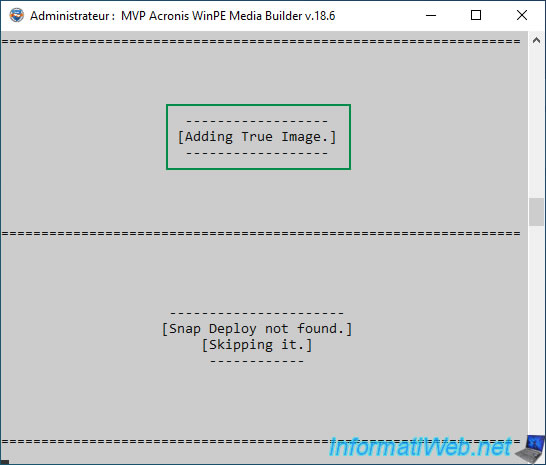
Then, this tool will add True Image in this Windows PE environment and will display the message "Adding True Image".
Warning : if this tool displays the message "True Image not found", it means that you are using a version not supported by this tool.
This will be the case if you have a too recent version of Acronis True Image or if you are using its equivalent "Acronis Cyber Protect Home Office".
Plain Text
[Adding True Image.]

[Snap Deploy not found.]
[Skipping it.]
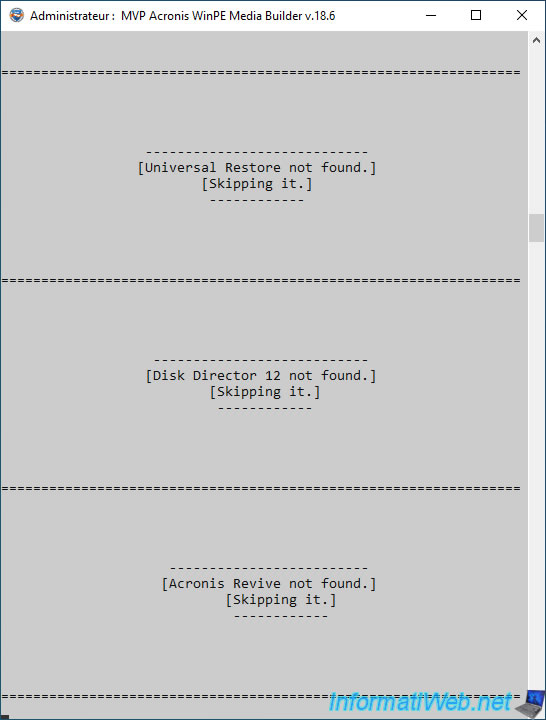
This tool then attempts to detect other Acronis products to try to add them also into the Windows PE environment being created:
- Universal Restore: which allows you to restore a backup on a computer with different hardware from the source computer.
- Disk Director: which allows you to manage the partitioning of your disks.
- Acronis Revive: which was a data recovery software.
But, it no longer exists.
Sources :
- System Restoration & Recovery - Acronis Universal Restore
- The Industry Standard Partition Manager: Acronis Disk Director 12 - Acronis
- Acronis Revive 2019 - User Guide (PDF)
- Acronis Revive 2019
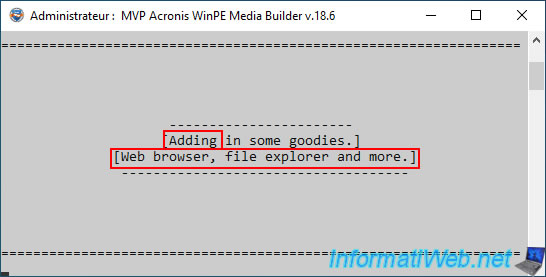
Then, this tool will add some free programs (including a web browser and a file explorer) into this Windows PE environment.
Plain Text
[Adding in some goodies.]
[Web browser, file explorer and more.]
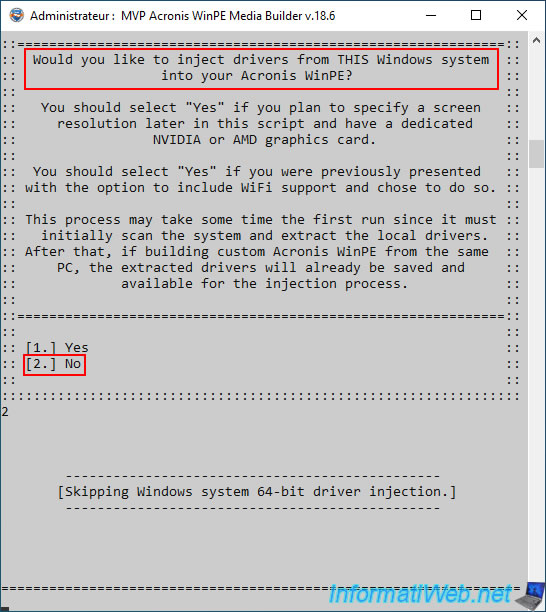
If you want, you can inject drivers from this computer into the Windows PE environment that is being created.
Which will improve the compatibility of this Windows PE environment, but which means that it will have to be used preferably on this computer.
Which makes it less flexible, especially for a computer technician.
So, we answered "No" in our case.
Plain Text
Would you like to inject drivers from THIS Windows system into your Acronis WinPE?
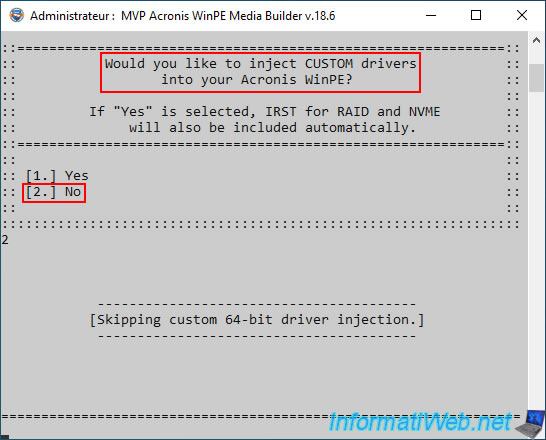
If you want, you can also add custom drivers in this Windows PE environment.
In our case, we answered "No" (for the same reason as in the previous step).
Plain Text
Would you like to inject CUSTOM drivers into your Acronis WinPE?
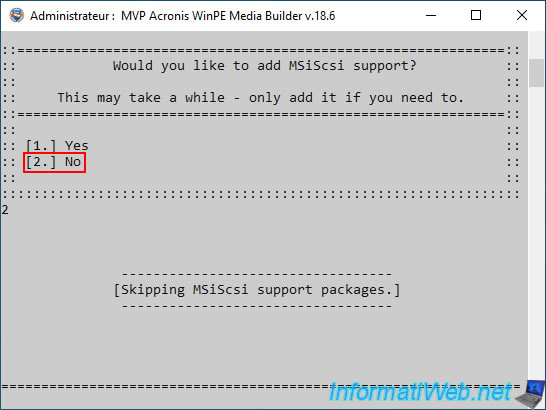
If needed, you can add iSCSI protocol support.
To access an iSCSI disk on an iSCSI server or NAS.
Plain Text
Would you like to add MSiScsi support?
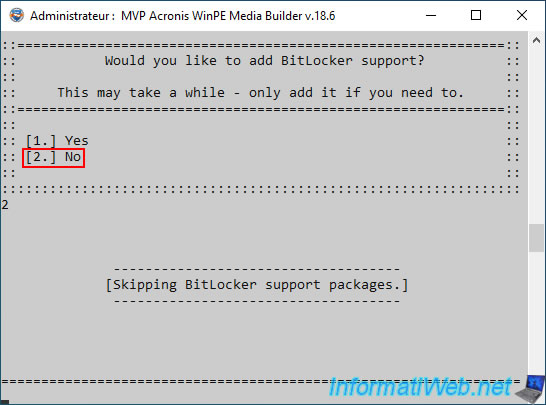
If needed, you can add BitLocker support (which allows you to encrypt the disk where Windows is located).
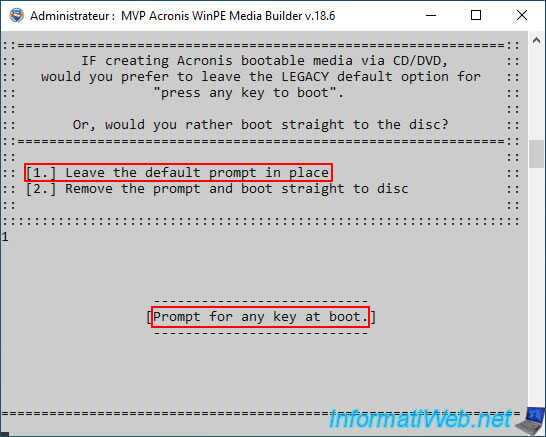
By default, when you boot to your Acronis Rescue CD, a message "Press any key to boot from this CD or DVD" appears.
Which requires you to press Enter to boot to this Acronis Rescue CD.
To leave this message displayed, choose option 1.
Otherwise, type 2 to suppress this message and boot directly to this Acronis Rescue CD.
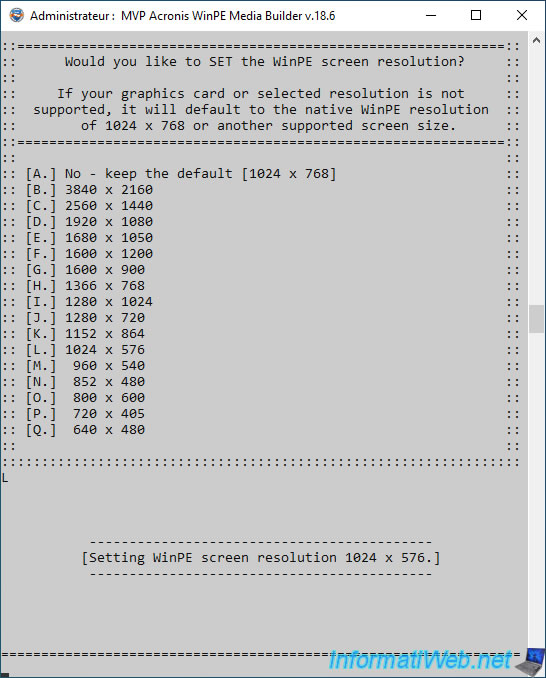
Select your screen resolution.
Warning : this only works if you have added your AMD or NVIDIA driver previously.
Otherwise, the value selected here will not work and will simply be ignored.
Finally, the tool will save the changes to the "winpe.wim" file being edited.
Plain Text
[Saving changes to amd64 winpe.wim file.]
Plain Text
Image file: ...\boot.wim
...
Saving image.
...
Unmounting image.
...
The operation was successful.
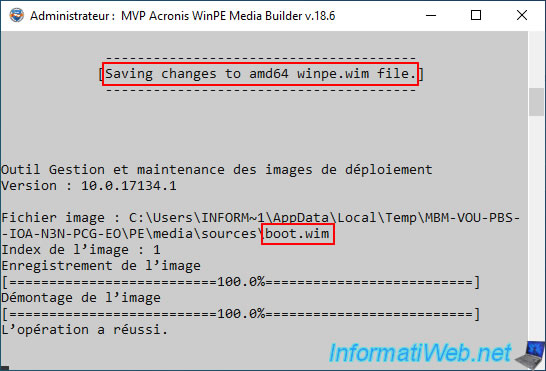
Once the "winpe.wim" file (which represents the Windows PE environment with the Acronis True Image program and the other programs that this tool has added to it) is saved, this tool will create the ISO file including in particular this "winpe.wim" file (which will be renamed "boot.wim" in this ISO file).
Plain Text
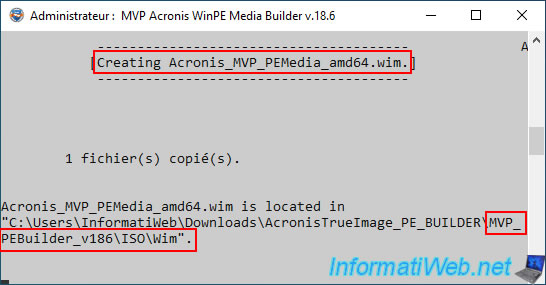
[Creating Acronis_MVP_PEMedia_amd64.iso.]
...
Creating ...\AcronisTrueImage_PE_BUILDER\MVP_ATIPEBuilder_v186\ISO\Acronis_MVP_PEMedia_amd64.iso ...
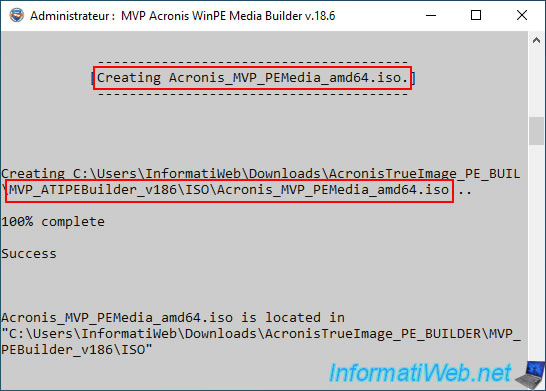
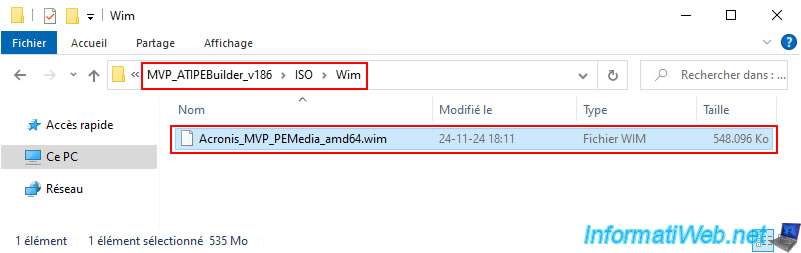
This tool will create the WIM file in a "Wim" subfolder of the "ISO" folder.
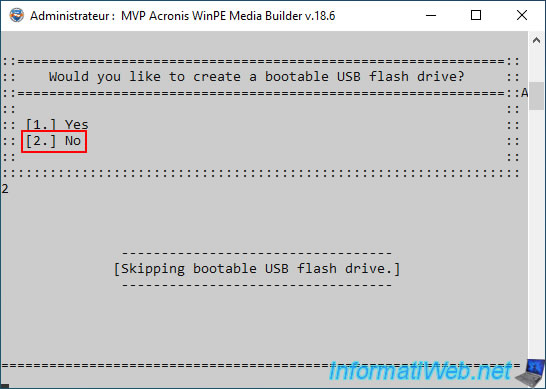
If you want, you can convert this ISO file to a bootable USB key using option 1.
However, in our case, we did not do this, as we prefer to use the ISO file created by this tool.
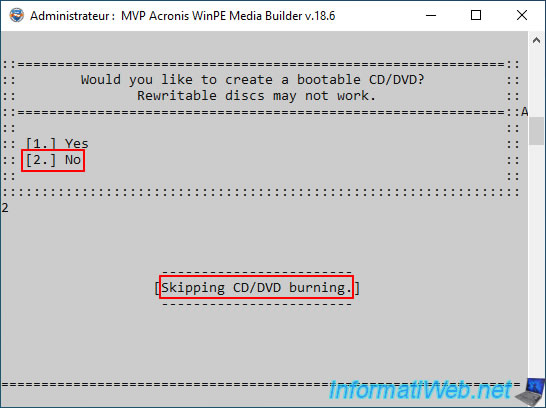
If needed, you can burn this ISO file with Windows burning software using option 1.
However, we recommend you to answer "No" and use a known burning software to avoid the burning failure.
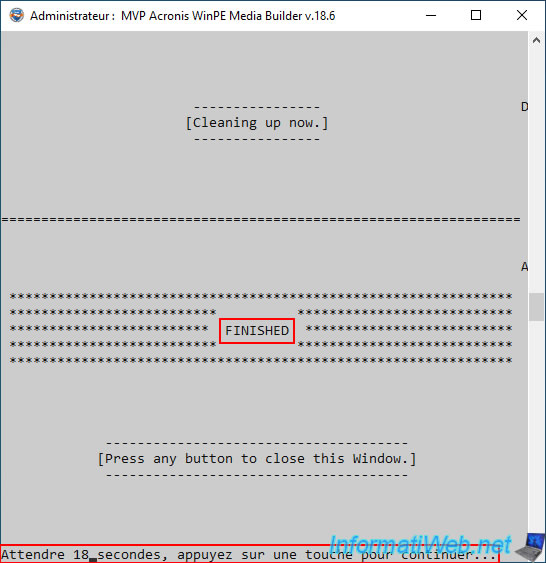
Finally, the message "FINISHED" will appear and the program will close automatically in 20 seconds.
Otherwise, press Enter to close it directly.
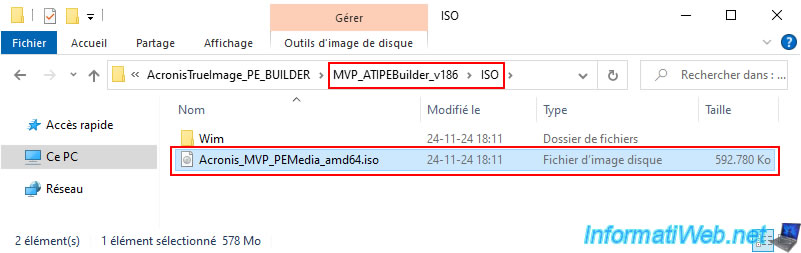
In the "ISO" folder of this tool, you will find the ISO file that you will need to burn to a CD.
For this, if necessary, refer to our tutorial: Burn a CD/DVD.
In the "Wim" subfolder of this "ISO" folder, you will find the file "Acronis_MVP_PEMedia_amd64.wim" which was copied to your ISO file under the name "boot.wim".
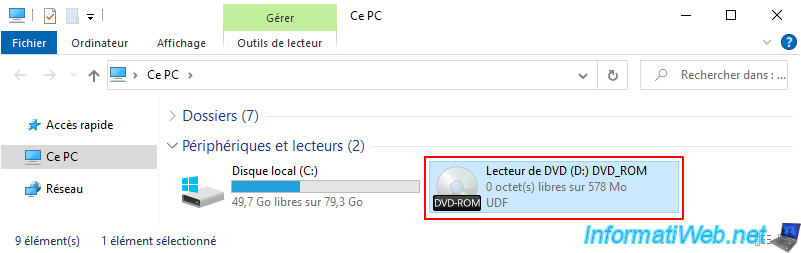
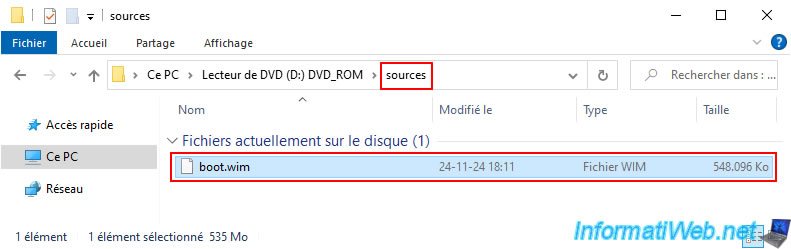
Once this ISO file is burned to a CD, it will appear as "DVD_ROM" in file explorer.
On this bootable CD, you will find in particular a "Boot" folder.
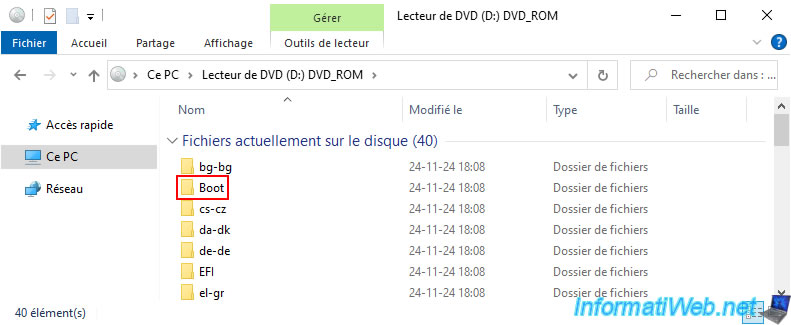
In the "sources" folder of this bootable CD, you will find a "boot.wim" file (which corresponds to the Windows PE environment that you have just customized via the "WinPE-based Media Builder" tool).
Share this tutorial
To see also
-
Backup 6/19/2025
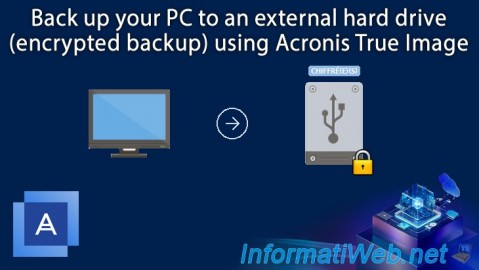
Acronis True Image - Backing up your PC to an external hard drive (encrypted backup)
-

Backup 9/22/2025
Acronis True Image - Backup your Microsoft account to Acronis Cloud
-
Backup 7/28/2025
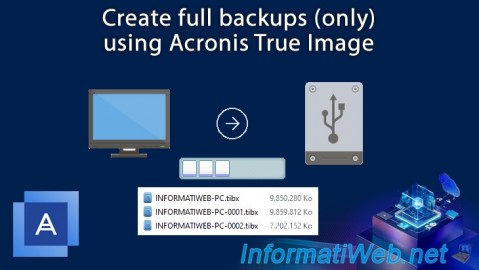
Acronis True Image - Create full backups
-

Backup 4/13/2026
Acronis True Image - Rescue Media - Create an incremental backup
No comment