- Backup
- Acronis True Image, Acronis Universal Restore
- 11 May 2026 at 07:59 UTC
-

When you want to create Acronis Universal Restore bootable media, you have the option to create Windows RE-based media instead of Linux.
Warning : when you create Acronis Universal Restore bootable media based on Windows RE (Recovery Environment), it will contain only the "Acronis Universal Restore" program.
Unlike Linux-based Acronis Universal Restore bootable media that would contain "Acronis Cyber Protect Home Office (True Image)" and "Acronis Universal Restore".
Notes :
- an advantage of this technique is that it does not require any installation of Microsoft tools.
Unlike creating a bootable Acronis Universal Restore media based on Windows PE which would require the installation of 1 or 2 free Microsoft tools. - tutorial made on Windows 10 v2104 and also tested under Windows 11 v21H2, 8.1, 8 and 7 SP1.
- Create Acronis Universal Restore media based on Windows RE (Recovery Environment)
- Boot to your Acronis Universal Restore bootable media
- Options available on Acronis UR bootable media (based on Windows RE)
1. Create Acronis Universal Restore media based on Windows RE (Recovery Environment)
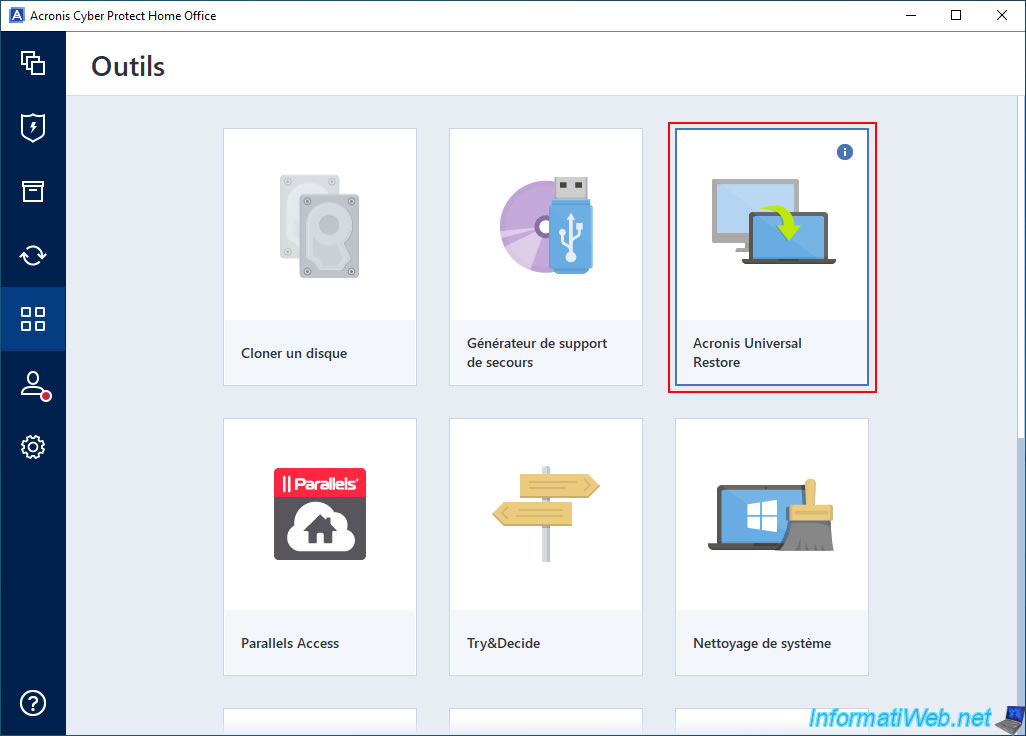
To create an Acronis Universal Restore media based on Windows RE (Recovery Environment), go to the "Tools" section and click "Acronis Universal Restore".
Warning : by default, this Acronis tool is not installed and Acronis Cyber Protect Home Office (True Image) will ask you to download and install it.
To do this, refer to step "1. Download and install Acronis Universal Restore" of our tutorial: Acronis True Image - Universal Restore Media - Create and use media.
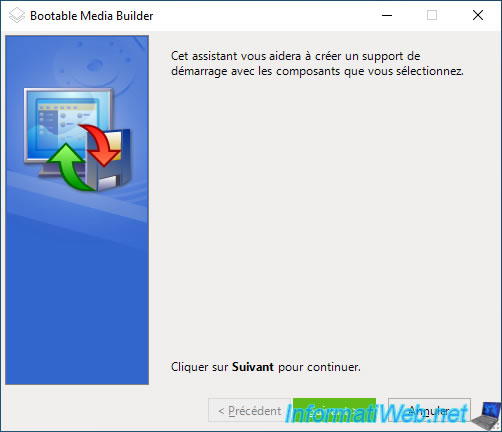
The "Bootable Media Builder" tool appears.
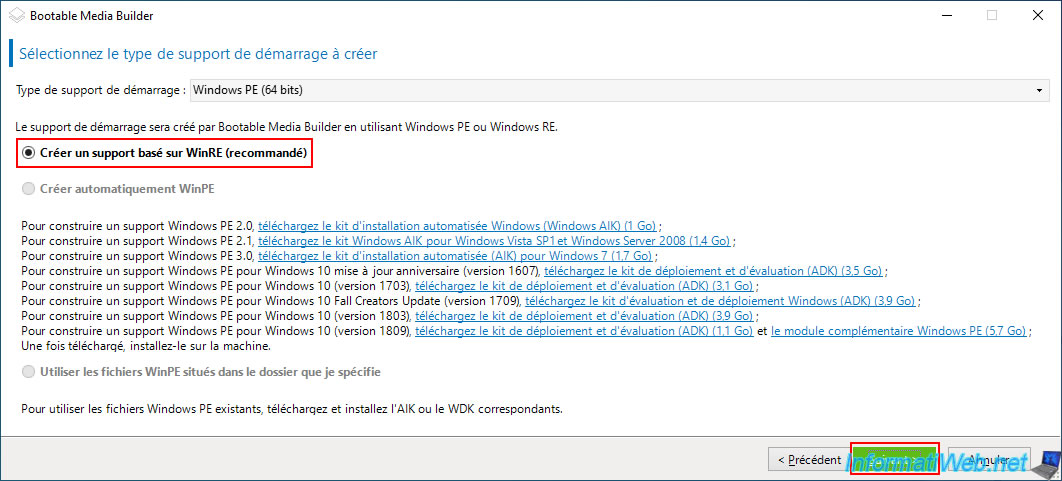
Choose the bootable media type "Windows PE" (if you have a 32-bit (x86) version of Windows) or "Windows PE (64-bit)" (if you have a 64-bit (x64) version of Windows).
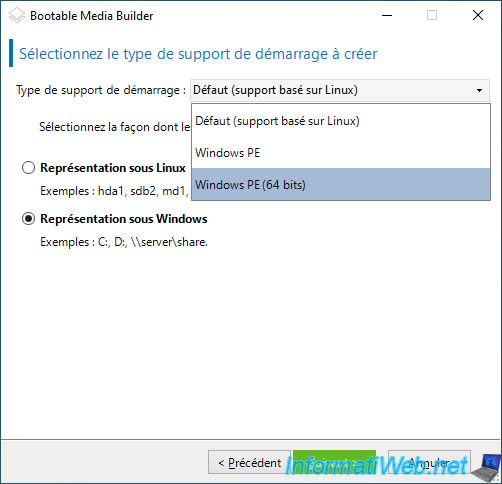
Select the "Create WinRE-based media (recommended)" option to create Windows PE bootable media based on Windows RE (already installed during Windows setup), then click "Next".
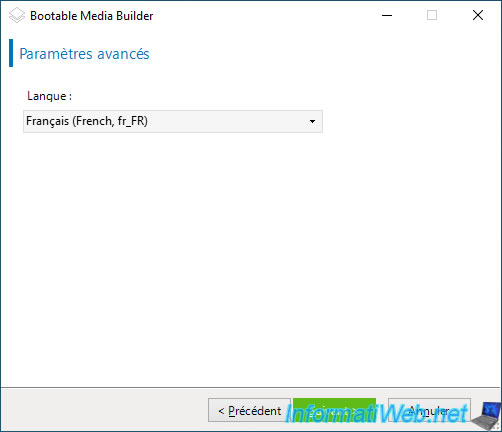
Select your language from the list to have Acronis bootable media configured in your language.
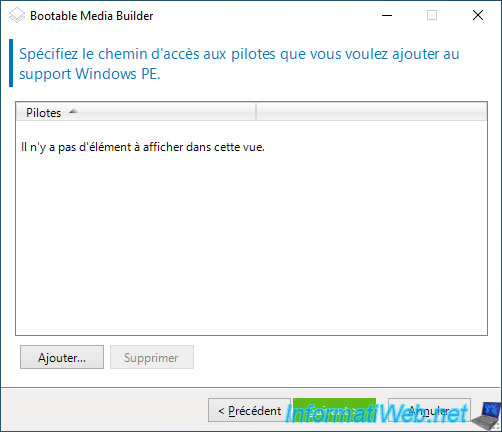
If needed, you can add drivers to this Windows PE media.
For example, to support a RAID controller that would not be natively supported by the Windows PE environment used to create this Acronis bootable media.
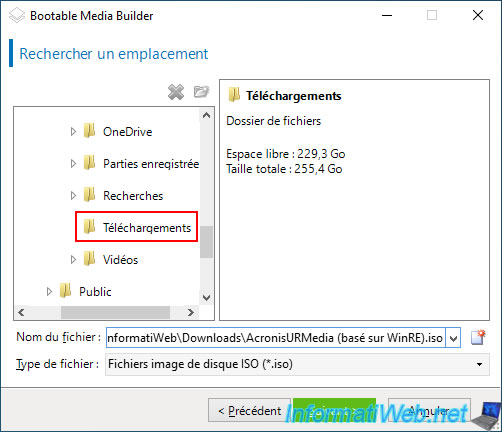
Select "ISO Image".
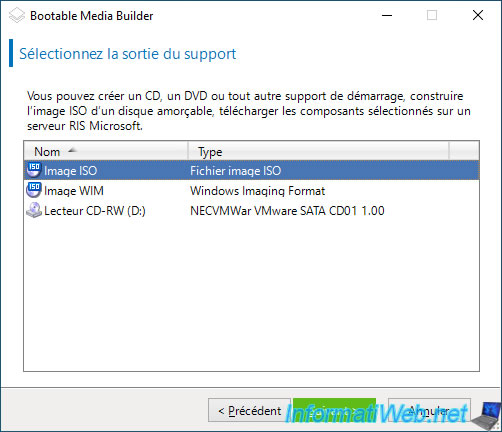
Select the folder where you want to store the ISO file that will be created and specify a name for this ISO file.
For example: AcronisURMedia (WinRE based).iso.
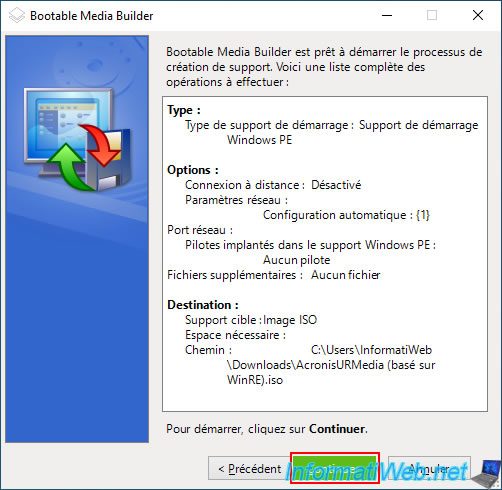
At the end, a summary will be displayed.
Click "Continue".
To start, Acronis' "Bootable Media Builder" tool will create a copy of the source WIM file (i.e. the one from Windows RE).
Plain Text
Copy the source WIM file.

Then, it will add the "Acronis Universal Restore" tool into this WIM file, along with the necessary files.
Plain Text
Updating WIM file contents.

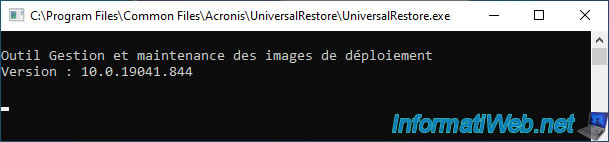
To manage the contents of this WIM file, the "Acronis Bootable Media Builder" tool will use the Windows "DISM" utility in the background.
Hence the brief appearance of a console with the title "Deployment Image Servicing and Management tool".
Once the contents of the WIM file are updated, Acronis Bootable Media Builder will unmount this WIM file.
Plain Text
WIM image unmounting.

Then, wait while the ISO file is built.
Plain Text
Building the ISO image.

Your "Acronis Universal Restore" bootable media is created.
Plain Text
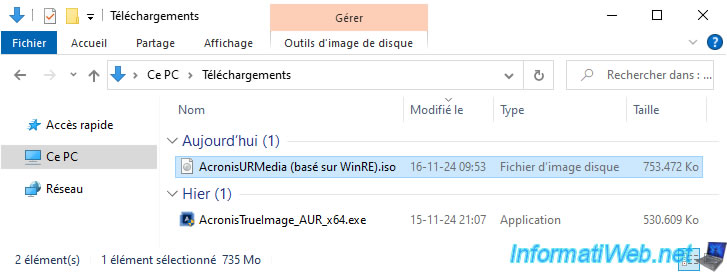
The bootable media was created successfully.

Your ISO file has been created.
All you have to do now is burn it to a DVD, referring to our tutorial "Burn a CD/DVD" if necessary.
2. Boot to your Acronis Universal Restore bootable media
Once your Acronis Universal Restore bootable media is created, configure your motherboard BIOS/UEFI firmware so that your computer boots to your CD/DVD drive first.
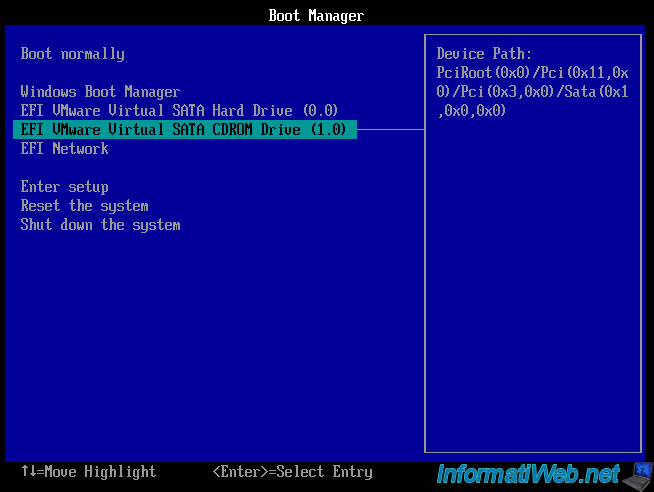
Then, when your computer starts, you will see the message below appear.
Press Enter to boot to your Acronis Universal Restore bootable media.

Windows PE starts.

A command prompt with several commands appears.
- wpeinit : this 1st line is required for the Windows PE environment used by this Acronis bootable media to work properly.
- wpeutil SetKeyboardLayout ... : allows you to specify your keyboard language (which depends on the language previously selected when creating your Acronis bootable media).
- ... trueimage_starter.exe : launches the "Acronis Universal Restore" tool in this case.
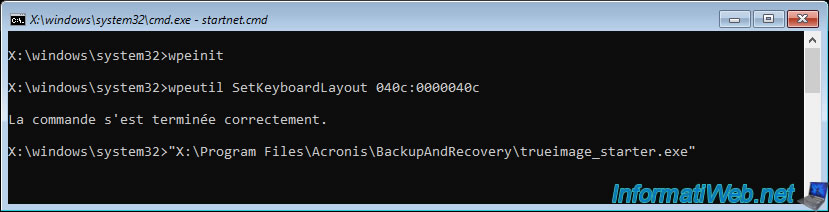
A few seconds later, you will see the Acronis Universal Restore logo appear for a few seconds.
![]()
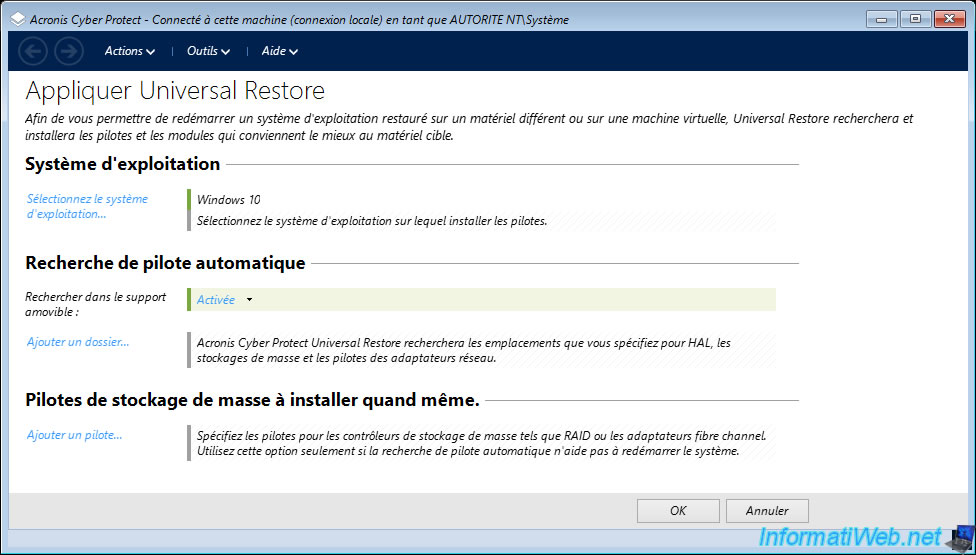
As you can see, the program for applying Universal Restore appears.
Attention: since you have created Acronis Universal Restore bootable media based on Windows RE, you will have access only to Acronis Universal Restore.
3. Options available on Acronis UR bootable media (based on Windows RE)
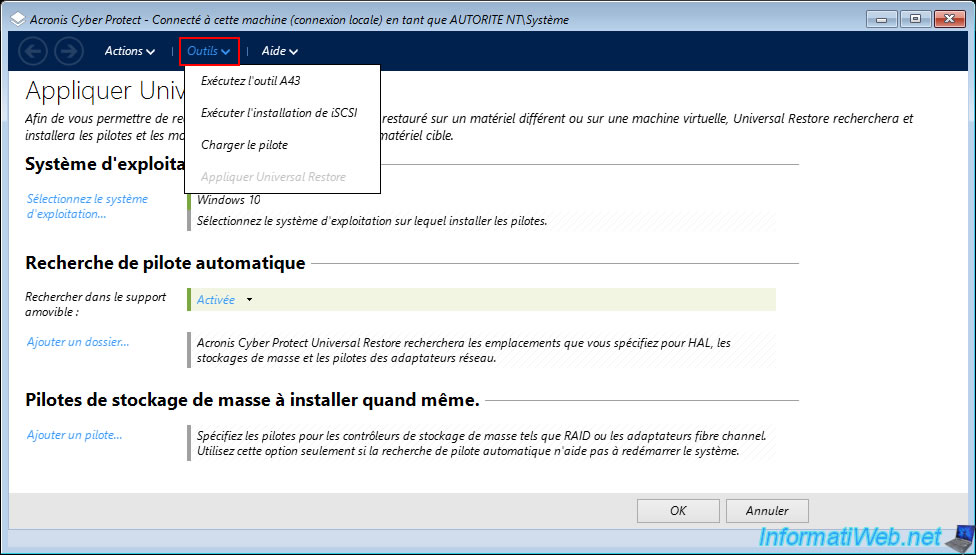
When you create Acronis Universal Restore bootable media based on Windows RE, the toolbar will allow you to access these options:
- Actions: useless, because on Windows the only option available is to close this program.
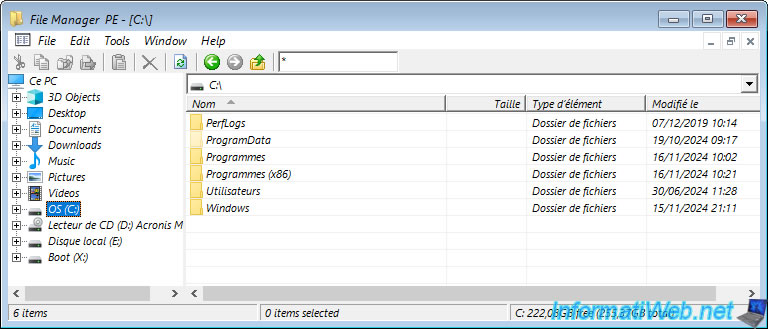
- Tools: allows you to launch the file manager "File Manager PE" (whose name in this menu is "A43"), to launch the iSCSI installation (although in our case it does not work) and to load additional drivers if necessary.
- Help: allows you to collect system information to send to Acronis support (if they ask you for it in case of a problem) and to see the version of this Acronis bootable media (as explained in our previous tutorial, referenced at the beginning of this tutorial).
If you click on "Tools -> Run A43 Tool", you will see the "File Manager PE" file manager appear.
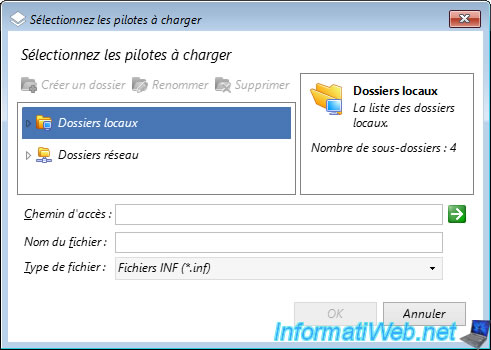
If you click "Tools -> Load Driver", you will see a "Select Drivers to Load" window appear that will allow you to select driver INF files to install.
This can be useful to access the logical disks of a RAID controller, for example, that would not be recognized by default by Windows PE.
Share this tutorial
To see also
-

Backup 11/10/2025
Acronis True Image - Archive your files on Acronis Cloud (encrypted archive)
-
Backup 6/9/2025
Acronis True Image - Backing up your PC to a FTP server
-
Backup 10/2/2025
Acronis True Image - Clean up backup versions of a PC
-
Backup 8/25/2025
Acronis True Image - Create backups and authenticate your files
You must be logged in to post a comment