Create software RAID (JBOD, RAID 0, and RAID 1) with dynamic disks on Windows 7 to 11
- Windows
- Windows 8 / 8.1, Windows 7, Windows 10, Windows 11
- 19 May 2025 at 14:37 UTC
-

- 3/3
5. Mirrored volume (software RAID 1)
5.1. Create a mirrored volume (RAID 1) on Windows
To store data in a volume that is protected against the loss (failure) of a physical disk, you can create a mirrored volume.
This is the same as creating a logical disk in RAID 1 if you did it with a physical RAID controller.
To do this, right-click "New Mirrored Volume" on the unallocated space of one of your physical disks.
Warning : although you will not lose anything if one of the physical disks making up this mirrored volume (RAID 1) fails, this does not protect your data against other problems (virus infection, accidental deletion of a file, ...).
A mirrored volume (RAID 1) is therefore different from a real backup that would be performed regularly on an external hard drive (which should not remain permanently connected to your computer).
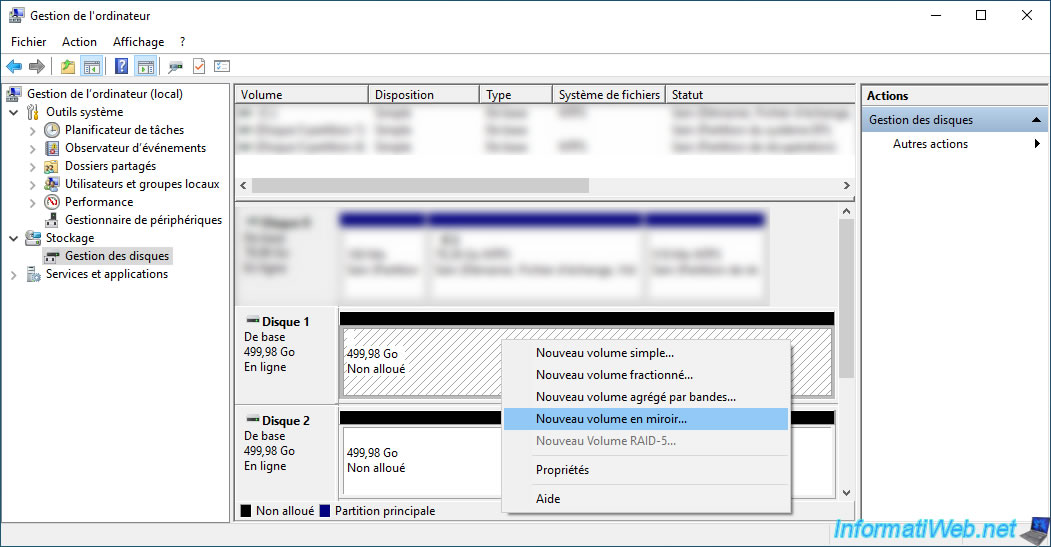
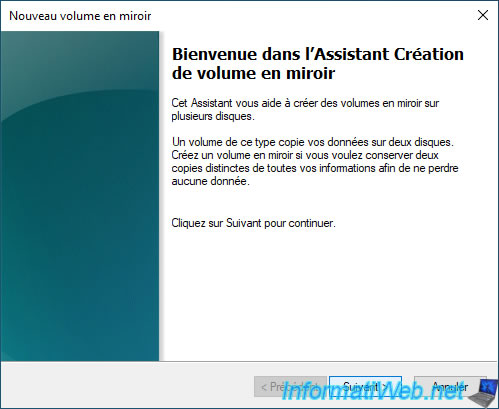
The "New Mirrored Volume" wizard appears.
By default, the disk where you wanted to create your mirrored volume appears in the right column.
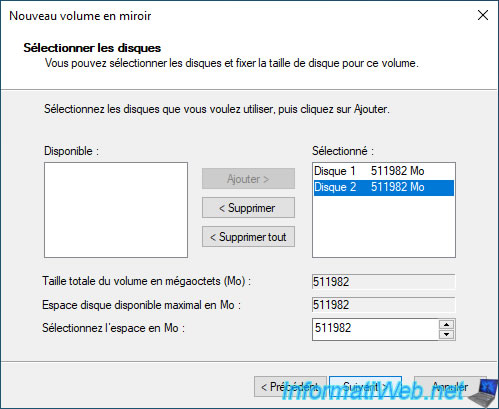
Now, select the disk on the left where you want to store a copy of the data from the disk on the right and click the "Add" button.
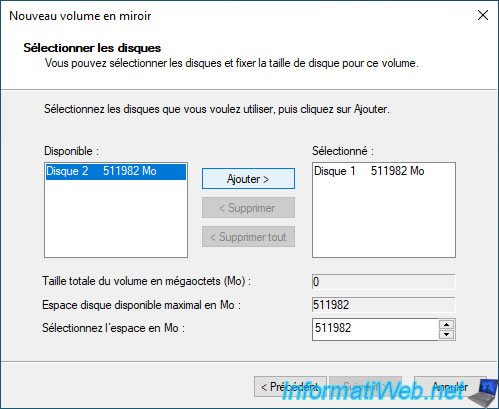
Once the second disk is added, click: Next.
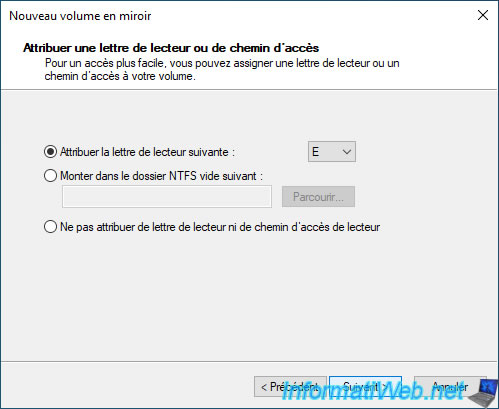
Windows will assign the next available letter to this mirrored volume.
Provide a name for this new mirrored volume and check the "Perform a quick format" box.
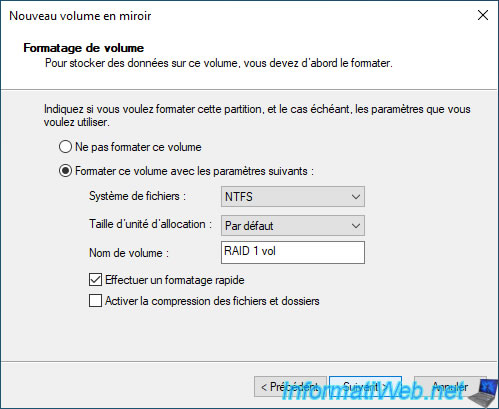
Click: Finish.

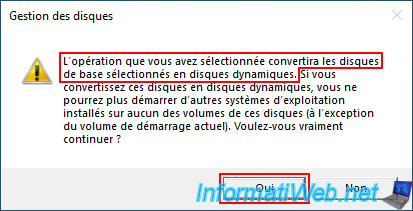
When you want to create a mirrored volume, Windows must convert the selected disks to dynamic disks instead of basic disks (the default type).
Confirm the conversion to dynamic disks by clicking "Yes".
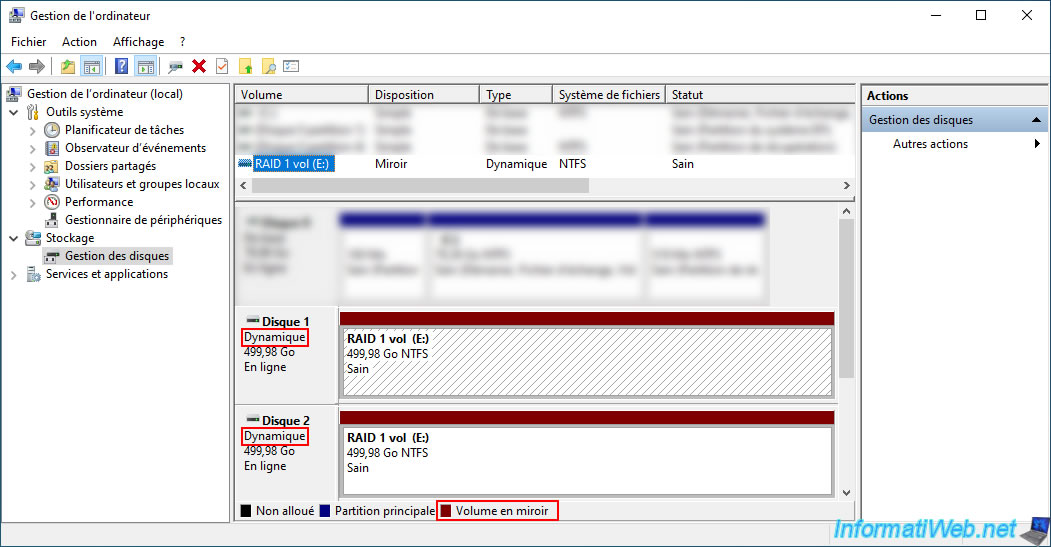
The mirrored volume appears on the 2 physical disks selected in the wizard.
In our case, the data will be stored on disk 1 and Windows will maintain a copy of this data on disk 2 in real time.
As you can see, the mirrored volumes appear in brown and the name of the volume created is necessarily the same on both disks.
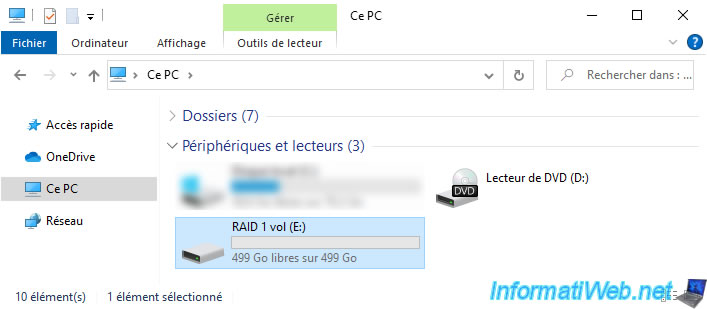
In file explorer, you will see a single volume appear in "This PC".
However, the size displayed corresponds to the size of the smallest physical disk selected when creating this mirrored volume.
Indeed, with 2 disks of 500 GB, you can only store 500 GB on your mirrored volume since the remaining 500 GB will be used transparently by Windows to store a copy of the data from the 1st disk.
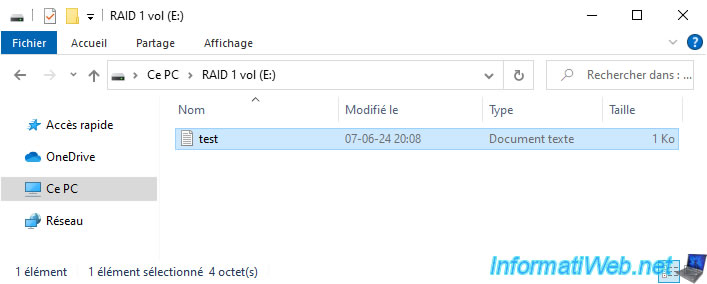
For data storage from file explorer, nothing changes.
When you modify a file in this mirrored volume, Windows is responsible for reflecting this modification on the 2 physical disks used by this mirrored volume.
5.2. Delete mirror disk (delete data copy)
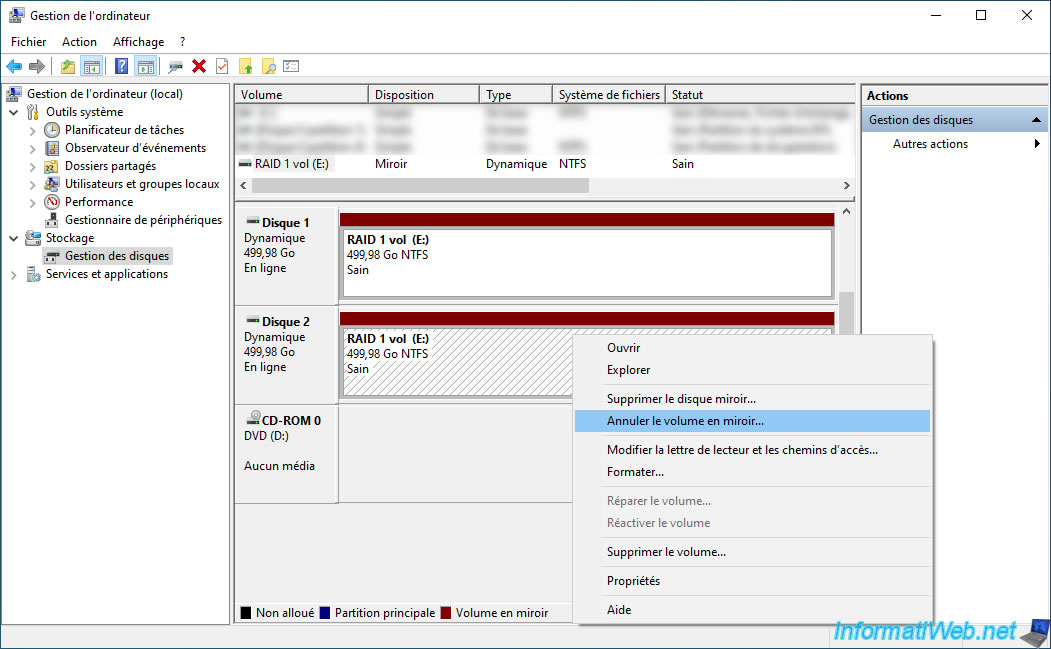
When using a mirrored volume (RAID 1), you have the option to delete the mirrored disk by right-clicking "Remove Mirror" on your mirrored volume.
This means that Windows will only delete the copy of the data present on the disk in question.
You will therefore not lose any data and the mirrored volume on the remaining disk will become a simple volume (= a normal partition).
However, the remaining disk will remain a dynamic disk instead of a basic disk.
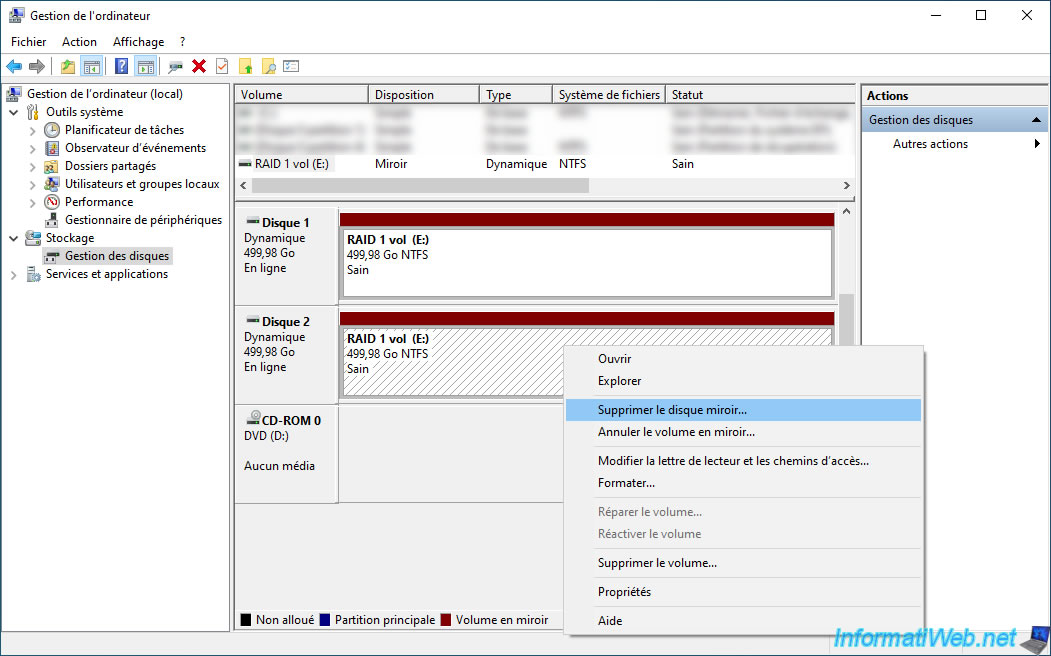
Select the disk where you want to delete the copy of the data created via this mirrored volume system, then click on the "Remove Mirror" button.
The selected disk will therefore be empty and your data will remain intact on the other disk that was also used by your mirrored volume.
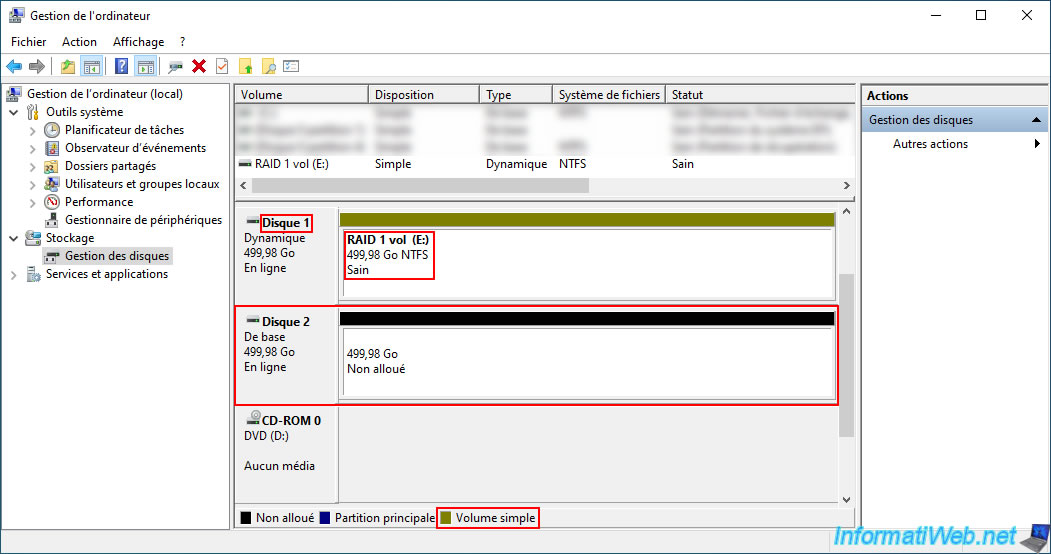
In our case, we delete the copy of the data present on our disk 2.
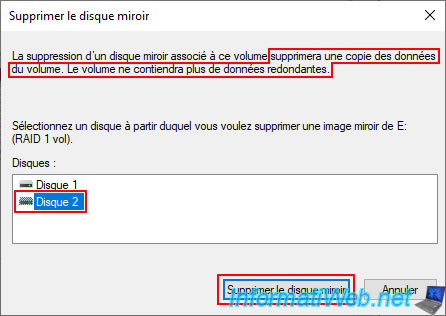
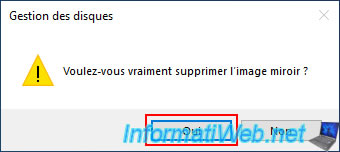
Confirm the deletion of the mirror image by clicking "Yes".
Plain Text
Do you really want to delete the mirror image?
As expected :
- the copy of the data from the selected disk (in our case: Disk 2) has been deleted. Hence the appearance of the unallocated (unpartitioned) space.
- the selected disk has been converted back to a basic disk.
Warning :
- the mirrored volume of the remaining disk (in our case: Disk 1) will be converted to a simple volume.
- the remaining disk (in our case: Disk 1) will remain a dynamic disk instead of a basic disk.
This does not change anything for data storage, but if you want to add an operating system to this disk, it will not be possible.
Indeed, you cannot boot an operating system from a volume created on a dynamic disk.
5.3. Unmirror volume (remove data synchronization between physical disks)
At the moment, only one mirrored volume (RAID 1) appears in the file explorer and Windows takes care of storing and updating your data on the physical disks used by it.
However, it is possible to remove the data synchronization between the different physical disks to obtain 2 physical disks with exactly the same data.
To do this, simply right-click "Break Mirrored Volume" on this mirrored volume (RAID 1).
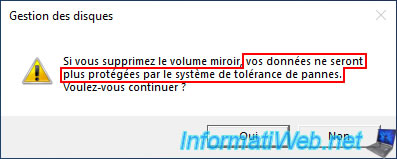
When you try to unmirror the volume, Windows simply warns you that your data will no longer be protected by the fault tolerance system.
Confirm by clicking "Yes".
Plain Text
If you break the mirrored volume, your data will no longer be fault tolerant.
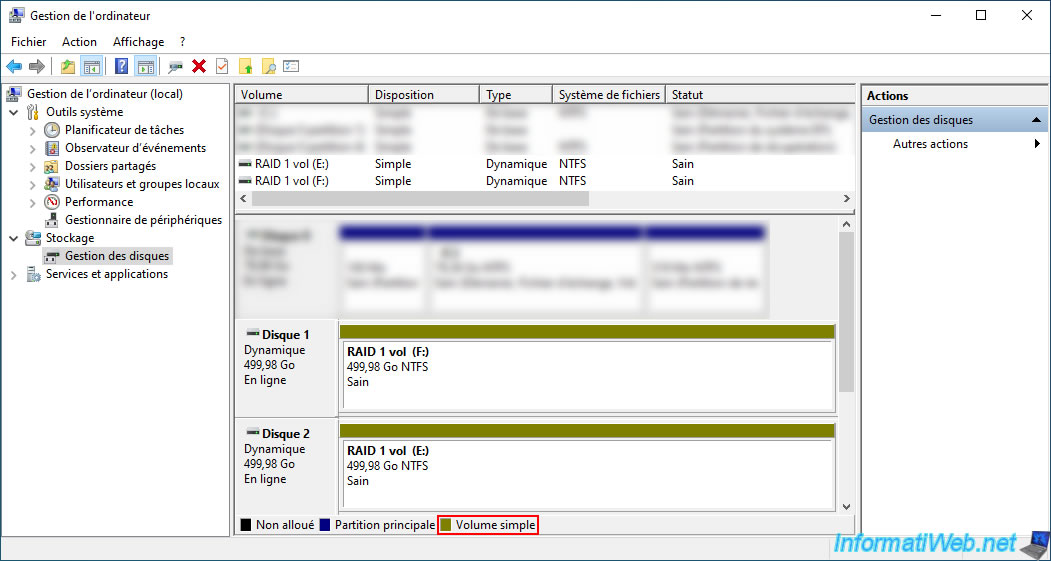
As you can see, unmirrored volume has caused the single mirrored volume to change to simple volumes.
The disks that were used for this mirrored volume (RAID 1) will remain as dynamic disks instead of the default "basic disk" type.
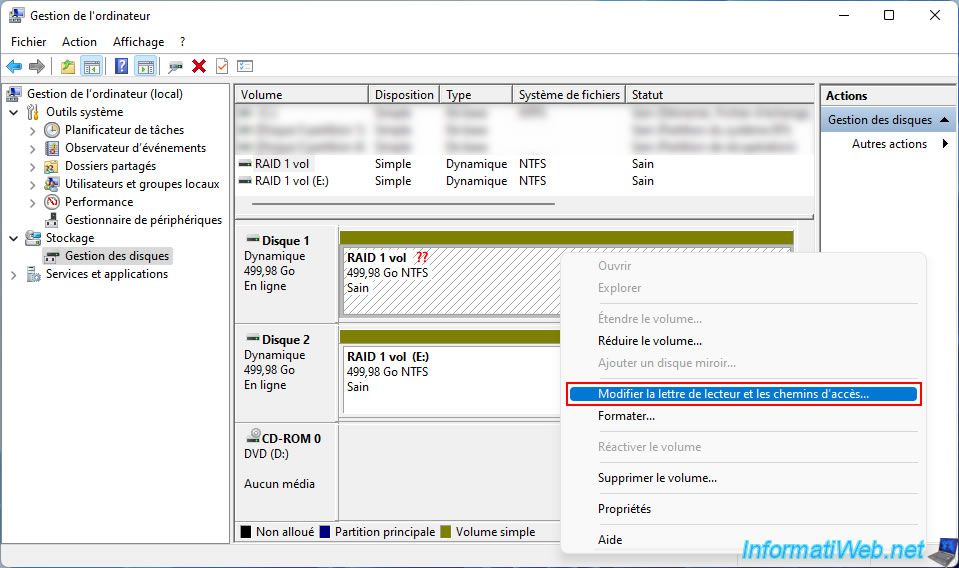
On Windows 11, it is possible that one of the volumes does not have a default letter.
In this case, simply right-click "Change Drive Letter and Paths" on the volume that currently does not have a letter.
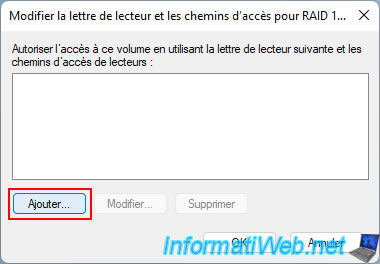
In the small "Change Drive Letter..." window that appears, click the "Add" button.
Windows 11 will automatically choose the next available letter.
Click OK.
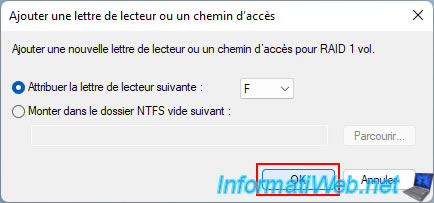
Now, your 2 volumes have a letter.
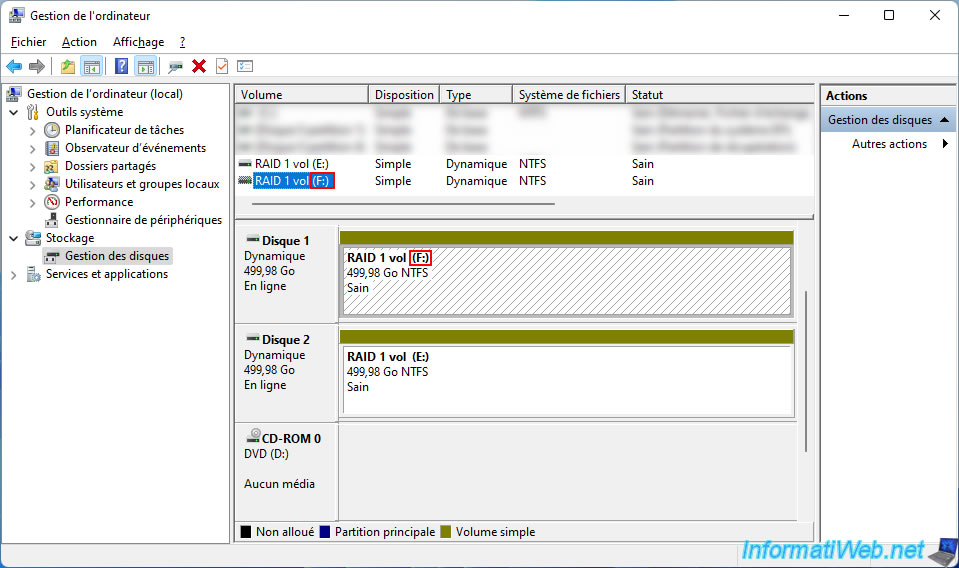
In file explorer, you will see multiple volumes with the same name, capacity (size), and amount of available free space appear.
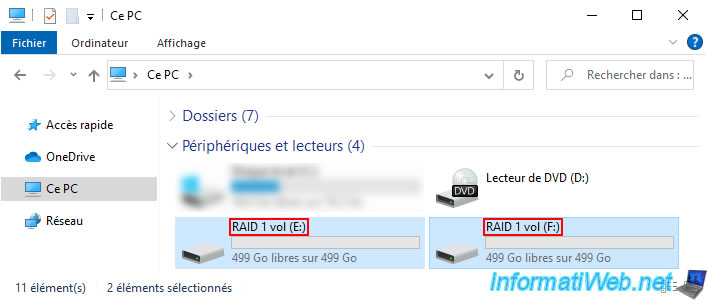
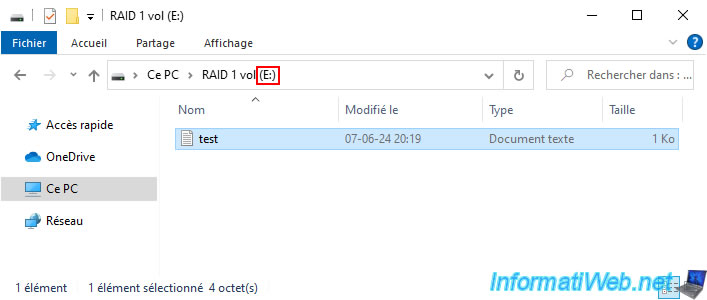
As you can see, on the 1st simple volume (whose assigned letter is "E" in our case), we find our test file created earlier on our mirrored volume (RAID 1).
On the 2nd simple volume (which has the assigned letter "F" in our case), we find exactly the same test file.
Warning : since the mirrored volume has been canceled, this data is no longer linked.
If you modify a file in one of these simple volumes, this file will be modified only on this simple volume.

5.4. Delete a mirrored volume (RAID 1) on Windows
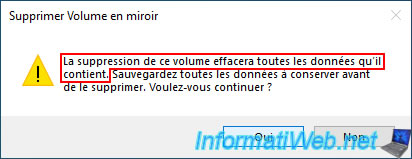
To completely delete a mirrored volume (RAID 1), right-click "Delete Volume" on it (regardless of the physical disk chosen).

Confirm the deletion of this mirrored volume by clicking "Yes".
As expected, the mirrored volume was permanently gone and the affected disks were automatically converted back to basic disks instead of dynamic disks.
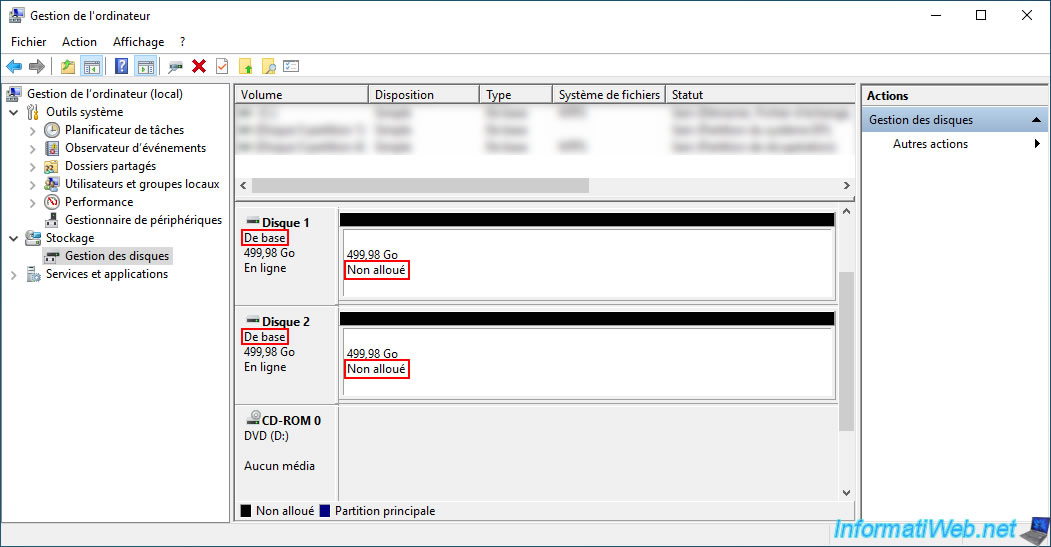
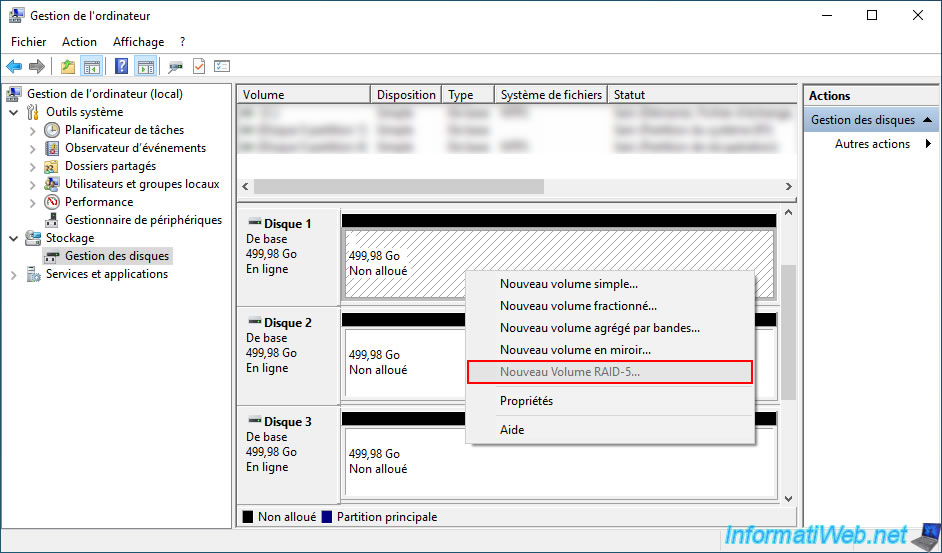
6. RAID-5 volume (not available on Windows)
If you right-click on the unallocated space of one of your disks, you will see that you can normally create a RAID 5 volume (which requires at least 3 physical disks).
This would allow you to combine data security and performance.
However, the "New RAID-5 Volume" option is grayed out on Windows 10, as well as on other versions of Windows, because RAID 5 is not supported on client versions of Windows.
Important : RAID 5 is only available on the server version of Windows. So, on Windows Server.
Share this tutorial
To see also
-
MultiBoot 7/15/2024
VHD/VHDX multiboot - Upgrade Windows 8 to Windows 8.1
-
Windows 3/31/2025
Windows 11 / 10 / 8.1 / 8 - Repair a three-way mirror storage space (software RAID 11)
-
Windows 1/16/2015
Windows 7 - Install from an USB 3.0 key
-
Windows 3/23/2022
Windows 7 - Reinstall Windows 7 built-in games
No comment