- Windows
- Windows 8 / 8.1
- 02 April 2022 at 20:37 UTC
-

- 1/2
On Windows 8.1, you again have the option to choose between "Private network" and "Public network" as was the case with Windows 8.
If you decide to use a private network, this will allow you in particular to facilitate file sharing between the different computers on your network.
- Choose network location type when installing Windows 8.1
- Choose network location type when a new network is detected
- Choose network location type from PC settings
- Choose network location type from HomeGroup settings
- Choose network location type from the Network section of File Explorer
- Choose network location type from command line via PowerShell
- Choose network location type by editing Windows 8/8.1 registry
1. Choose network location type when installing Windows 8.1
As during the installation of Windows 8, you also have the possibility to choose between "Private network" and "Public network" during the installation of Windows 8.1.
The technique is very similar. After installing Windows 8.1, several configuration steps will appear, including the "Settings" step.
At this time, click on the "Customize" button.
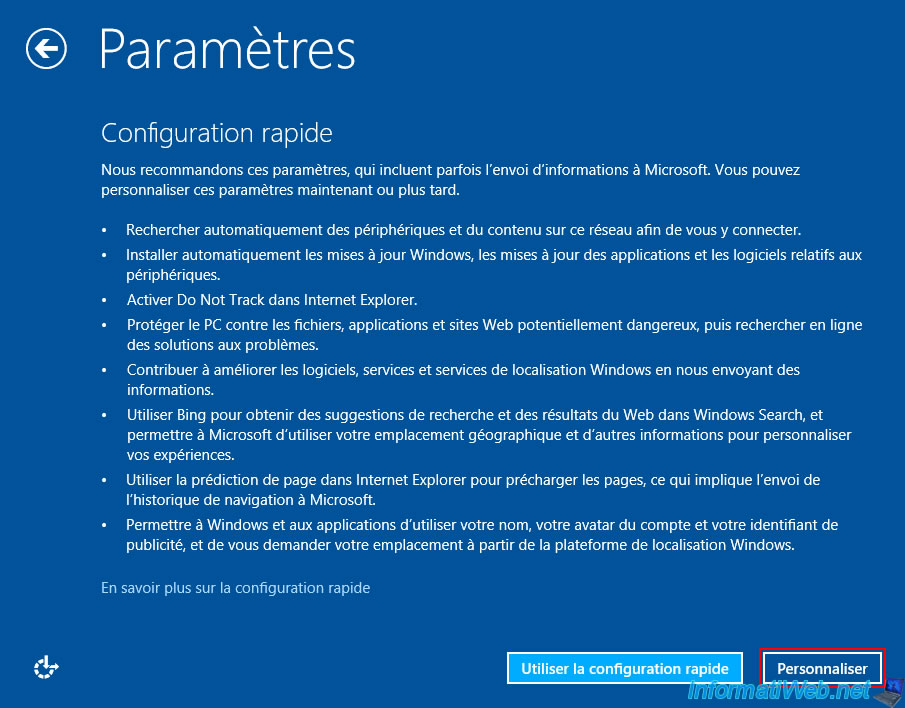
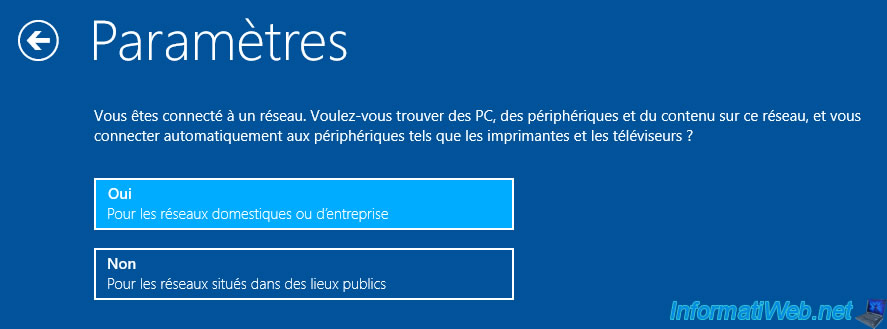
The options available on Windows 8.1 have changed names from those shown when installing Windows 8, but the technique is the same.
- Yes : allows you to use a private network to enable file sharing, network discovery, ...
- No : allows you to use a public network to block file sharing (by default), ...
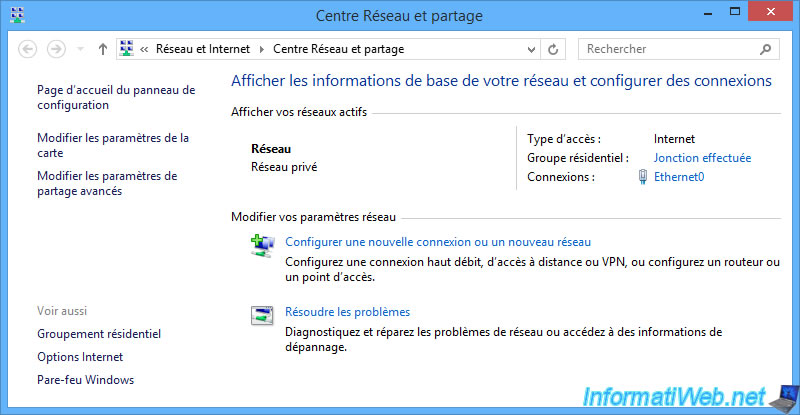
Once you've finished setting up Windows 8.1, you'll arrive at your Windows desktop.
Now, right-click on the "Network" icon in the taskbar and click : Open Network and Sharing Center.

As you can see, Windows 8.1 uses a private network (if you clicked "Yes" when setting up Windows 8.1) or a public network otherwise.
2. Choose network location type when a new network is detected
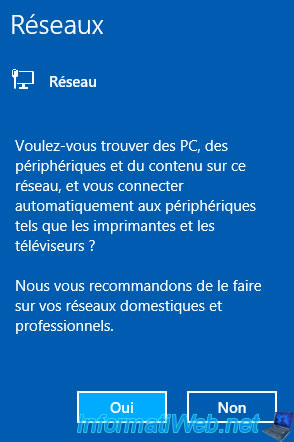
When you connect to a new network on Windows 8.1, Windows will ask you if you want to find PCs, devices, and content on that network.
- Answer "Yes" to use a private network and benefit from Windows file sharing, ...
- Answer "No" to use a public network and better secure your computer by blocking file sharing in particular.
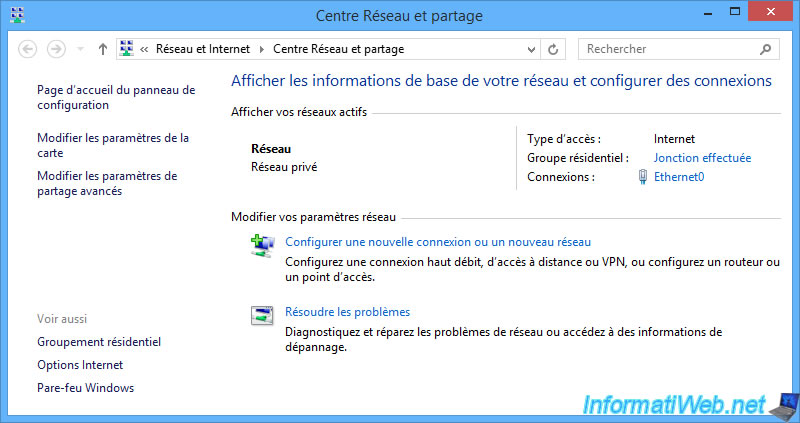
To verify that the network location type used by Windows 8.1 is correct, right-click "Open Network and Sharing Center".

As expected, if you clicked "Yes", Windows 8.1 uses a private network.
3. Choose network location type from PC settings
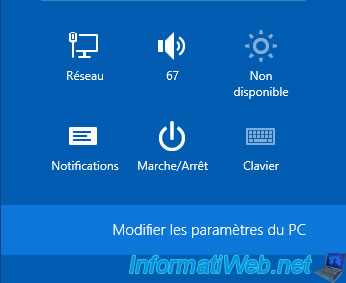
To manually change the network location type used for the network you are currently connected to on Windows 8.1, place your mouse in the lower right corner of the screen, then click on the "Settings" option.

Then, click on : Change PC settings.
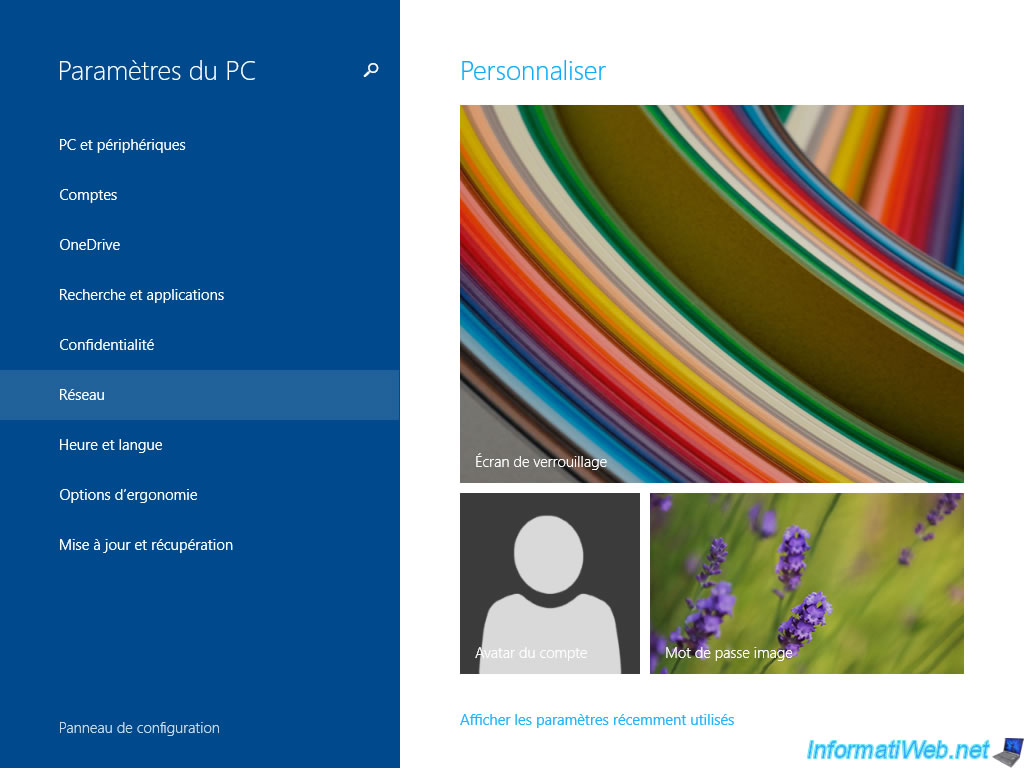
In the modern "PC Settings" application of Windows 8.1, go to the "Network" section.
Note that this network section was not present on Windows 8.
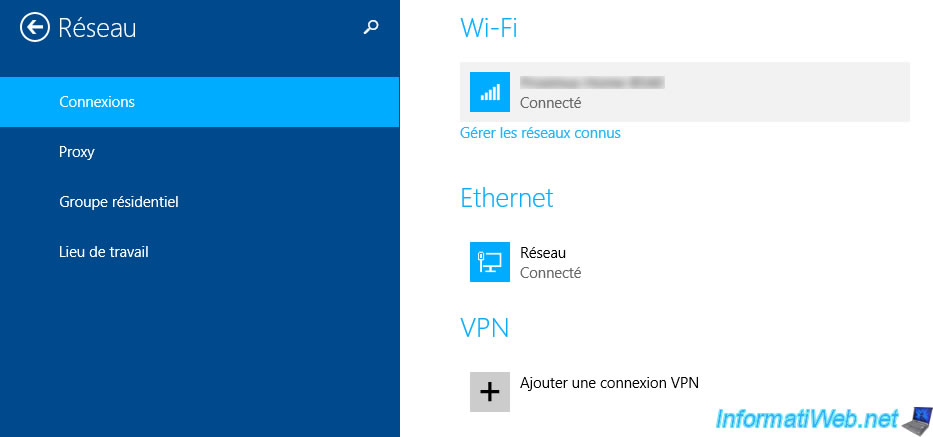
Click the name of the network you are connected to.
If you are connected to the network via a network cable, it will appear in the "Ethernet" section.

If it's a wireless network, it will appear in the "Wi-Fi" section.
However, the procedure is the same whether it's a wired (Ethernet) or wireless (Wi-Fi) network.
In both cases, you will have access to the "Find devices and content" setting.
If this setting is disabled (Off/gray), Windows 8.1 uses a public network.
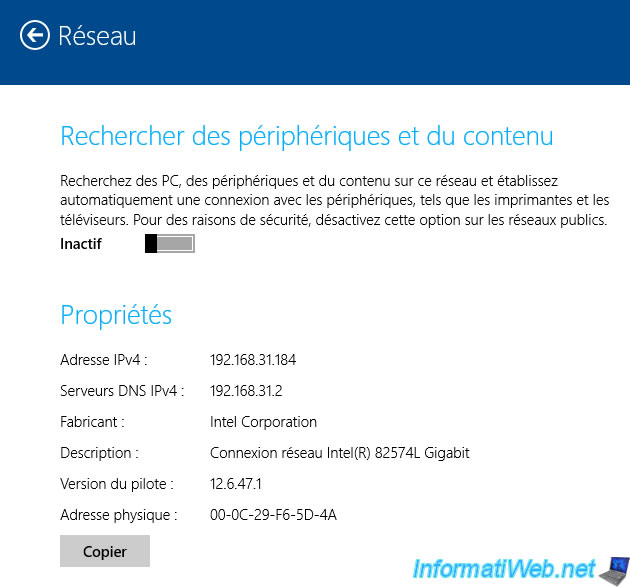
To use a private network, turn this setting on so it turns blue.
So, file sharing and network discovery will be enabled by default.
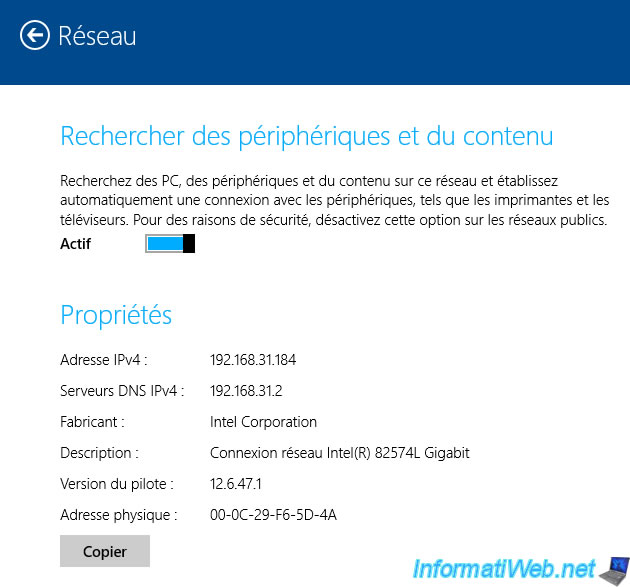
To return to your Windows desktop, press the "Windows" key on your keyboard.
Then, if you want to close the "PC Settings" application present in the background, move your mouse to the upper left corner to display a small square.
Then, right-click "Close" on it.
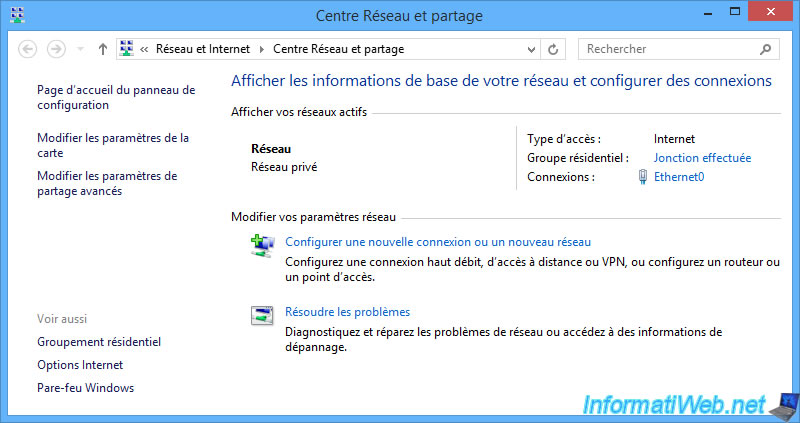
Now, right-click on the "Network" icon located in the Windows 8.1 taskbar and click : Open Network and Sharing Center.

As expected, Windows 8.1 now uses a private network (if you have enabled the setting mentioned above).
4. Choose network location type from HomeGroup settings
On Windows 8 and 8.1, you can also go through Windows Homegroup settings.
To do this, open the Network and Sharing Center by right-clicking on the "Network" icon present in the taskbar.

Then, click on the "HomeGroup" link at the bottom left.
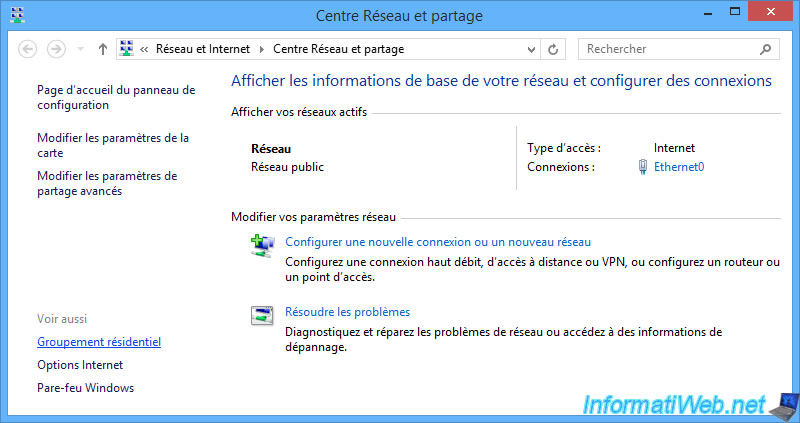
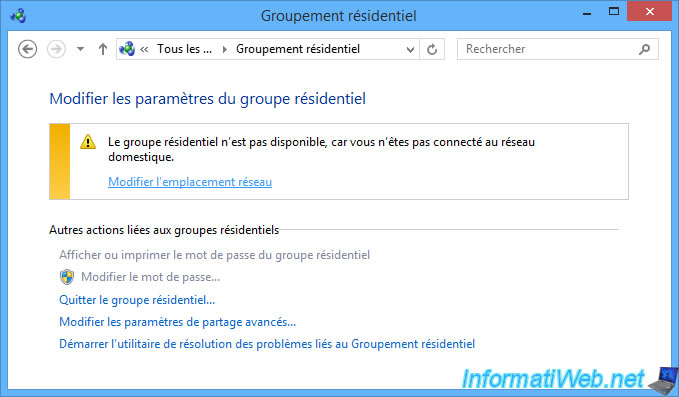
Windows 8 / 8.1 warns you that HomeGroup is not available because you're not connected to the home network.
This allows you to change the network location used by clicking on the link : Change network location.
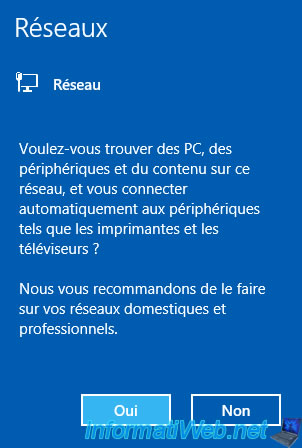
A banner will appear on the right side of your screen with 2 buttons :
- Yes : to use a private network
- No : to use a public network
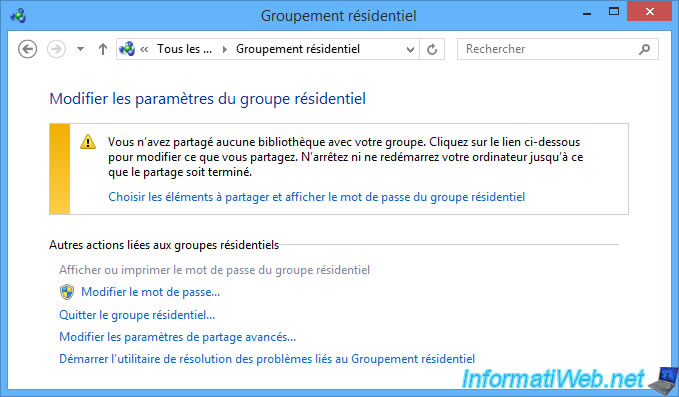
The warning displayed by Windows 8 / 8.1 will change.
Click the "Back" arrow at the top left to return to the Network and Sharing Center.
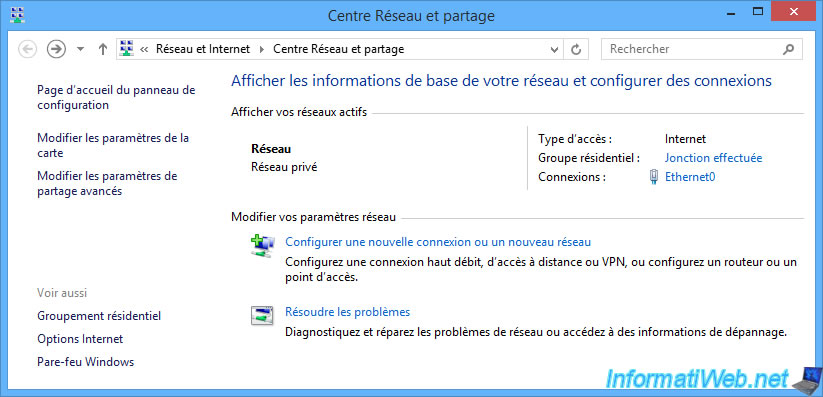
As expected, Windows 8 / 8.1 now uses a private network (if you answered "Yes" to the question).
Share this tutorial
To see also
-
MultiBoot 5/6/2024
Multiboot with Windows 8.1 and Linux (Ubuntu)
-
MultiBoot 6/3/2024
VHD/VHDX multiboot with Windows 7 and Windows 8.1
-
Windows 4/28/2025
Windows - Manually install Windows in LEGACY BIOS mode (old BIOS / MBR)
-
Windows 12/17/2015
Windows 8 / 8.1 / 10 / 11 - System restore
You must be logged in to post a comment