- Windows
- Windows 8 / 8.1, Windows 10, Windows 11
- 10 April 2025 at 13:02 UTC
-

When you create a storage space in Windows, you have the possibility to replace one of the physical disks used without having to delete and recreate your storage space.
Which is rather practical if you want one or more of the disks used without having to transfer everything.
In addition, if you often check the SMART of your physical disks, this can allow you to replace a physical disk used by your storage space before it actually fails.
Note: for this tutorial, we used a "Parity" type storage space (software RAID 5), but the type used is not important in this case.
If we chose it, it is simply because it is the most practical type since it combines performance and security.
Tutorial made with Windows 10 version 2104 and also tested with Windows 11 v21H2.
Important : this is not possible on Windows 8 and 8.1, as the "Prepare for removal" option does not exist on these versions of Windows.
- Hard Drive Health (SMART)
- Edit an existing storage space
- Add the new physical disk
- Delete the old physical disk
1. Hard Drive Health (SMART)
To check the health of a hard drive, you can use various free or paid programs.
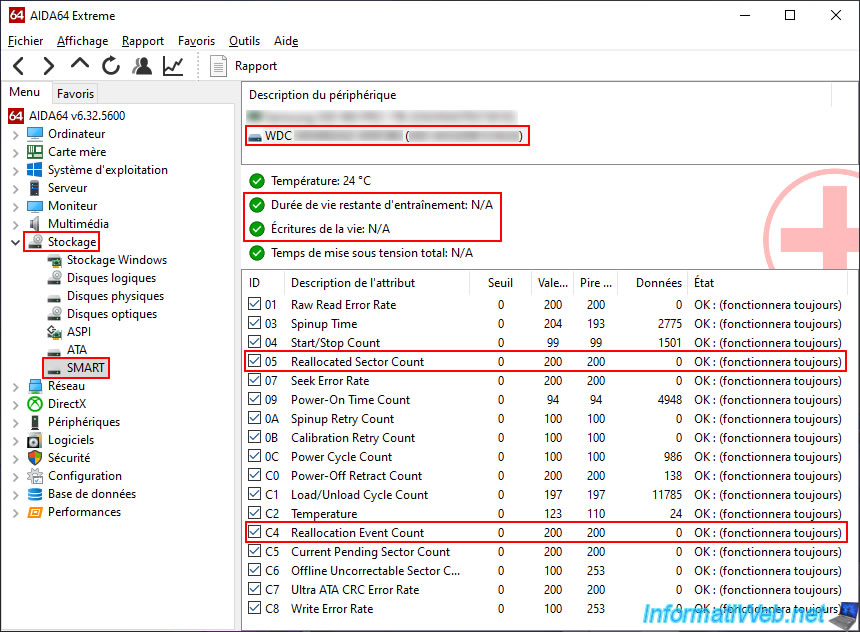
In the famous program "AIDA64" (formerly "EVEREST"), you can check the health of your hard drives by going to the section: Storage -> SMART.
Select the desired hard drive from the top list and AIDA64 will show you green icons if everything is fine.
The 2 most important icons are:
- Remaining Drive Lifetime.
- Lifetime Writes.
Then, in the list below, you can see all the SMART data supported by your hard drive.
In the case of AIDA64, just check that the status (displayed in the right column) is OK for all the data displayed.
Otherwise, check especially these 2 data:
- Reallocated Sector Count.
- Reallocation Event Count.
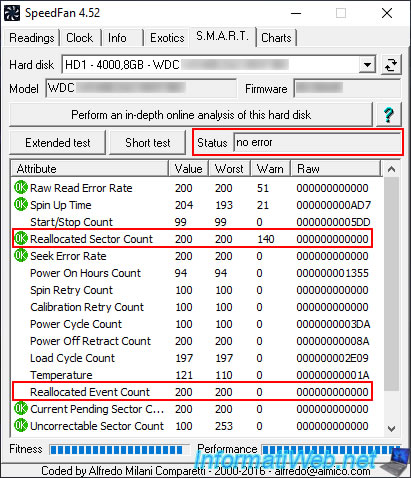
These 2 data indicate that bad sectors have been reallocated.
By default, a certain number of sectors are reserved and inaccessible, because these will replace the bad sectors when your hard drive detects them.
If 3 or 4 bad sectors have been reallocated, it may simply be a shock to your computer that caused them.
But if this number increases, it is a sign of a hard drive that will fail or where the data will potentially be corrupted in the future (depending on where the bad sectors are located).
So it is time to replace it with a new hard drive before it is too late.
Note: AIDA64 is paid, but available as a trial version.
If you are looking for a free (although less complete) program, we recommend the "SpeedFan" program.
2. Edit an existing storage space
To change the settings of an existing storage space, you need to open the Control Panel and go to the section: System and Security -> Storage Spaces.
Then, you will need to click on the "Change settings" button located at the top.
Otherwise, all the options for your storage pool and storage space will remain grayed out.
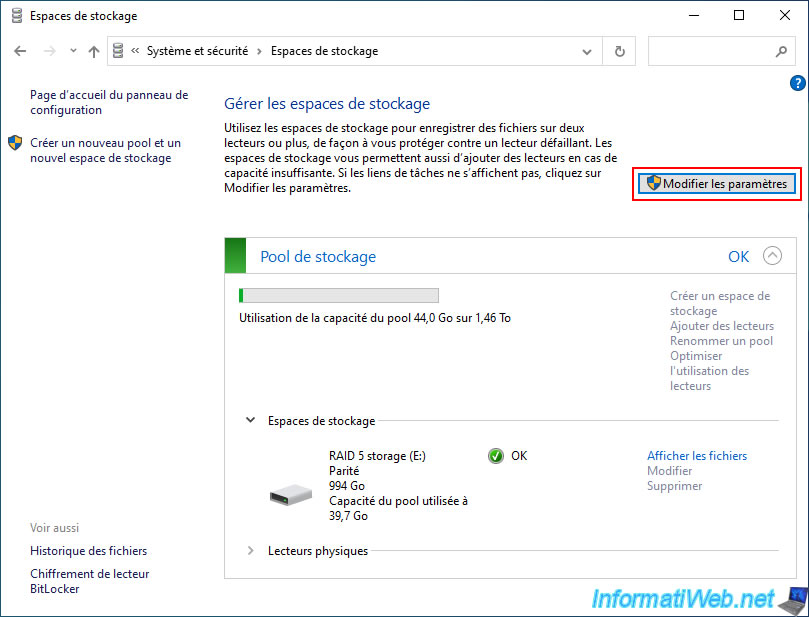
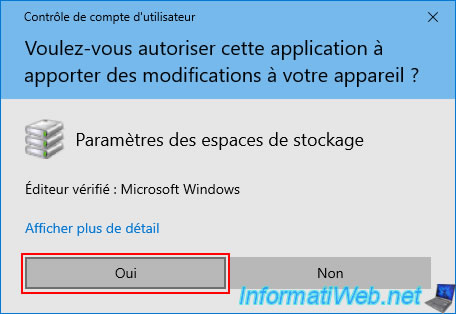
When the "User Account Control" (UAC) window appears for "Storage Spaces Settings", click "Yes".
Now, all your storage pool and storage space options are accessible.
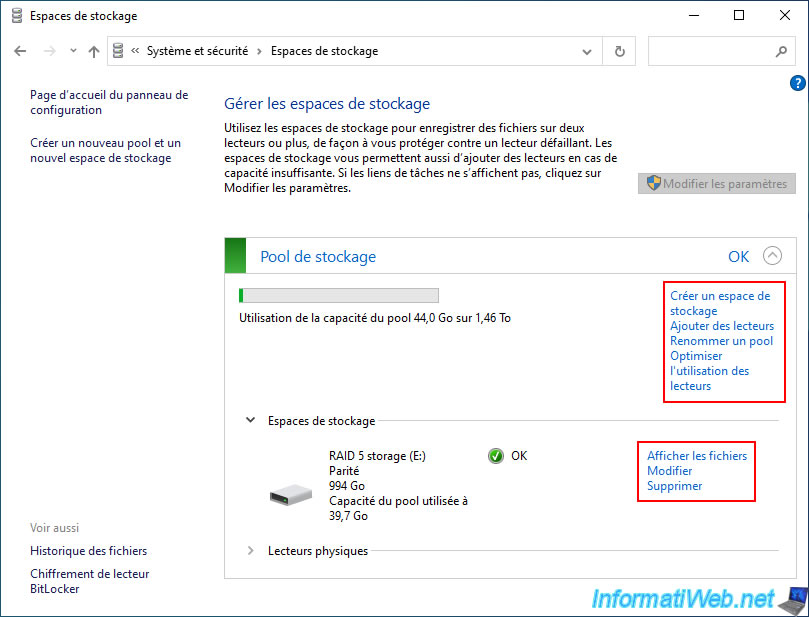
For this tutorial, we used a "Parity" type storage space with 3 physical drives (which is the minimum required and what is sufficient).
3. Add the new physical disk
Before you can remove the physical disk you want to replace, you must first add a new disk.
This will allow Windows to transfer the data from the disk you want to remove to the new disk you want from now on.
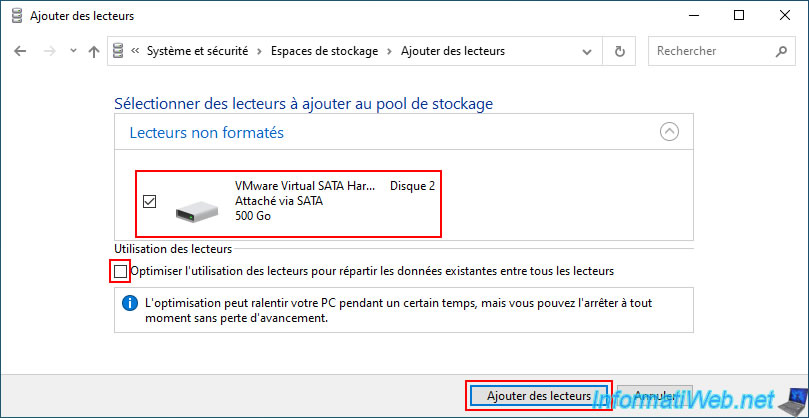
To do this, click the "Add drives" link to the right of your storage pool.
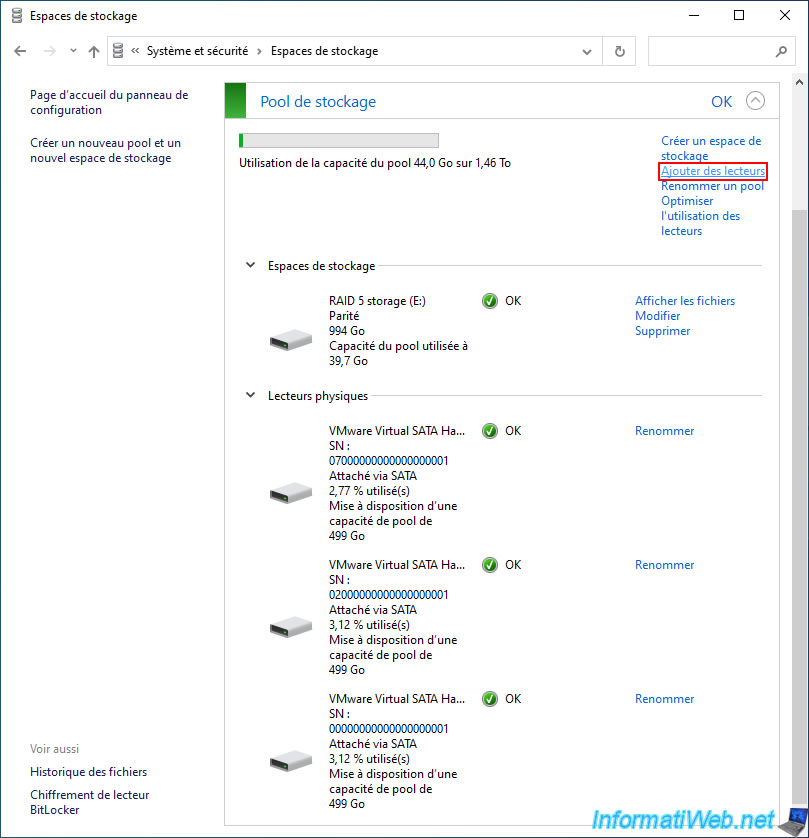
In the "Add drives" window, select the new physical disk that you want to use for this storage pool.
Important : uncheck the "Optimize drive usage..." box, as this option only allows you to distribute data across the different physical disks in your pool.
In this case, you only need to transfer data from the old physical disk to this new physical disk.
Next, click "Add drives".
4. Delete the old physical disk
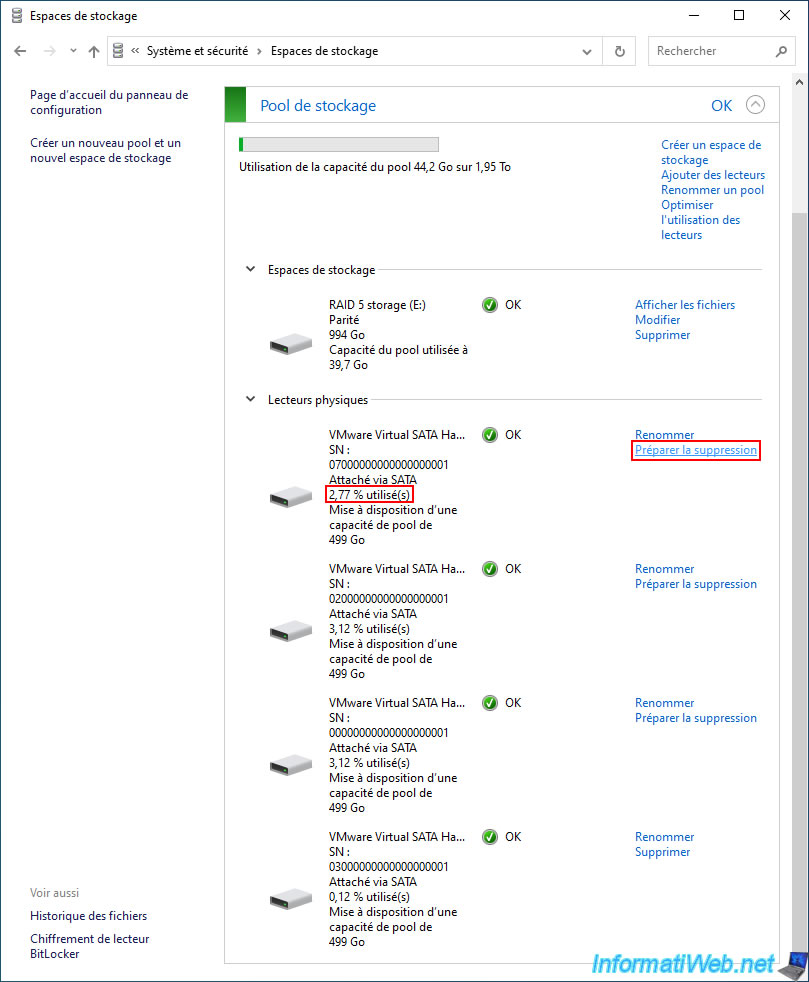
Now that you have added a new physical disk, Windows allows you to remove one of the physical disks from your storage pool.
In fact, since you have one more physical disk than the minimum required, you can remove one of them at will.
To do this, simply click on the "Prepare for removal" link next to the physical disk you wish to remove.
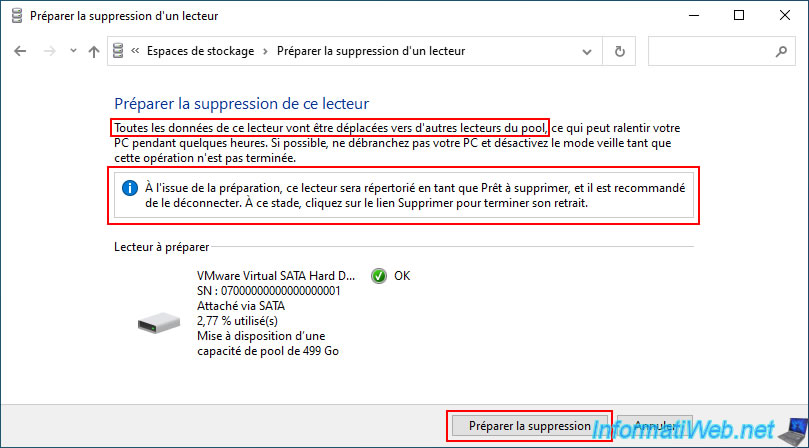
As Windows tells you, all data on this drive will be moved to other drives in the pool.
Once the preparation is complete, the status of this physical disk will change to "Ready to remove".
Only then, you can unplug this physical disk from your computer.
Click the "Prepare for removal" button.
Important : as indicated here by Windows, it is recommended to disable sleep so that your computer does not go to sleep during this data transfer.
To do this, refer to our tutorial : Disable automatic sleep on Windows 11, 10, 8.1, 8 and 7.
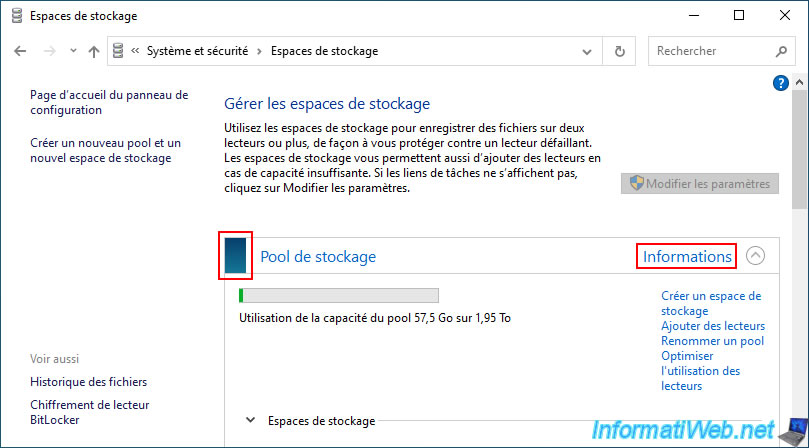
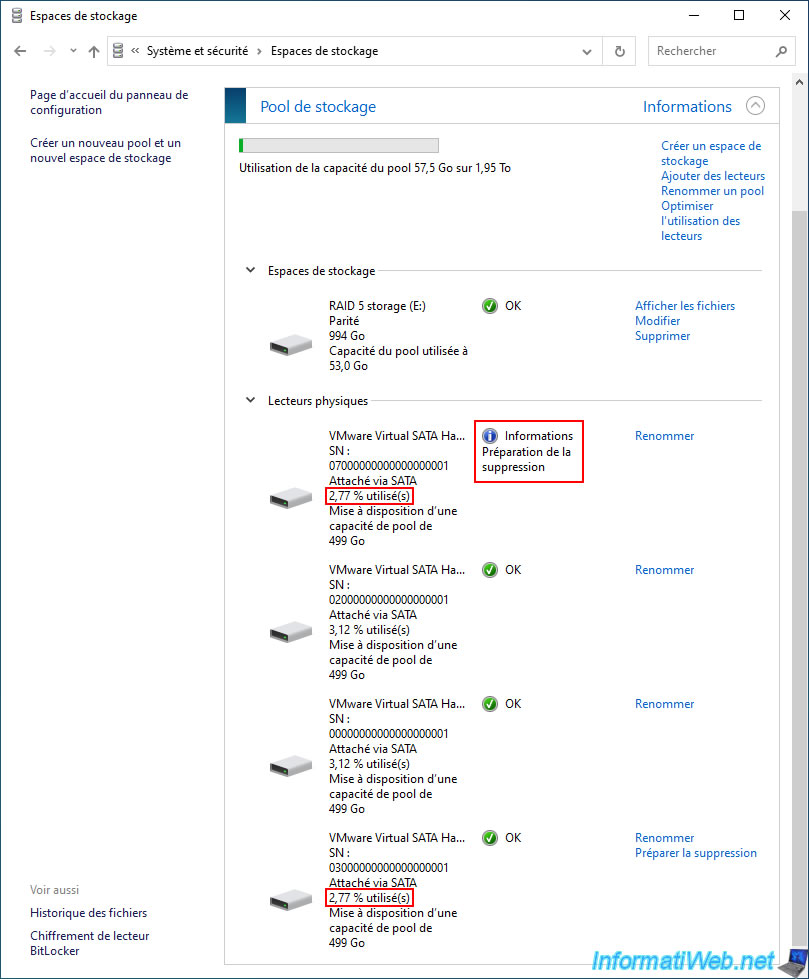
Once this action is done, your storage pool status will change to "Information" and your storage pool color will be blue.
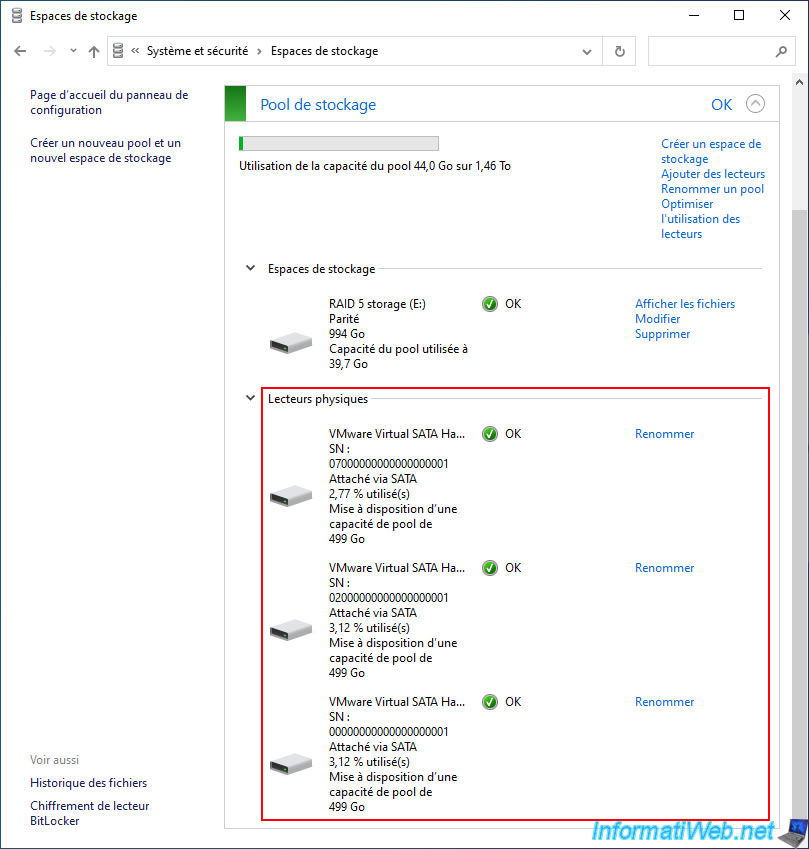
In the "Physical drives" section, you will see that:
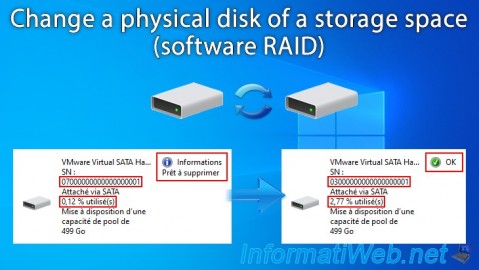
- the disk you want to remove is used at a certain percentage and its status is "Information - Preparing for deletion".
- the new disk you added earlier is used at the same percentage and its status is "OK".
You will easily understand that Windows will simply copy the data from your old disk (with the blue icon) to your new disk (with a green icon).
Once the data is transferred from the old physical disk to the new physical disk, you will see that:
- the old disk is used at about 0%, its status has changed to "Information - Ready to remove" (as Windows explained to you earlier) and the "Remove" link has appeared next to it.
- the new disk is used at the percentage that the old physical disk was.
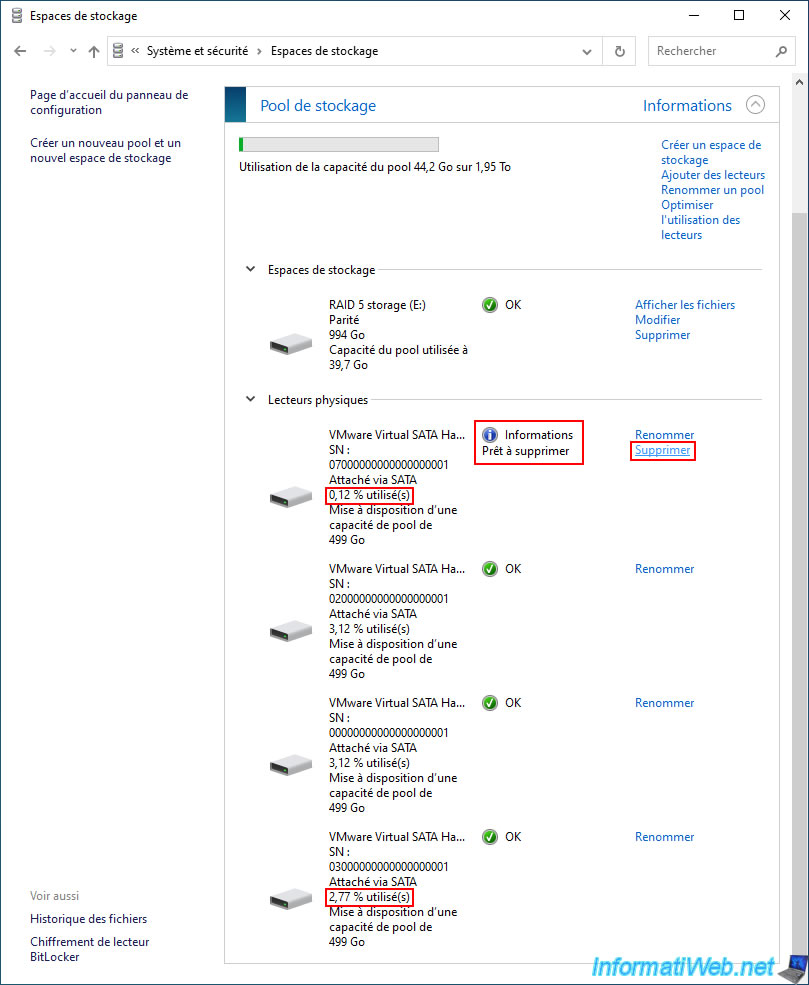
Your physical disk with the status "Information - Ready to remove" appears.
Confirm its deletion by clicking on "Remove drive".

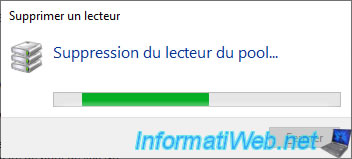
Please wait while physical disks are removed from your storage pool.
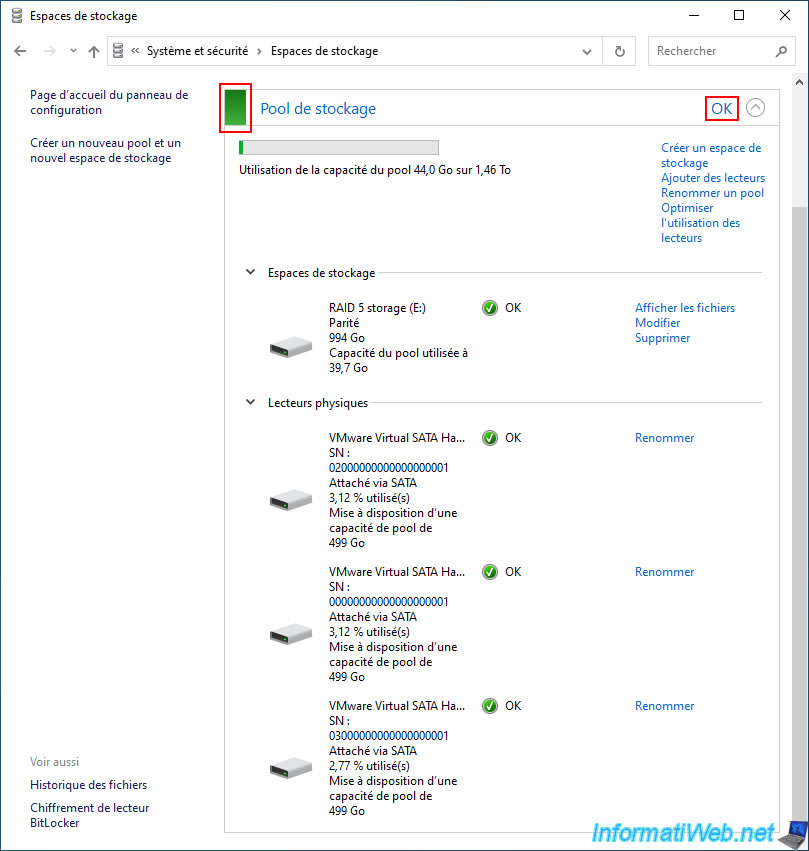
Your old physical disk has disappeared from your storage pool and your storage pool status has returned to "OK".
Share this tutorial
To see also
-
Windows 5/8/2025
Windows 10 - Delete Windows.old folder
-
Windows 8/9/2022
Windows 7 / 8 / 8.1 / 10 / 11 - Create a virtual Wifi network
-
Windows 10/21/2024
Windows 8 - Use a Bluetooth headset
-
Windows 5/10/2021
Windows 8 / 8.1 / 10 / 11 - Installation on an USB support
You must be logged in to post a comment