- Windows
- Windows 8 / 8.1, Windows 7, Windows 10, Windows 11, Rufus
- 02 January 2023 at 14:55 UTC
-

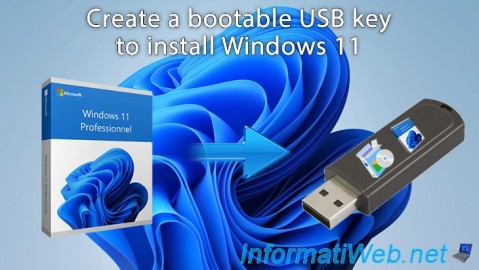
When you want to install Windows on a computer, you can burn its installation ISO file to a blank DVD or create a bootable USB key from this ISO file.
It saves you from buying blank DVDs and it also saves you money.
Info : this tutorial was made with the ISO of Windows 10 v2104 (21H1) and also tested with the ISOs of Windows Vista to 10 and Windows Server 2008 to 2016.
The procedure therefore works the same way with all these versions of Windows and Windows Server.
- Create a bootable USB key to install Windows or Windows Server with Rufus
- Create a bootable USB key to install Windows or Windows Server with Windows 7 USB/DVD Download Tool
1. Create a bootable USB key to install Windows or Windows Server with Rufus
1.1. Create a bootable USB key to install Windows (Vista to 10) or Windows Server (2008 to 2016)
To create a bootable USB key to install Windows (Vista to 10) or Windows Server (2008 to 2016), you can use the Rufus utility in exactly the same way.
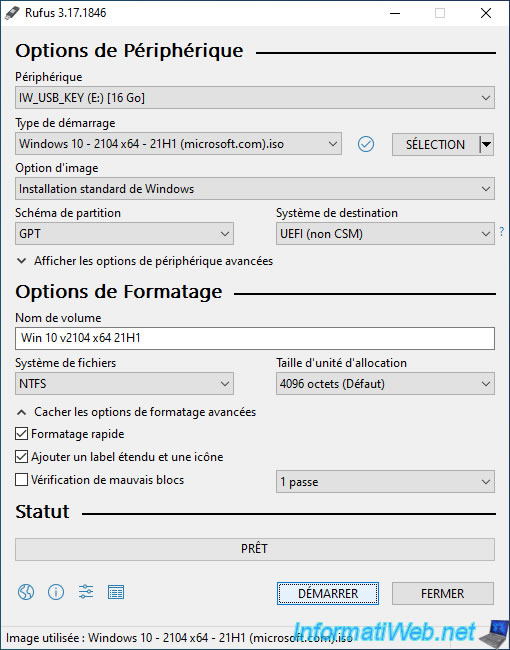
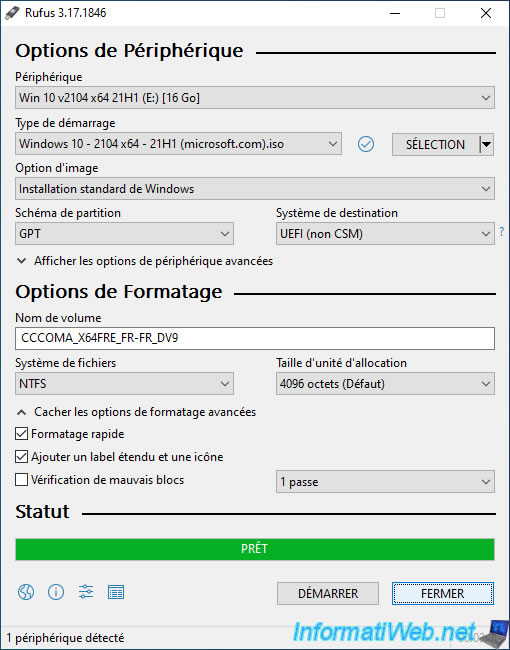
To get started, select your USB key from the "Device" list at the top, then click : Select.
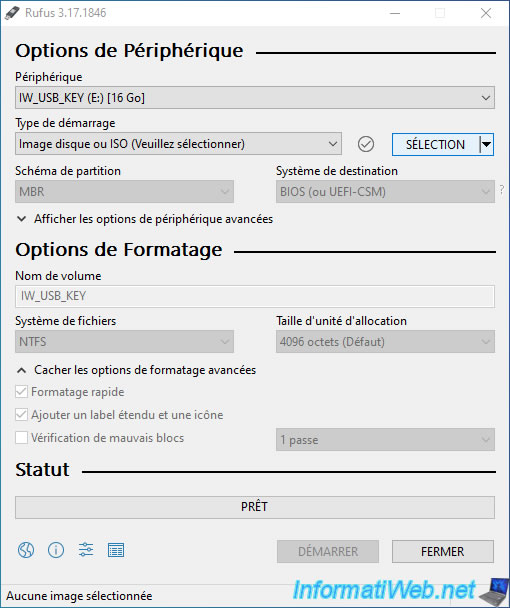
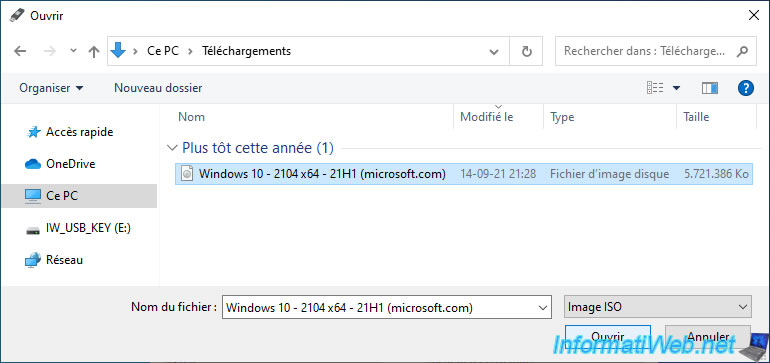
Select the ISO file of the version of Windows you want to install using a bootable USB key.
For this tutorial, we used the ISO of Windows 10 v2104 (21H1) which is the latest version of Windows 10 available today.
Rufus will automatically adapt its settings according to the selected Windows or Windows Server ISO.
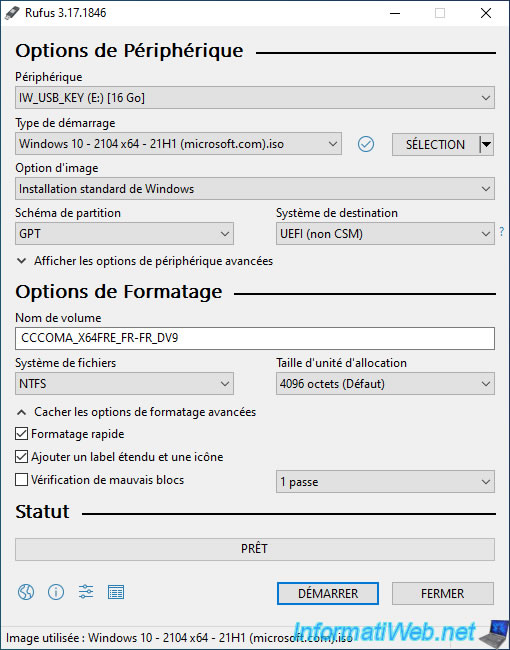
Change the name of your bootable USB key if you wish by changing the volume label.
Confirm the deletion of the data present on your USB key by clicking on OK.
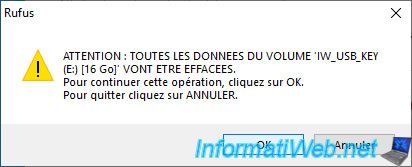
Rufus will perform various actions on the file system of your USB key.

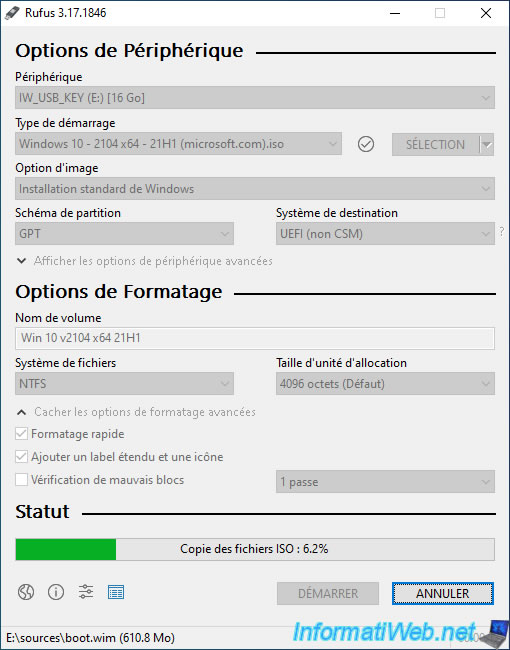
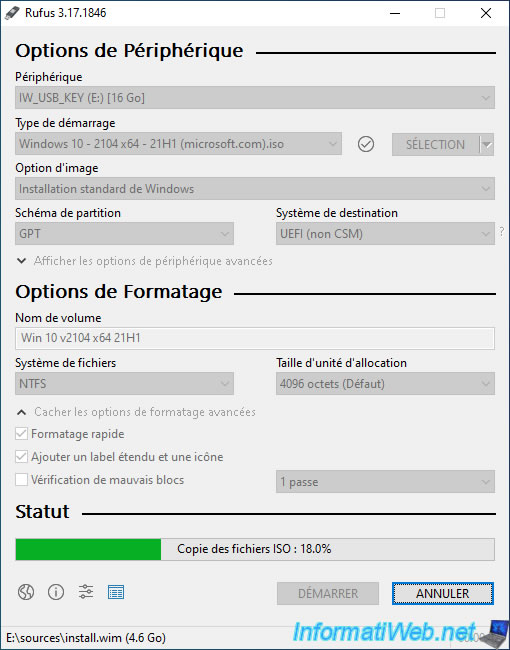
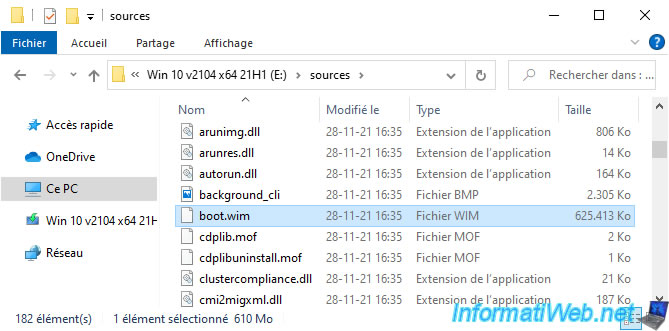
Then, it will copy the contents of the selected ISO file to your USB key (including the "boot.wim" and "install.wim" files of the selected ISO).
Once the Windows or Windows Server bootable USB key is created, the "Ready" status will appear.
Click Close.
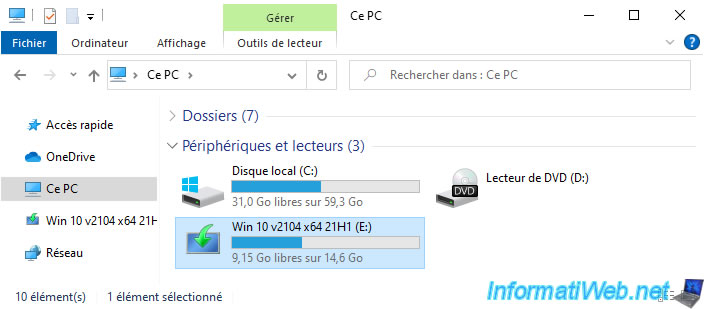
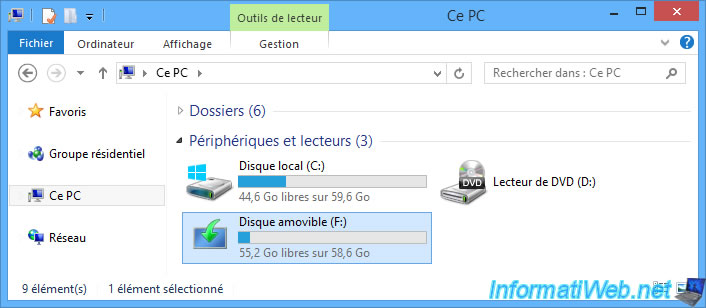
As you can see, your Windows bootable USB key has been created.
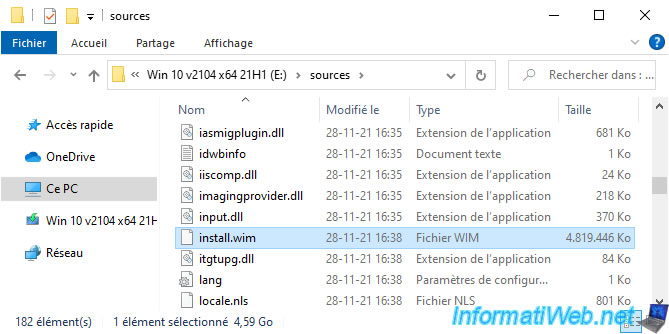
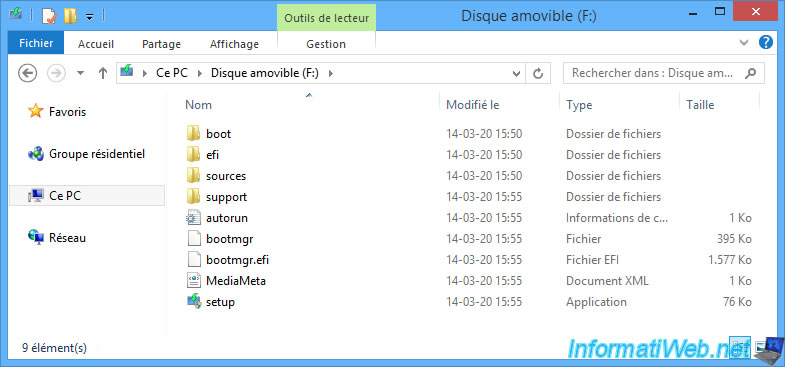
Here is the contents of a Windows 10 bootable USB key.
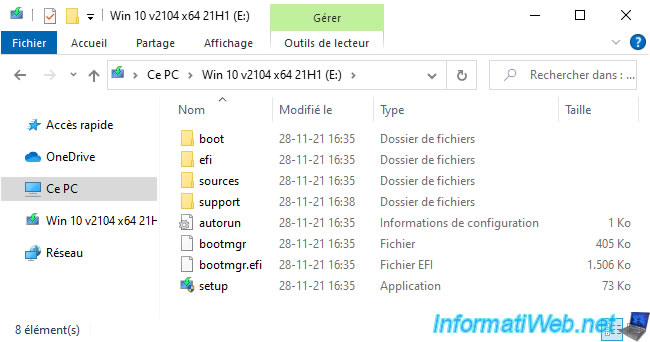
As expected, in the "sources" folder, you will find in particular the "boot.wim" and "install.wim" files of the Windows or Windows Server ISO file selected previously.
1.2. Install Windows or Windows Server from a bootable USB key
To install Windows or Windows Server, configure your computer's boot order to boot first on your bootable USB key.
Note : the "UEFI:NTFS" screen is caused by Rufus for compatibility reasons between UEFI boot and NTFS file system.

Then, the Windows or Windows Server installer will appear.
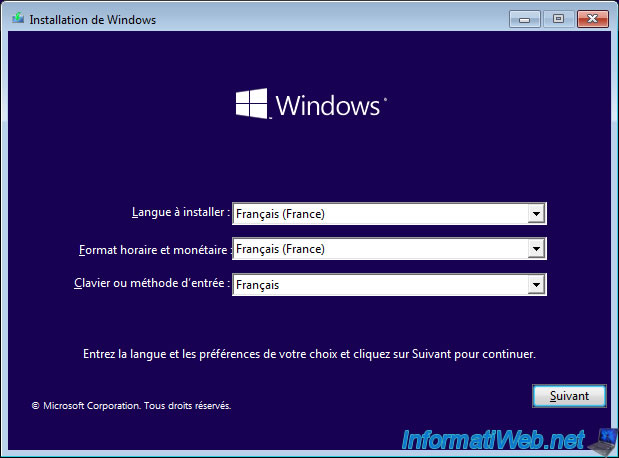
As expected, installing Windows or Windows Server from your bootable USB key will go smoothly.
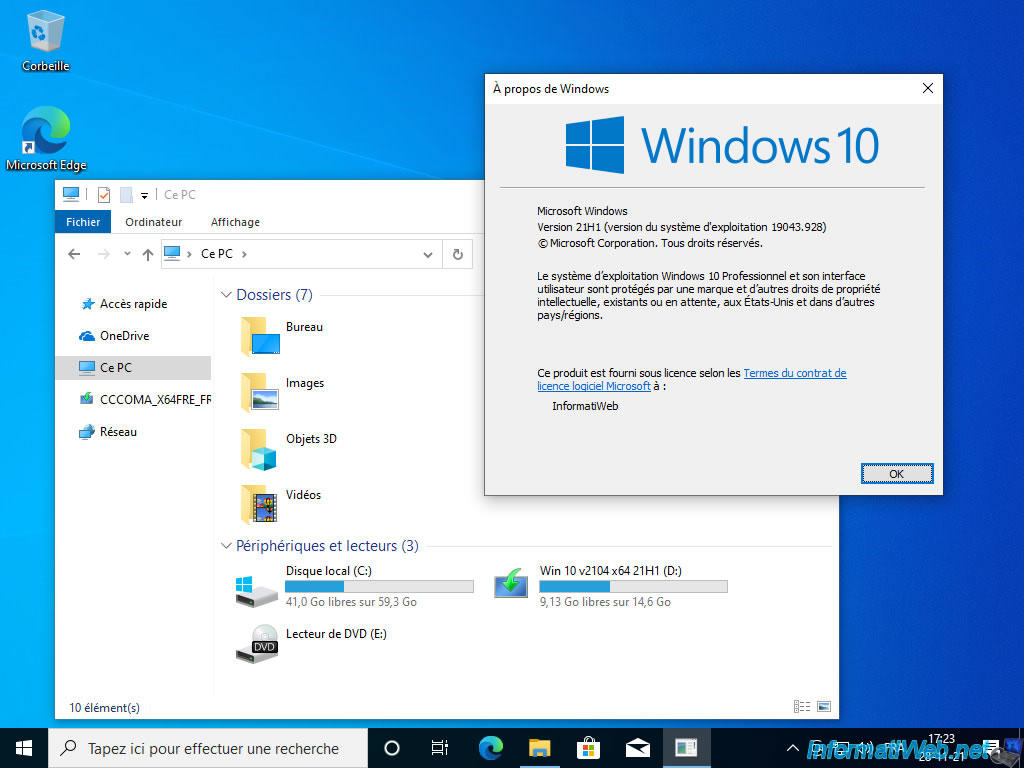
Once Windows or Windows Server is installed, you will also see your bootable USB key appear in File Explorer.
2. Create a bootable USB key to install Windows or Windows Server with Windows 7 USB/DVD Download Tool
In this second part of this tutorial, we will create a bootable Windows 8.1 USB key.
But, Windows 7 USB/DVD Download Tool also works with Windows 7, 8, 8.1, 10 and their server versions (2008 R2, 2012, 2012 R2 and 2016).
To begin, download the "Windows USB/DVD Download Tool" software from the Microsoft site.
Important : this tool is no longer available on Microsoft servers.
All official download links for this tool are dead.
If you still want to use it, you'll need to download it from a third-party site, like FileHippo for example.
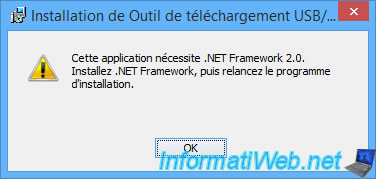
When you attempt to install it, a warning will appear regarding .Net Framework 2.0.
However, on Windows 8 / 8.1, you will have to enable the corresponding feature and not download the .Net Framework 2.0 from the Microsoft site to install it.
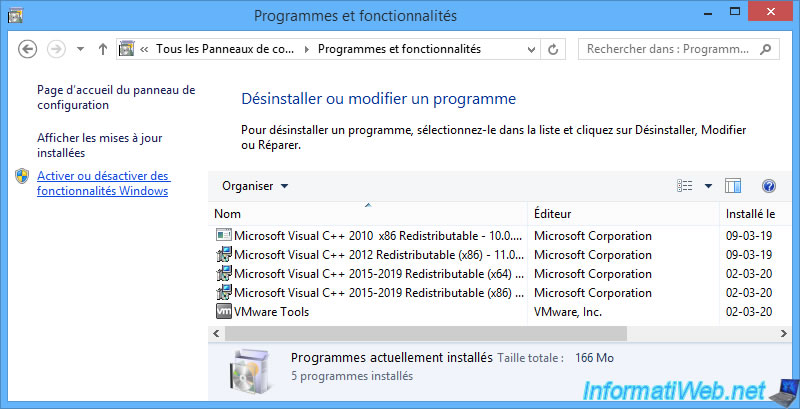
To do this, go to the control panel -> Programs -> Programs and Features.
Then, click on "Turn Windows features on or off" in the left menu.
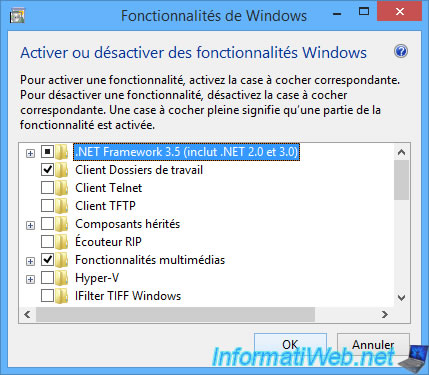
Check the ".NET Framework 3.5 (includes .NET 2.0 and 3.0)" box and click OK.
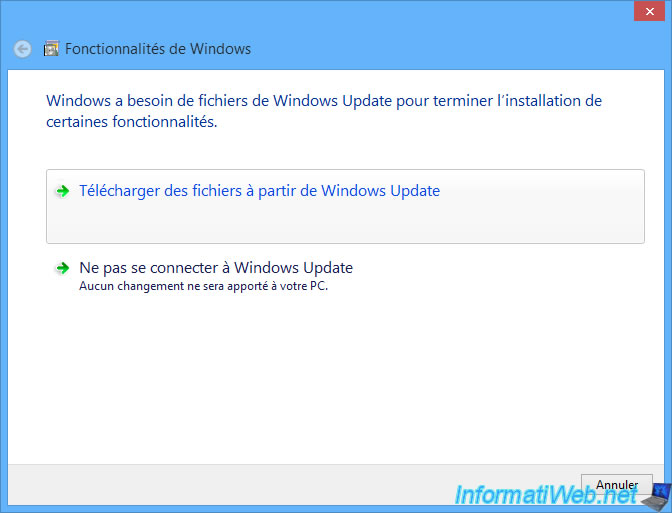
Click "Download files from Windows Update".
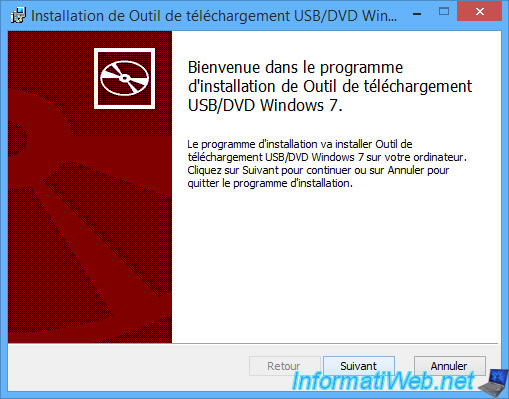
Once the .NET Framework 2.0 is installed, restart the installation of "Windows USB/DVD Download Tool" and click on Next.
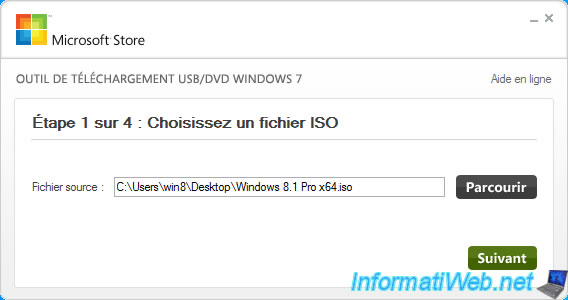
Once this program is installed, launch it and click on Browse.
Choose the iso file of Windows 8.1 (or any other version of Windows supported by this program) and click on Next.
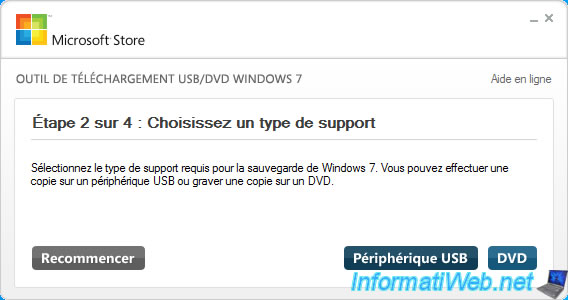
Click on "USB Device".
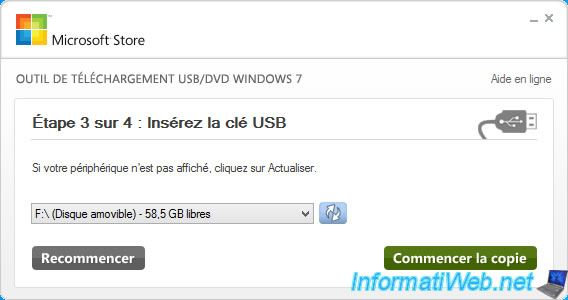
Choose your USB key from the list.
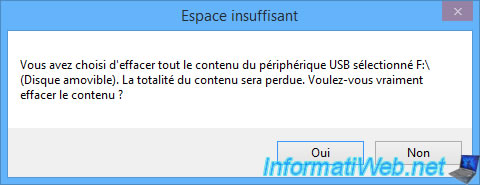
Warning, as indicated in this warning, all the data present on this one will be deleted.
Click "Erase USB Device".
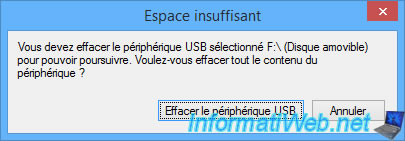
Confirm the deletion of the files from your USB key by clicking Yes.
The program will format your USB key.
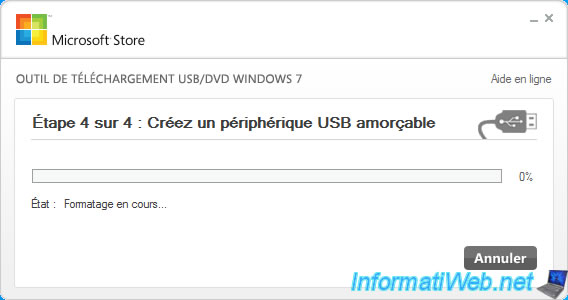
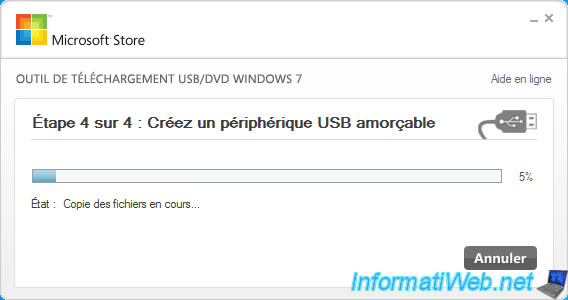
Then, copy the files contained in the iso file to your USB key.
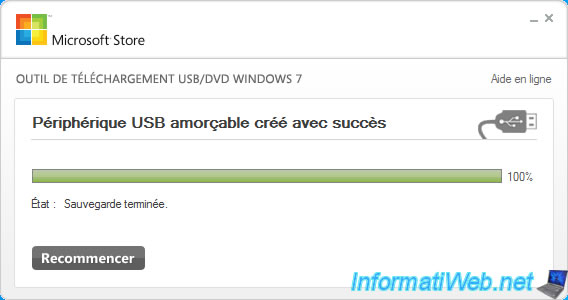
Once the bootable USB key has been created, the message "Backup complete" will be displayed.
As you can see, your USB key has the same icon as a Windows 8 / 8.1 installation DVD.
Le contenu de votre clé USB est identique au contenu du DVD d'installation de Windows 8 / 8.1.
Share this tutorial
To see also
-
Windows 3/1/2022
Upgrade from Windows 10 to Windows 11 (free)
-
Windows 10/3/2022
Windows - Create a sandbox to isolate a process
-
Windows 2/2/2022
Windows 11 - Create a bootable USB key to install Windows 11
-

Virtualization 1/29/2024
Windows 8 / 8.1 / 10 / 11 - Install Hyper-V on Windows Home Edition
You must be logged in to post a comment