Virtualize a physical PC to VMware vSphere (P2V) using Acronis True Image (Cyber Protect Home Office) and Acronis Universal Restore
- Backup
- Acronis True Image, Acronis Universal Restore
- 28 September 2026 at 07:41 UTC
-

- 3/9
4.2. Restore physical PC partitions from your Acronis backup
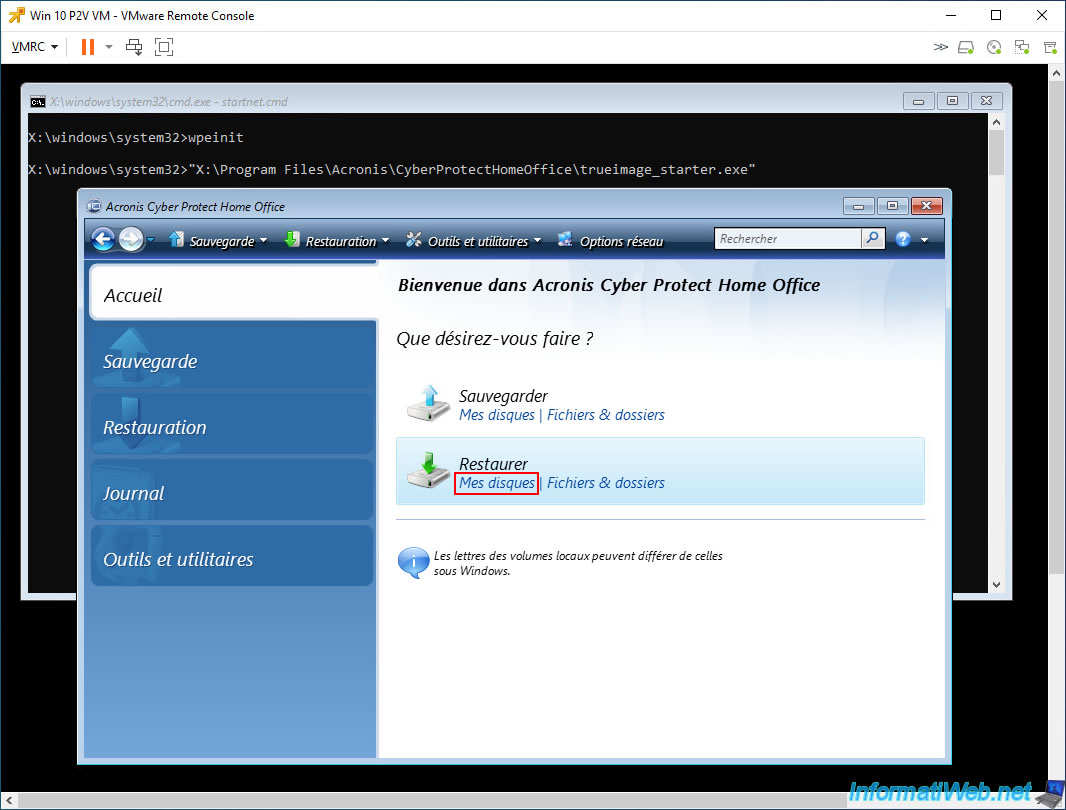
Now that your virtual hard disk is initialized with the correct partition table type, go back to the "Home" section of Acronis Cyber Protect Home Office (True Image) and click the "My Disks" link of the "Recover" option.
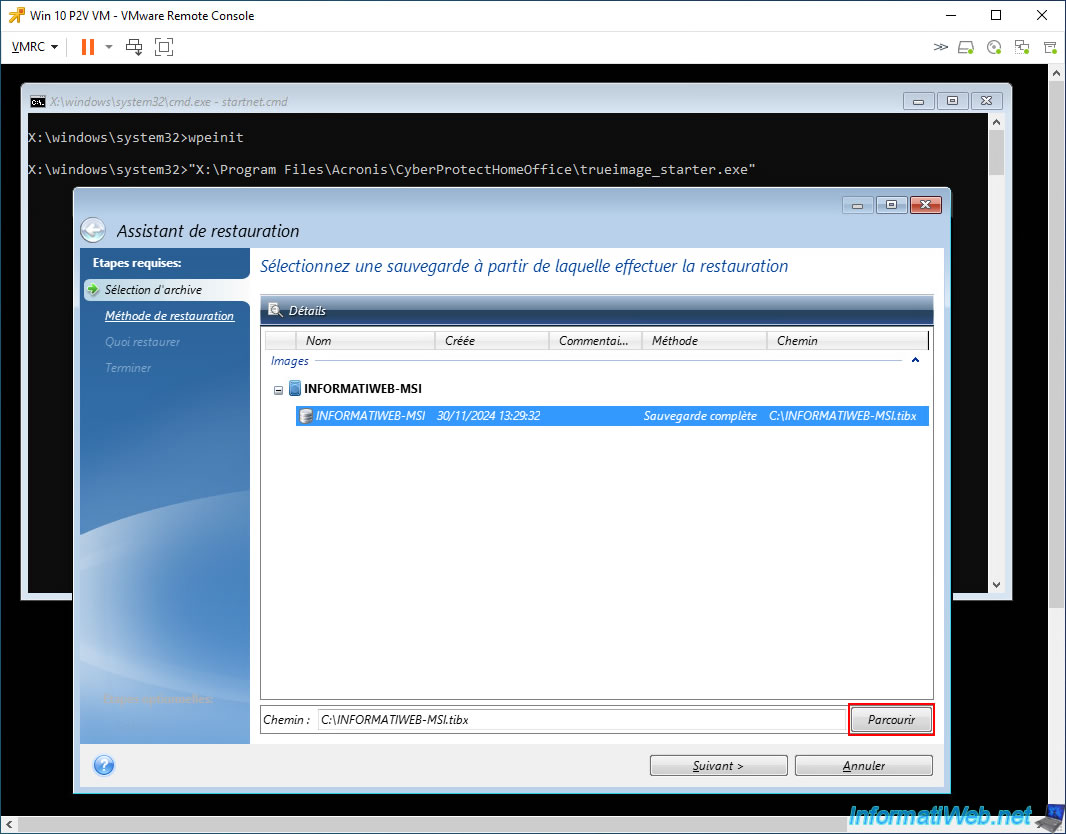
If the Restore Wizard automatically detects your backup, select it and click "Next".
Otherwise, click the "Browse" button.
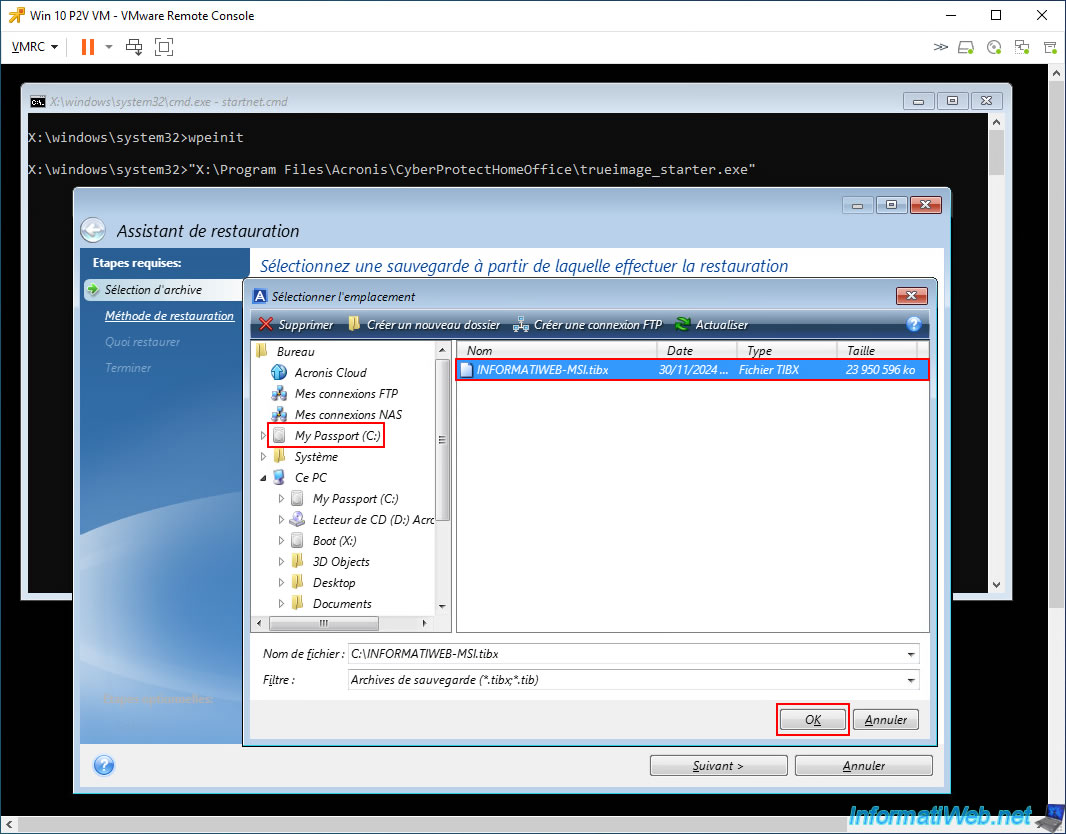
Select your external hard drive (which appears in the list on the left), then select your backup file (.tibx) on the right and click OK.
In our case, we therefore select our backup file "INFORMATIWEB-MSI.tibx" stored on our external hard drive "My Passport (C:)".
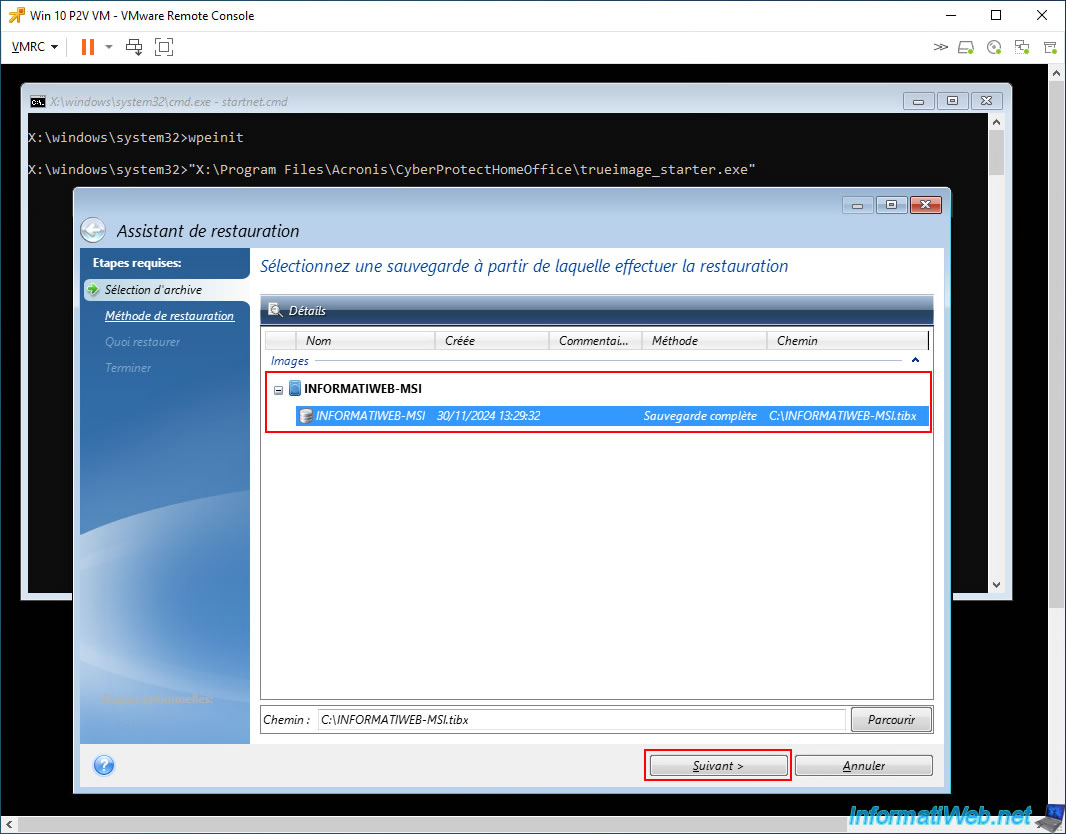
Now, your Acronis backup appears in the list.
Select it and click "Next".
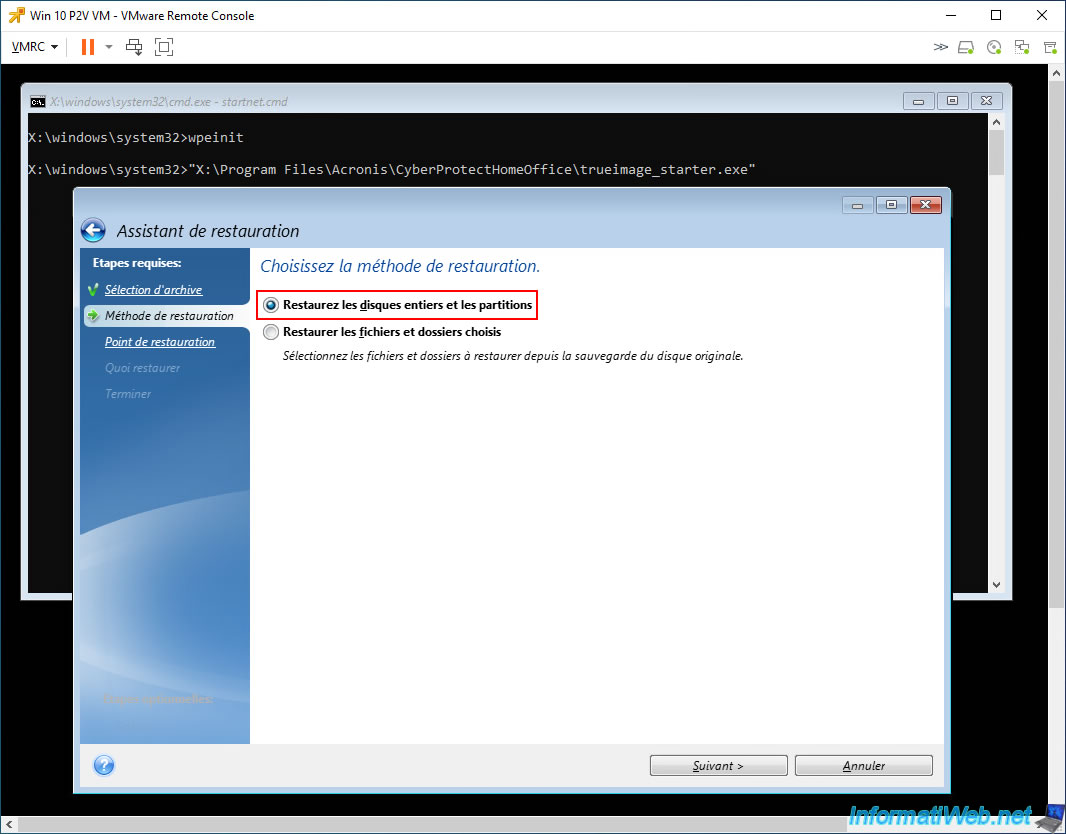
Select the restore method "Restore entire disks and partitions".
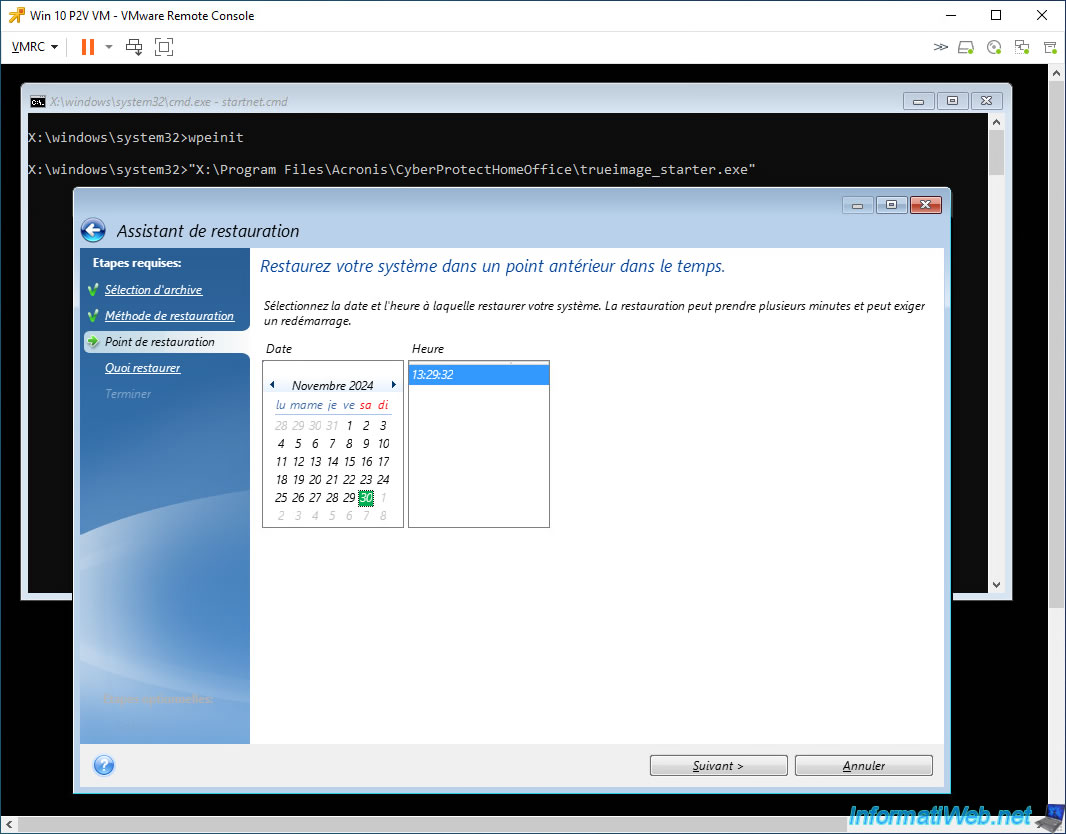
Select the date available in your case (which depends on the date your physical PC was backed up).
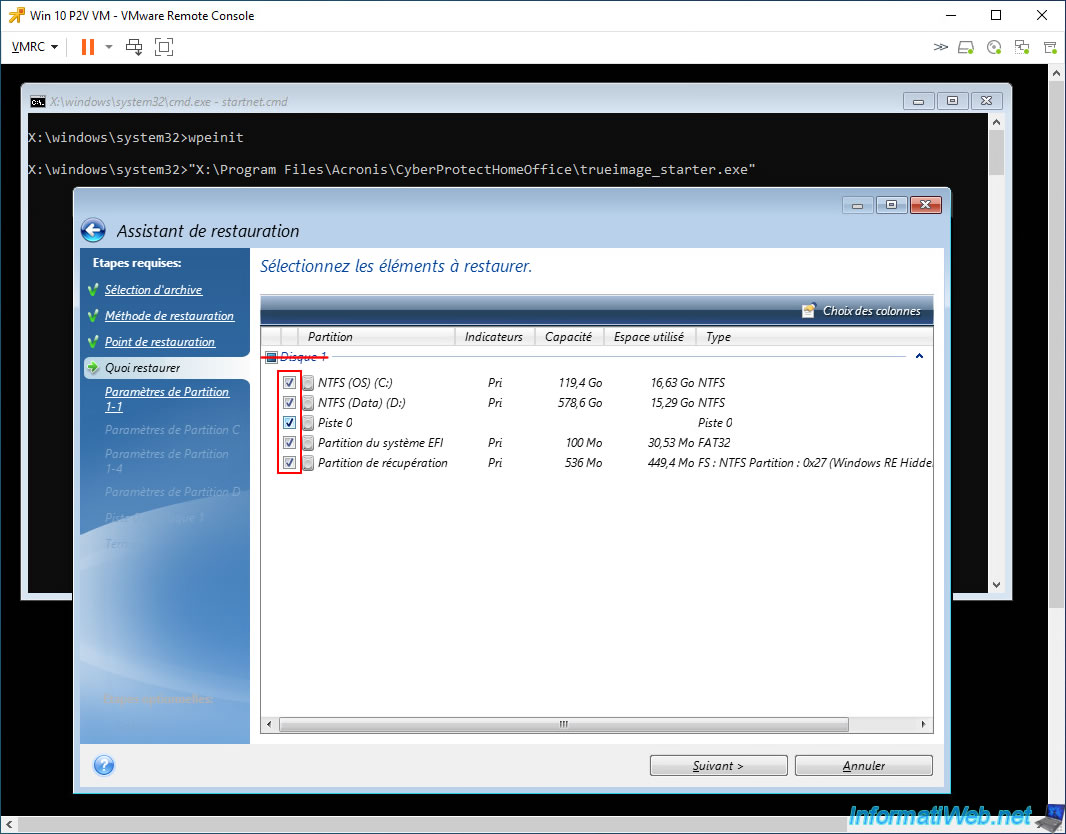
Warning : for the items to be restored, you must uncheck the "Disk 1" box, then check only the boxes of all partitions and track 0.
The goal is to perform a partition restore and not an entire disk. This will allow you to modify the size of each partition to be restored and adapt it to the size of your virtual hard disk.
Otherwise, you could very likely end up with full partitions (including the one where Windows is located), as you can see in step "12. Bonus: Problem encountered if you try to restore the entire disk instead of its partitions" of our P2V migration tutorial via Acronis on VirtualBox.
For each partition's restore settings, the procedure is almost the same every time.
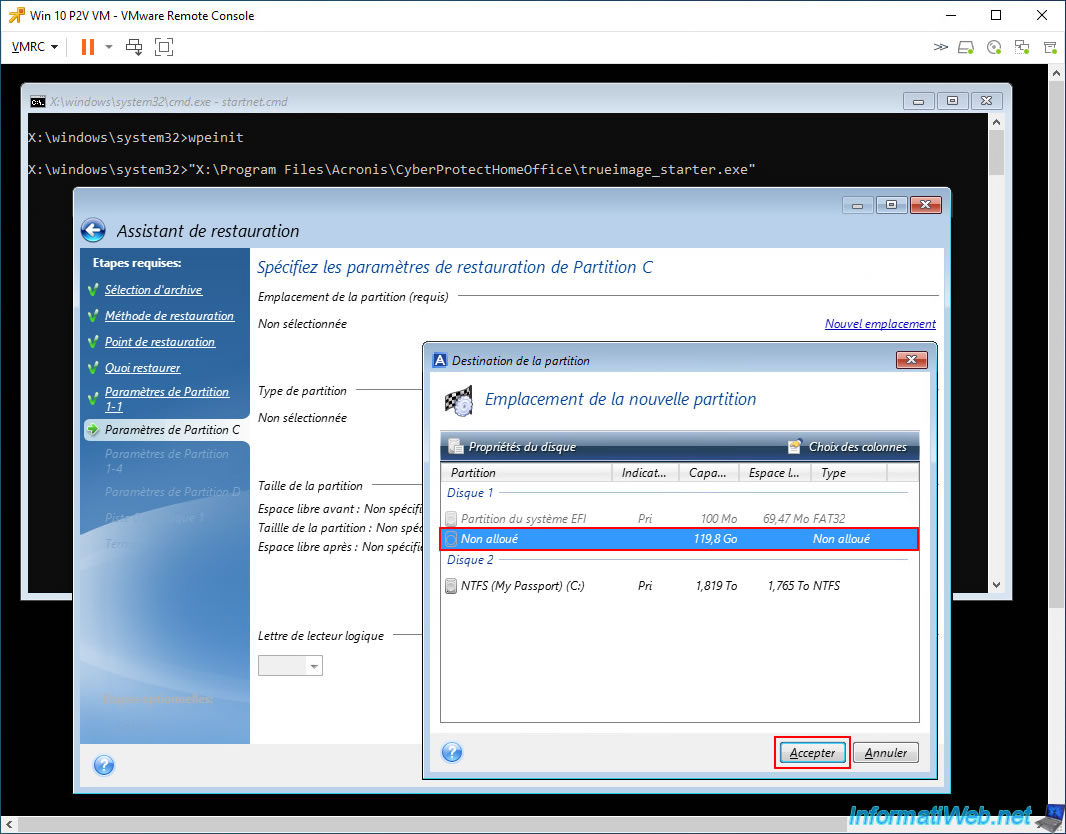
To start, click on the "New location" link (located at the top right), then select the "Unallocated" space of disk 1 as the partition destination.
Then, click "Accept".
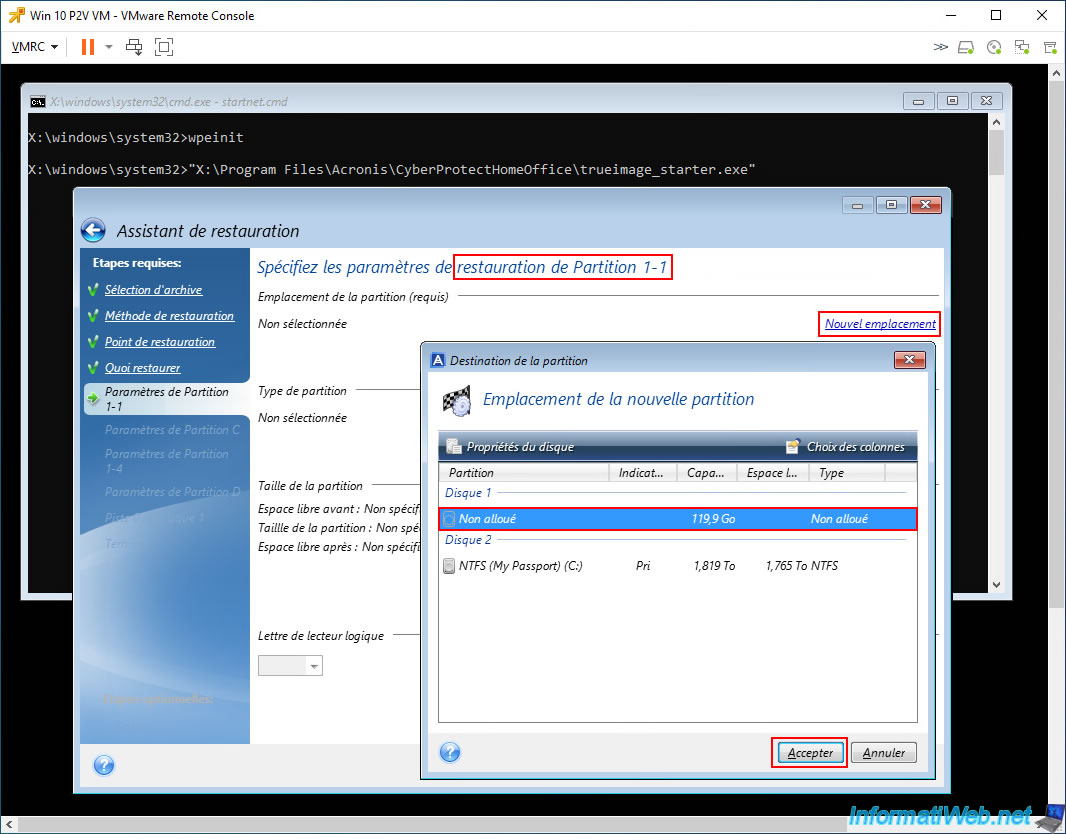
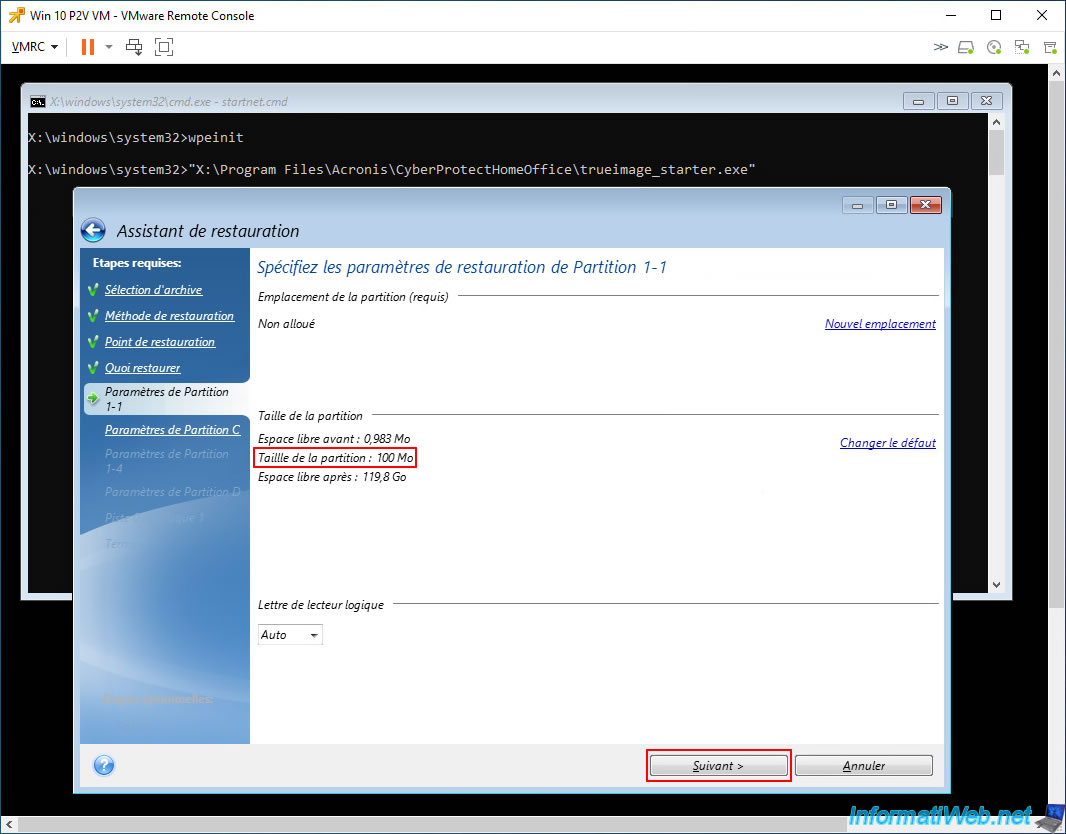
As you can see, the 1st partition (Partition 1-1) to be restored is a small partition of 100MB.
In case of Windows 10, it is the small system partition "EFI System Partition".
Click "Next".
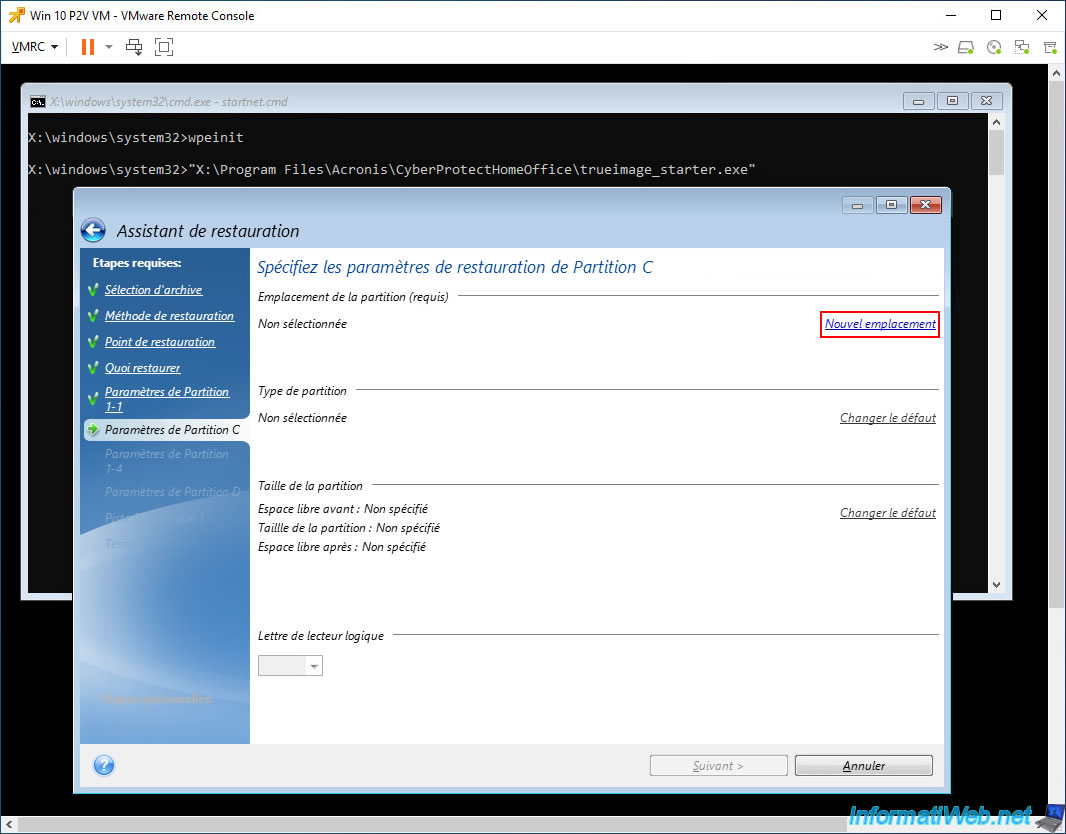
For "Partition C", click the "New Location" link again.
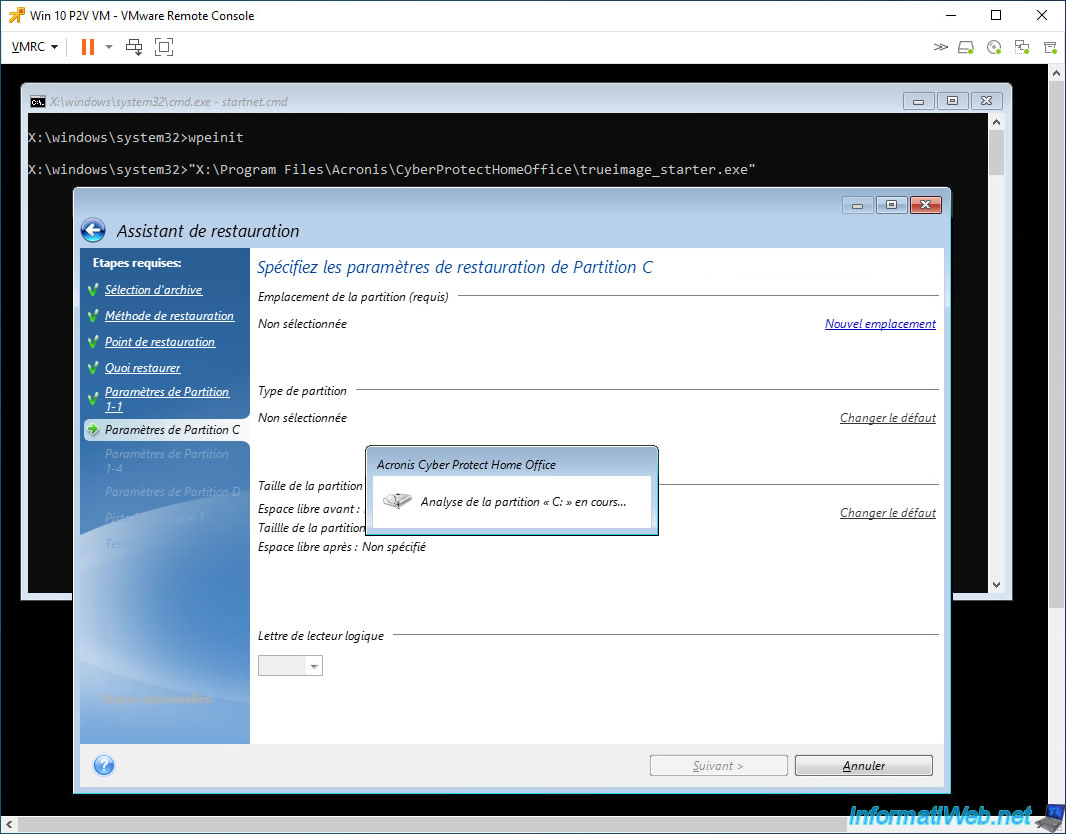
The message "Analyzing partition 'C:'" appears.
Then, in the small "Partition Destination" window that appears, select the "Unallocated" space of disk 1 again and click "Accept".
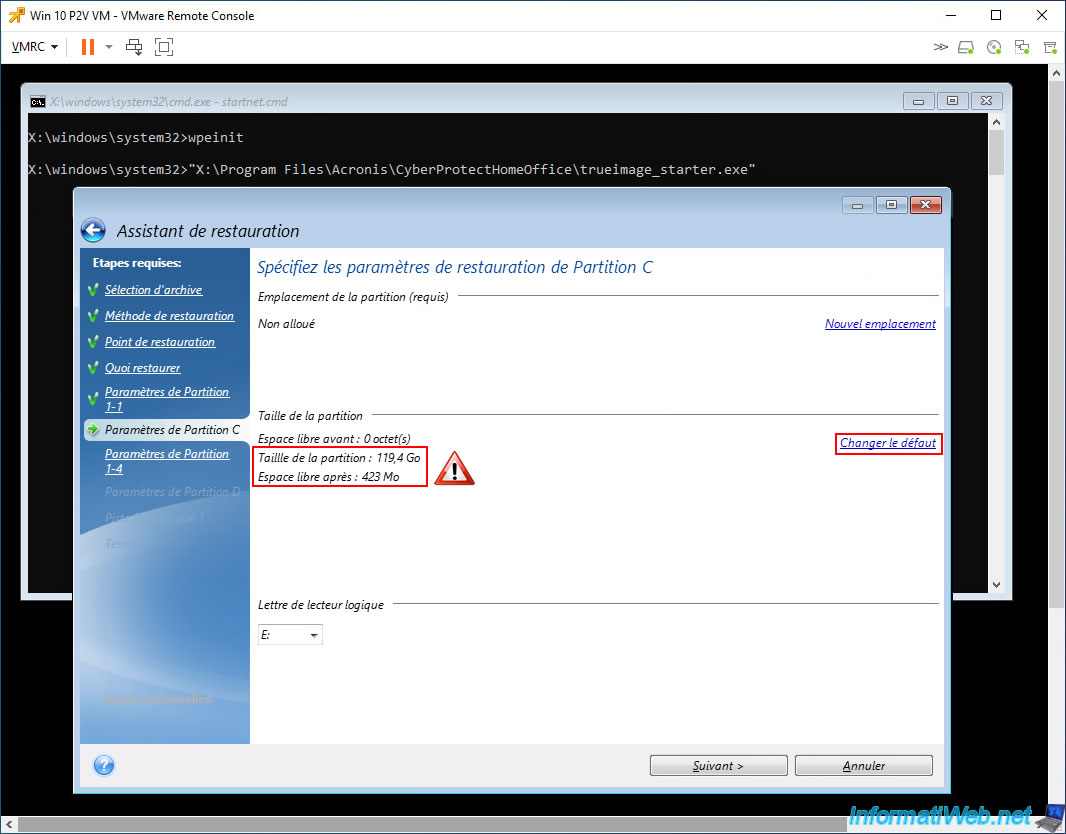
Warning : when you try to restore large partitions to a virtual hard disk (of a VM), Acronis may use all the remaining space on your virtual hard disk by default.
However, this would prevent you from restoring subsequent partitions to the same virtual hard disk.
To fix this, click the "Change default" link (located on the right).
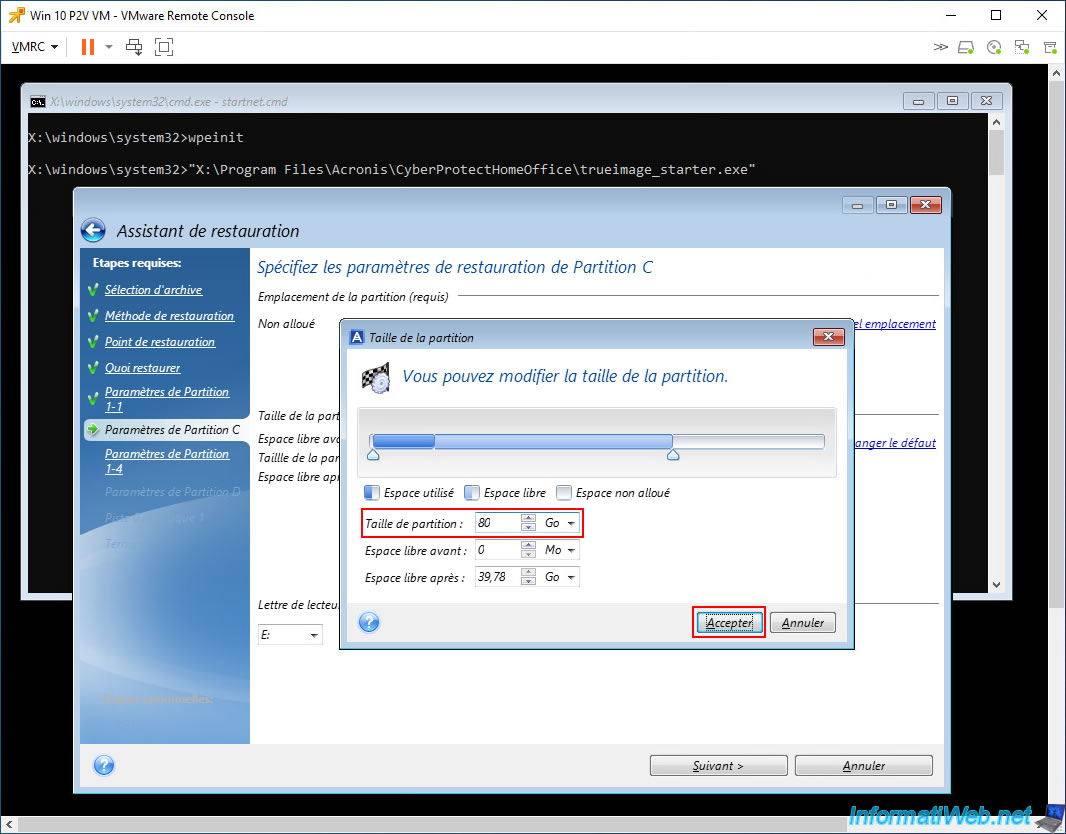
In our case, we specified a size of 80 GB for the restoration of this "C" partition (knowing that our virtual hard disk has a capacity of 120 GB).
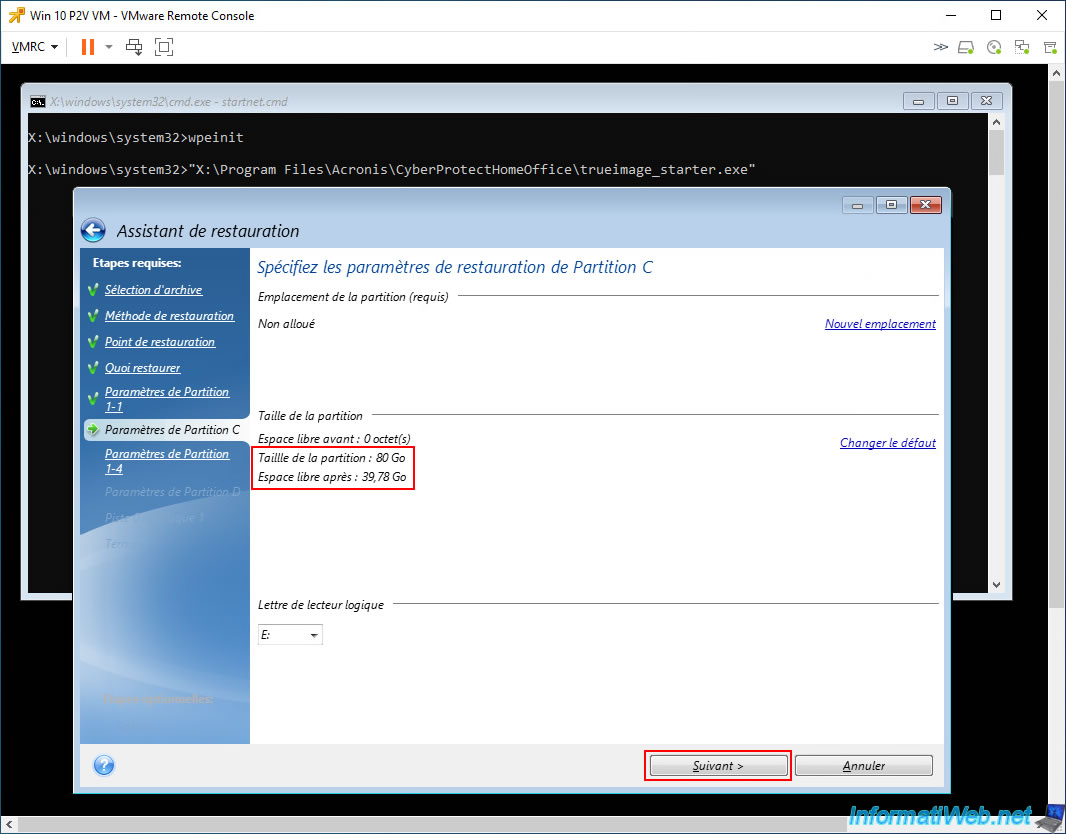
Now, this "C" partition will be 80GB in size on our virtual hard drive.
Which will leave us with about 40GB of disk space on our virtual hard drive.
Click "Next".
Share this tutorial
To see also
-
Backup 9/26/2012
Acronis - Restore a backup on a different hardware
-

Backup 6/12/2025
Acronis True Image - Delete an FTP connection
-
Backup 5/11/2026
Acronis True Image - Universal Restore Media - Create media (Win PE version based on Win RE)
-
Backup 10/9/2025
Acronis True Image - Validate a backup
No comment