Create and use Universal Restore bootable media with Acronis True Image (Cyber Protect Home Office)
- Backup
- Acronis True Image, Acronis Universal Restore
- 04 May 2026 at 13:20 UTC
-

- 2/4
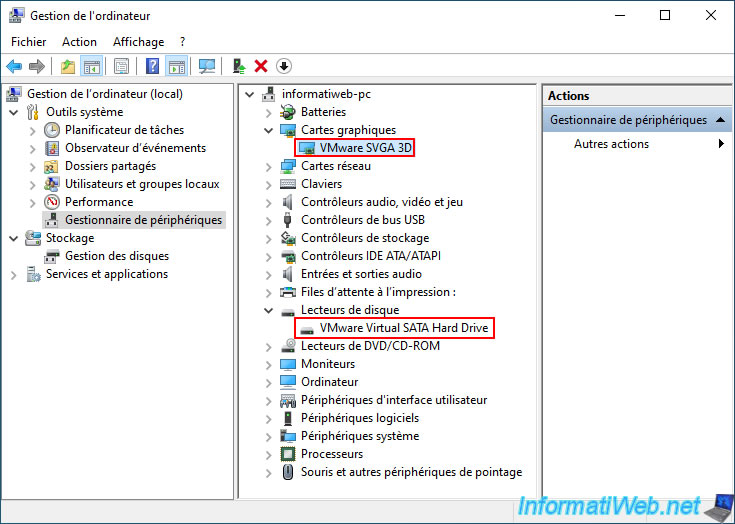
3. Source PC hardware
Just for your information, here is the source PC hardware.
As you can see, this is a VMware virtual machine.
4. Backup source PC via Acronis bootable media
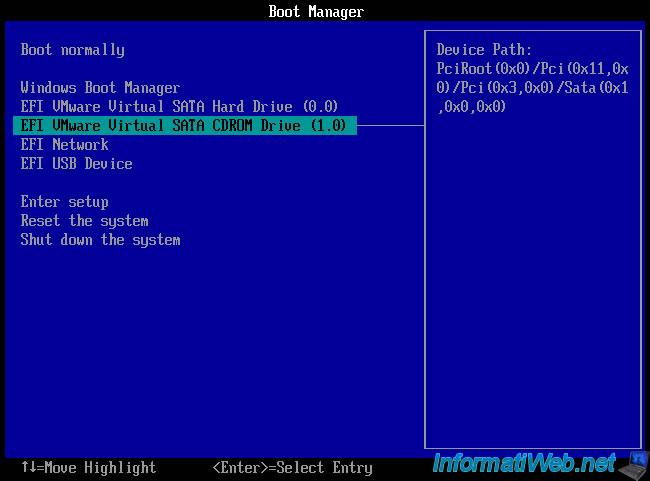
Once you have your Acronis bootable media burned to DVD, configure your motherboard's UEFI/BIOS firmware boot order to boot from your CD/DVD drive first.
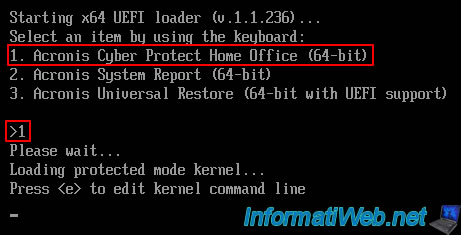
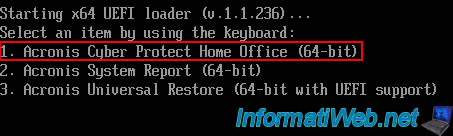
Then, to backup your computer, choose option "1. Acronis Cyber Protect Home Office (64-bit)".
Plain Text
Starting x64 UEFI loader (v1.1.236) ...
Select an item by using the keyboard :
1. Acronis Cyber Protect Home Office (64-bit)
...
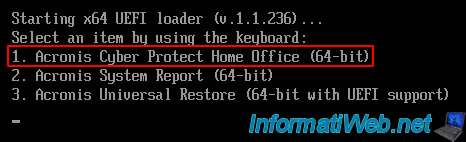
To do this, simply press the "1" key on the numeric keypad.
Which will display this.
Plain Text
>1
Please wait...
Loading protected mode kernel...
Press <e> to edit kernel command line.
A few seconds later, other messages will appear.
Plain Text
Loading, please wait...
no raid disks.
Reading all physical volumes. This may take a while...

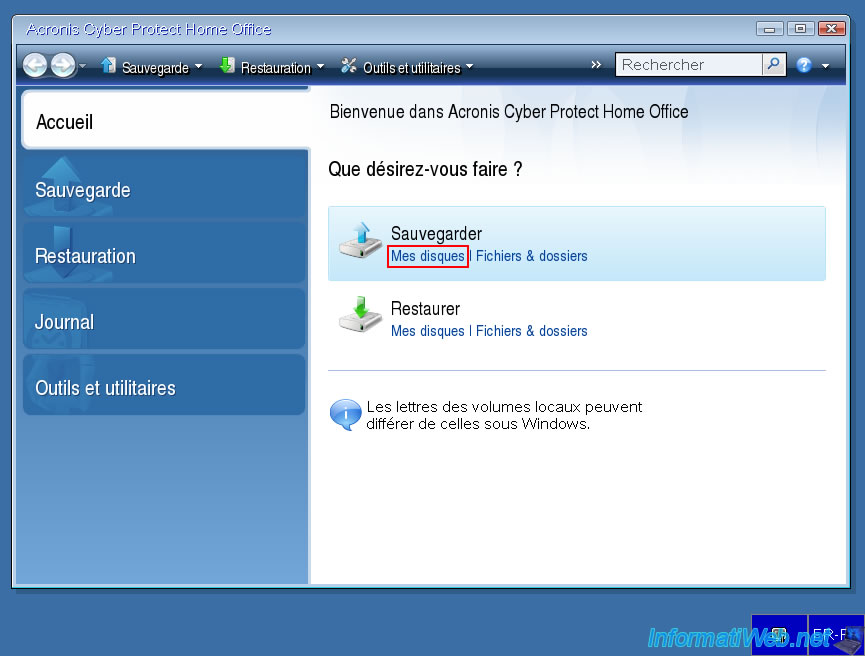
A little later, the program "Acronis Cyber Protect Home Office (True Image)" will appear.
Click on the link "My Disks".
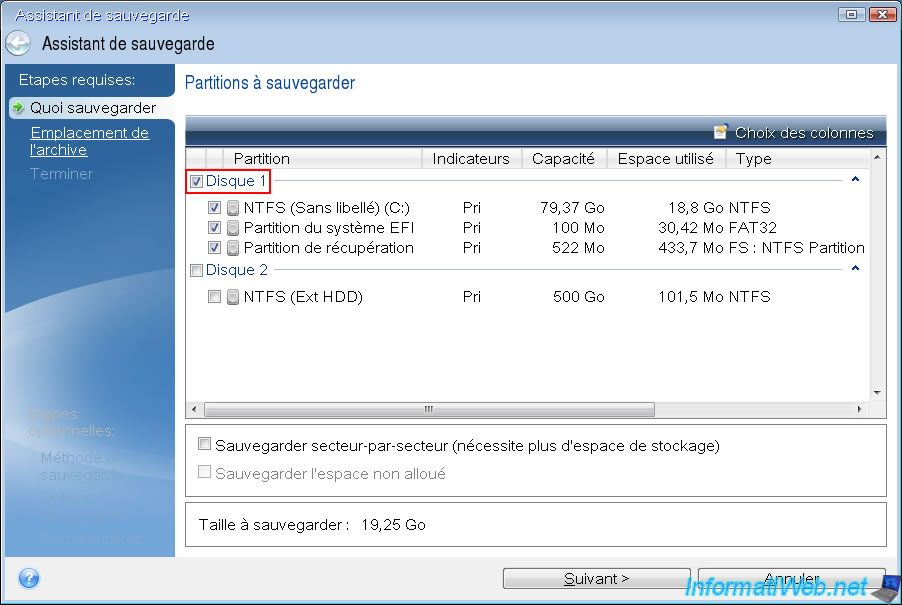
Select the disk to backup.
In our case, disk 1 of 80 GB.
Select "Create a new backup archive" and click "Browse".
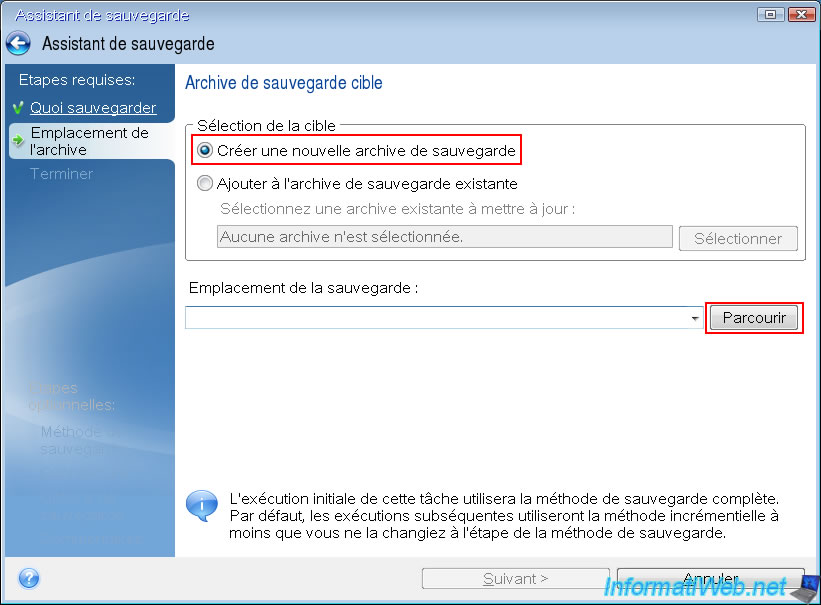
Select the location where you want to store your backup.
In our case, our external hard drive (recognized as a removable drive by Acronis).
Then, specify a file name for this backup.
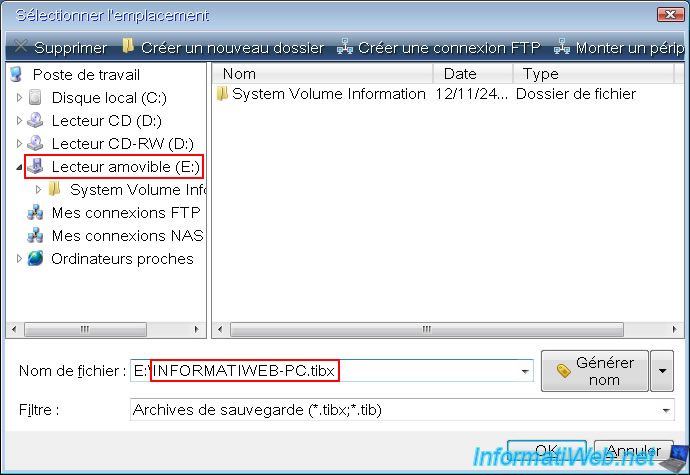
Click "Next".

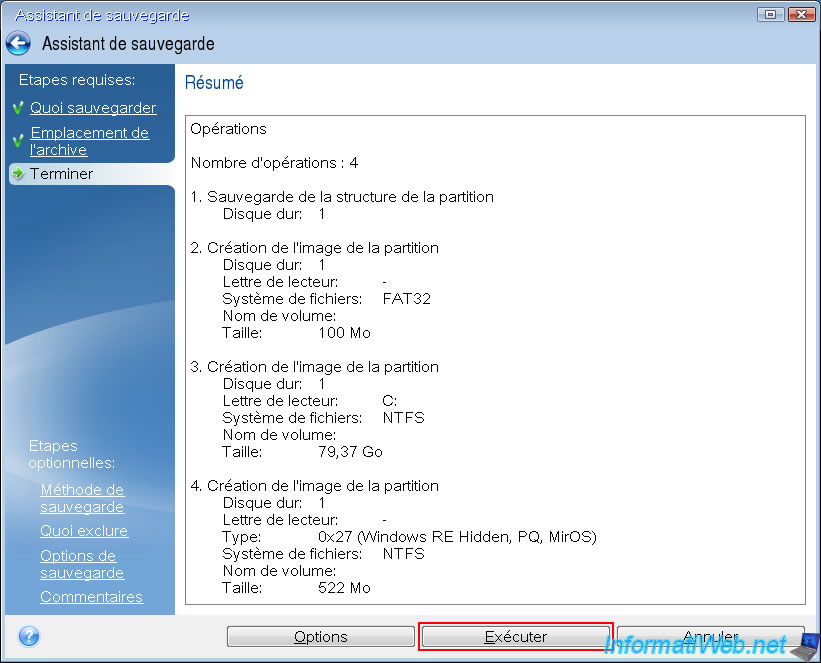
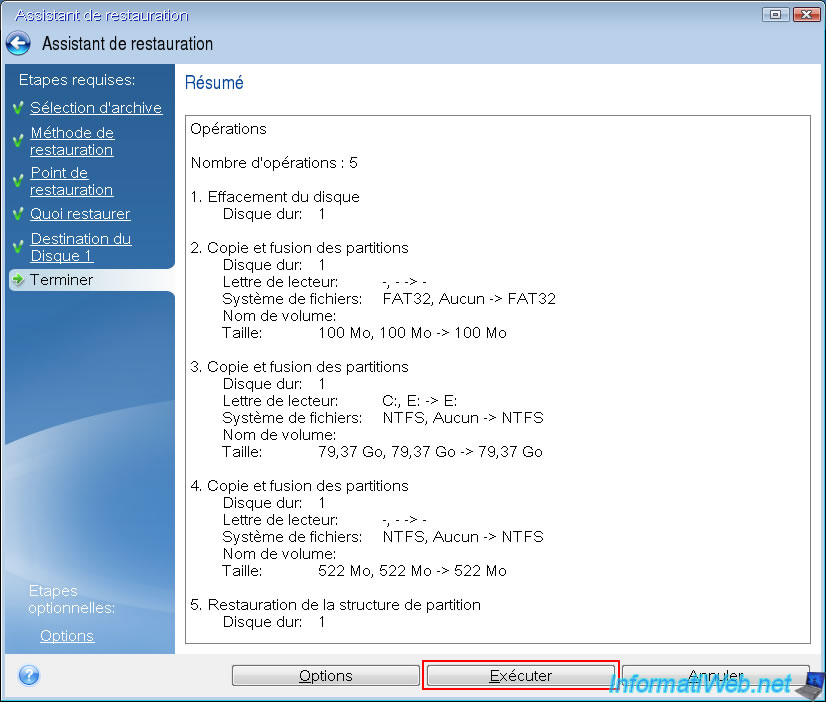
A summary of the backup operations appears.
Click "Run".
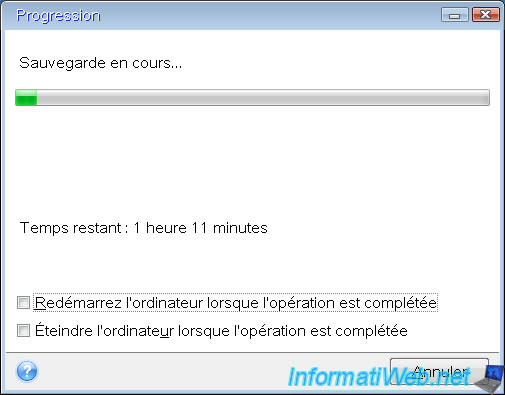
Please wait while your computer is backed up.
Once the backup is complete, the message "Backup operation successful" will appear.

On your external hard drive (or the location you previously selected to store your backup), you will find the ".tibx" file created by your bootable media.

5. Restore to the destination PC via Acronis bootable media
On the destination PC, plug in the external hard drive where you previously stored your backup from the source PC, then configure the boot order of your motherboard's UEFI/BIOS firmware so that this destination PC boots to its CD/DVD drive first.
Then, select the "1. Acronis Cyber Protect Home Office (64-bit)" option again by pressing the number 1 on your numeric keypad.
Please wait a few seconds while this program starts.

Another loading message appears for a few seconds.

Then, the Acronis program appears.
This time, click on the "My Disks" link of the "Restore" option.
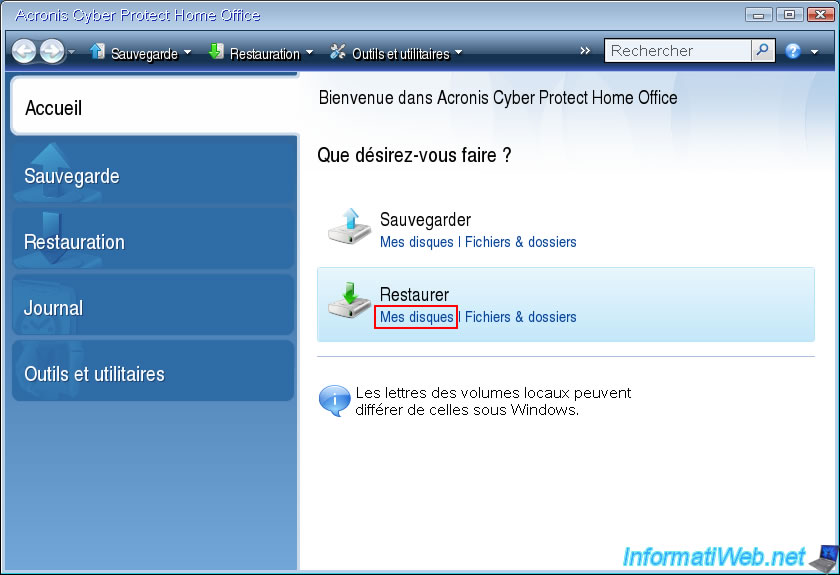
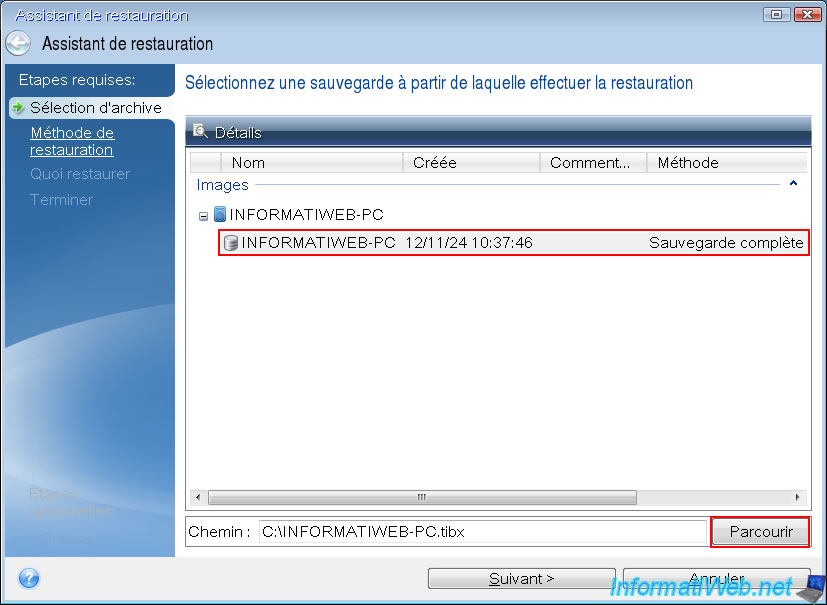
If the restore wzard that appears automatically detects your backup, select it and click "Next".
Otherwise, click "Browse" to select the desired ".tibx" backup file.
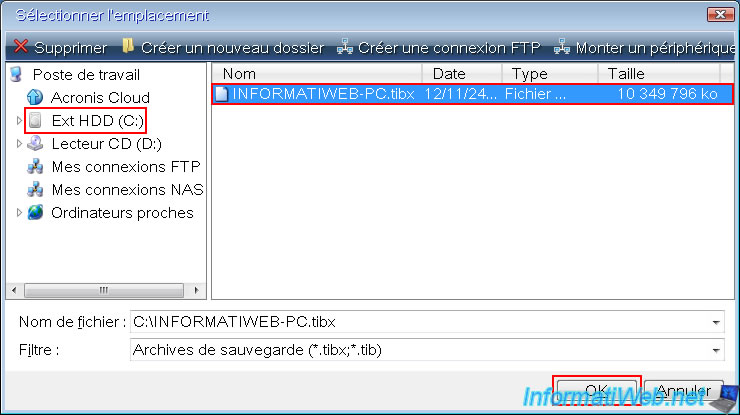
Select the location (on the left) where your backup is located, then select the desired ".tibx" file.
In our case, the backup file "INFORMATIWEB-PC.tibx" present on our external hard drive "Ext HDD".
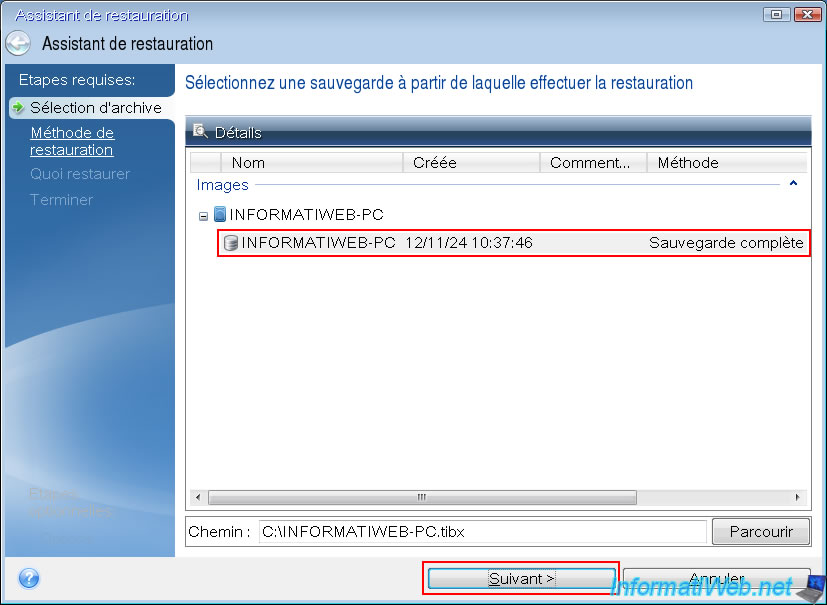
Once the desired ".tibx" file is selected, select the desired image from the list and click "Next".
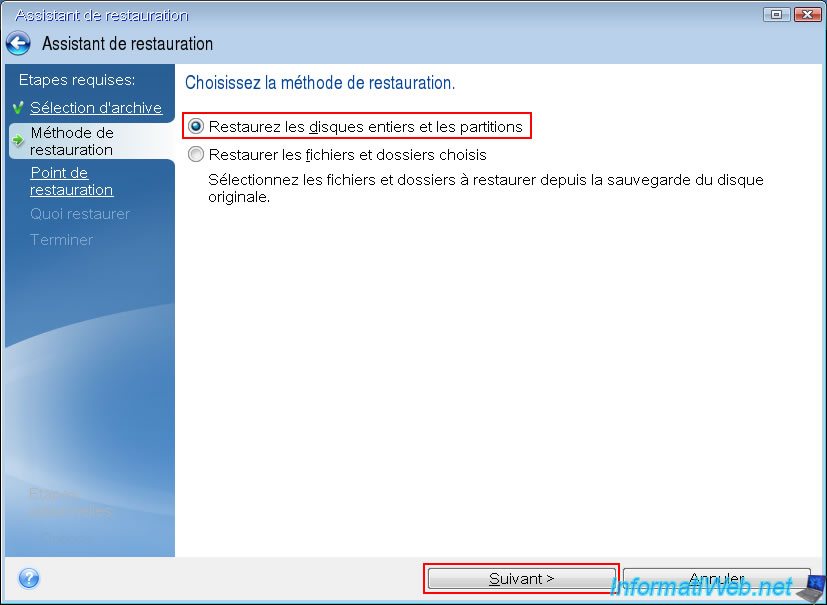
Select the "Restore entire disks and partitions" option.
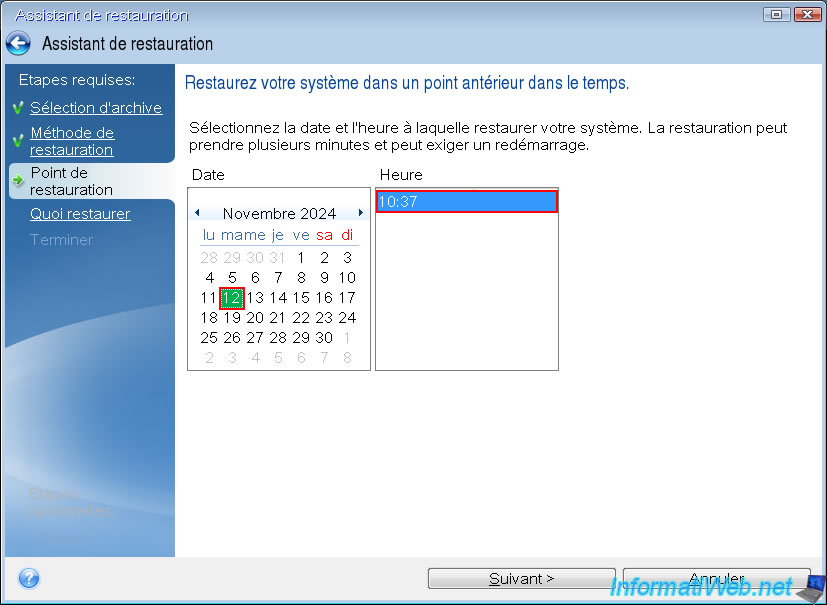
Select the date/time you want to restore your computer to (which depends on the number of backups present in the ".tibx" file selected previously).
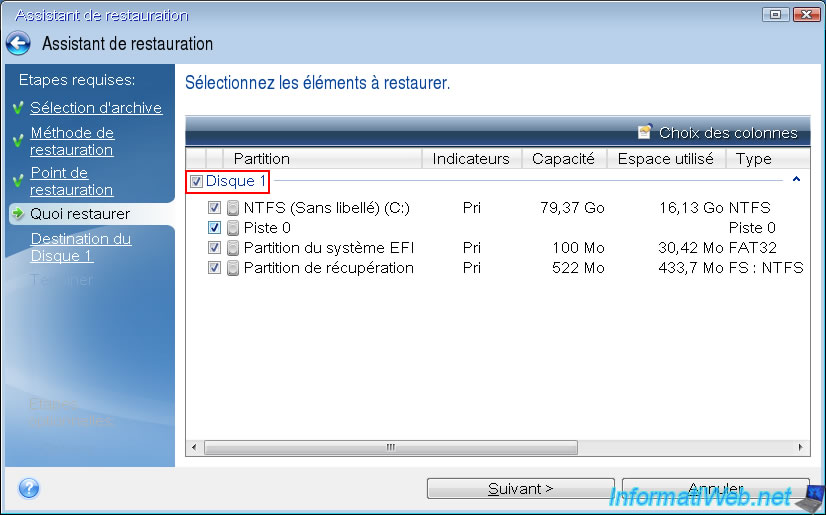
Select the disk (contained in the backup) to restore and click "Next".
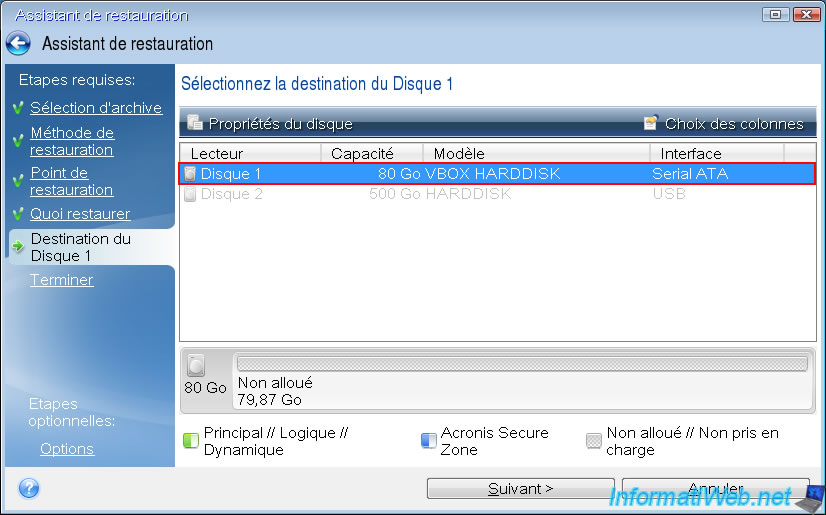
Select the destination disk (i.e. the physical disk of your computer) on which to restore the data from disk 1 of your backup and click "Next".
Note: as you can see, the restoration will take place in a VirtualBox virtual machine.
Hence the hard disk model "VBOX HARDDISK" visible here.
As a reminder, the source PC was a VMware virtual machine.
A summary of the restoration operations appears.
Click "Run".
Please wait while your backup is restored to your new PC (destination PC).
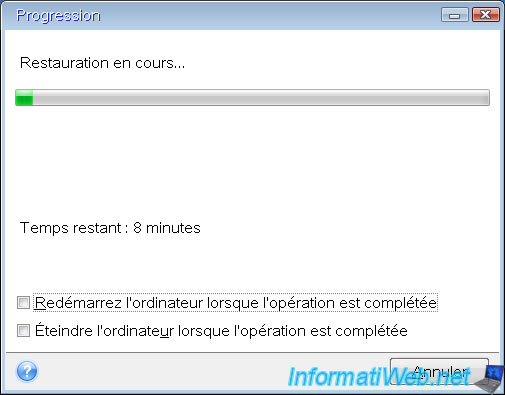
Once the restore is complete, the "Restore operation successful" message will appear.

Share this tutorial
To see also
-
Backup 9/26/2012
Acronis - Restore a backup on a different hardware
-

Backup 6/5/2025
Acronis True Image - Backing up your PC to Acronis Cloud
-
Backup 7/7/2025
Acronis True Image - Backup files or folders
-
Backup 6/8/2026
Acronis True Image - Clean your system securely
No comment