Create a Windows 7 / 10 / Win RE multiboot with the possibility to boot on live CDs
- MultiBoot
- Windows 10, Windows 7, Syslinux
- 28 May 2017 at 14:24 UTC
-

- 2/6
4. Install Windows 10
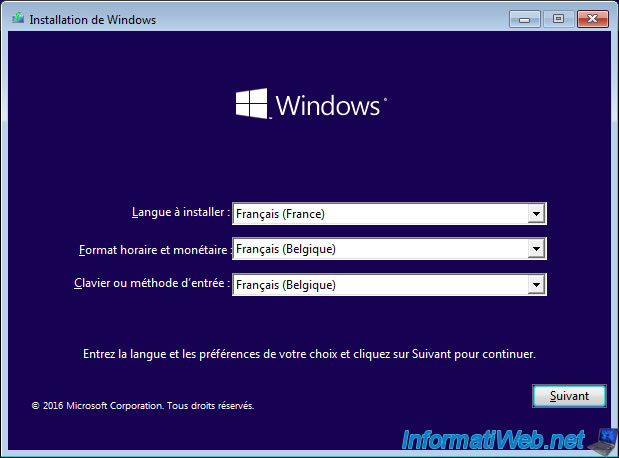
Insert the Windows 10 installation DVD and boot on it.
Then, choose your country / language and click Next.
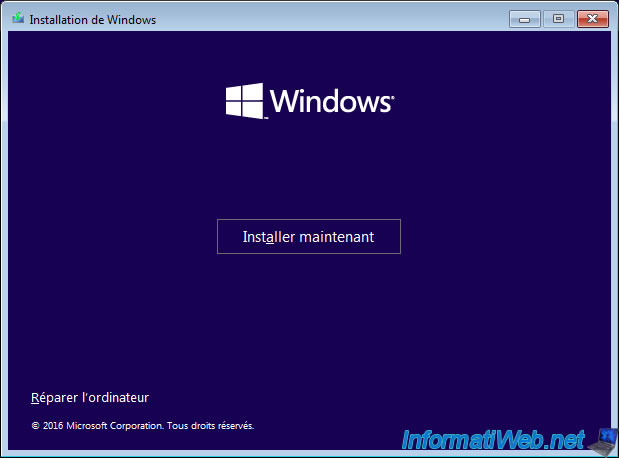
Click Install Now.
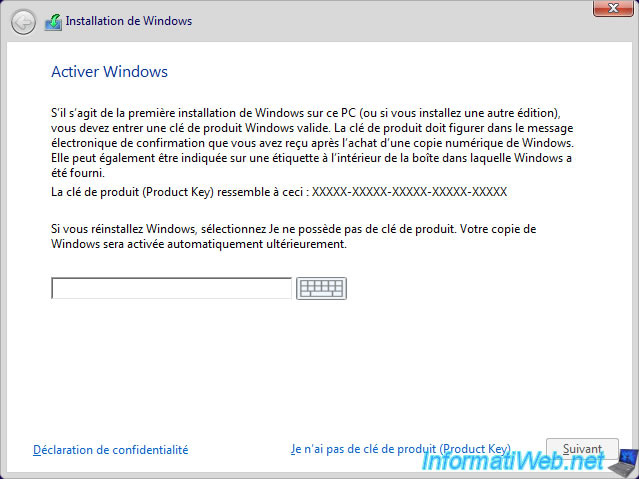
Enter your Windows 10 serial number if requested by the wizard.
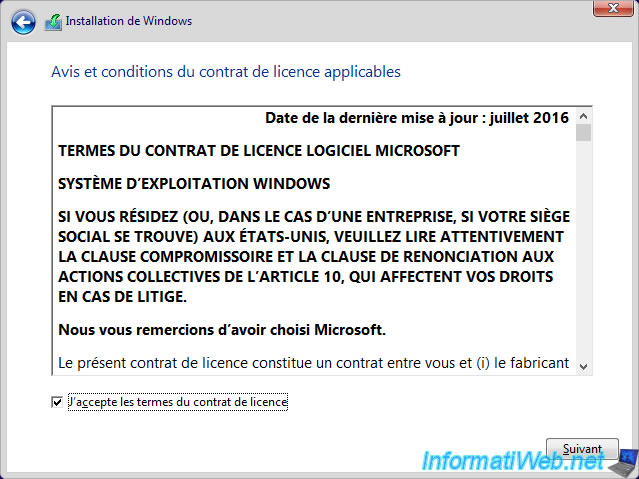
Check the "I agree..." box and click "Next".
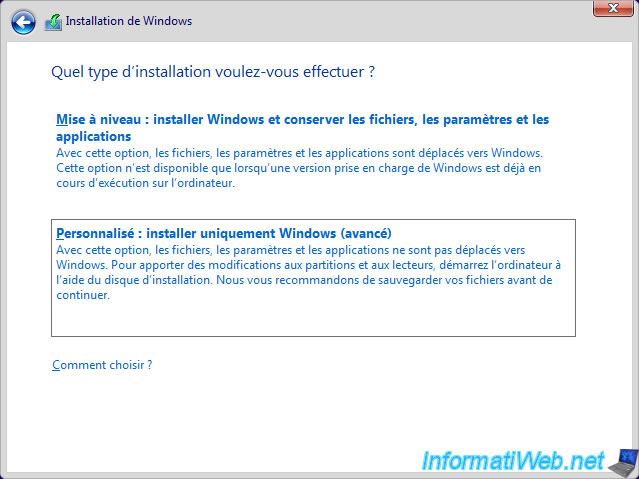
Click "Custom : Install Windows only (advanced)".
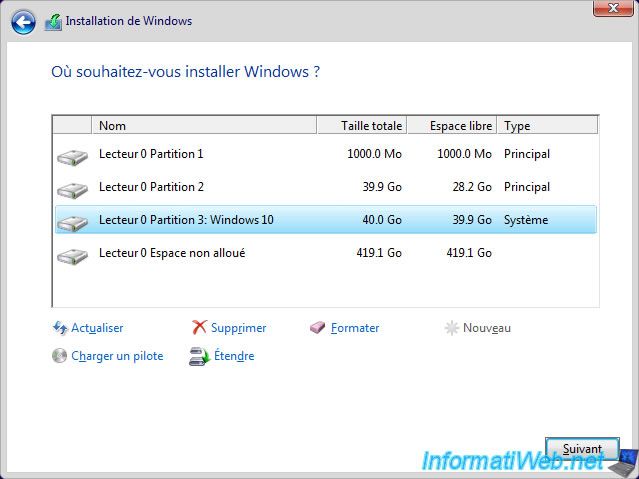
Select the "Windows 10" partition you created earlier and click Next.
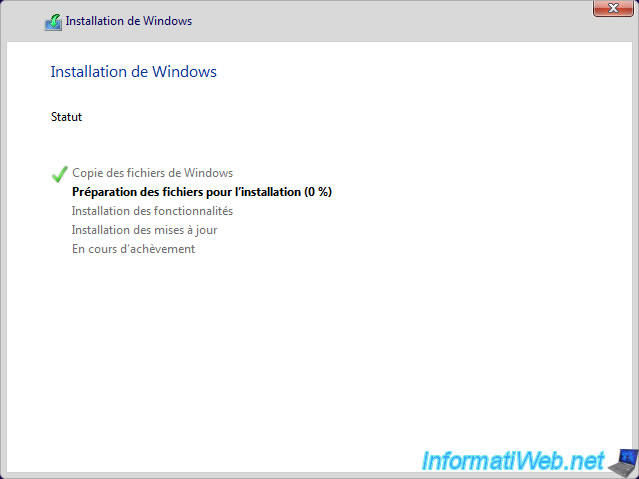
The installation of Windows 10 begins.
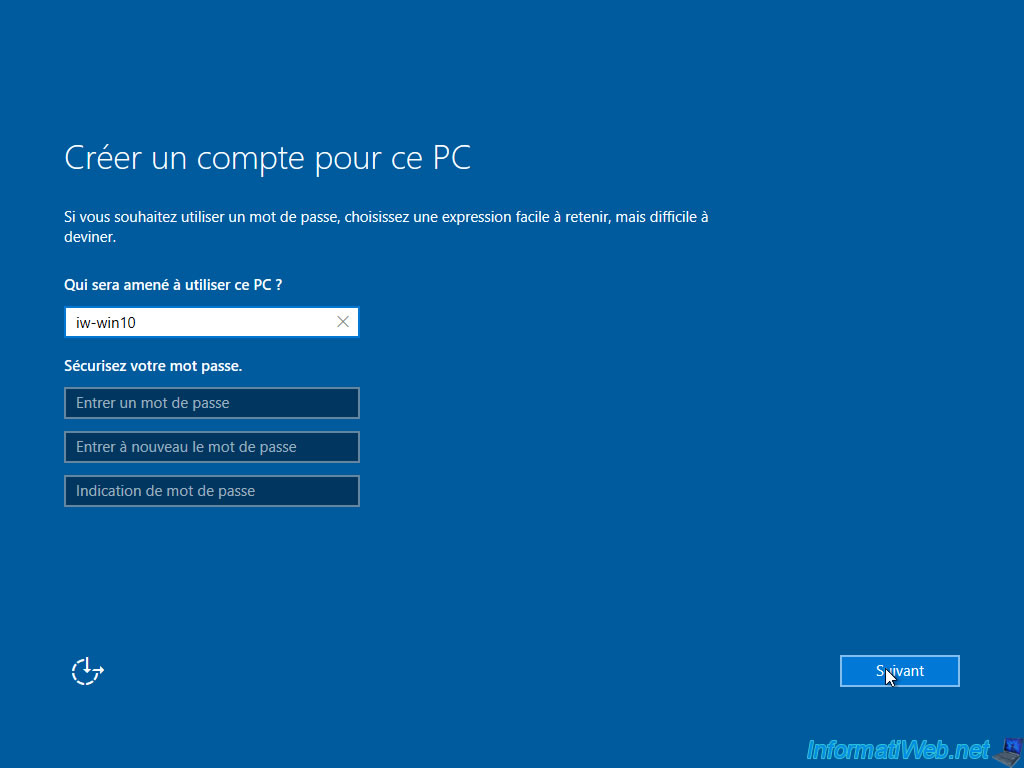
Enter a name for your PC.
Note : this name can be different from the one used for the Windows 7 installation.
For the rest of the Windows 10 configuration, refer to our tutorial : Windows 10 - Formatting and reinstalling
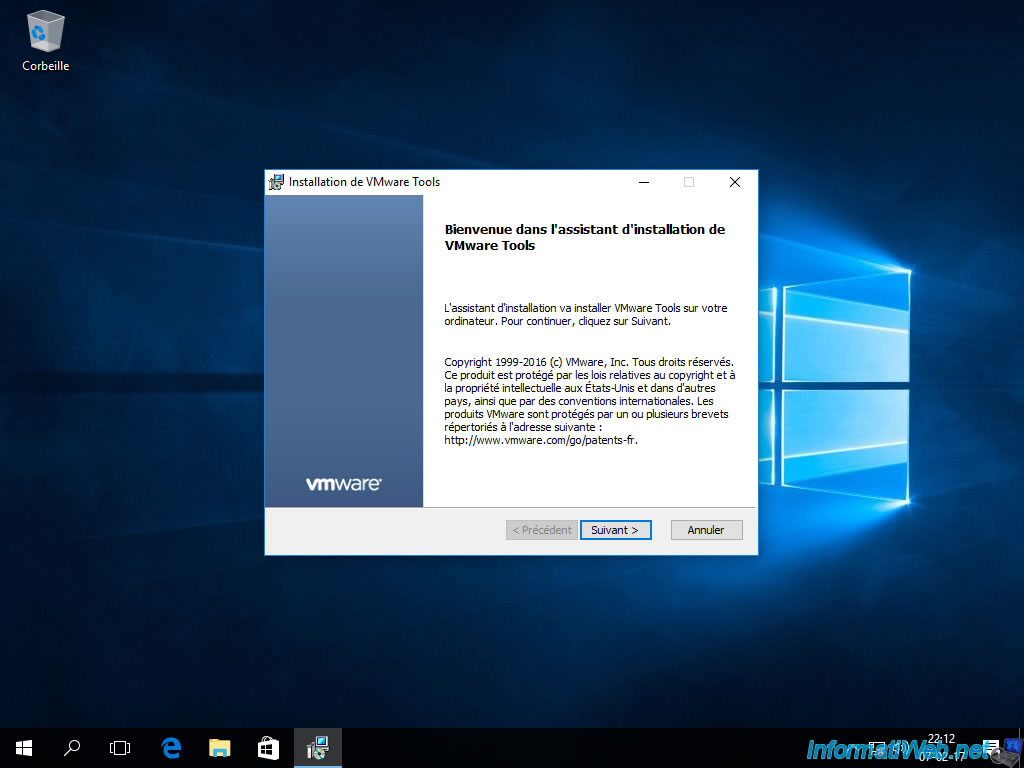
Install the drivers of your computer for Windows 10.
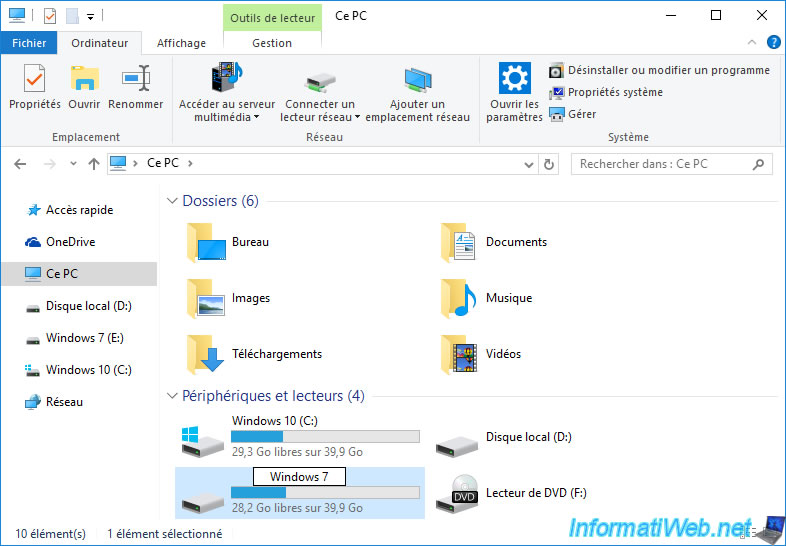
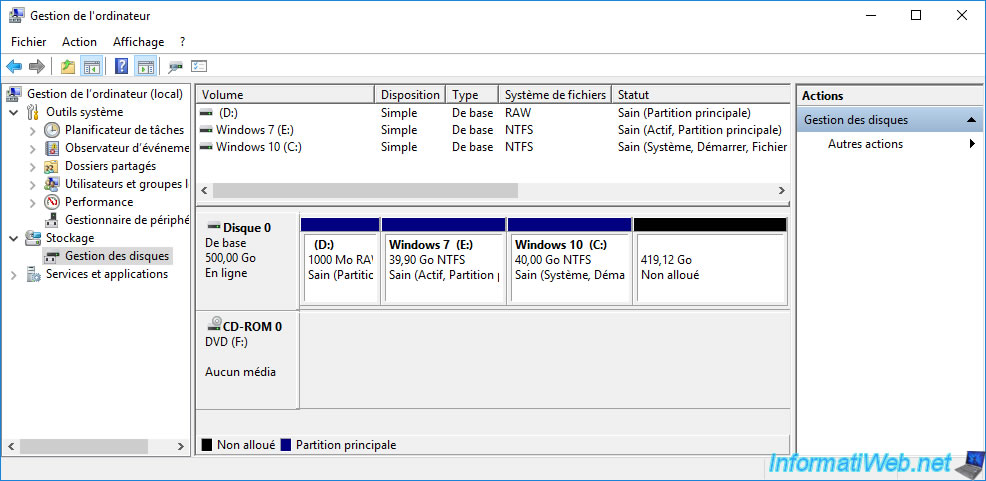
In "This PC," rename the partition of Windows 7 to "Windows 7".
To do this, do a double click while waiting 1 second between the 2 clicks. Then, you can change its name.
The other possibility is to right click "Properties" on the partition.
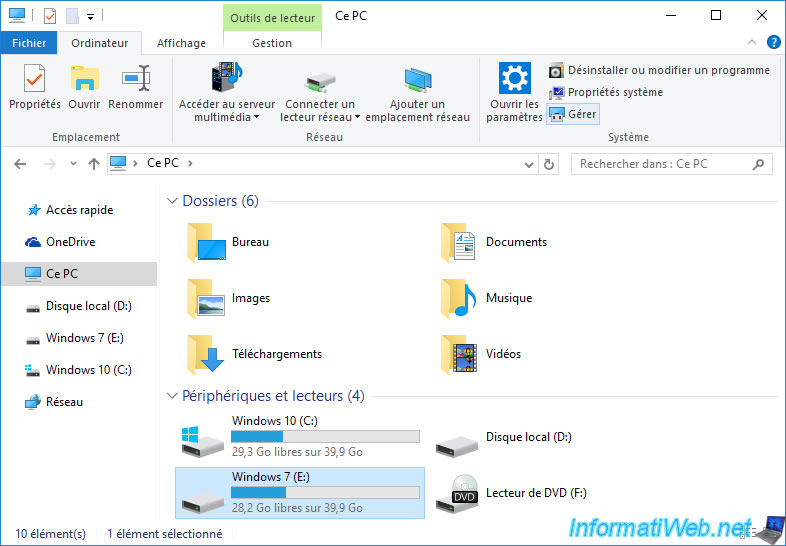
In this window, click "Computer," and then click Manage.
For ease, we will configure syslinux from Windows 7.
To boot again on Windows 7, right click on its partition and click on "Mark Partition as Active".
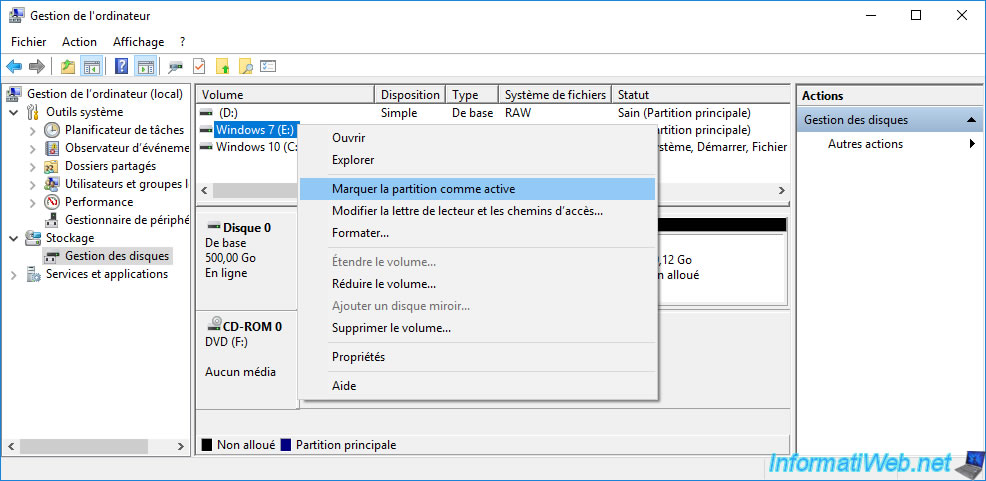
Confirm by clicking Yes.
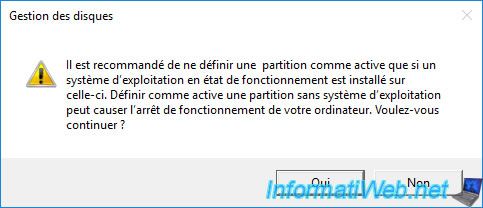
Now the status of the "Windows 7" partition is "active".
5. Create a multiboot with syslinux
Reboot your computer and Windows 7 will start.
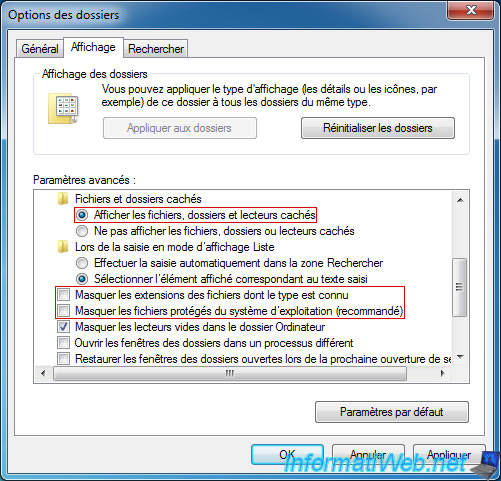
Now, to create the multiboot with syslinux, it's better to show the files extensions, hidden files, as well as operating system files.
To do this, in the start menu of Windows 7, type : Folder Options
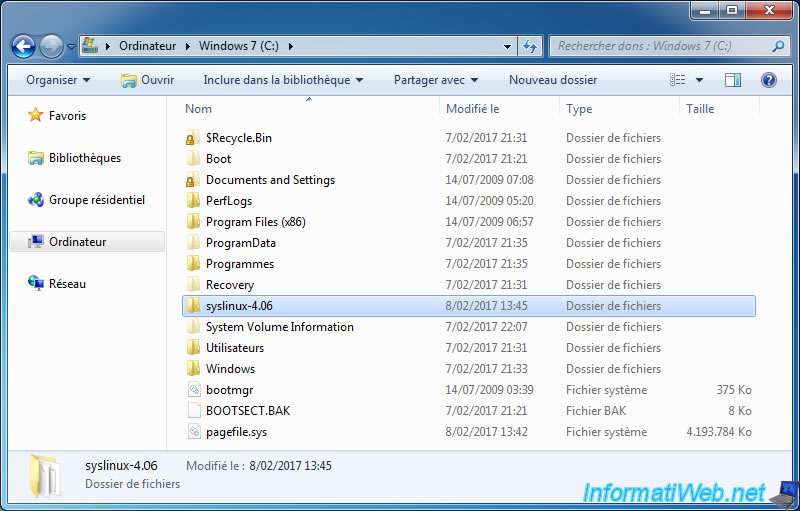
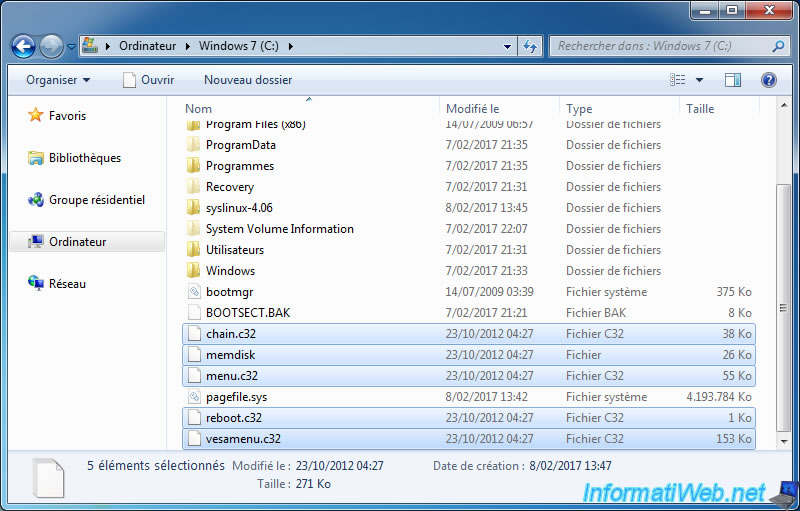
Then, download syslinux version 4.06 and unzip this file to the root of partition C (where Windows 7 is installed).
Note : you must download syslinux version 4.06 and not another version. Indeed, over time, the syntax and the required files are no longer the same.
To create your multiboot with syslinux, you will need the following files :
- menu.c32 of the "com32\menu" folder (allows you to create a simple menu with syslinux)
- vesamenu.c32 of the "com32\menu" folder (optional - allows you to create a menu with a background image)
- reboot.c32 of the "com32\modules" folder (allows you to restart your computer from the menu created with syslinux)
- memdisk of the "memdisk" folder (allows you to boot your computer from CDs / DVDs in iso format, bootable floppy disks, ...)
- chain.c32 of the "com32\chain" folder (allows you to boot on boot sectors, boot managers (such as ntldr and bootmgr of Windows, grldr file of grub4dos, ...), ...)
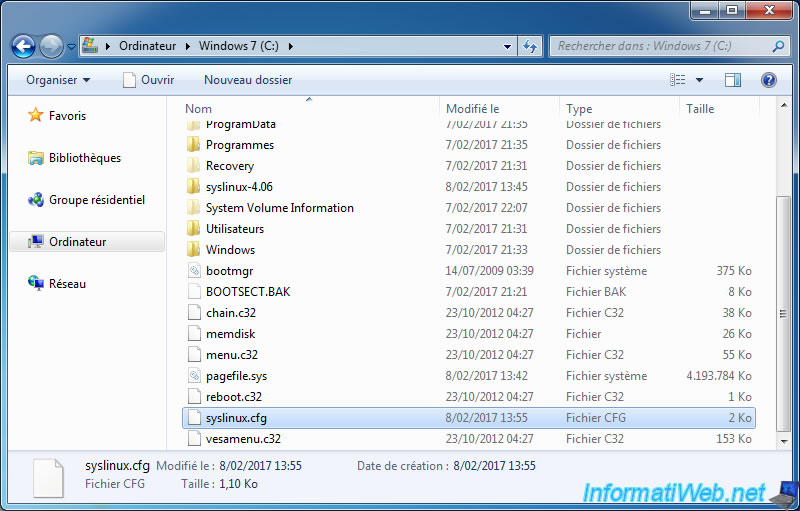
In total, you will have added 5 files to the root of "C" partition.
Now that syslinux system files are copied to the root of the partition, you only have to create your syslinux menu.
To do this, open the notepad program as an administrator.

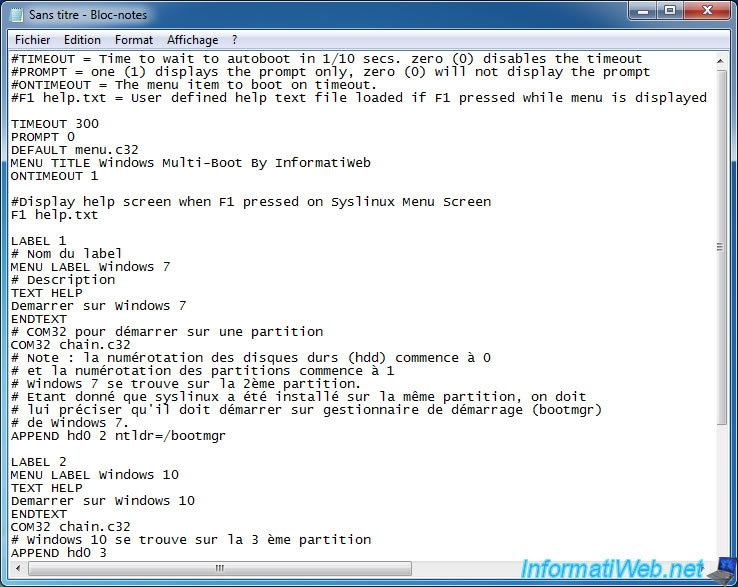
Then, paste this :
Plain Text
#TIMEOUT = Time to wait to autoboot in 1/10 secs. zero (0) disables the timeout
#PROMPT = one (1) displays the prompt only, zero (0) will not display the prompt
#ONTIMEOUT = The menu item to boot on timeout.
#F1 help.txt = User defined help text file loaded if F1 pressed while menu is displayed

TIMEOUT 300
PROMPT 0
DEFAULT menu.c32
MENU TITLE Windows Multi-Boot By InformatiWeb
ONTIMEOUT 1

#Display help screen when F1 pressed on Syslinux Menu Screen
F1 help.txt

LABEL 1
# Label name
MENU LABEL Windows 7
# Description
TEXT HELP
Boot on Windows 7
ENDTEXT
# COM32 to boot on a partition
COM32 chain.c32
# Note : hard disk (hdd) numbering starts at 0
# and partition numbering starts at 1
# Windows 7 is on the 2nd partition.
# Since syslinux has been installed on the same partition, we have
# to specify that it should boot on the bootmgr of Windows 7.
APPEND hd0 2 ntldr=/bootmgr

LABEL 2
MENU LABEL Windows 10
TEXT HELP
Boot on Windows 10
ENDTEXT
COM32 chain.c32
# Windows 10 is on the 3 rd partition
APPEND hd0 3

# Separator
MENU SEPARATOR

LABEL 4
MENU LABEL Reboot
TEXT HELP
Restart the computer by using reboot.c32
ENDTEXT
COM32 reboot.c32
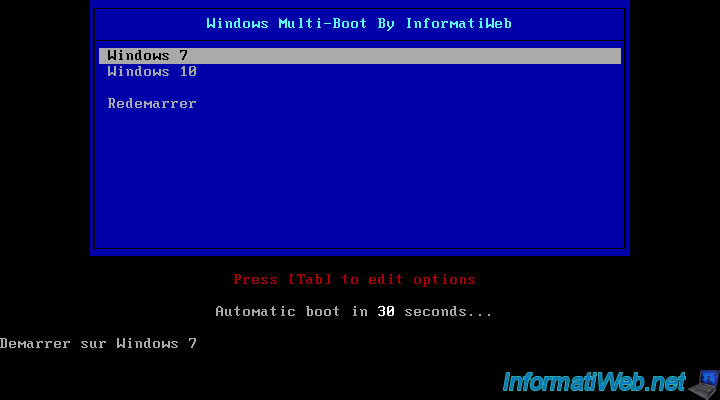
With this configuration, you can :
- boot on Windows 7
- boot on Windows 10
- restart your PC (this may be useful if you tried to enter the BIOS but the computer had already booted to the hard disk)
In this configuration, you will see that syslinux will start automatically on Windows 7 (ID: 1) after 30 seconds (TIMEOUT 300 = 300 tenths of seconds = 30 seconds) if the user has not made a choice.
First, we used the simple menu system (DEFAULT menu.c32) and we have used "Windows Multi-Boot By InformatiWeb" as the title.
To save this configuration file, save it with the name "syslinux.cfg" and store it at the root of the "C" partition.
Warning : to save this file with the ".cfg" extension, you must select the option "All files (*. *)" in the bottom list.
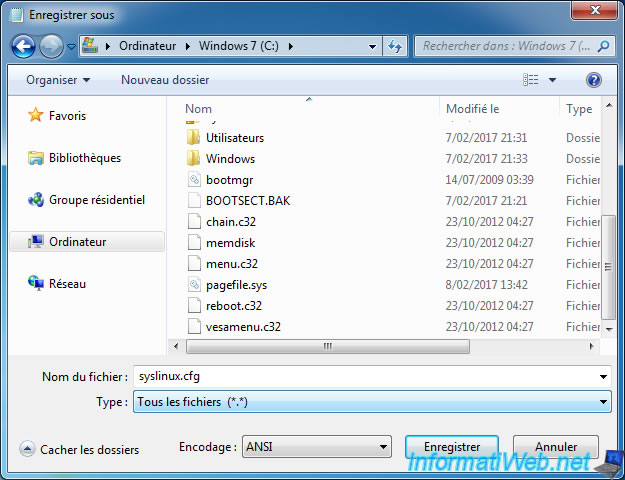
Make sure the file has a ".cfg" extension and not ".cfg.txt".
If the extension is correct, then the syslinux menu will be displayed.
Finally, in order for your computer to be able to boot on this custom menu, you must install the syslinux in the MBR of the hard disk.
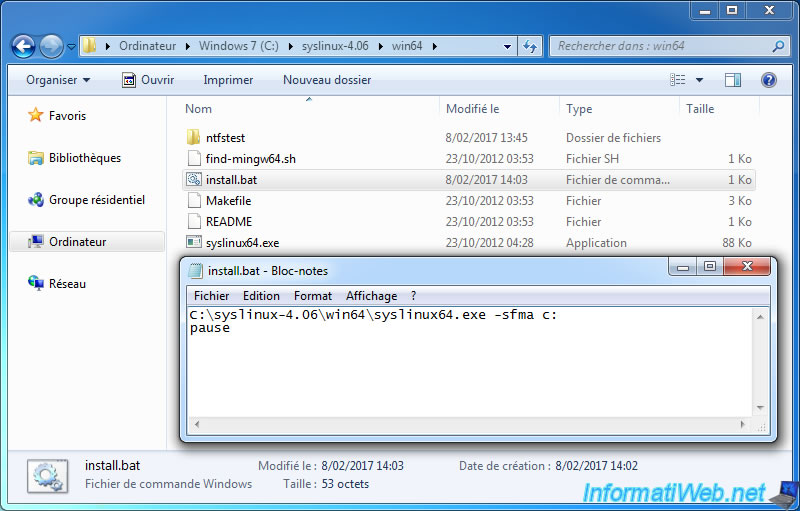
To do this, go to the "win64" folder of syslinux and create a file : install.bat
In this "install.bat" file, type this :
Batch
C:\syslinux-4.06\win64\syslinux64.exe -sfma c:
pause
Note : "c:" corresponds to the partition containing the ".c32" files and the "syslinux.cfg" file. If you make a mistake for the partition, the computer will no longer start on Windows. In this case, you will need to use the mini XP from Hiren Boot CD to reinstall syslinux correctly.
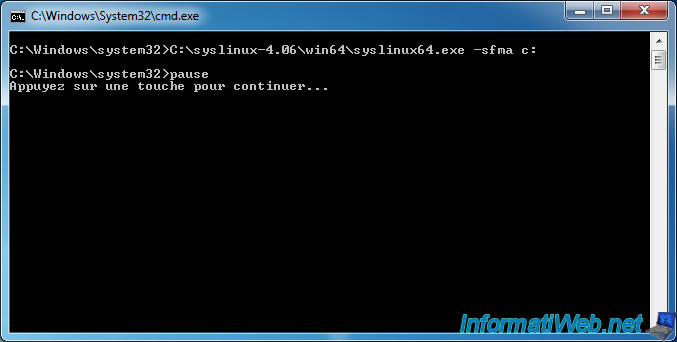
Then, run this file as an administrator.
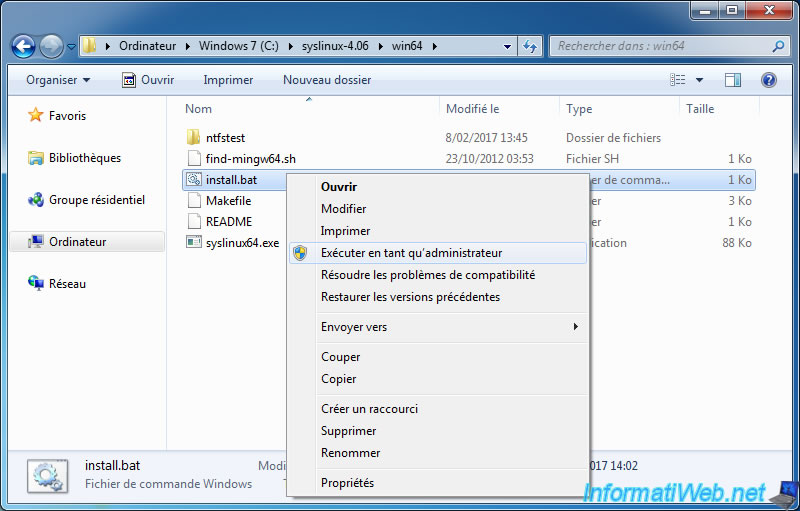
If nothing appears between the 2 commands (syslinux64.exe and pause), then syslinux has been successfully installed in the MBR of the hard disk.
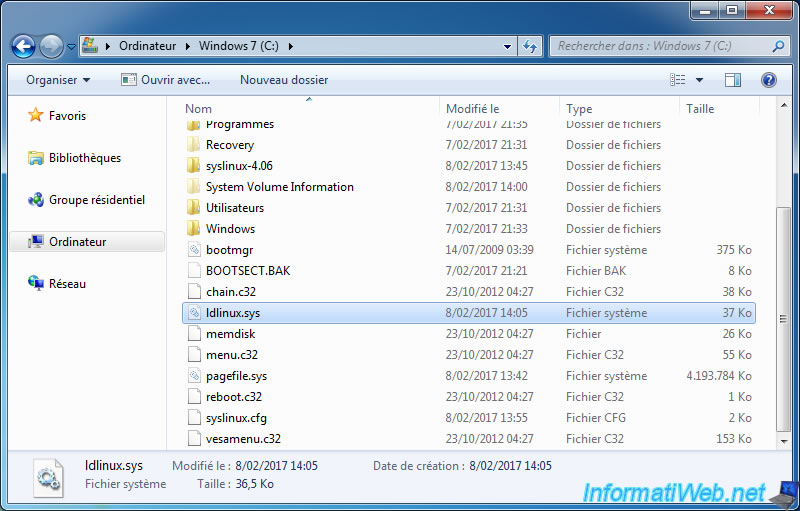
The installation of syslinux will also add a file "ldlinux.sys" in the partition indicated above.
Restart your computer and test your multiboot.
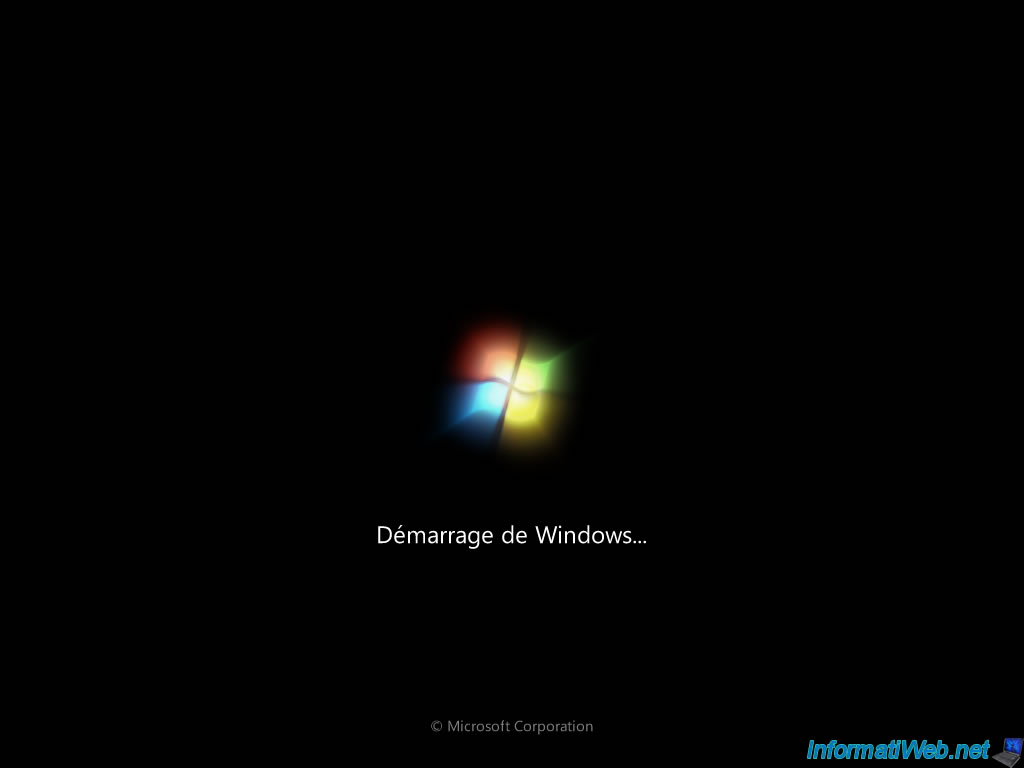
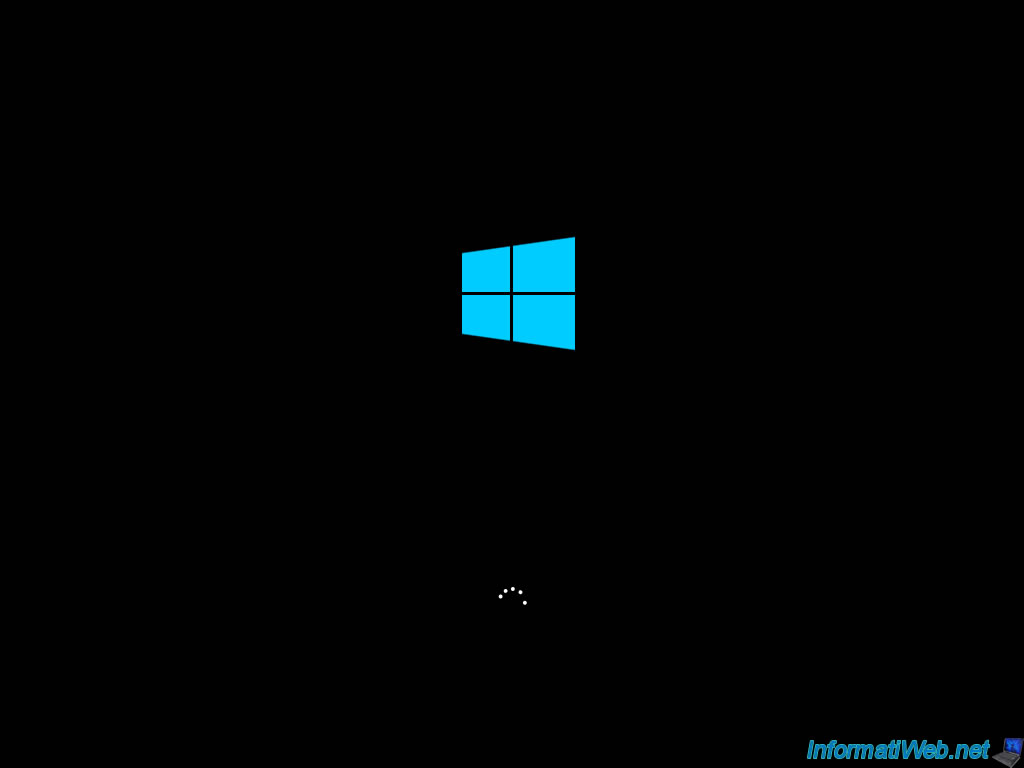
Here's what you'll see when you start your computer.
If you choose Windows 7, then Windows 7 will appear.
If you choose Windows 10, then Windows 10 will launch.
Now, your multiboot with Windows 7 and 10 is functional.
However, if you want to go further and add the Win RE environments (Windows repair environment), as well as the ISO files of live CDs, then follow the rest of our tutorial.
Share this tutorial
To see also
-
Windows 3/15/2022
Upgrade from Windows 10 to Windows 11 (not compatible hardware / unofficial method)
-

Virtualization 2/12/2024
Windows 10 / 11 - Quick creation of VMs on Hyper-V
-

Windows 4/21/2013
Windows 7 - Create Universal Installation DVD
-
Windows 2/26/2021
Windows 7 - Fix Windows Defender updates issue
No comment