VHD/VHDX multiboot (native boot) with Windows 7 and Windows 8.1
- MultiBoot
- Windows 8 / 8.1, Windows 7
- 03 June 2024 at 14:51 UTC
-

- 3/5
6. Partition your 2nd hard drive
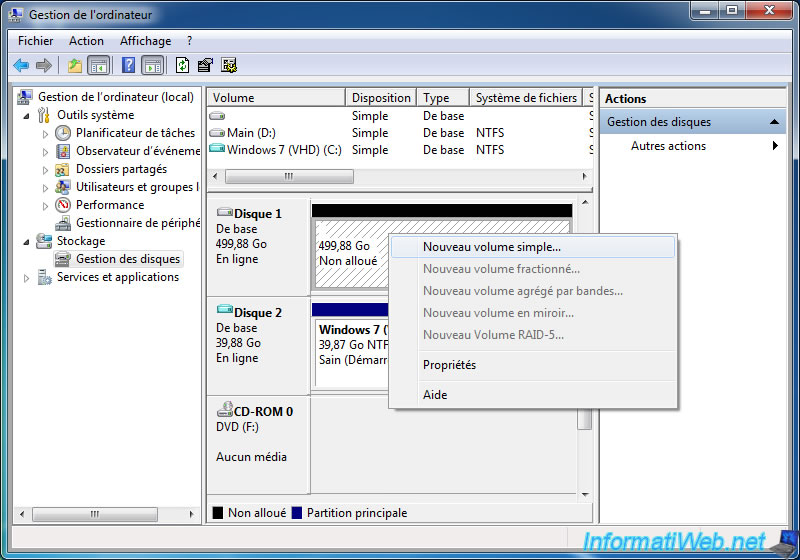
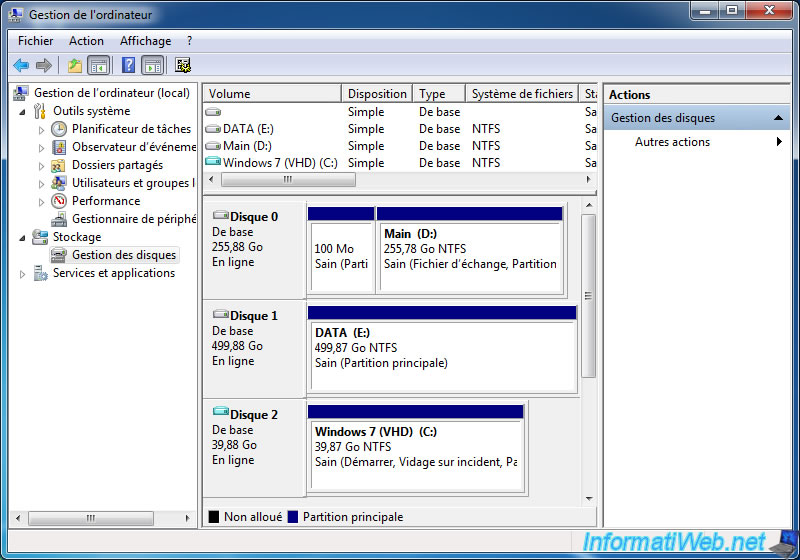
To partition your 2nd hard disk and be able to store data on it, right-click "Manage" on "Computer".
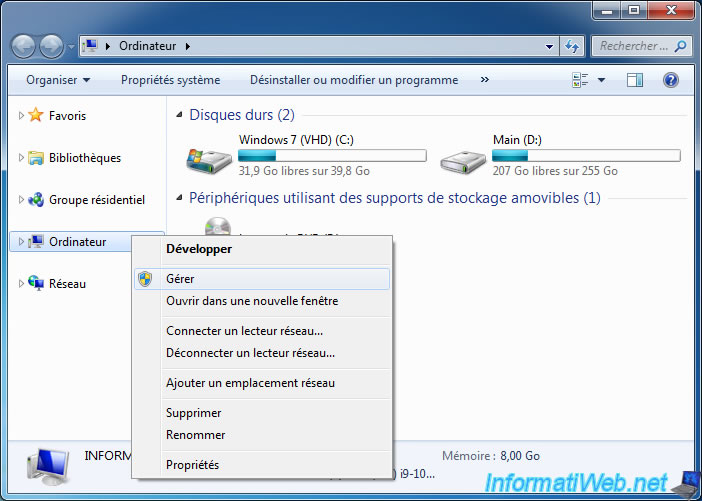
In the "Computer Management" console that appears, go to "Storage -> Disk Management".
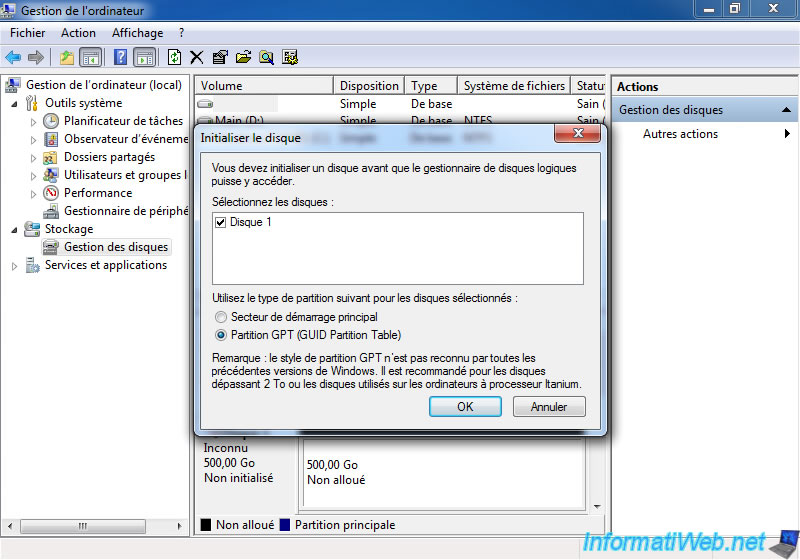
An "Initialize Disk" window will appear.
It doesn't really matter what type of partition table to use for data storage.
Except for the fact that MBR is supported by all operating systems and GPT allows the use of disks larger than 2 TB.
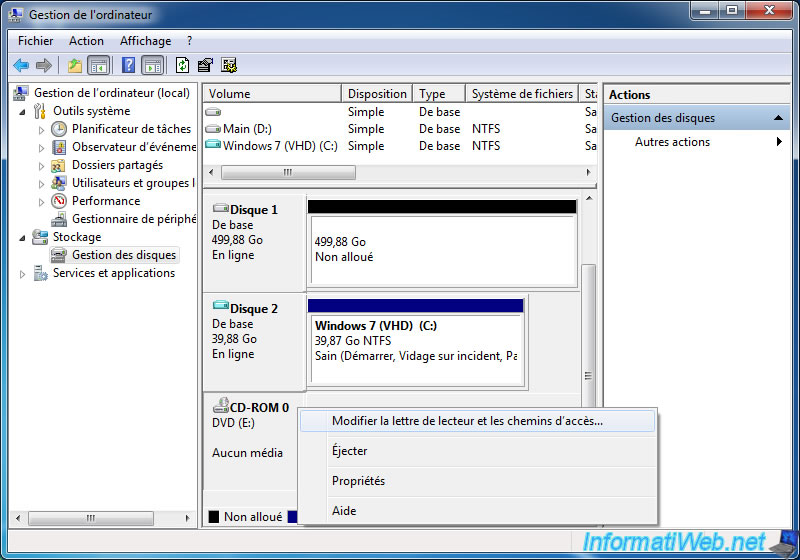
Once your 2nd hard drive has been initialized, change the letter automatically assigned to your CD/DVD drive to free up the necessary letters for the partitions you wish to create on your 2nd hard drive.
This way, you will be able to display the partitions first, then the CD/DVD drive in the file explorer.
To do this, right-click "Change Drive Letter and Paths" on "CD-ROM 0".
Select the displayed letter and click on: Change.
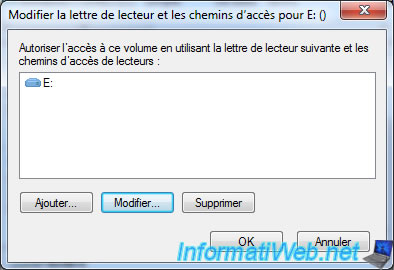
Select a letter a little further.
In our case, we select the letter "F" and we click on OK.
Note: in our case, we will create a single partition (which will have the letter "E") on our 2nd hard drive.
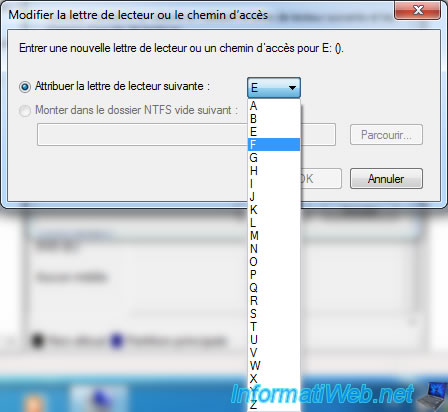
Confirm the letter change by clicking "Yes".

Now, right click "New Simple Volume" on the unallocated space of your 2nd hard drive.
To learn more about initializing and partitioning a hard drive on Windows 7, refer to our tutorial: Windows Vista to 11 - Partitioning your hard drive.
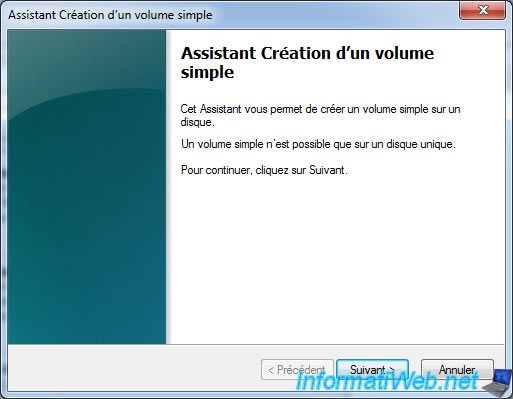
The "Create Simple Volume Wizard" appears.
Click Next.
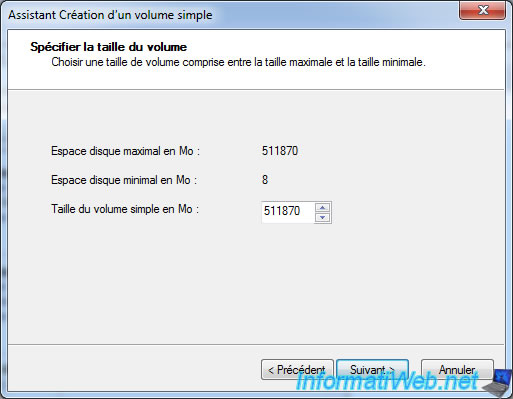
Leave the size displayed by default if you want to create a single partition on the entire unallocated space of your 2nd hard drive.
Select the letter to assign to this volume (partition).
By default, the 1st letter of the alphabet available in your case. Hence the fact that we had previously released the letter "E".
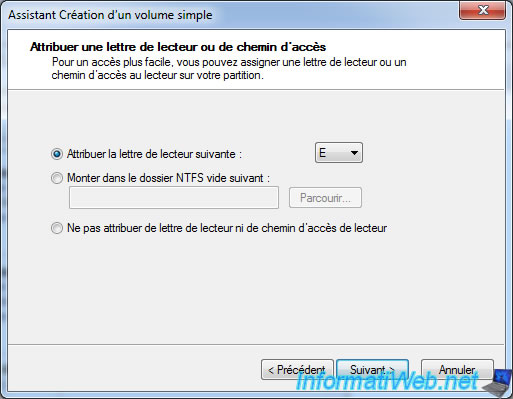
Choose the file system to use (usually: NTFS) and indicate the name under which this volume (partition) should appear.

Click Finish.
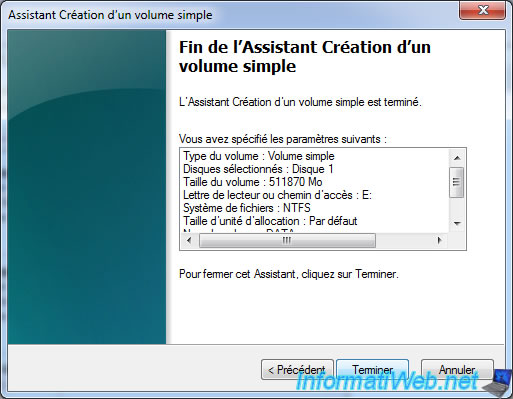
Your 2nd hard drive is partitioned.
7. Create a virtual hard disk for Windows 8.1
Now that Windows 7 is installed and the boot files have been created, move on to creating the virtual hard disk (VHD) for Windows 8.1.
To create the virtual disk (VHD) for Windows 8.1, boot your computer to the Windows 8.1 installation DVD.
If this message appears, press the "Enter" key on your keyboard.

The Windows 8.1 loading logo will appear.
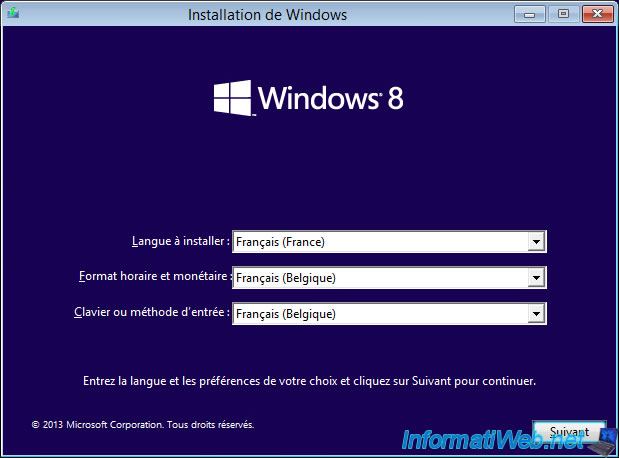
Select your language and country in the Windows 8.1 installer that appears.
As before, you will need to use the "DiskPart" command line tool to create a new virtual hard disk (VHD).
So you will need a command prompt (cmd.exe).
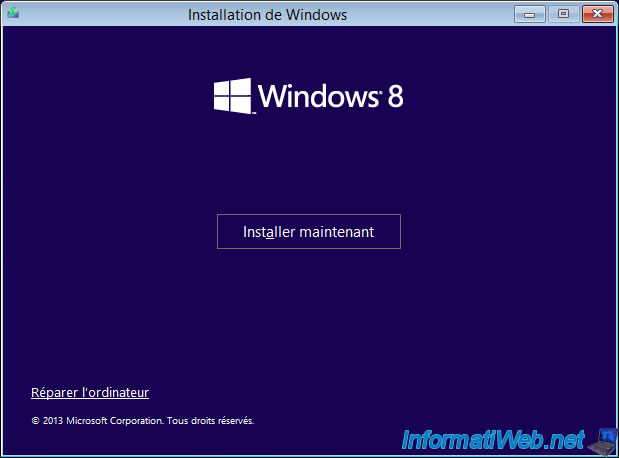
To do this, click on the "Repair your computer" link at the bottom left of the "Windows Setup" window.
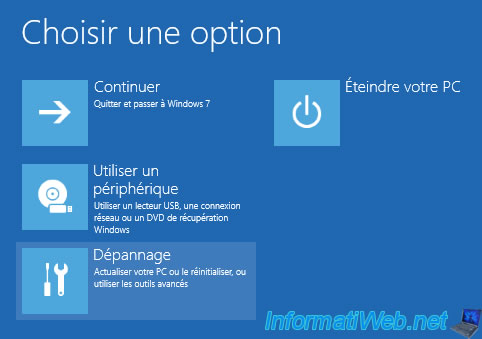
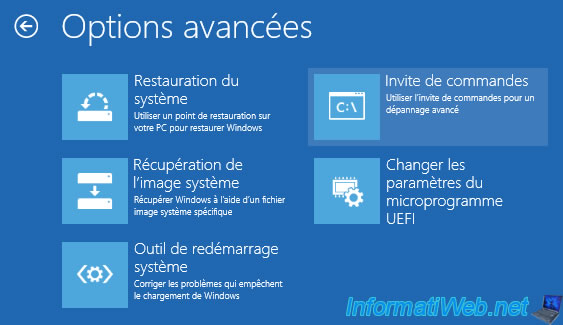
A "Choose an option" menu on a blue background appears.
Click on: Troubleshooting.
Then, in the "Troubleshooting" menu, choose: Advanced options.
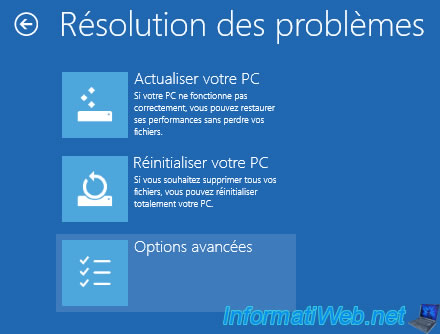
In the available advanced options, choose: Command Prompt.
A command prompt running as administrator appears.
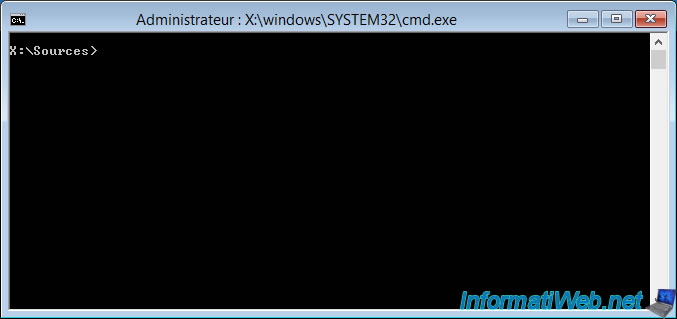
Launch the DiskPart tool.
Batch
diskpart
Display the list of volumes present on your computer
Batch
list volume
Which gives in our case, in EFI mode, this:
- Volume 0: the CD/DVD drive where the Windows 8.1 installation DVD is located.
Moreover, the name of the DVD "ESD-ISO" tells you that the file you will need will be "install.esd". - Volume 1: the "Main" partition where the "win7.vhd" virtual hard disk is currently located.
- Volume 2: the 100 MB hidden system partition created by Windows 7 allowing the start of Windows 7 and soon also Windows 8.1 in our case.
- Volume 3: the data partition created on your 2nd hard drive.
Plain Text
  Volume ###  Ltr  Label        Fs     Type        Size     Status     Info
  ----------  ---  -----------  -----  ----------  -------  ---------  --------
  Volume 0     E   ESD-ISO      UDF    DVD-ROM     3370 M   Healthy
  Volume 1     C   Main         NTFS   Partition    255 G   Healthy
  Volume 2                      FAT32  Partition    100 M   Healthy     Hidden
  Volume 3     D   DATA         NTFS   Partition    499 G   Healthy
In BIOS LEGACY (MBR) mode, this command will give this :
  Volume ###  Ltr  Label        Fs     Type        Size     Status     Info
  ----------  ---  -----------  -----  ----------  -------  ---------  --------
  Volume 0     F   ESD-ISO      UDF    DVD-ROM     3370 M   Healthy
  Volume 1     C   System Rese  NTFS   Partition    100 M   Healthy
  Volume 2     E   Main         NTFS   Partition    255 G   Healthy
  Volume 3     D   DATA         NTFS   Partition    499 G   Healthy
Create a new 40 GB virtual hard disk in VHD format on the "Main" partition.
Warning : in our case, this "Main" partition currently has the letter "C" in the repair environment of Windows 8.1 in EFI mode, but the letter "E" in LEGACY BIOS mode.
Warning : from the moment you create a multiboot based on virtual hard disks where Windows 7 is present, it is essential to use only the VHD format for your virtual hard disks.
Indeed, Windows 7 does not support and does not know the VHDX format. So it can't handle them and Windows 7 boot files won't work with this VHDX format.
Note: again, the limit for a VHD file is 2040 GB (about 2 TB).
Wait while creating the VHD virtual hard disk.
Batch
create vdisk file=C:\win81.vhd maximum=40960 type=fixed
Once the VHD virtual hard disk is created for Windows 8.1, attach it to be able to use it from this command prompt.
Batch
attach vdisk
Create a primary partition on your entire VHD virtual hard disk.
Batch
create partition primary
Format this partition as NTFS and name it "Windows 8.1 (VHD)".
Batch
format quick fs=NTFS label="Windows 8.1 (VHD)"
Assign the letter "V" to this virtual hard disk.
Batch
assign letter=V
8. Install Windows 8.1 on virtual hard drive
In DiskPart, redisplay the list of volumes available for:
- check that the "Windows 8.1 (VHD)" partition of your new 39 GB (about 40 GB) virtual hard disk has the letter "V".
- know the letter of your CD/DVD drive where the Windows 8.1 installation DVD is located.
In our case, our CD/DVD drive has the letter "E".
Batch
list volume
Plain Text
  Volume ###  Ltr  Label        Fs     Type        Size     Status     Info
  ----------  ---  -----------  -----  ----------  -------  ---------  --------
  Volume 0     E   ESD-ISO      UDF    DVD-ROM     3370 M   Healthy
  Volume 1     C   Main         NTFS   Partition    255 G   Healthy
  Volume 2                      FAT32  Partition    100 M   Healthy     Hidden
  Volume 3     D   DATA         NTFS   Partition    499 G   Healthy
  Volume 4     V   Windows 8.1  NTFS   Partition     39 G   Healthy
Now that you have recovered the 2 letters that you will need in the following commands, you can quit DiskPart.
Batch
exit
In the "sources" folder of your Windows 8.1 installation DVD, you will find an "install.wim" or "install.esd" file that you will need to install Windows 8.1 on your virtual hard disk.
To find out which file format (wim or esd) is present on your Windows 8.1 installation DVD, you can use the command:
Batch
dir E:\sources\install.*
In our case, we can see that it is the "install.esd" file.
Plain Text
 Volume in drive E is ESD-ISO
 Volume Serial Number is C921-BF90

 Directory of E:\sources

28/01/17  19:12     2 780 984 234 install.esd
24/07/14  16:40         4 991 120 install.exe
               2 File(s)       2,785,975,354 bytes
               0 Dir(s)                    0 bytes free
An "install.esd" (compressed format) or "install.wim" (normal format) file can contain one or more Windows images.
Usually one image per edition of Windows.
To find out what index of the image you want to use, use the command:
Batch
Dism /Get-WimInfo /WimFile:E:\sources\install.esd
As you can see, in our case, there is only the "Windows 8.1 Pro" edition in this case.
Plain Text
Deployment Image Servicing and Management tool
Version : 6.3.9600.17031

Details for image : E:\sources\install.esd

Index : 1
Nom : Windows 8.1 Pro
Description : Windows 8.1 Pro
Size : 13,293,080,436 bytes

The operation completed successfully.
Once you know the index for the edition you want to install, use the command below.
- /ImageFile:E:\sources\install.esd : path to the "install.esd" or "install.wim" file of your Windows 8.1 installation DVD.
- /Index:1 : index of the desired edition retrieved using the previous command.
- /ApplyDir:V:\ : letter of the "Windows 8.1 (VHD)" partition created on the "win81.vhd" virtual hard disk.
Batch
Dism /Apply-Image /ImageFile:E:\sources\install.esd /Index:1 /ApplyDir:V:\
Wait while the image is applied to your virtual hard disk.
It may take time.
Plain Text
Deployment Image Servicing and Management tool
Version : 6.3.9600.17031

Applying image
[===========================50.0%                          ]
The image has been applied
Plain Text
Applying image
[==========================100.0%==========================]
The operation completed successfully.
Share this tutorial
To see also
-
Windows 1/2/2023
Windows - Create a bootable USB key to install Windows
-
Windows 1/16/2015
Windows 7 - Install from an USB 3.0 key
-
Windows 3/13/2021
Windows 7 - Switching from IDE to AHCI without reinstalling Windows
-
Windows 2/27/2017
WTG - Windows workspace on USB key
No comment