Configure the firewall of Windows 11, 10, 8.1, 8, 7, Vista or XP and the firewall of Internet Security solutions
- Windows
- Windows 7, Windows 8 / 8.1, Windows Vista, Windows 10, Windows 11
- 15 February 2013 at 15:46 UTC
-

- 2/7
2. Windows Vista
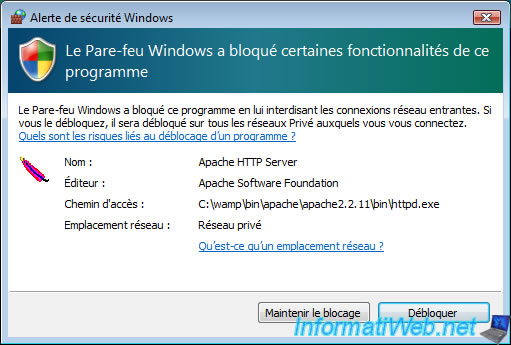
As for Windows XP, when a program wish to act as a server or it will attempt to connect to the Internet, Windows Firewall sometimes react and ask you in this case what you want to do. You simply answer "Unblock" if you want to allow this program.
2.1. Allow a program
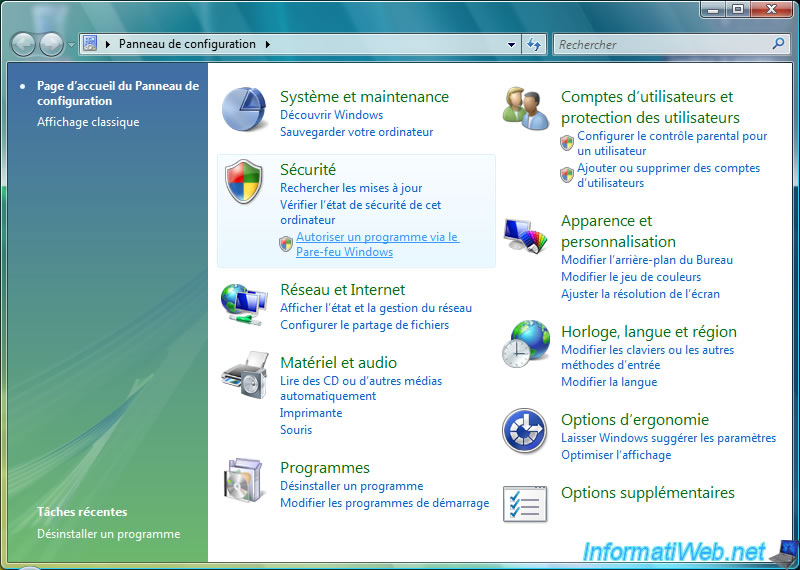
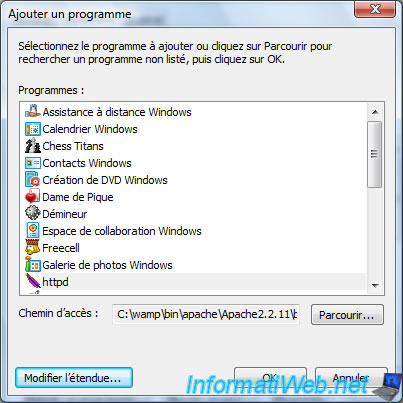
If this message does not appear you will need to allow the program or port used by one manually. To do this, go to the Start menu -> Control Panel -> Security : Allow a program through Windows Firewall.
Click "Add a Program".

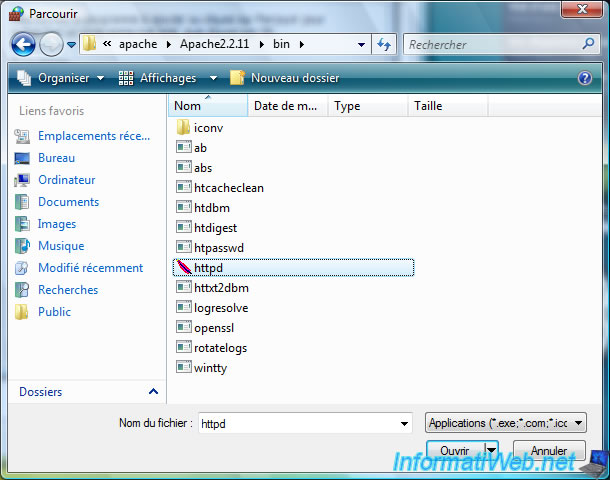
Click "Browse" if your program is not in the list.
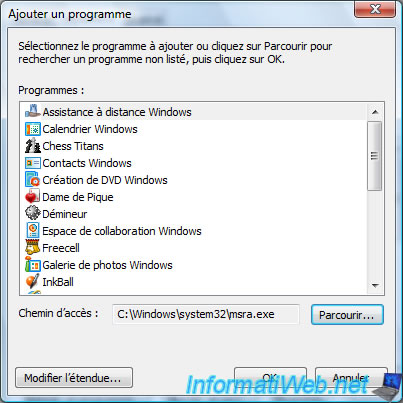
Select the process that should be allowed on the network.
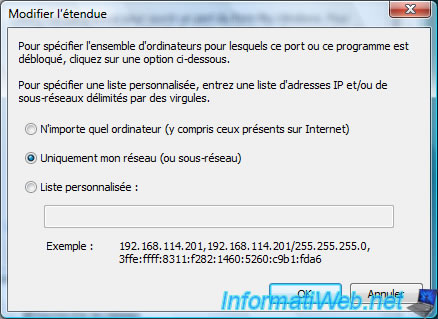
The program is now in the list. Select it and click the "Change scope" button (on bottom left) to allow access from the Internet or Not.
The same choice earlier appear :
- Any computer (including those on the Internet) : Internet
- Only My network (subnet) : local area network (Intranet) only
- Custom list : networks or subnets that you want
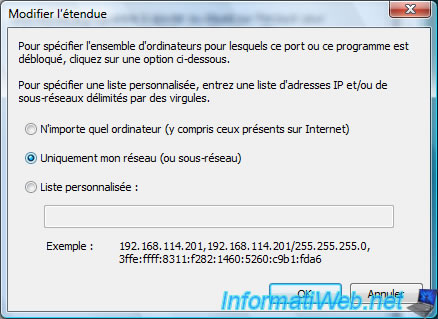
Then confirm by clicking OK.
2.2. Allow a port
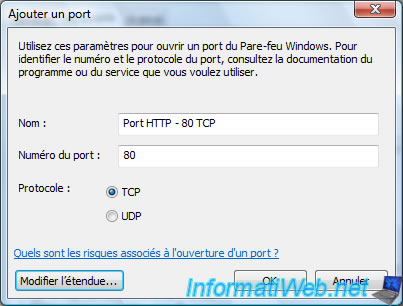
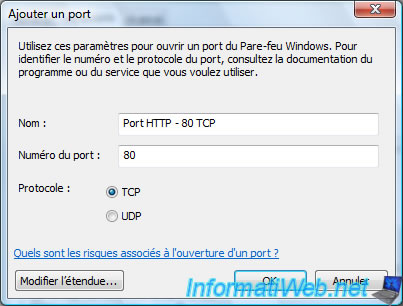
To allow a port, click the "Add Port" button and then fill in the following information :
- Name : The name by which, it appear in the list of firewall
- Port Number : differs from program to program. In our case, it is the Apache Web server that uses port 80.
- Protocol : differs from program to program. In our case, this program uses TCP
Then click "Change Scope".
The same choice earlier appear :
- Any computer (including those on the Internet) : Internet
- Only My network (subnet) : local area network (Intranet) only
- Custom list : networks or subnets that you want
Then, confirm by clicking OK.
Share this tutorial
To see also
-
Windows 1/1/2021
Upgrade from Windows 7 to Windows 8 or 8.1
-
Windows 5/19/2025
Windows 11 / 10 / 8.1 / 8 / 7 - Create a software RAID with dynamic disks
-

Windows 10/14/2024
Windows 7 - Use a Bluetooth headset
-

Windows 9/28/2021
Windows 8 / 8.1 - Translate Windows using language packs (MUI)
No comment