- Windows
- Windows 10, Windows 11
- 01 December 2023 at 19:30 UTC
-

- 1/4
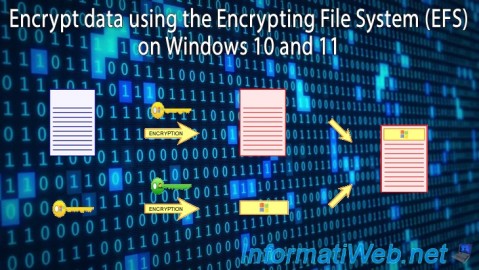
On Windows 10 and 11, you can easily protect access to your data (files and folders) thanks to the EFS system present natively on Windows.
- What is EFS ?
- File encryption with EFS
- Manage certificates on Windows
- Encrypt a file
- Notification for exporting your file encryption key
- EFS certificate generated for the current user
- Test as administrator
- Manually export the EFS certificate and its associated private key
- Add encryption / decryption option in Windows context menu
- Re-import the EFS certificate
1. What is EFS ?
EFS (Encrypting File System) is a system for encrypting files to make them unreadable without the associated key.
Indeed, when you have a laptop computer in a company, it may happen that you take it outside (to a client, to a coffee shop, ...).
In the event of theft or unauthorized access to your laptop, an unauthorized user will therefore not be able to access these data (read their content).
With EFS, you can encrypt data so that it's readable only by one or more specific users without having to disclose the key that was used by the 1st user so that the 2nd user can access it.
For a user to use EFS, the user must have a personal certificate (which contains a public key) and an associated private key.
These public and private keys will allow him to encrypt and decrypt the data he wishes to protect.
Note that this certificate and its associated private key will be generated automatically by Windows when the user wishes to encrypt a file for the first time.
EFS uses 2 types of certificates :
- EFS certificate : a user with an EFS certificate can encrypt and decrypt their data.
The "Enhanced Key Usage" field of this certificate will have the value : Encrypting File System (1.3.6.1.4.1.311.10.3.4). - File recovery certificates : users with a file recovery certificate will be able to access data encrypted by other users in a domain or project.
However, only trusted people (named : Data Recovery Agents) or domain administrators should have this type of certificate.
The "Enhanced Key Usage" field of this certificate will have the value : File Recovery (1.3.6.1.4.1.311.10.3.4.1).
Important :
- EFS requires the use of the NTFS file system on the desired partition.
You will therefore not be able to use EFS on a partition formatted in FAT, FAT32 or ExFAT. - you can't encrypt files with the "compressed" attribute. In other words, files that are compressed by Windows to save disk space or those for which you have enabled the compression option in the properties of the file concerned. If you attempt to encrypt a compressed file, it will automatically be decompressed before being encrypted.
Note that this has nothing to do with compressed files in zip, rar, 7z, ... - you can't encrypt files with the "system" attribute, as well as files in the "systemroot" folder.
Source : Data protection with EFS (Encrypting File System).
To find out more about data encryption, refer to our article: What is encryption and how does it work ?
2. File encryption with EFS
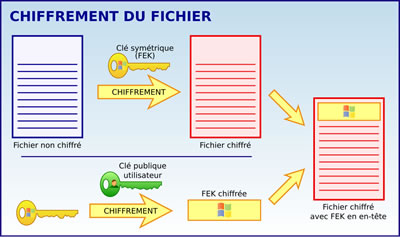
When you encrypt data using EFS, Windows transparently generates a random symmetric key (also called FEK for File Encryption Key) and encrypts the contents of the file using it.
The advantage of this symmetric key is that data encryption and decryption is much faster for large amounts of data than using asymmetric encryption.
If the user doesn't yet have a personal certificate, Windows automatically generates an EFS certificate for him with a combination : public key / private key.
Then, Windows encrypts the symmetric key used with the user's public key so that he can decrypt it later with his private key.
Indeed, with asymmetric encryption, data encrypted with the public key (which everyone can know) can only be decrypted with the private key.
Finally, this encrypted symmetric key (FEK) is stored in an encrypted header.
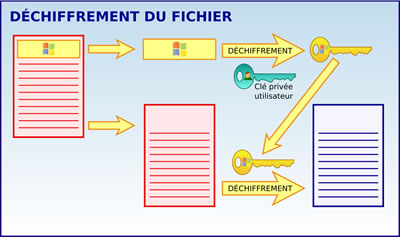
To decrypt a file, Windows will use the user's private key to decrypt the file header to obtain the symmetric key (FEK) that was used to encrypt the data.
As the file was encrypted with a symmetric cipher, the recovered FEK key is also used to decrypt the data (the contents of the file).
Of course, since the encryption and decryption of the file at the level of your computer's file system, the user doesn't see this whole process.
On the other hand, if another user tries to access your encrypted file, he will simply see an "Access Denied" message.
3. Manage certificates on Windows
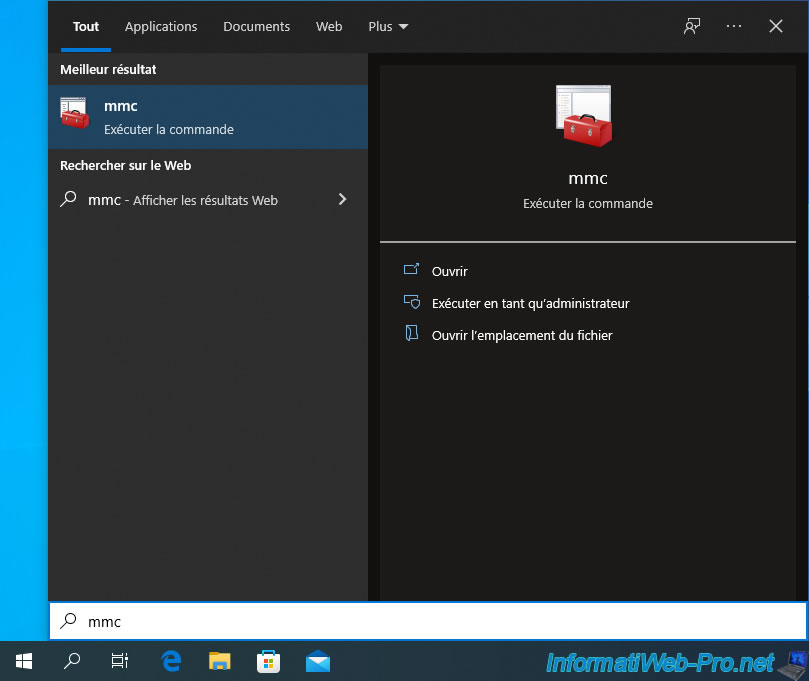
To manage certificates on Windows, you will need to use an "mmc" console.
To do this, open the start menu and type "mmc".
In the "mmc" console that appears, go to : File -> Add/Remove Snap-in.
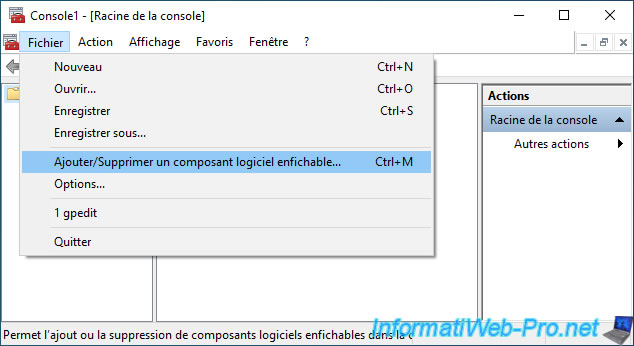
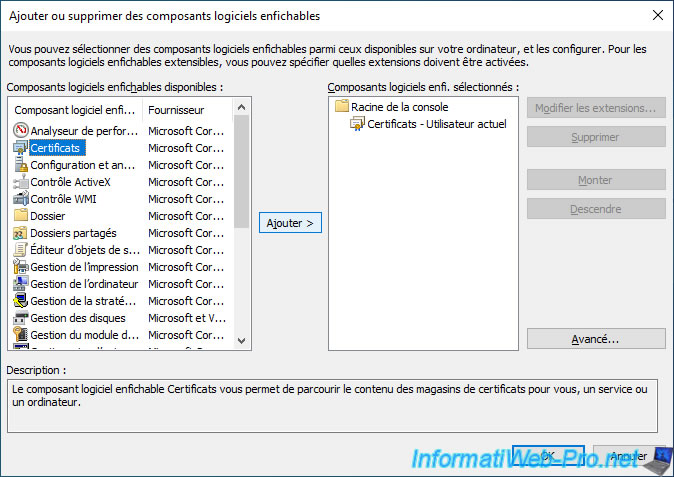
Select the "Certificates" component and click "Add".
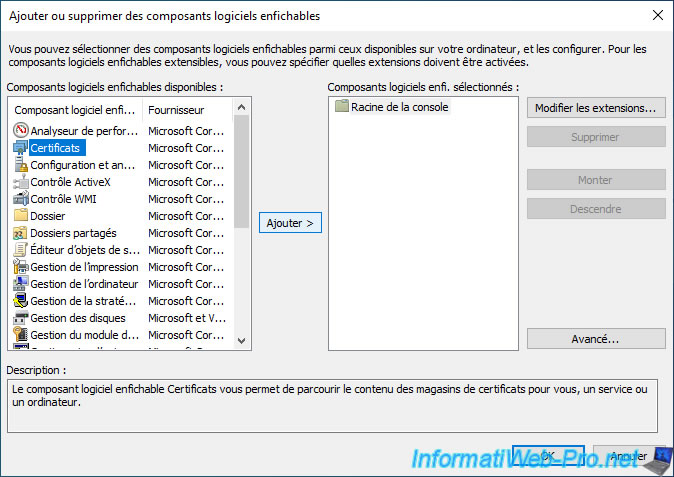
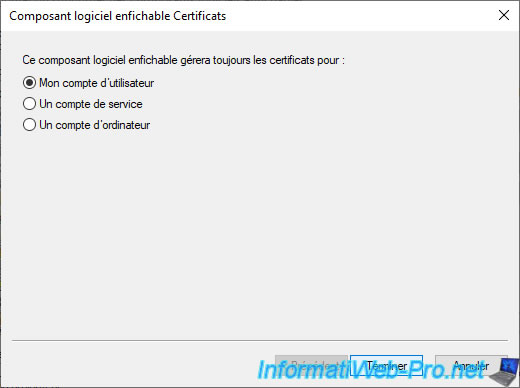
If you have an "Administrator" type Windows user account, a window will ask you to choose between :
- My user account
- Service account
- Computer account
Select "My user account" and click Finish.
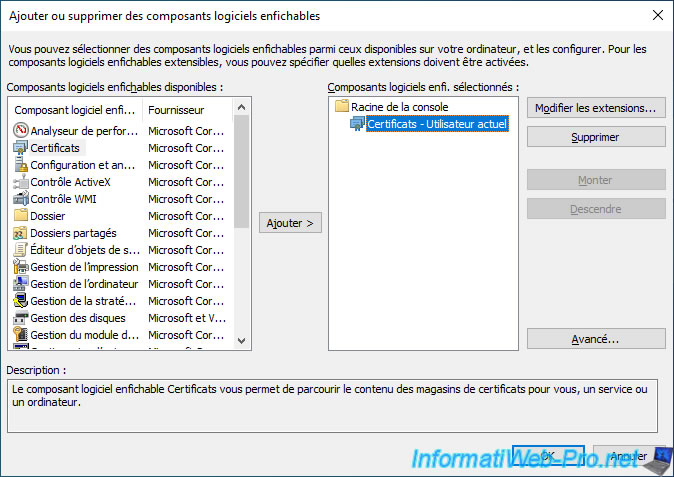
If you have a "Standard" type Windows user account, this window will not appear and the choice "My user account" will be used automatically.
As you can see, the "Certificates" component will be added for the current user.
Click OK.
If you wish, you can also add it for the local computer.
However, you will see that no certificate will be created for it when using EFS.
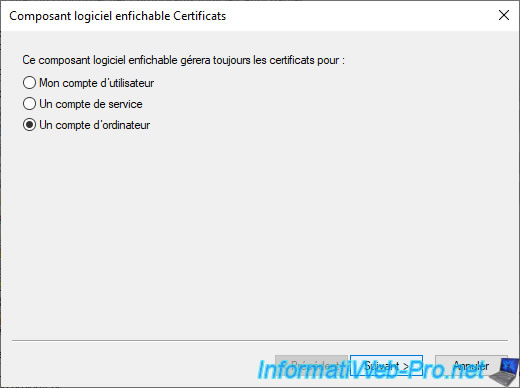
To do this, select the "Certificates" component again and click on "Add".
Select "Computer account" and click Next.
Reminder : this is only possible if you have administrator rights on your computer.
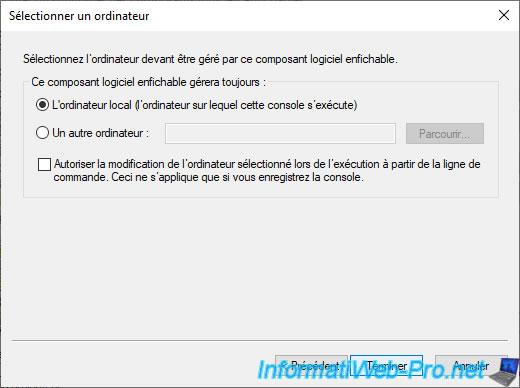
Select "Local computer..." and click Finish.
As you can see, the "Certificates" component will be added for the current user, as well as for the local computer.
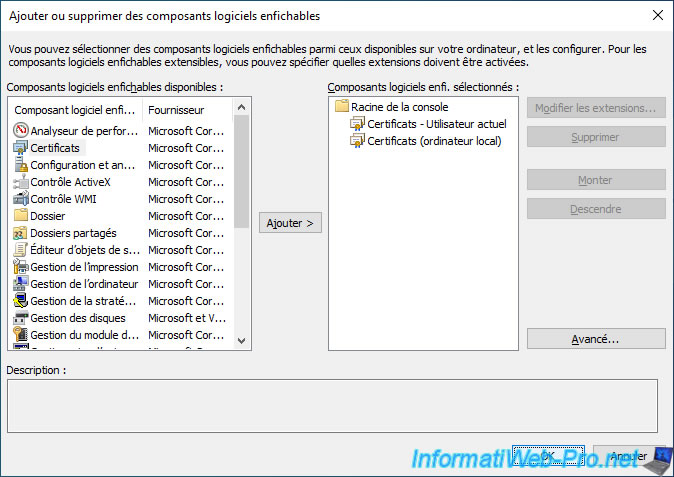
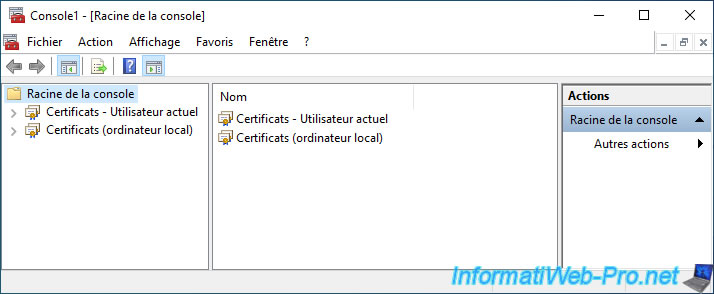
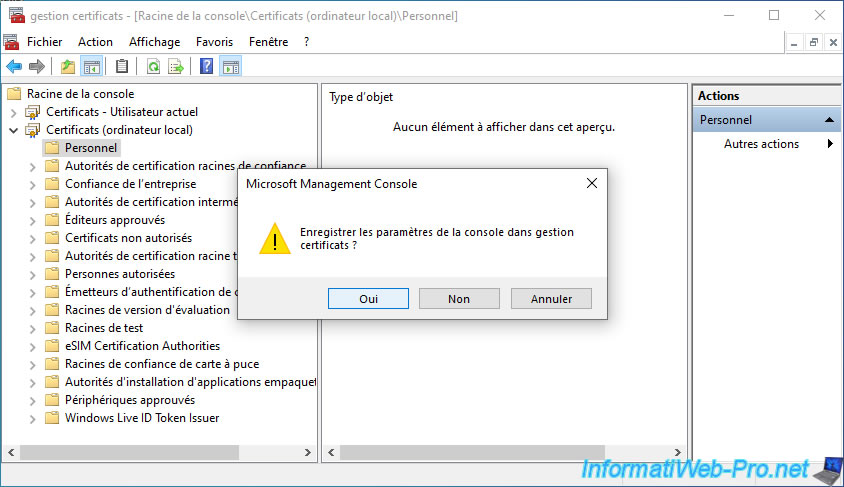
The "Certificates - Current User" and "Certificates (Local Computer)" components appear in the "mmc" console.
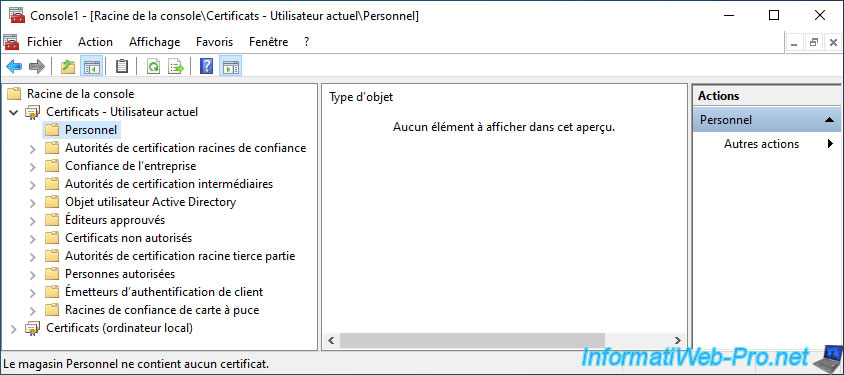
As you can see in the "Personal" section of "Certificates - Current User", you don't yet have a personal user certificate.
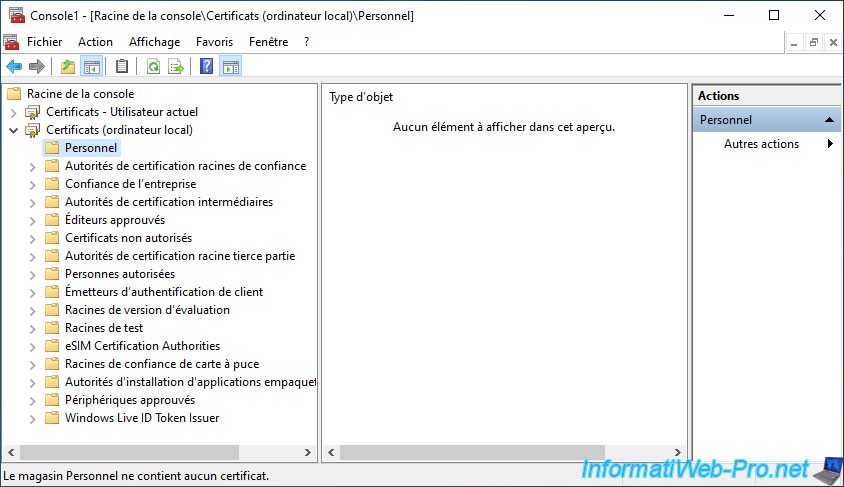
In the "Personal" section of "Certificates (Local Computer)", you will be able to see that there is also no certificate associated with your computer.
Save the settings of this "mmc" console to be able to reopen it as it is in the future.
To do this, go to : File -> Save As.
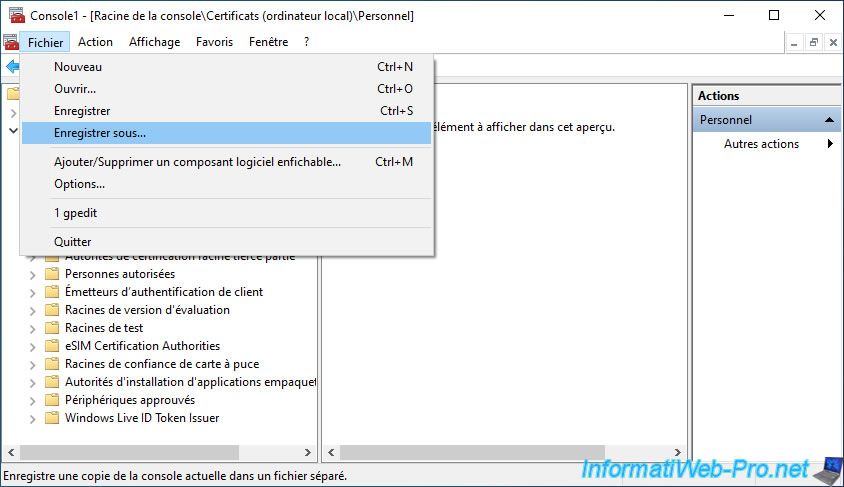
Save the console under any name you want.
For example : certificate management.
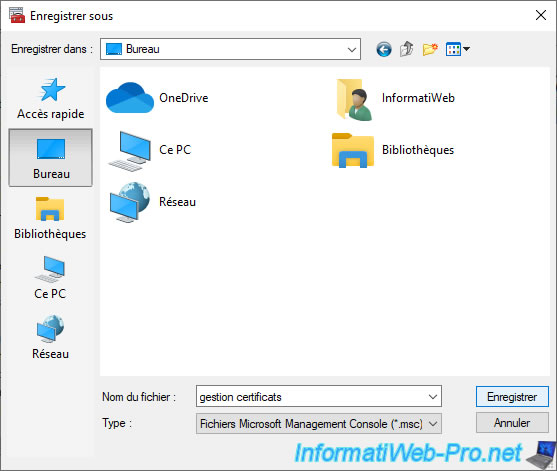
Then, close this "mmc" console and click "Yes" to save the settings.
Note that the "mmc" console will also remember which item is currently selected here.
Share this tutorial
To see also
-
Windows 2/3/2025
Windows 10 - Tabbed file explorer (via Files)
-
Windows 2/8/2022
Windows 11 - Formatting and reinstalling
-
Windows 2/15/2022
Windows 11 - Formatting and reinstalling (on incompatible hardware)
-
Windows 5/15/2023
Windows 11 - Put the start menu on the left
You must be logged in to post a comment