- Windows
- Windows 11, Rufus
- 16 October 2023 at 09:14 UTC
-

Since Windows 11, Microsoft has implemented several restrictions in its installer: TPM module required, 4GB minimum RAM, ...
Since version 22H2 of Windows 11, a new restriction has appeared: the need to use a Microsoft account when installing Windows 11.
Nevertheless, you will see that Rufus will easily allow you to disable all of its restrictions.
Which will allow you to install Windows 11 on any computer with officially supported or unsupported hardware, as well as with a local account instead of a Microsoft account (including on the new 22H2 version of Windows 11).
- Create Windows 11 v22H2 Bootable USB key with Rufus
- Install Windows 11 v22H2 with a local account from your bootable USB key
1. Create Windows 11 v22H2 Bootable USB key with Rufus
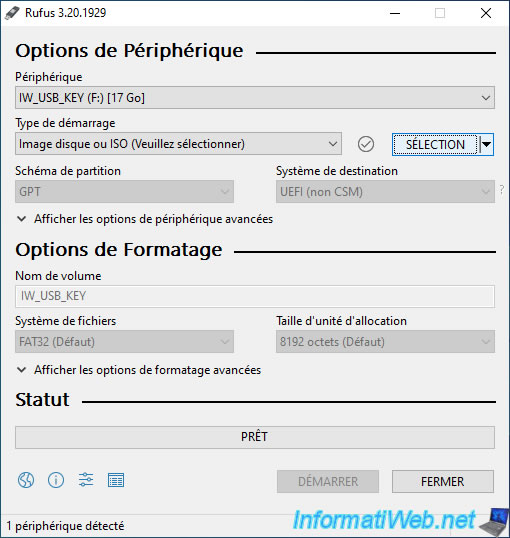
To get started, download and launch the "Rufus" program.
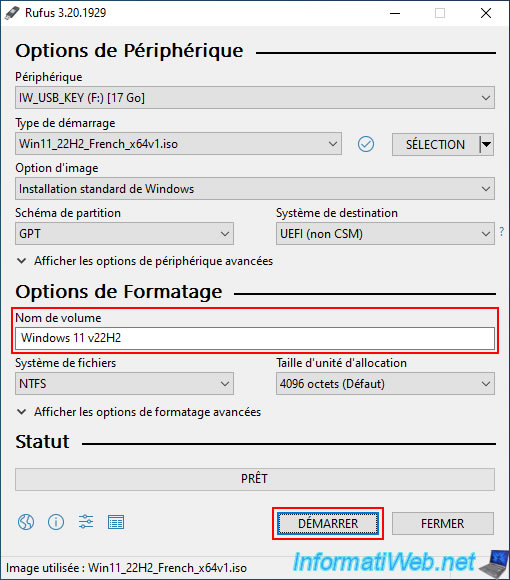
Next, select your USB key from the "Device" list and click "Select".
Warning : the USB key you will use will be completely erased before creating your Windows 11 bootable USB key.
Remember to save its content elsewhere before continuing with this tutorial.
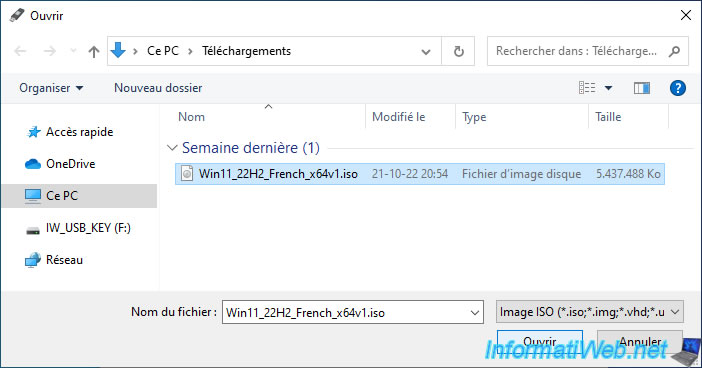
Select the Windows 11 ISO file and click Open.
Note: in this tutorial, we will use the iso of the latest version available at the moment.
Namely, the 22H2 version.
Note that the option "Extended Windows 11 Installation (no TPM / no Secure Boot)" which was visible in the old version of Rufus has changed its place.
With this new version of Rufus, you must therefore leave the "Standard Windows installation" option and the deactivation of the various restrictions of Windows 11 will be offered only when you click on the "Start" button.
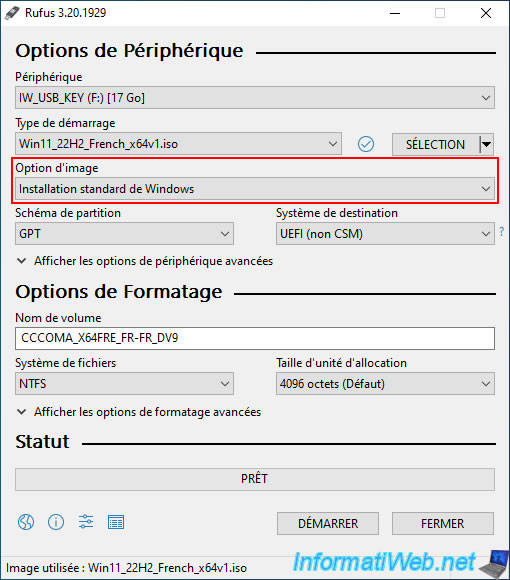
Change the volume label (the name under which your USB key will appear in File Explorer) if desired.
Then, click on the button: Start.
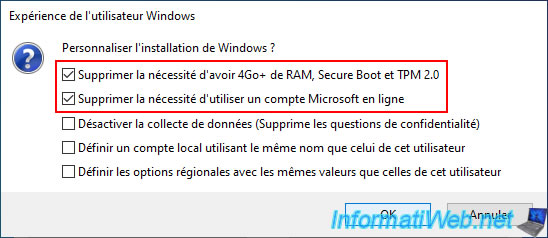
If you selected the Windows 11 v22H2 ISO, a "Windows User Experience" window will appear with 5 options:
- Remove requirement for 4GB+ of RAM, Secure Boot and TPM 2.0: allows you to install Windows 11 on a computer whose hardware is not officially supported.
This is possible, because checking for the presence of a TPM 2.0 module, at least 4 GB of random access memory (RAM) and the activation of Secure Boot (which requires a motherboard with UEFI firmware) will be disabled. - Remove requirement for an online Microsoft account: Allows you to install Windows 11 (regardless of its edition) using a local account IF Internet is not available.
In other words, when the installer asks you to connect to a Microsoft account, all you have to do is unplug the network cable from your computer and click on the "back" icon for the installer to offer you to use an account. local as was the case with the previous version (21H2) of Windows 11.
Note that the "Local account" option that appeared by default with the professional edition of Windows 11 no longer exists.
You will therefore have to activate this option to use a local account, even on this edition of Windows 11. - Disable data collection (Skip privacy questions): allows you to disable Windows 11 data collection without having to answer privacy questions during the Windows 11 setup steps.
- Set a local account using the same name as this user's: allows you to create an account on your future installation of Windows 11 whose name will be the same as the user with which you are currently logged in on your computer.
- Set regional options using the same values as this user's: allows you to use the same regional options (country, language, ...) as your current installation for your future Windows 11 installation.
By default, the first 2 options will be checked. This allows disabling hardware verification (RAM, Secure Boot, and TPM 2.0), as well as installing Windows 11 using a local account, if desired.
Click OK.
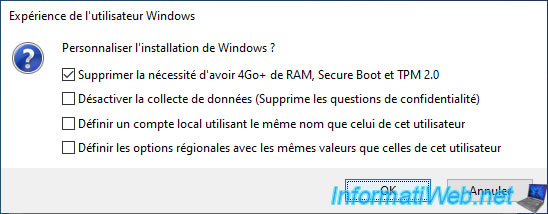
If you have selected the Windows 11 v21H2 ISO, you will see that the option "Remove requirement for an online Microsoft account" will not appear as this relates to the restriction that appeared with the 22H2 version of Windows 11 .
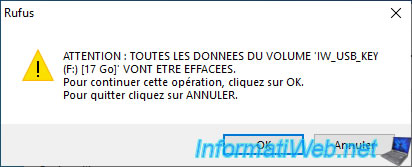
As stated by Rufus, all data present on your USB key will be erased.
Click OK.
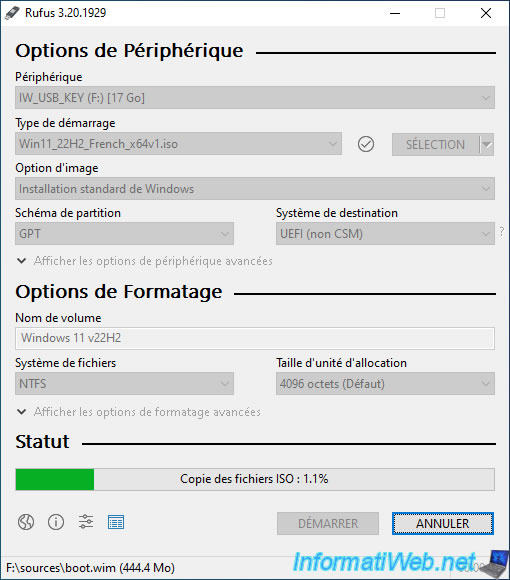
Wait while the contents of the ISO file are copied to your USB key.
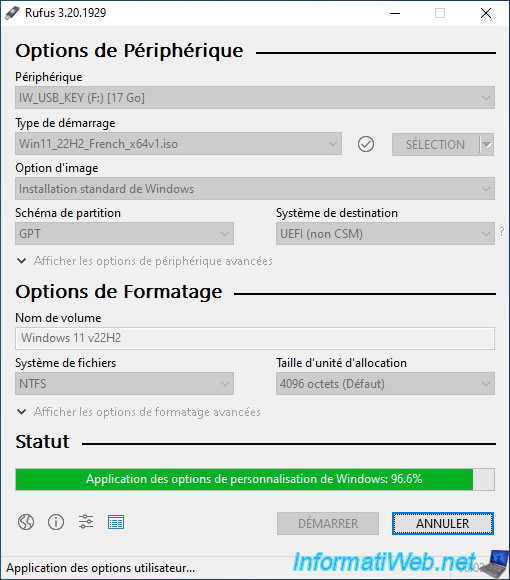
Then, the Windows customization options selected earlier will be applied to your USB key.
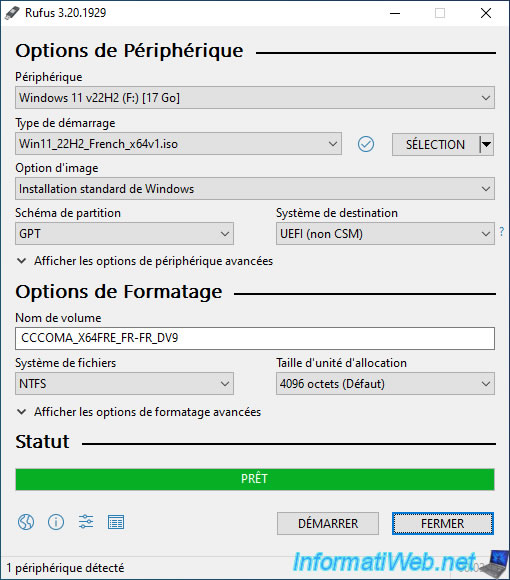
Once your Windows 11 bootable USB key is created, the "Ready" status will appear.
Click Close.
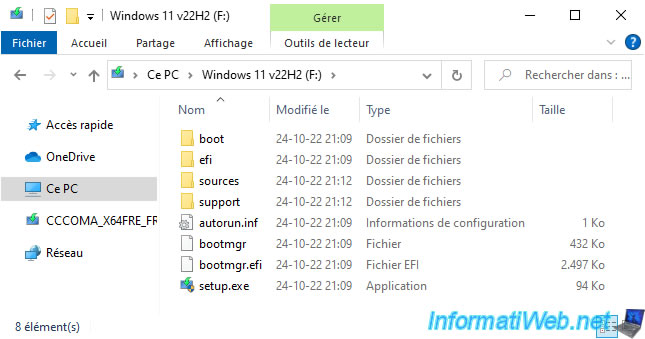
Your bootable USB key will have a blue icon as it does by default with the Windows 11 installation DVD.
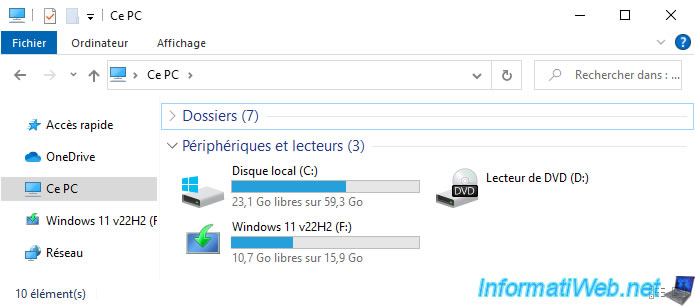
Its content will look like this.
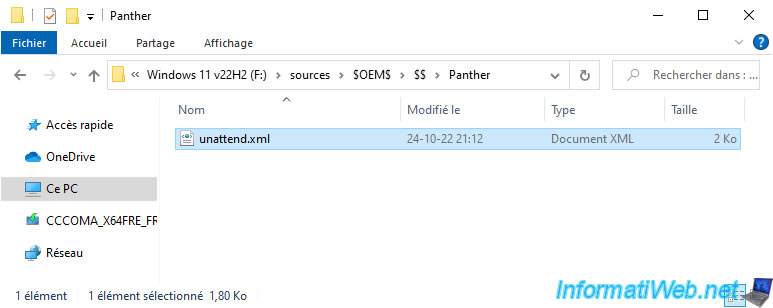
In the "sources\$OEM$\$$\Panther" folder of your Windows 11 bootable USB drive, you will find an "unattend.xml" file which contains the previously selected Windows customizations.
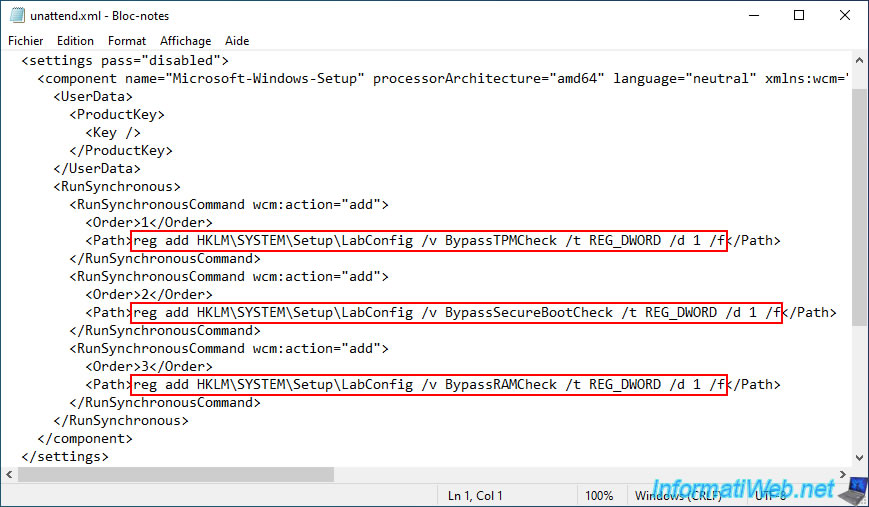
If you open this "unattend.xml" file with notepad, you will see that it has commands to add 3 DWORD values in the Windows PE environment registry of Windows 11 used during installation from Windows 11:
- BypassTPMCheck = 1
- BypassSecureBootCheck = 1
- BypassRAMCheck = 1
Note: this block concerns the 1st step of the installation of Windows 11.
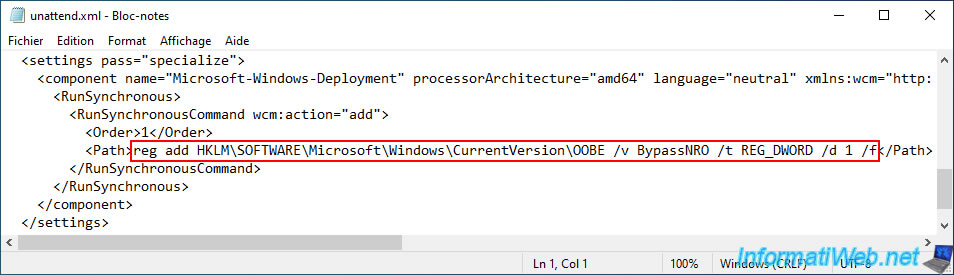
Below, you will find a second block which concerns this time the OOBE environment (Out-of-box experience).
In other words, the configuration steps proposed after the installation of Windows 11 (after the 1st restart).
The given command allows to add a DWORD value named "BypassNRO" whose value is again "1" and which allows to use a local account during the configuration steps of Windows 11 IF Internet is not available.
2. Install Windows 11 v22H2 with a local account from your bootable USB key
Configure your computer's BIOS boot order to boot from your bootable USB key to install Windows 11.
If your BIOS is configured correctly, you will see a "UEFI:NTFS" screen briefly appear when your computer boots.
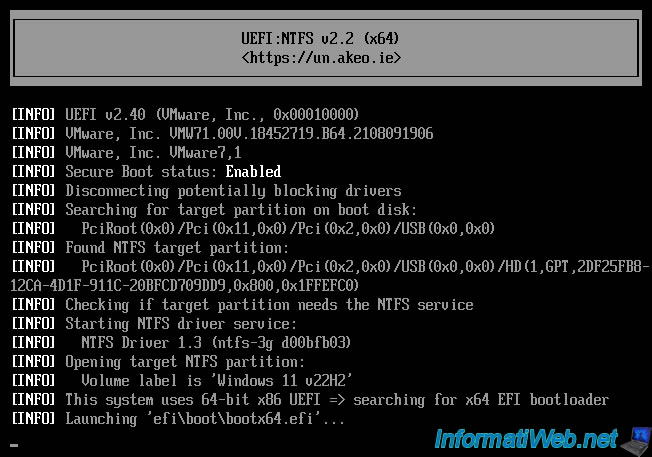
Then, the Windows 11 loading logo will appear.
![]()
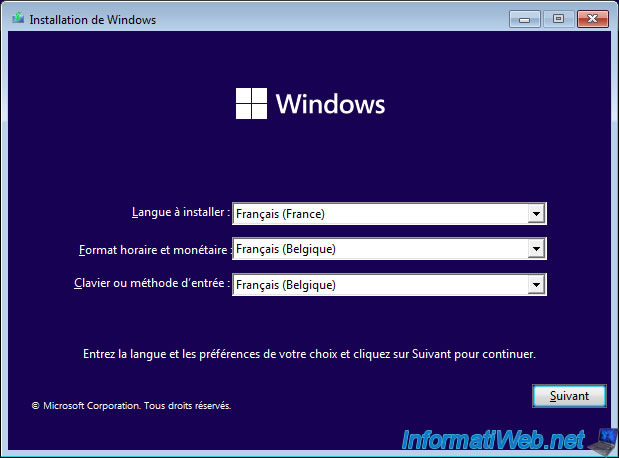
Choose your country and language in the "Windows Setup" program that appears, then click Next.
Then, click on: Install now.
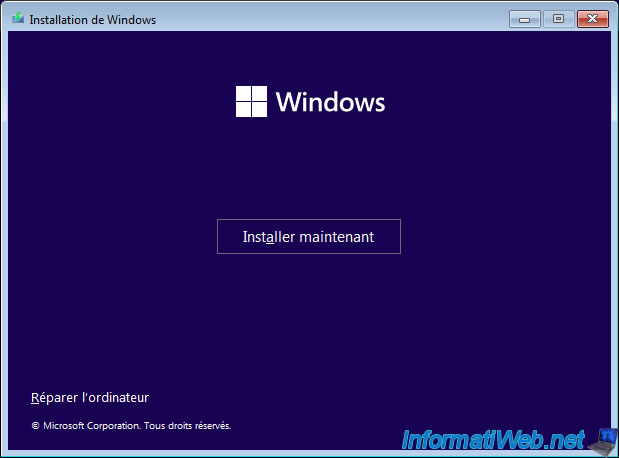
As expected, you will be able to install Windows 11 without any problem, without the error "This PC can't run Windows 11" occurring.
Note: to see all the steps for a standard installation of Windows 11, refer to our tutorial: Windows 11 - Formatting and reinstalling.
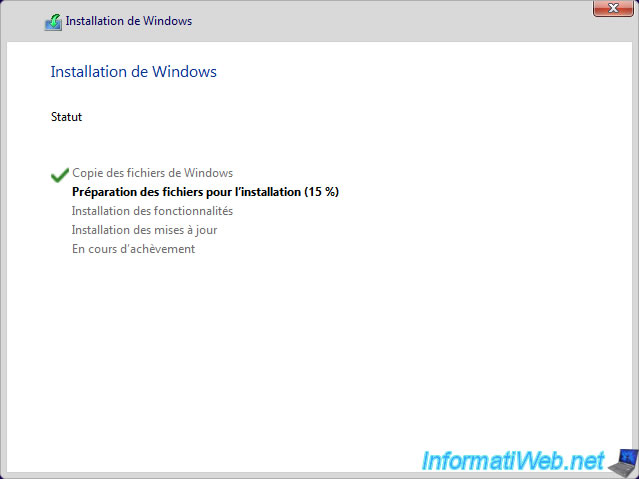
Once the 1st step of the installation is complete, your computer will restart and eventually arrive at the Windows 11 setup steps.
Select your country, your keyboard language, ...
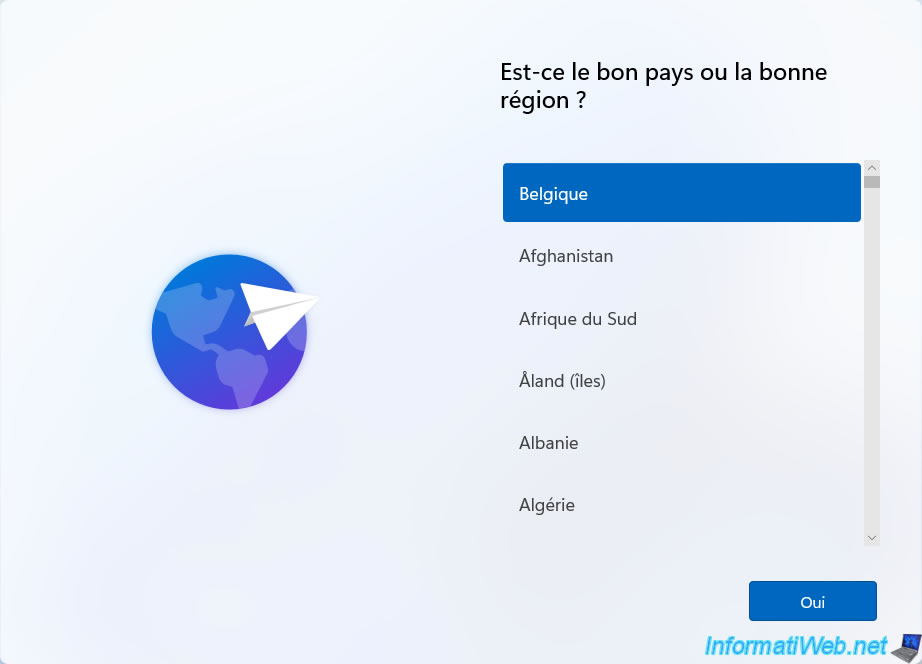
Since version 22H2 of Windows 11, a "Sign in with a Microsoft account" step will appear if you are connected to the Internet.
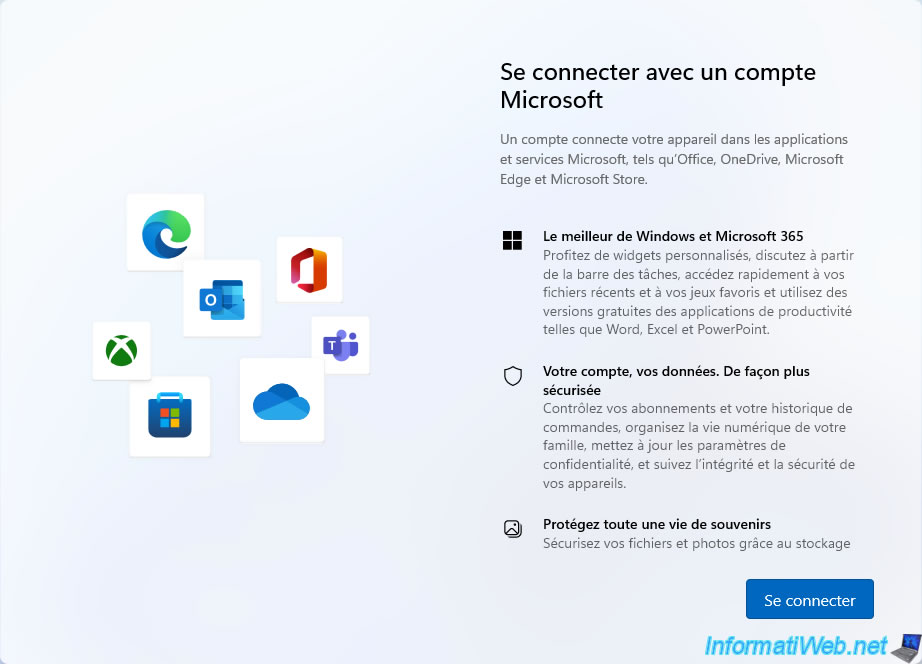
If you are connected to the Internet, Windows 11 will ask you to add your Microsoft account.
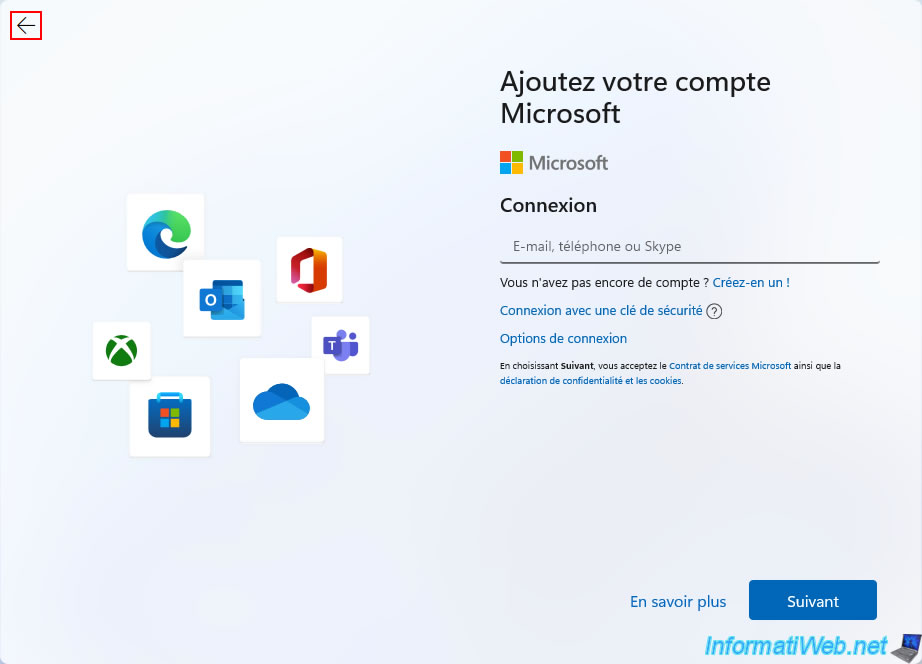
Even if you selected the "Remove requirement for an online Microsoft account" option when creating your Windows 11 bootable USB key.
To use a local account, you must unplug the network cable from your computer (so that the Internet is no longer available), then click on the "<-" arrow located at the top left.
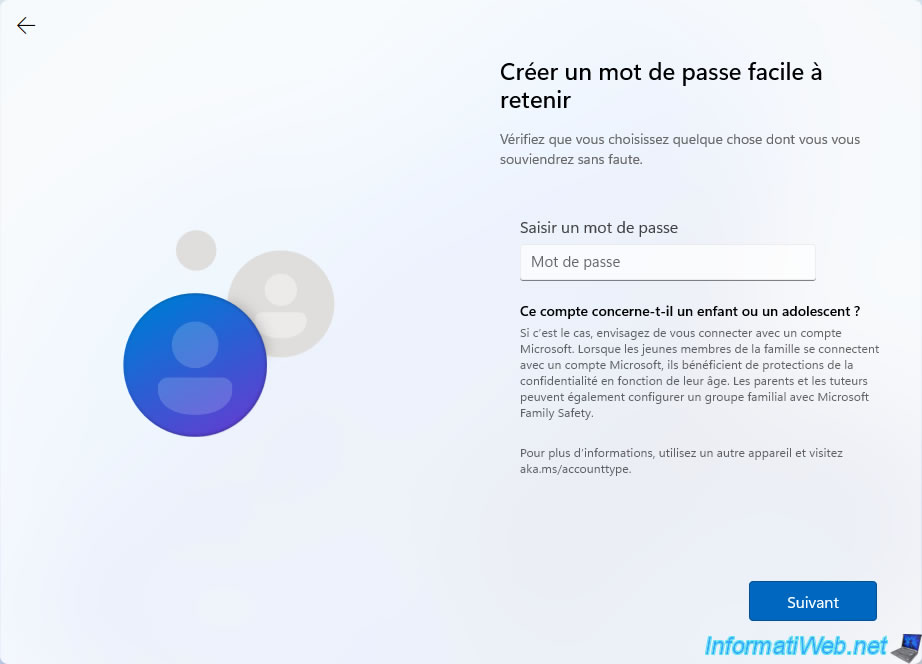
Now, Windows 11 asks you to provide a name for the local account to create on your computer.
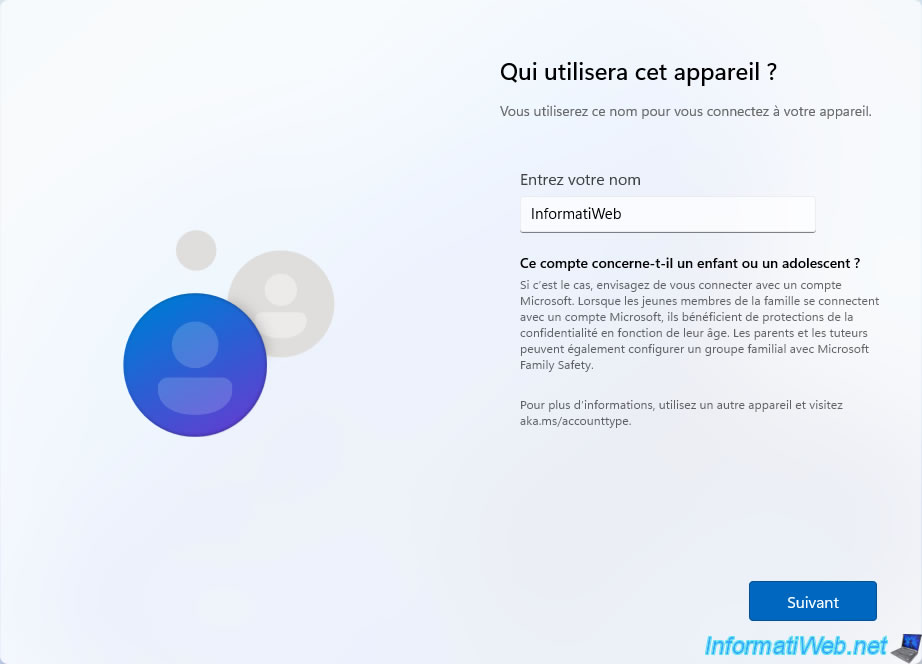
If desired, set a password for this local account.
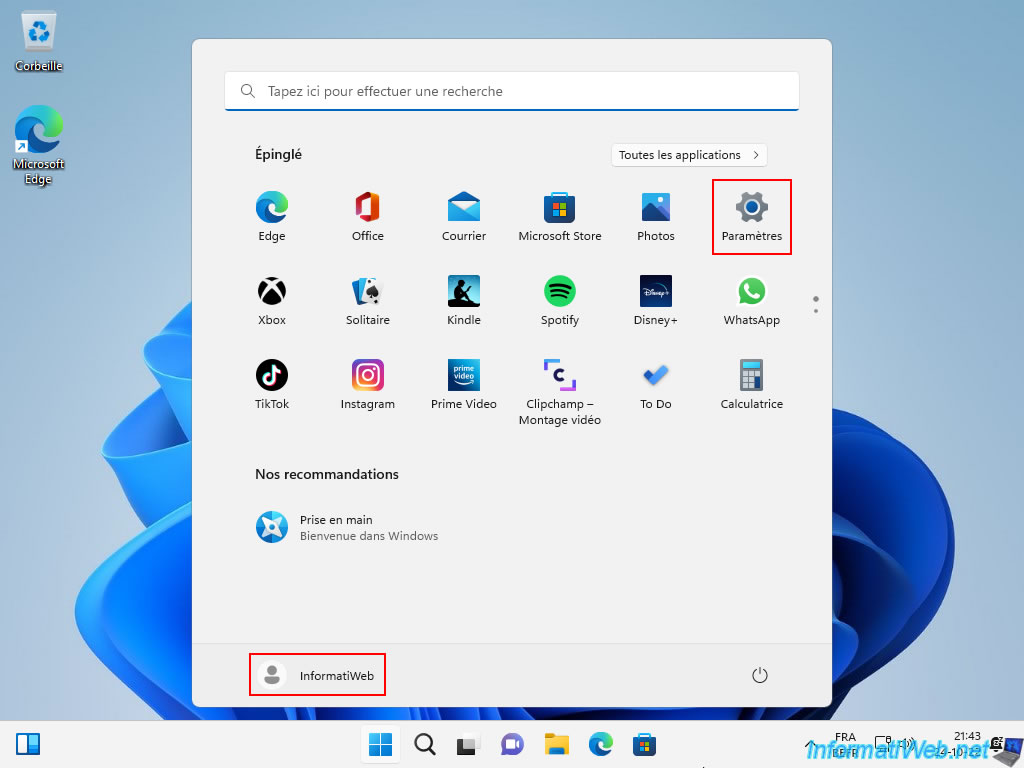
Once Windows 11 is installed, reconnect your computer's network cable and open the start menu.
As you can see, you are logged in with a local account.
Click on: Settings.
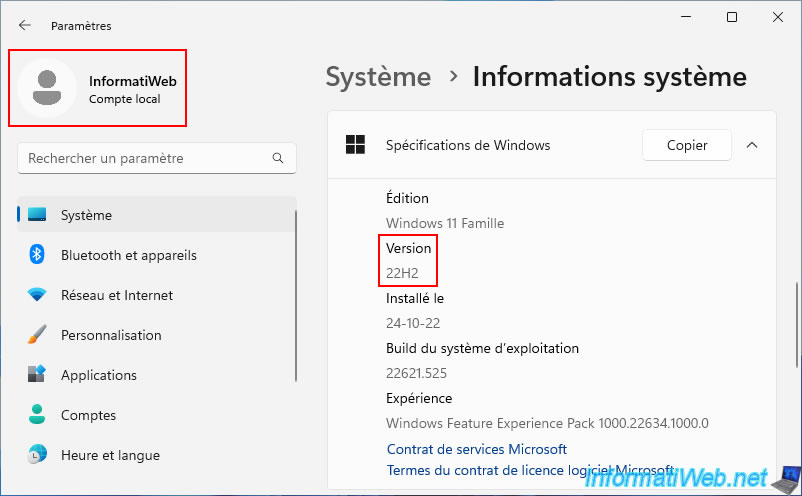
In the "Settings" window that appears, go to: System -> System Information.
As you can see, Windows 11 v22H2 was successfully installed using a local account.
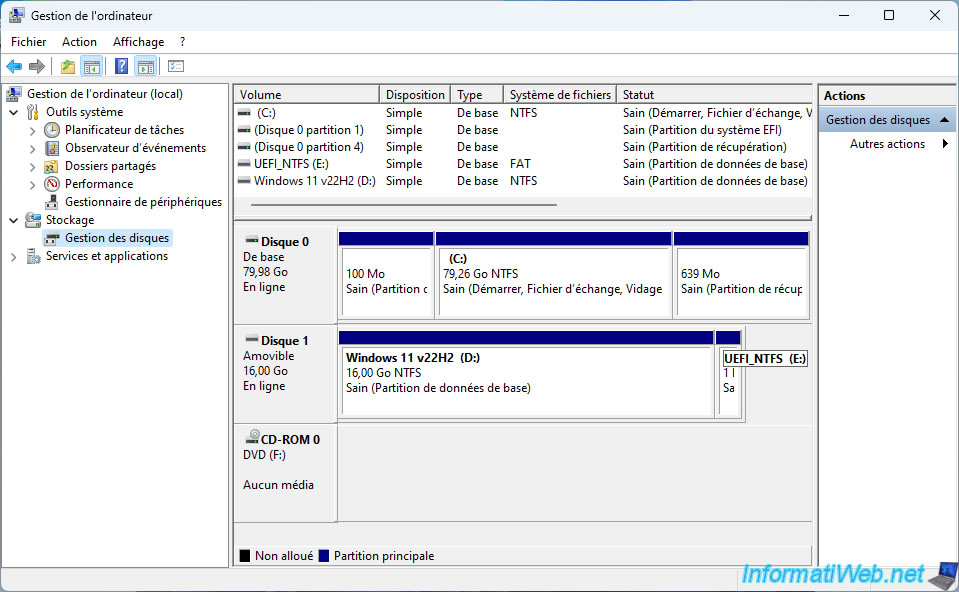
If you open the file explorer, you will see in particular a "UEFI_NTFS" partition appear.

This partition is not part of your Windows 11 installation.
Indeed, this small "UEFI_NTFS" partition of 1 MB is on your bootable USB key and was automatically created on your USB key by Rufus.
Once the USB key is unplugged, this partition will disappear from the file explorer.
Share this tutorial
To see also
-
Virtualization 2/23/2022
VirtualBox - Virtualize Windows 11 (unsupported hardware)
-
Windows 12/1/2023
Windows 10 / 11 - Encrypt data using EFS
-
Windows 4/5/2022
Windows 11 - Change the network profile used
-
Windows 5/10/2021
Windows 8 / 8.1 / 10 / 11 - Installation on an USB support
You must be logged in to post a comment