- Backup
- Acronis True Image, Acronis Universal Restore
- 21 September 2026 at 13:05 UTC
-

- 1/8
With Acronis Cyber Protect Home Office (True Image) and Acronis Universal Restore, you have the ability to backup your virtual machines and restore these backups to dissimilar hardware, if needed. This means that you can also use Acronis to perform P2V migrations, which allows you to virtualize a physical PC and get the corresponding virtual machine on your "VMware ESXi" hypervisor.
Important : this method is not official, as it is not documented by Acronis for the "Acronis Cyber Protect Home Office (True Image)" program for home users.
Nevertheless, it works effectively.
Warning : to backup your physical PC using Acronis Cyber Protect Home Office (True Image), please refer to the first three steps of our tutorial "Acronis True Image - P2V - Virtualize a physical PC to VirtualBox". Indeed, the backup used in this new tutorial is identical to the one in our previous P2V tutorial for VirtualBox.
- Store Acronis ISO files on your VMware ESXi hypervisor
- Create a VM on VMware ESXi (where to restore your Acronis backup)
- Connect your external hard drive to your virtual machine (VM)
- Restore physical PC disk to your VM on VMware ESXi via Acronis Cyber Protect Home Office (True Image)
- Disconnect your external hard drive from your virtual machine (VM)
- Extract drivers from VMware Tools (recommended for using Acronis Universal Restore)
- Apply Acronis Universal Restore in your virtual machine on VMware ESXi
- Booting your virtual machine on VMware ESXi after applying Acronis Universal Restore
- Uninstall old drivers related to the hardware of the virtualized physical PC copied into your VM on VMware ESXi
- Install VMware ESXi drivers (VMware Tools) in your virtual machine
- Virtual machine working on VMware ESXi and corresponding to the virtualized physical PC
1. Store Acronis ISO files on your VMware ESXi hypervisor
To start, you will need to store the 2 ISO files of your Acronis media created previously (see information in the tutorial cited above).
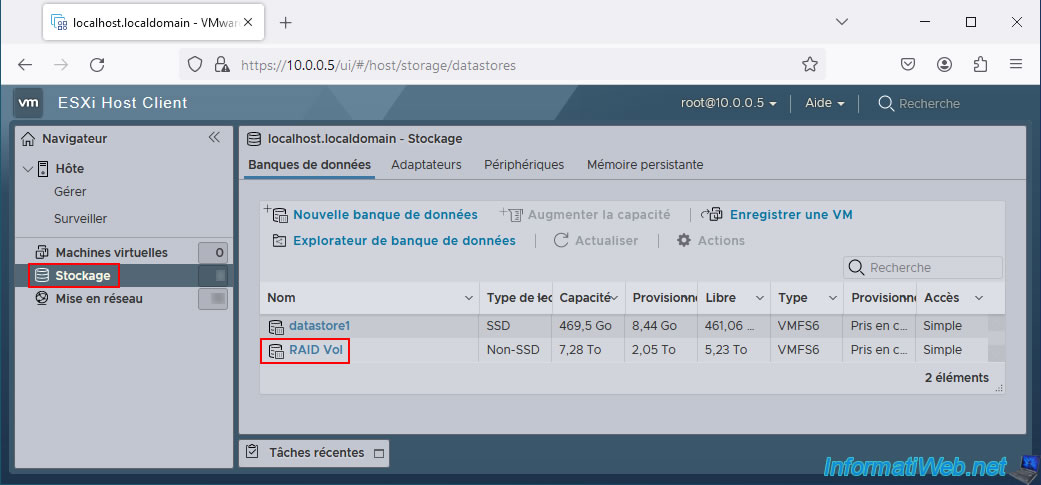
To do this, go to the "Storage" section of your VMware ESXi hypervisor and click on the desired datastore (in our case "RAID Vol").
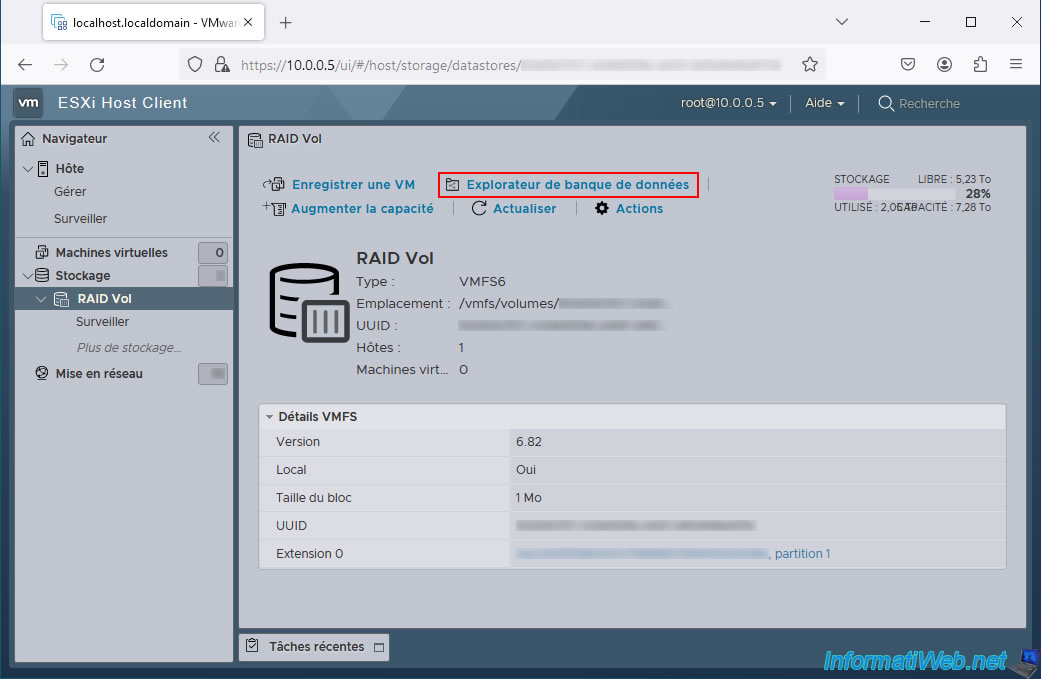
Then, click on "Datastore browser".
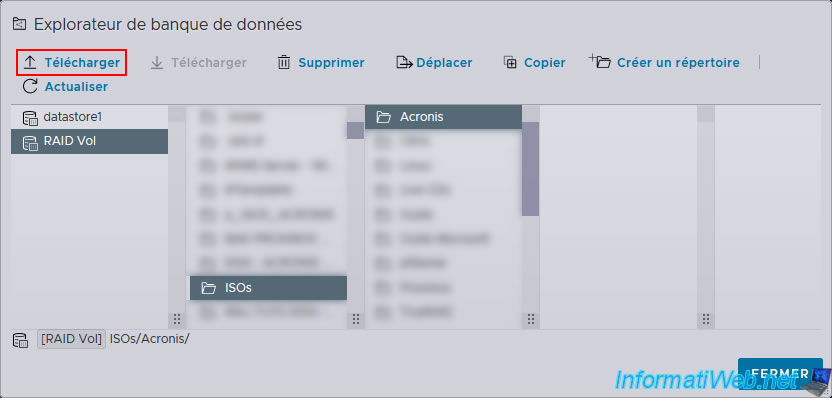
Select the folder where you store your ISO files and click "Upload".
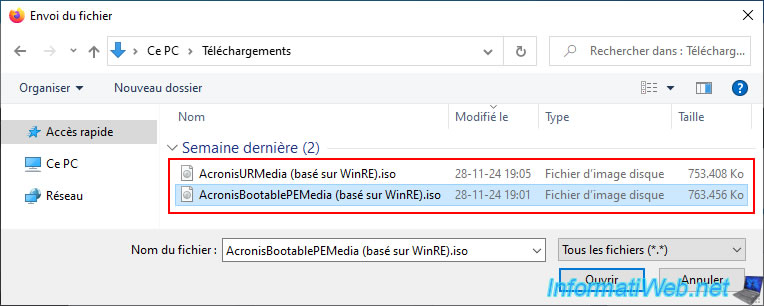
Select your Acronis ISO files one by one and click "Open".
- AcronisURMedia (WinRE-based).iso: bootable media for using the "Acronis Universal Restore" program.
- AcronisBootablePEMedia (WinRE-based).iso: rescue media for using the "Acronis Cyber Protect Home Office (True Image)" program.
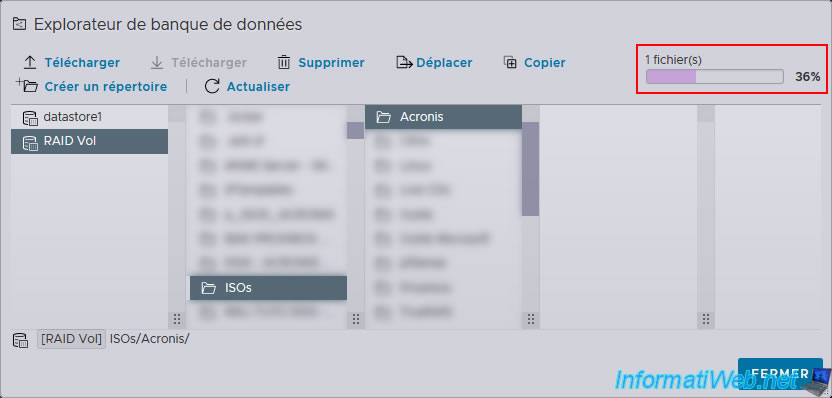
Please wait while your ISO files are uploaded to your datastore.
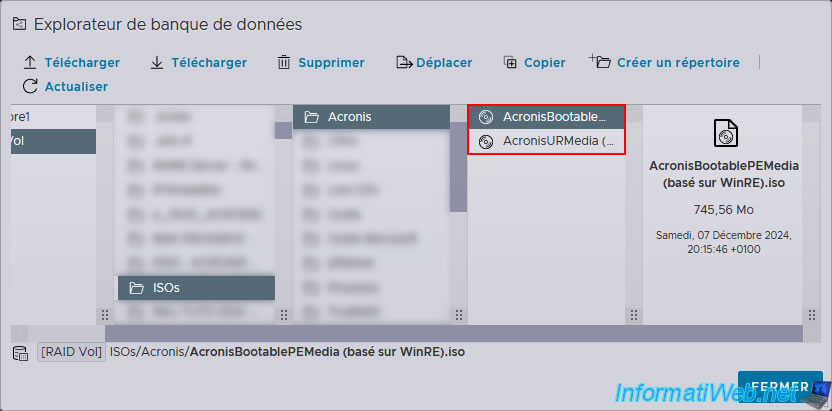
As expected, you will have 2 Acronis ISO files on your datastore.
Click "Close".
2. Create a VM on VMware ESXi (where to restore your Acronis backup)
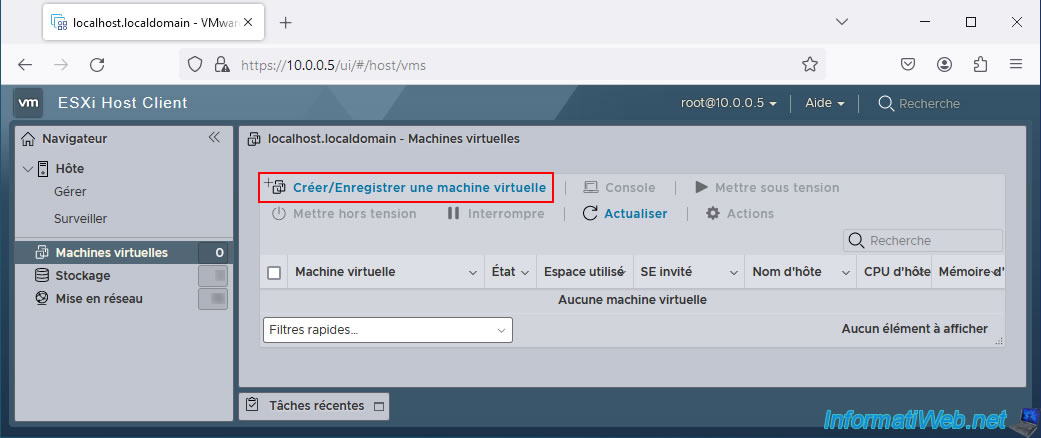
In the "Virtual Machines" section of the VMware ESXi web interface, click "Create / Register VM".
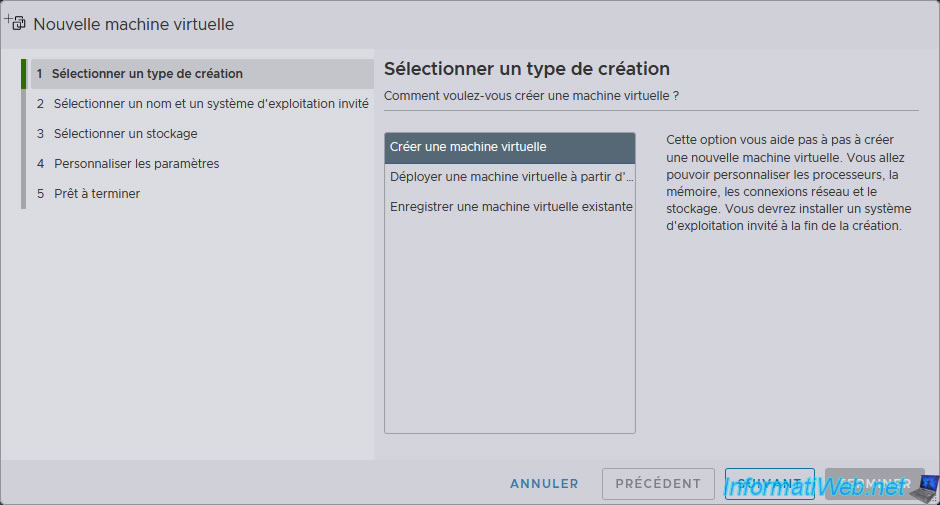
In the "New Virtual Machine" wizard that appears, select "Create a virtual machine" and click "Next".
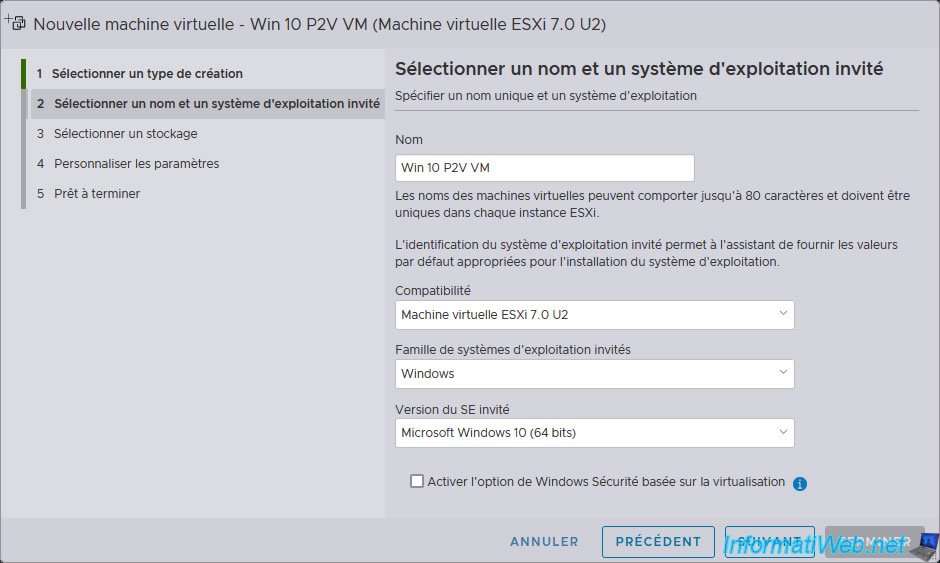
Enter a name for your new virtual machine.
For example: Win 10 P2V VM.
Then, select the Windows version that matches the physical PC that was previously backed up via Acronis.
In our case:
- Guest OS Family: Windows.
- Guest OS Version: Microsoft Windows 10 (64-bit).
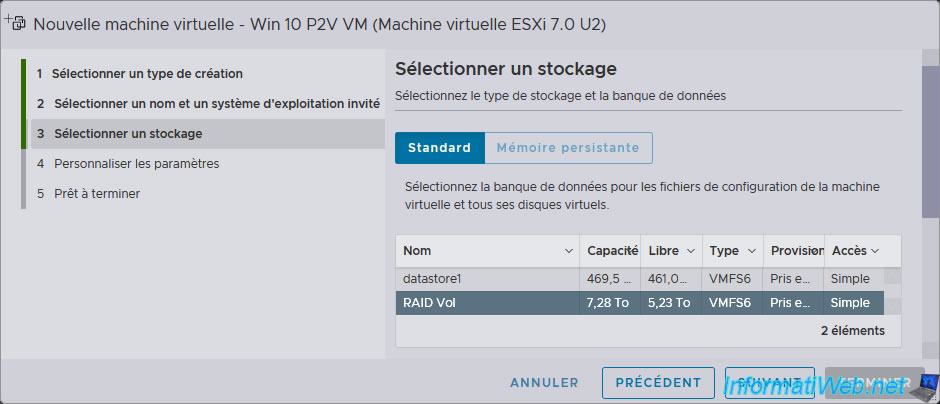
Select the datastore where you want to store your virtual machine.
In our case, our "RAID Vol" datastore.
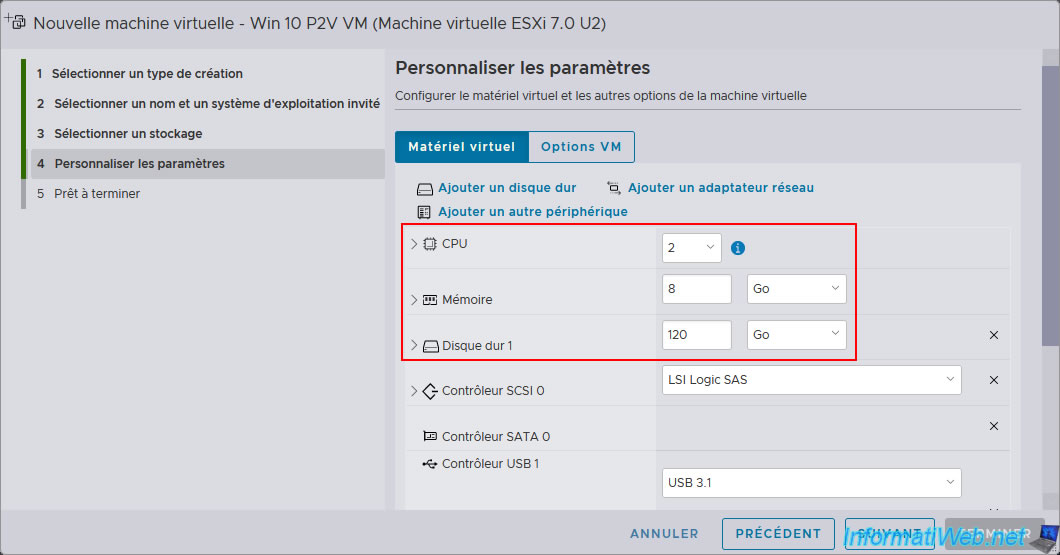
For Windows 10, allocate at least:
- 2 processor cores (CPU), or even 4 cores if you have the possibility to make Windows 10 even smoother.
- 4 GB of RAM, or even 8 GB of RAM for recent versions of Windows 10.
For the size of the virtual hard disk, do not indicate the size of the physical hard disk previously backed up via Acronis, but a smaller size sufficient for the amount of data actually stored on the previously backed up disk, as well as to allow the installation of new programs or the addition of data to your virtual machine later (without going overboard).
Indeed, it is possible to enlarge a virtual hard disk on VMware ESXi, but not to reduce its size.
In our case, there was about 48 GB of data (about 33 GB for the "C" partition which contains Windows in particular and 15 GB for the "D" partition which simply contains data) stored on the hard disk backed up from our physical PC.
We therefore chose to create a virtual hard disk with a size of 120 GB.
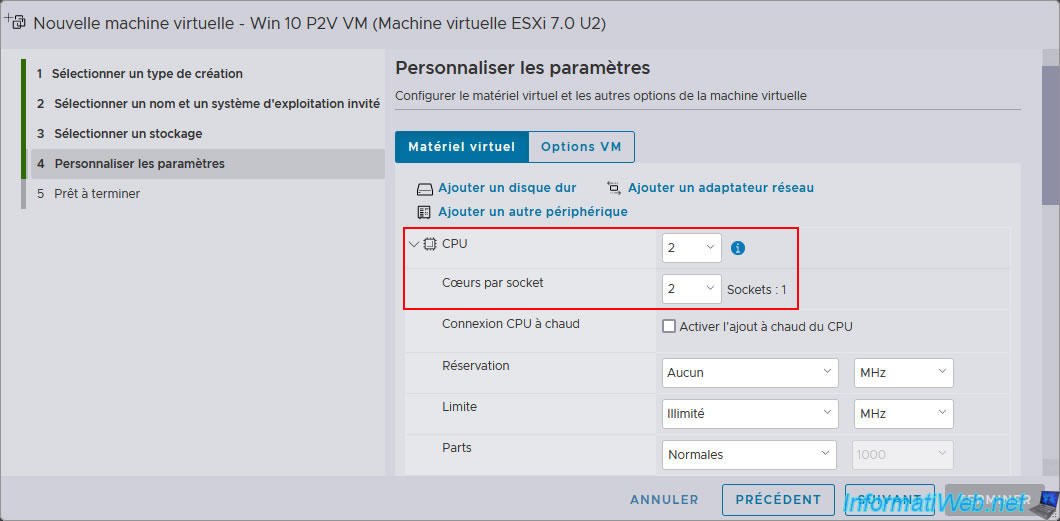
Warning : for the processor (CPU), make sure to indicate the same thing for the "CPU" and "Cores per socket" options.
So, the value of "Sockets" will be "1" (just to the right).
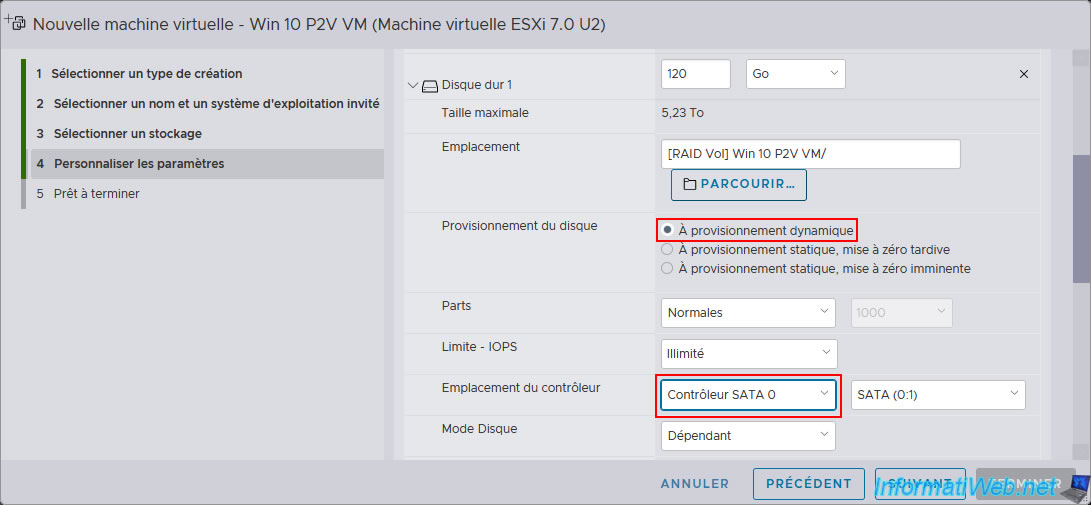
Warning : for the virtual hard disk, make sure to select "Thin provisioned" so that your virtual hard disk only takes up as much space as needed on your VMware ESXi hypervisor's physical disk.
To best reflect the source hard disk type, select "SATA 0 Controller" for the controller location of this virtual hard disk.
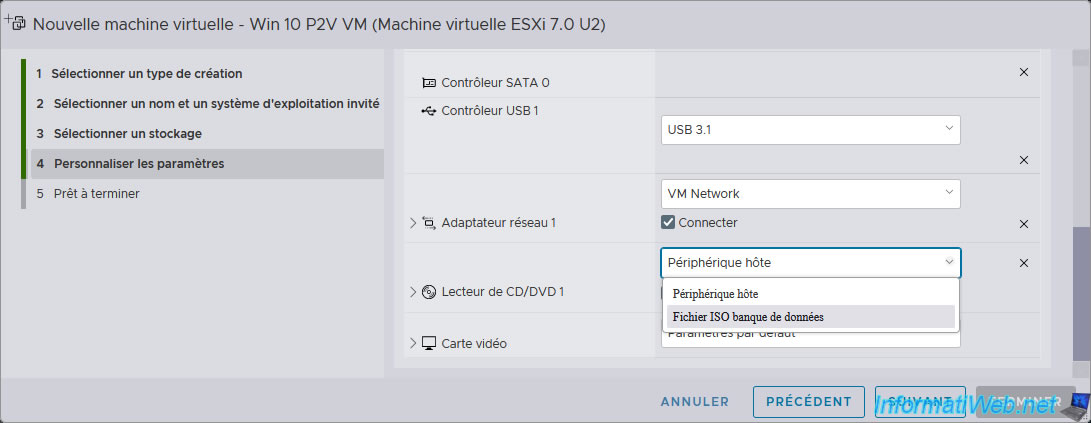
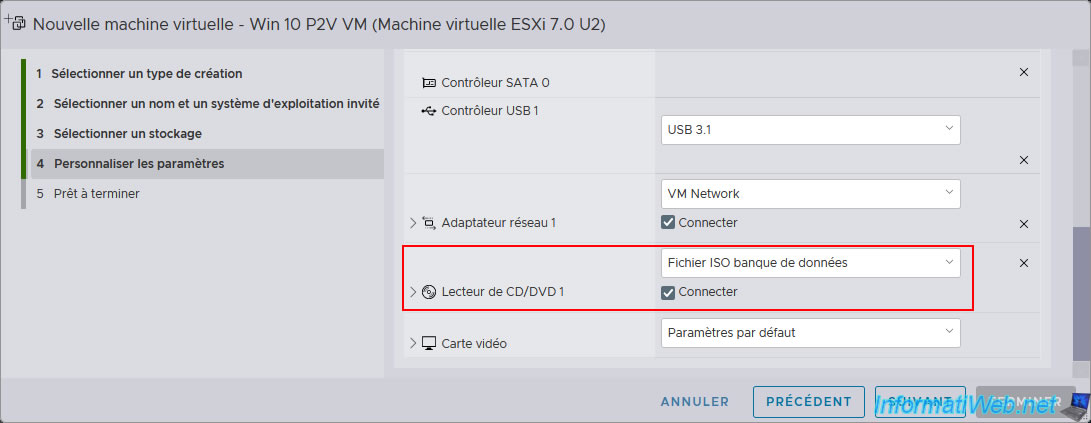
For your VM's CD/DVD drive, select "Datastore ISO file".
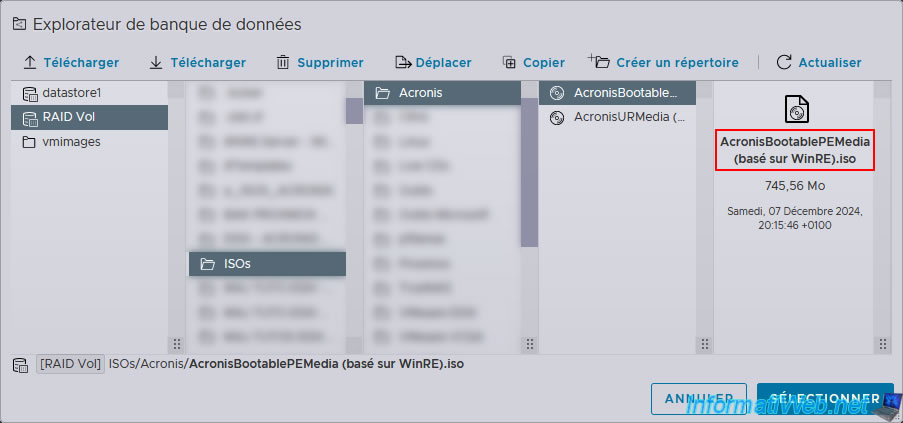
Select the "AcronisBootablePEMedia (WinRE based).iso" file previously stored in your datastore.
This will allow you to use the "Acronis Cyber Protect Home Office (True Image)" program to restore your backup to your VM.
The ISO file has been inserted into your VM's CD/DVD drive.
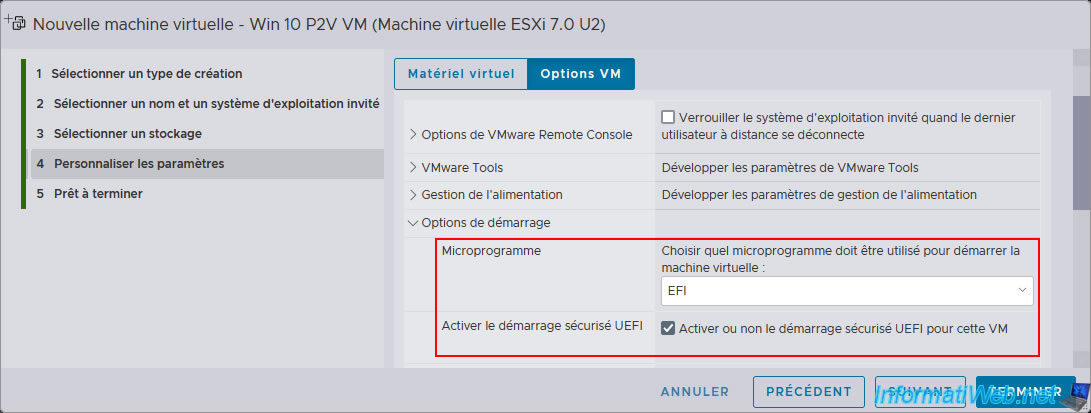
In the "VM Options" tab (at the top), go to the "Boot Options" section and select the appropriate firmware.
If you select the "EFI" firmware, then check the "Enable UEFI Secure Boot" box (if you want and if it is at least Windows 8).
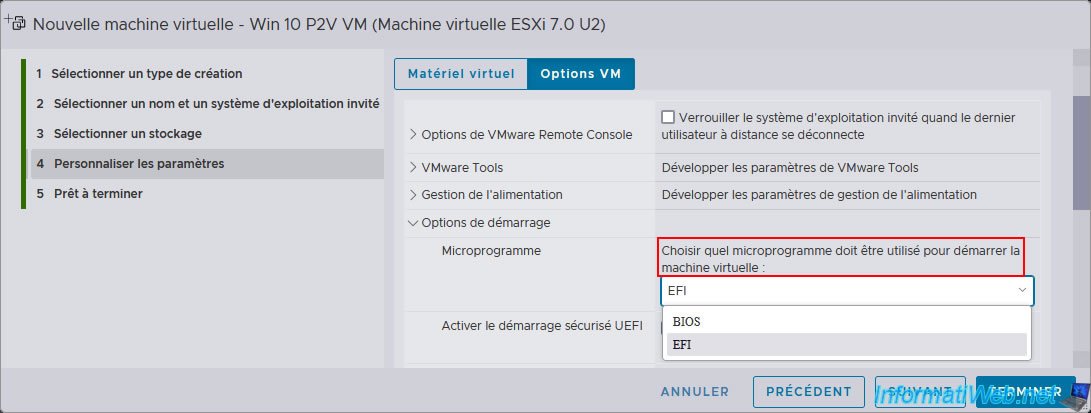
For the firmware, you have the choice between:
- BIOS: select this if the Windows installation backed up from your physical PC was in LEGACY BIOS mode.
In this case, the disk where Windows is installed uses a "MBR" (Master Boot Record) partition table. - EFI: select this if the Windows installation backed up from your physical PC was in UEFI mode.
In this case, the disk where Windows is installed uses a "GPT" (GUID Partition Table) partition table.
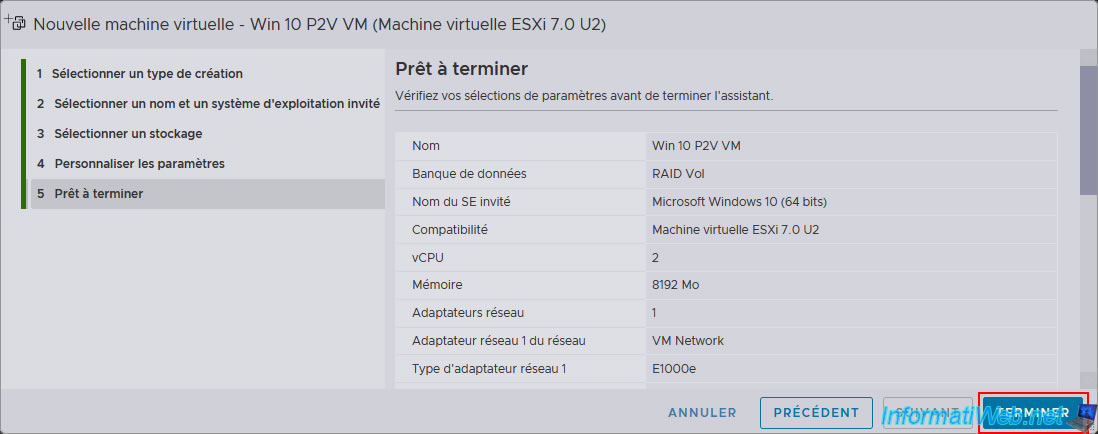
A summary of the configuration appears.
Click "Finish".
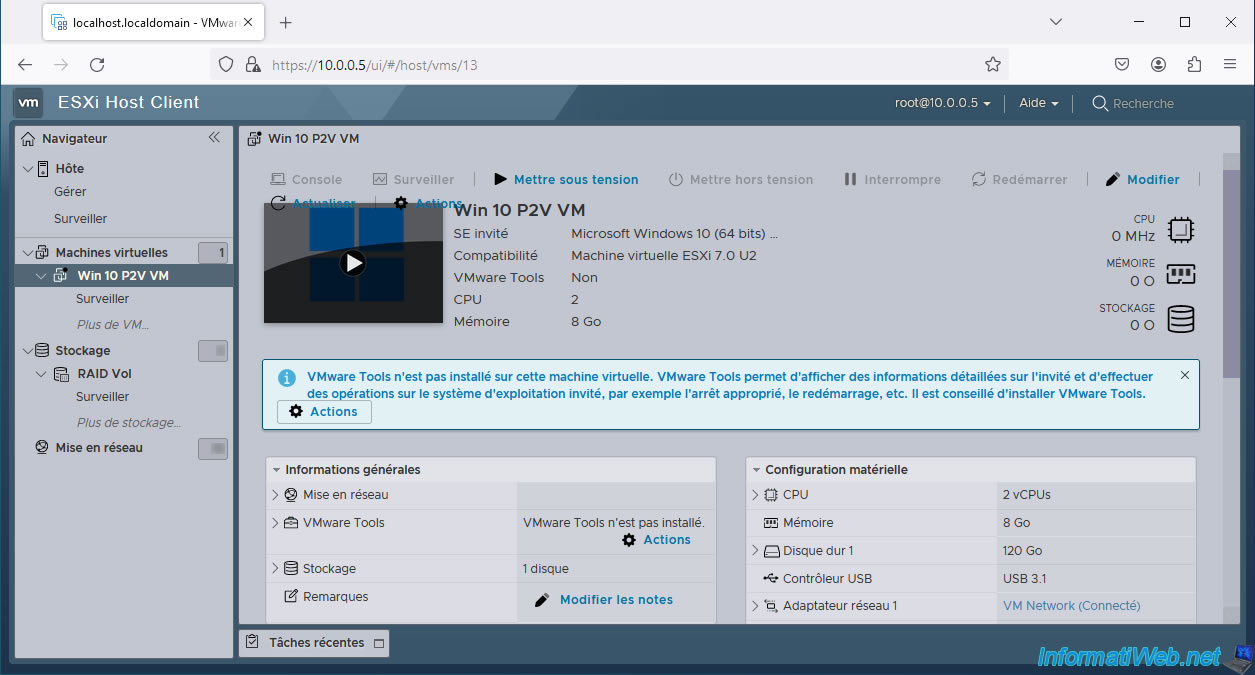
Your virtual machine "Windows 10 P2V VM" has been created.
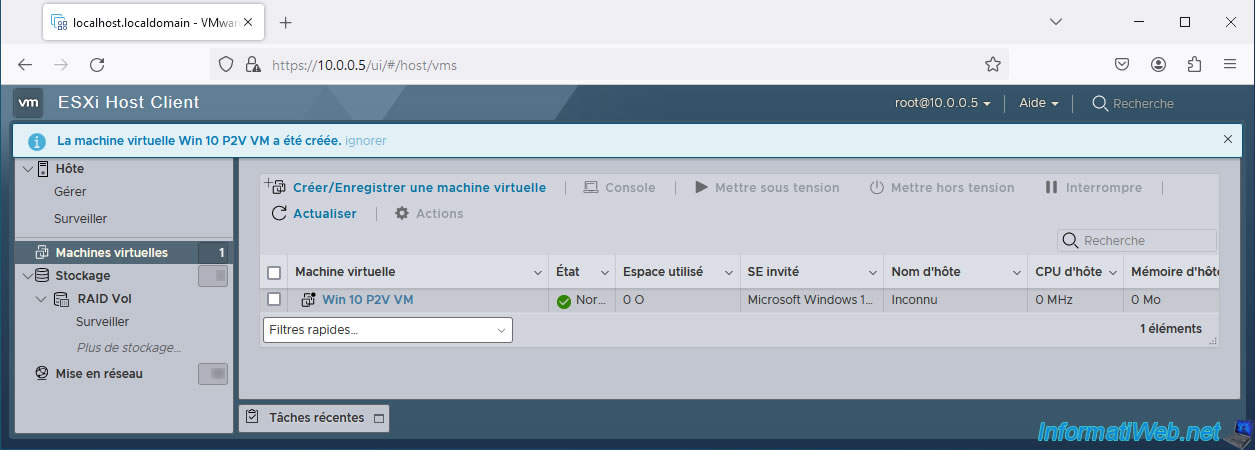
Click on its name to display it.
3. Connect your external hard drive to your virtual machine (VM)
For this tutorial, we considered that it was a VMware ESXi hypervisor installed at home.
So, we plugged the USB external hard drive containing our backup into a USB port of our VMware ESXi server.
Once your USB external hard drive is physically plugged into your VMware ESXi server, click on "Edit".
Note: if you do not have physical access to your VMware ESXi server, then you will have to manage this virtual machine via VMware Workstation Pro or via the VMRC console.
Then, you can connect your USB external hard drive to your VM by plugging it into your client PC.
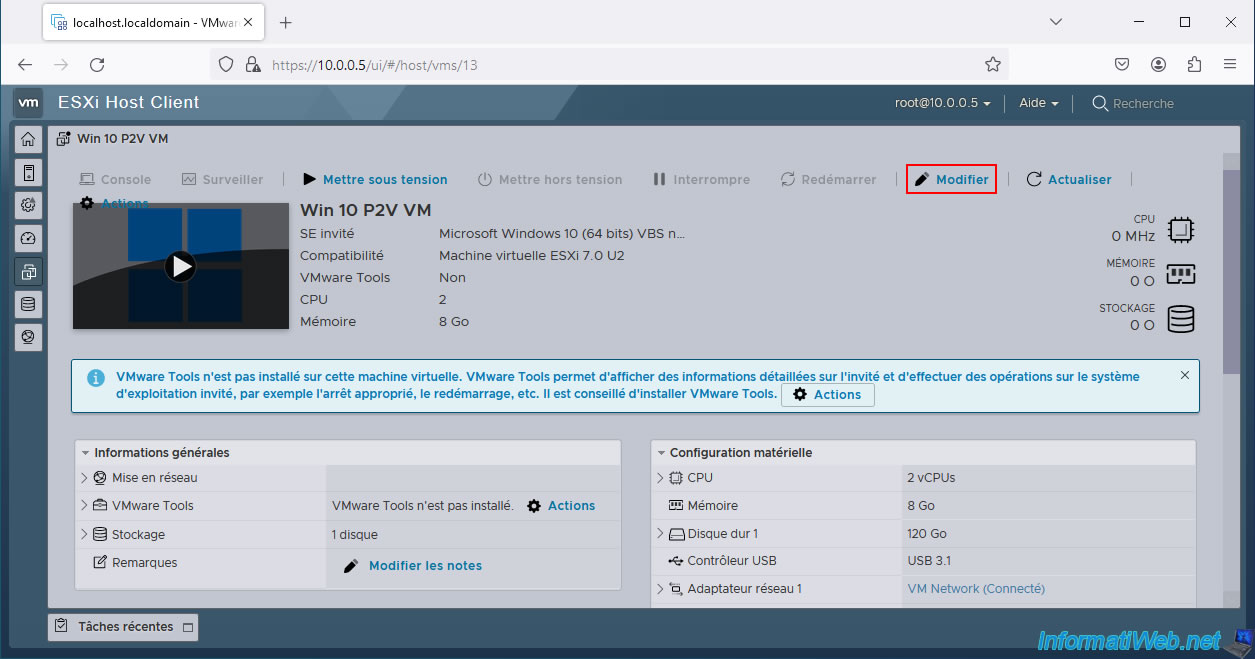
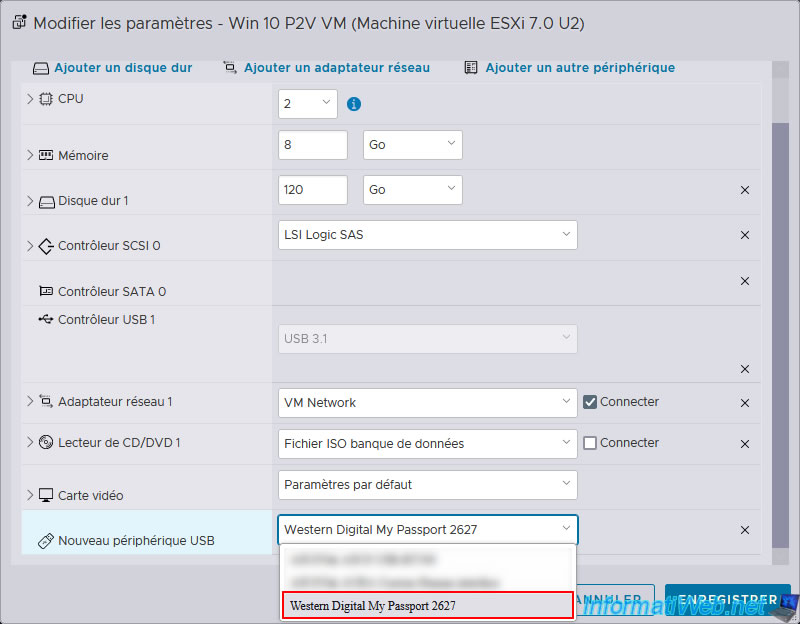
Then, click on: Add another device -> USB device.
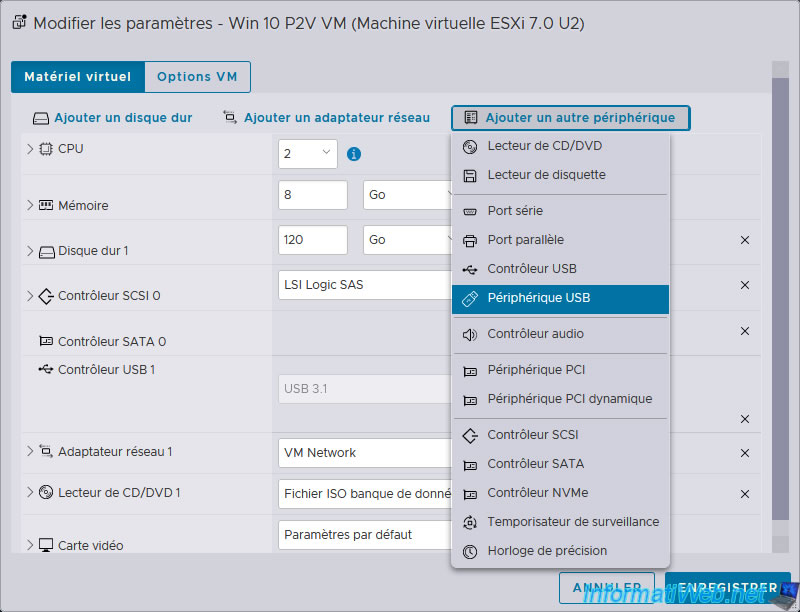
For the "New USB Device" that appears, select your USB external hard drive from the list.
In our case: Western Digital My Passport 2627.
Then, click "Save".
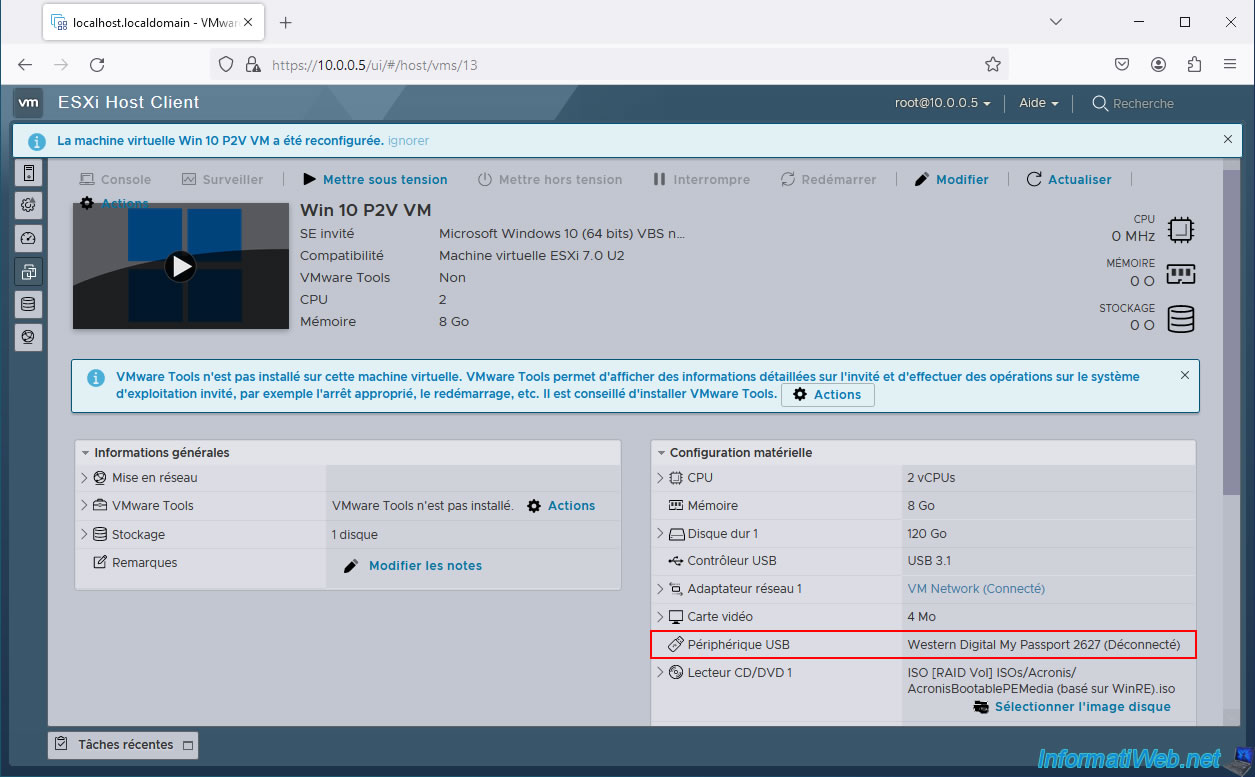
Your USB external hard drive will be automatically connected to your VM every time you start it.
Share this tutorial
To see also
-

Backup 10/20/2025
Acronis True Image - Archive your files locally
-

Backup 11/3/2025
Acronis True Image - Archive your files on Acronis Cloud
-

Backup 6/16/2025
Acronis True Image - Backing up your PC to a Synology NAS
-

Backup 11/20/2025
Acronis True Image - Synchronize a folder from Acronis Cloud
You must be logged in to post a comment