- Live CD
- Malekal Live CD
- 30 December 2024 at 14:13 UTC
-

- 1/6
After the Win7PESE version of his Malekal Live CD, Malekal returns with a new version based on Chris' Win8PESE project.
This 2nd version is based on a "Windows 8 Enterprise" PE environment in 64 bits (x64).
Important : this live CD supports EFI, but allows you to boot in EFI mode as well as in LEGACY BIOS mode.
However, you will notice that testing RAM via Memtest86 and booting to a bootable floppy will only be possible by booting your computer in LEGACY BIOS mode.
- Windows PE environment in Windows 8 Enterprise version - 64 bits (x64)
- MemTest86+ 4.20 (test your RAM)
- Boot from internal Hard Disk (boot on Windows)
- Floppy (boot from floppy disk)
- CommandLine (command line)
- Reboot / Halt (reboot / shut down)
1. Windows PE environment in Windows 8 Enterprise version - 64 bits (x64)
To get started, download the "Win8PE_x64_EFI.ISO" file referenced on our "Malekal Live CD" page.
Next, burn this ISO image to a CD and configure your computer's BIOS boot order to boot from your CD/DVD drive.
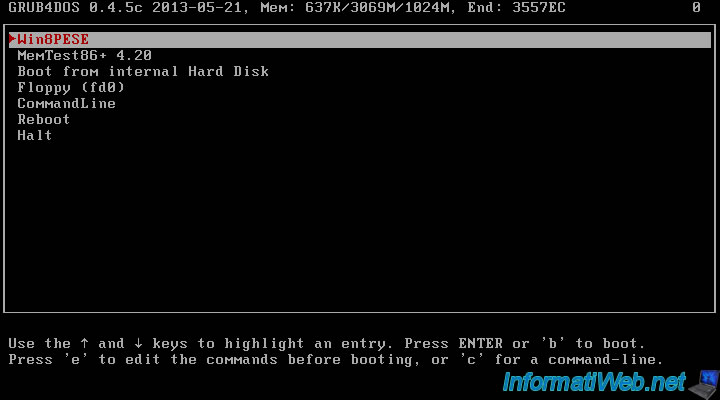
If your motherboard BIOS is configured to boot in LEGACY BIOS (old BIOS) mode, the GRUB4DOS boot menu will appear.
Select the "Win8PESE" option to start the "Windows 8 Enterprise" PE environment in 64-bit (x64).
Note : if your motherboard BIOS is configured to boot in EFI mode, this boot menu will not appear and Win8PESE will be started automatically.
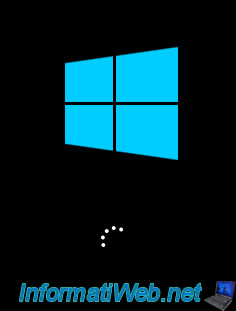
If your computer started in EFI mode, press Enter when this message appears.

In both cases, you will see the Windows logo appear at startup.
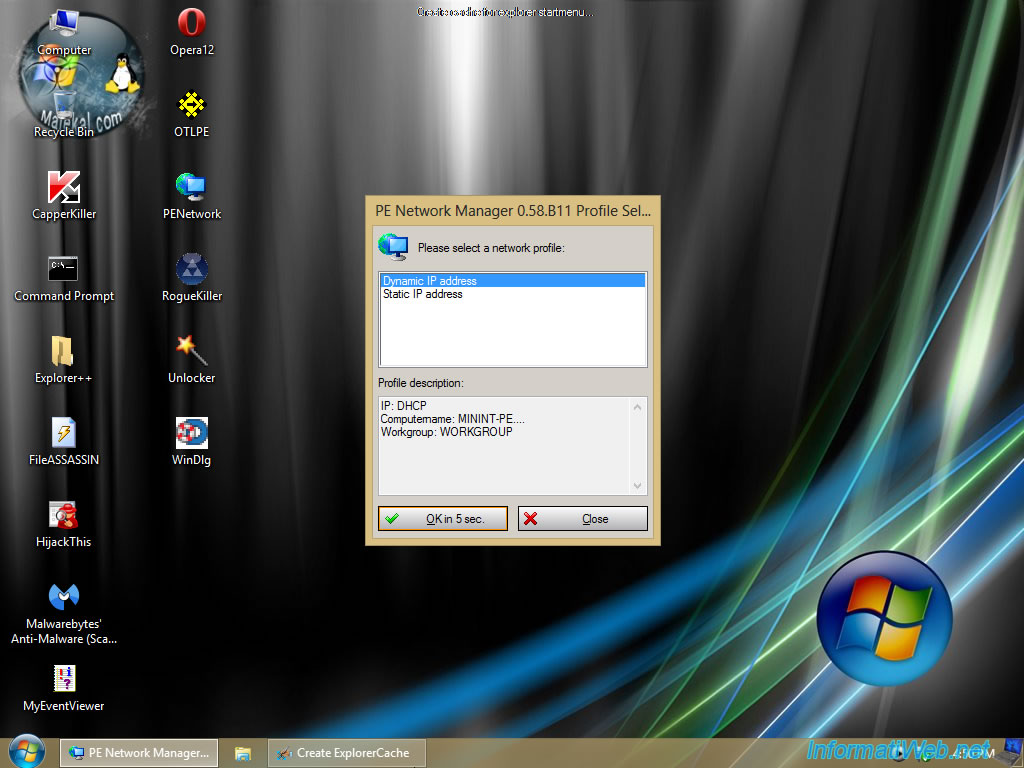
When starting the Windows PE environment, you will see the PE Network Manager program appear.
This program automatically provides network and Internet access to your Windows PE environment by retrieving the necessary information (including a dynamic IP address) from the DHCP server of your Box or router.
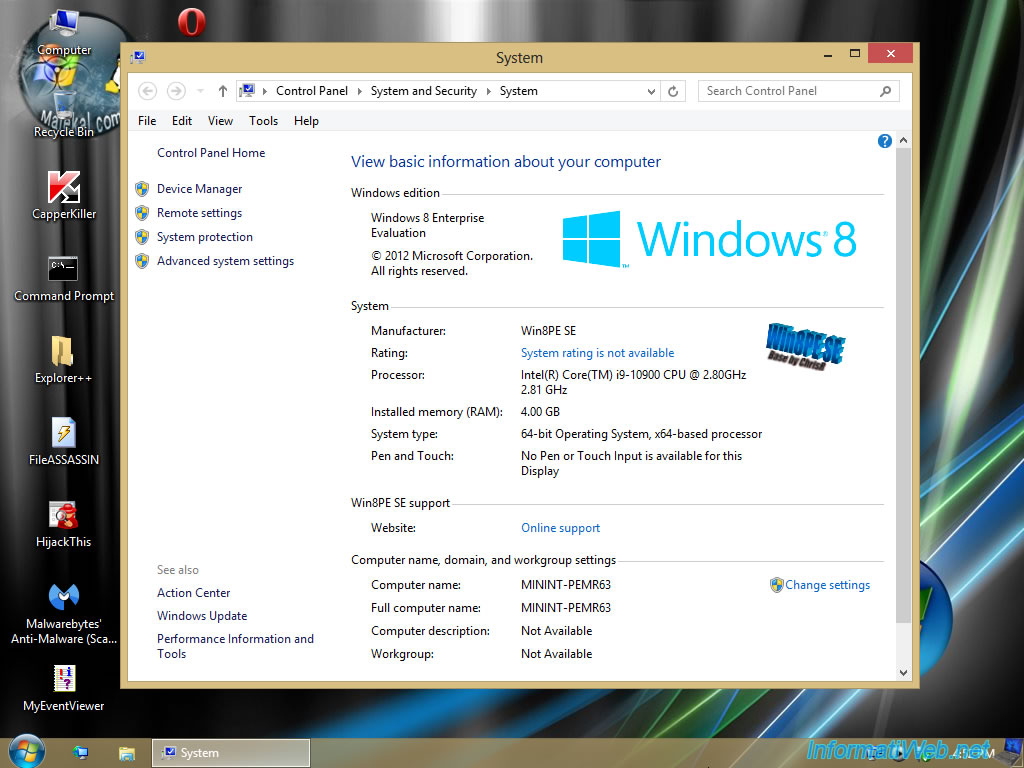
If you right click "Properties" on "Computer", you will see that this 2nd version of Malekal's live CD is based on "Windows 8 Enterprise" in 64 bits.
Hence the fact that it also supports booting in EFI mode. This was not the case with the 1st version of Malekal's live CD which was in 32 bits and therefore didn't support EFI.
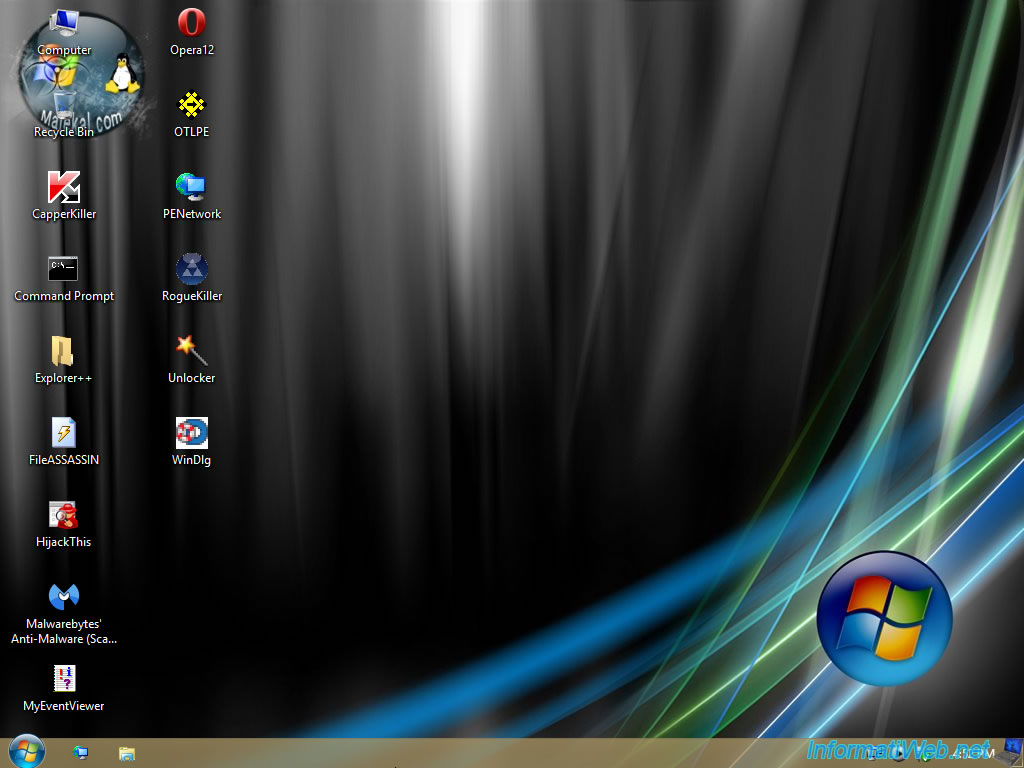
As you can see, on the new version of this live CD, you will find some programs that were already available previously, as well as others.
- CapperKiller : helps to remove Trojan-Banker.Win32.Capper virus.
- Command Prompt : windows command prompt.
- Explorer++ : alternative file explorer.
- FileASSASSIN : allows you to delete stubborn files.
- HijackThis : allows you to delete malicious keys loading, for example, a malicious site when opening a web browser.
- Malwarebytes Anti-Malware : well-known anti-malware for removing malware (malicious software).
- MyEventViewer : alternative utility to view windows events.
- Opera12 : web browser to go on the Internet and potentially download your favorite utilities, if needed.
- OTLPE : diagnostic utility.
- PENetwork : mainly used to provide network access to the Windows PE environment where you are.
- RogueKiller : allows you to remove malware.
- Unlocker : allows you to delete stubborn files.
- WinDlg : allows you to know the health of your hard drives.
1.1. Programs available on the Malekal Live CD based on Win8PESE
To see all the programs available on this live CD, open the start menu and click on : All Programs.
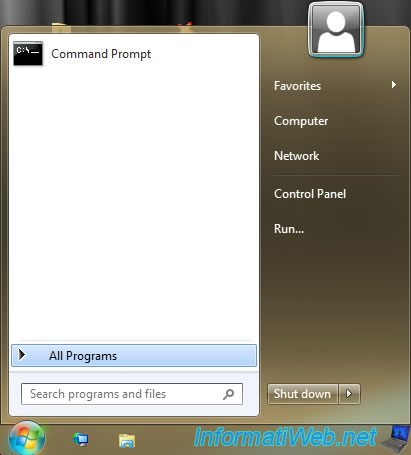
At the top, you will find shortcuts for :
- Reboot : reboot the computer.
- Shutdown : shut down the computer.
- Explorer : open file explorer.
- Lock Computer : lock computer with password.
- Shutdown : this second "Shutdown" shortcut allows this time to display the shutdown menu which was visible under Windows XP and which will allow you to choose between : Lock, Shutdown and Restart.
You will also have the option of automatically ejecting the live CD from your CD/DVD drive or not.
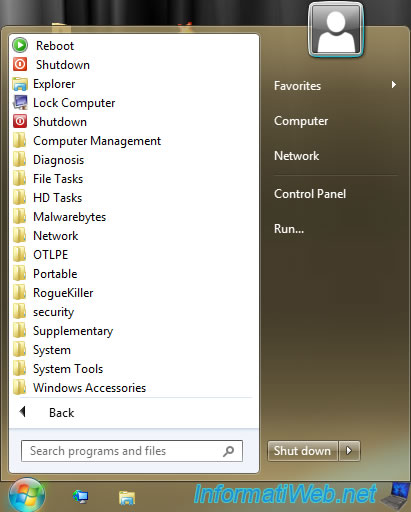
Then, you will find different program categories :
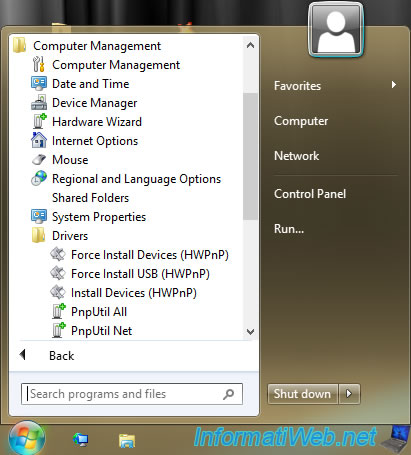
- Computer Management : several Windows consoles allowing you to manage your hard disks, your devices and their drivers, the settings of this Windows PE environment, ...
- Diagnosis : tools to test your processor, your hard disks, your SSDs, ...
- File Tasks : explore files on your computer, as well as search for them.
- HD Tasks : change your computer's MBR and boot menu.
- Malwarebytes : scan your computer for malwares and remove them.
- Network : analyze your wired or wireless network, access the Internet, ...
- OTLPE : use the diagnostic tool of the same name.
- Portable : open the PStart utility.
- RogueKiller : utility for removing malware.
- Security : utilities to remove specific virus, as well as keys created or modified by malware or adware.
- Supplementary : allows you to launch the xCHM utility allowing you to view the help files in CHM format.
- System : utilities to test your memory (RAM), delete stubborn files, ...
- System Tools : Windows 8 repair tools, as well as utilities to modify the registry or create RAMDisks.
- Windows Accessories : common Windows accessories, such as a notepad, WordPad text editor, ...
1.1.1. Computer Management
In the "Computer Management" category of the start menu, you will find the consoles :
- Computer Management : to manage your local disks (hard disks, SSDs, USB keys, ...), manage your devices, ...
- Date ant Time : to set the clock for the Windows PE environment where you are.
- Device Manager : to manage your devices and their drivers.
This allows you to manually install missing drivers that you would need to access some devices or local disks (including RAID volumes). - Hardware Wizard : allows you to open the "Add Hardware" wizard allowing you to add devices by providing their drivers.
- Internet Options : provides access to Internet options usually accessible through Internet Explorer.
- Mouse : allows you to adjust the mouse settings.
- Regional and Language Options : allows you to set Windows PE regional options, including language, country, ...
- Shared Folders : allows you to manage folders shared by Windows PE if the file sharing service is enabled.
To do this, go to the "Sharing" section of the "PE Network Manager" program accessible via the network icon in the taskbar. - System Properties : allows you to display the system properties of Windows PE to find out the name of the computer (MININT-...), the workgroup in which it's located (WORKGROUP by default), ...
- Drivers :
- Force Install Devices (HWPnP) : force installation of drivers for Plug-and-Play (PnP) devices.
By default, this process already starts when Windows PE starts. - Force Install USB (HWPnP) : ditto, but only for USB devices.
This can help force Windows PE to recognize a plugged-in USB key or external hard drive after Windows PE starts. - Install Devices (HWPnP) : installs drivers for Plug-and-Play (PnP) devices.
- PnpUtil All : another technique for installing drivers for Plug-and-Play (PnP) devices.
- PnpUtil Net : same as the previous option, but only for network devices.
- Force Install Devices (HWPnP) : force installation of drivers for Plug-and-Play (PnP) devices.
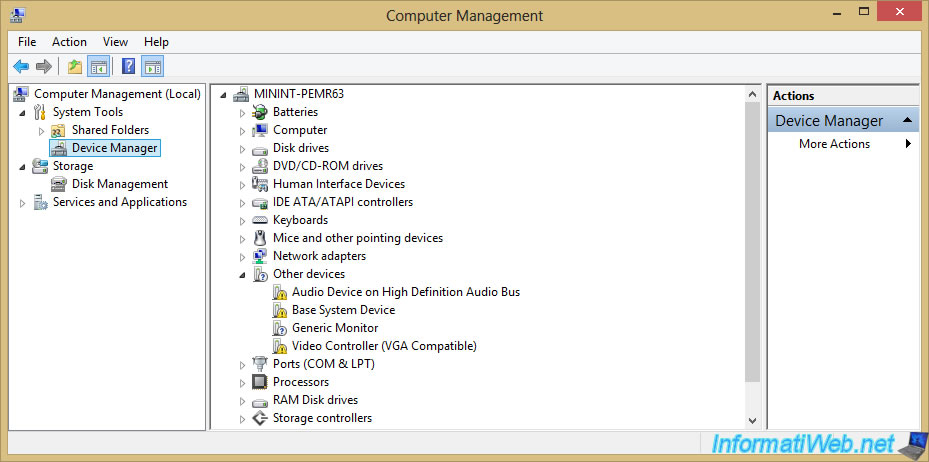
If you launch the "Computer Management" console, you will see that you will have access to the Device Manager, among other things.
Which may allow you to manually install drivers for an unrecognized device that you really need in this case.
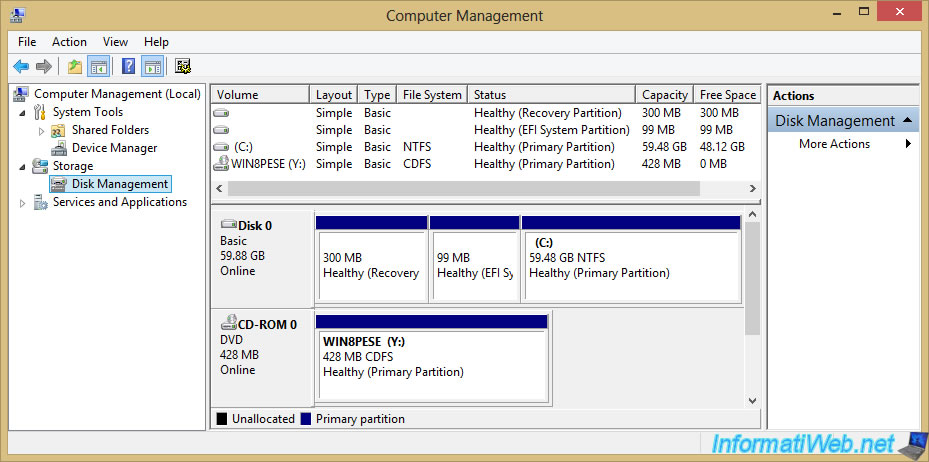
In the "Disk Management" section of this console, you will be able to manage your local disks with their partitions.
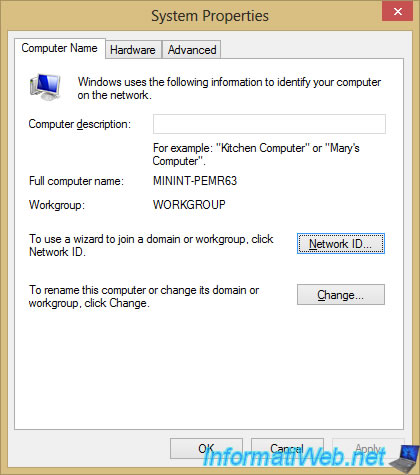
If you use the "System Properties" shortcut, you will be able to see the name of the computer, as well as the workgroup it is in.
You will also be able to access other system settings through the other tabs : Hardware and Advanced.
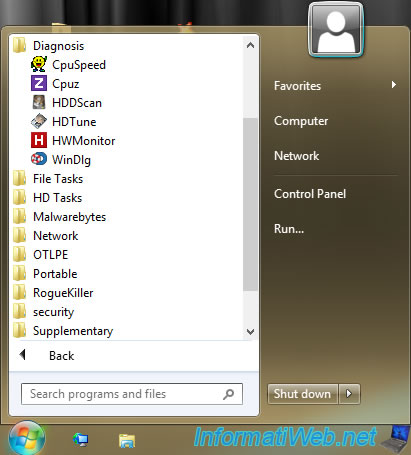
1.1.2. Diagnosis
In the "Diagnosis" category of the start menu, you will find the programs :
- CpuSpeed : allows you to test the speed of your processor.
- Cpuz : provides detailed information about your processor (CPU) and other components.
- HDDScan : allows you to test your hard drives and check their health.
- HDTune : allows you to test the performance of your hard drives, check their health and test their sectors.
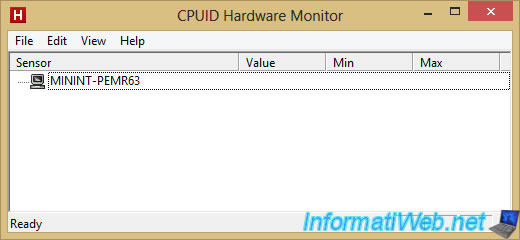
- HWMonitor : is used to retrieve information concerning different probes (temperatures, fan speed, ...).
- WinDlg : Western Digital utility to test your hard drives and know their S.M.A.R.T. (health).
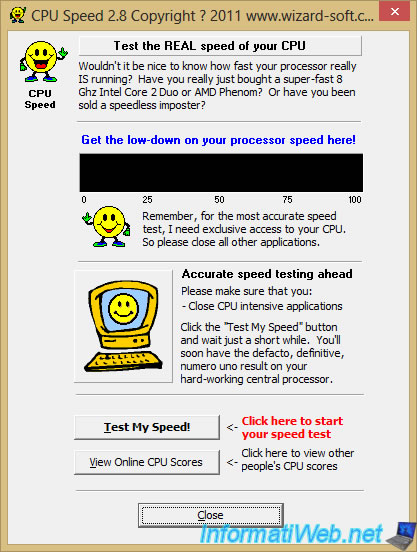
CPU Speed allows you to test the real speed of your processor.
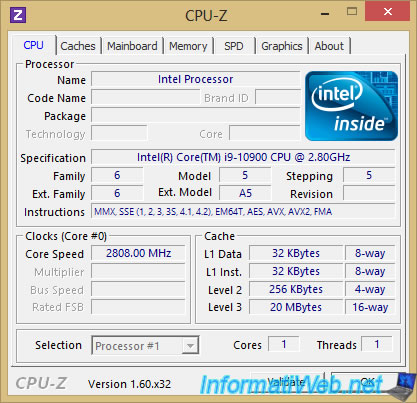
CPU-Z allows you to get detailed information about :
- CPU : your processor.
Its name, its model, its base frequency, the instructions it supports, ... - Caches : the L1, L2 and L3 caches of your processor (CPU).
- Mainboard : your motherboard.
Its manufacturer, model, chipset, BIOS version, ... - Memory : your random access memory (RAM).
Its generation (DDR4, DDR3, ...), its quantity, the number of channels supported, its frequency, ... - SPD : your RAM sticks.
Detailed information about each RAM stick on your motherboard. - Graphics : your graphics card.
Its name, model, amount of memory (also known as graphics/video memory).
Thanks to HD Tune, you will be able to :
- test the performance of your hard drives, SSDs and USB keys.
- get information about them.
- know their health (S.M.A.R.T.), if applicable.
- test their sectors for possible bad sectors present on them.
- see their temperature (if applicable).

Thanks to CPUID Hardware Monitor, you will be able to obtain information through different probes of your computer :
- temperatures of your graphics card, your hard drives, ...
- fan speed of the case, your graphics card, ...
- voltages of your computer (+3.3V, +5V, +12V, ...), as well as the voltage of your graphics card, ...
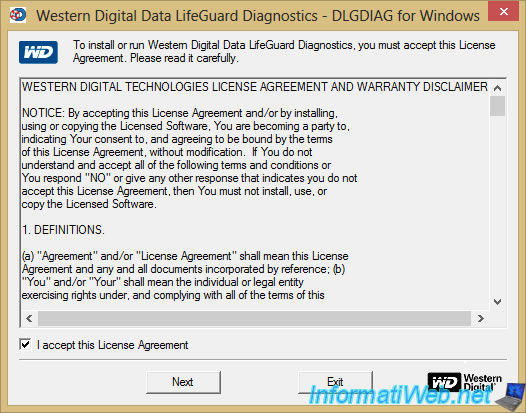
When launching Western Digital Data LifeGuard Diagnostics (DLGDIAG), you will first need to accept the Western Digital (WD) License Agreement.
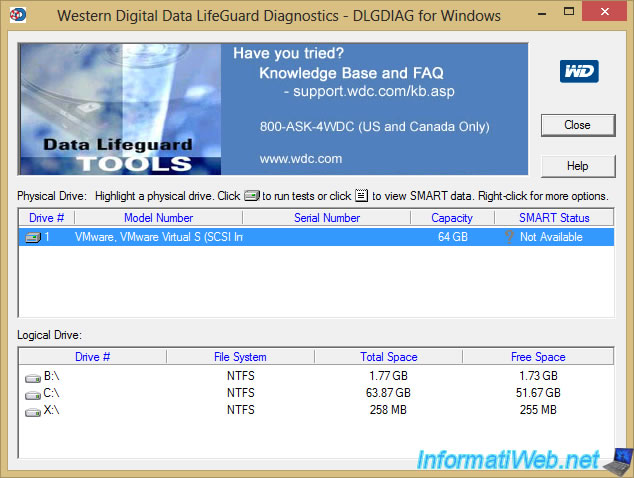
With Western Digital Data LifeGuard Diagnostics (DLGDIAG), you will be able to see SMART information (health data), as well as test your hard drives.
Share this tutorial
To see also
-
Live CD 1/6/2025
Malekal Live CD - Presentation of the live CD (Win10PESE v1607) features
-
Live CD 1/13/2025
Malekal Live CD - Presentation of the live CD (Win10PESE v1709) features
-
Live CD 12/23/2024
Malekal Live CD - Presentation of the live CD (Win7PESE) features
-
Live CD 1/16/2025
Malekal Live USB - Presentation of the live USB 2024 (Win11) features
You must be logged in to post a comment