- Backup
- Acronis True Image, Acronis Universal Restore
- 28 September 2026 at 07:41 UTC
-

- 1/9
With Acronis Cyber Protect Home Office (True Image) and Acronis Universal Restore, you can back up a disk from a physical computer and restore this backup on another computer (with different hardware, if necessary). In other words, you can also do P2V migrations by virtualizing your physical computers to your virtual infrastructure "VMware vSphere".
Important : this is an unofficial technique since it is not indicated in the official documentation of the "Acronis Cyber Protect Home Office (True Image)" program intended for individuals used in this tutorial.
But, it still works without problem.
Warning : for the backup of the physical PC, we reused the same backup as the one created in our previous P2V tutorial concerning VirtualBox.
So, before following this new tutorial concerning VMware vSphere, follow the first 3 steps of our tutorial "Acronis True Image - P2V - Virtualize a physical PC to VirtualBox".
- Store Acronis ISO files on your host via VMware vSphere Client
- Create a VM on VMware vSphere (where to restore your Acronis backup)
- Connect your external hard drive to your virtual machine (VM)
- Restore physical PC disk to your VM on VMware vSphere via Acronis Cyber Protect Home Office (True Image)
- Extract drivers from VMware Tools (recommended for using Acronis Universal Restore)
- Apply Acronis Universal Restore in your virtual machine on VMware vSphere
- Starting your virtual machine on VMware vSphere after applying Acronis Universal Restore
- Uninstall old drivers related to the hardware of the virtualized physical PC copied into your VM on VMware vSphere
- Install VMware vSphere drivers (VMware Tools) in your virtual machine
- Virtual machine working on VMware vSphere and corresponding to the virtualized physical PC
1. Store Acronis ISO files on your host via VMware vSphere Client
As you can see, in our case we have a VMware vSphere virtual infrastructure with 2 hosts running VMware ESXi 6.7.0.
Each host has a processor with 12 logical cores and 32 GB of RAM each.
Note: these are virtual hosts, hence the "VMware7,1" model visible in the image below.
But this does not change anything for this tutorial.
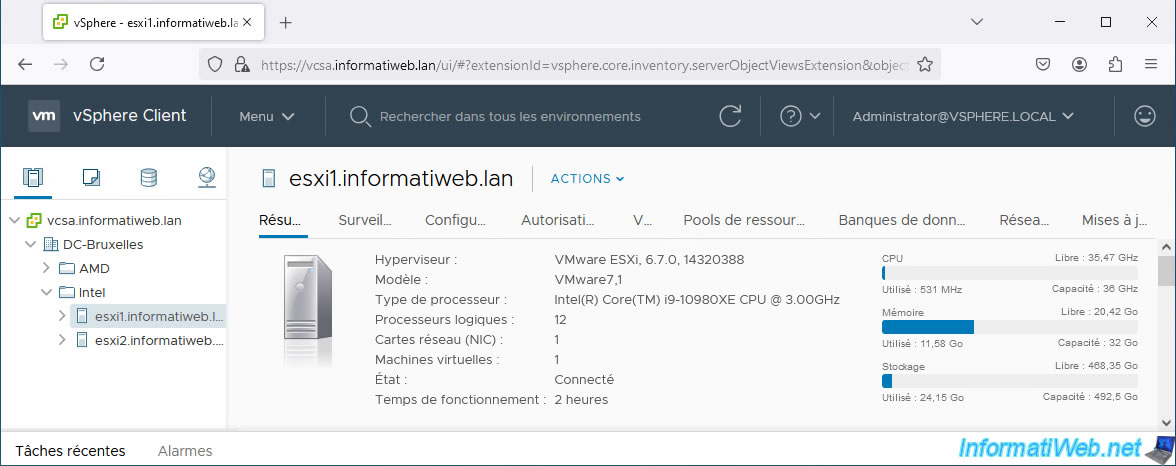
To store your Acronis ISOs on your VMware ESXi host via the vSphere Client:
- go to the "Storage" section.
- select the datastore corresponding to the VMware ESXi host on which you want to create your virtual machine.
- go to the "Files" tab of this datastore.
- select the folder where you want to store your ISO files.
- click on "Upload files".
Note: in business, you will likely use shared storage.
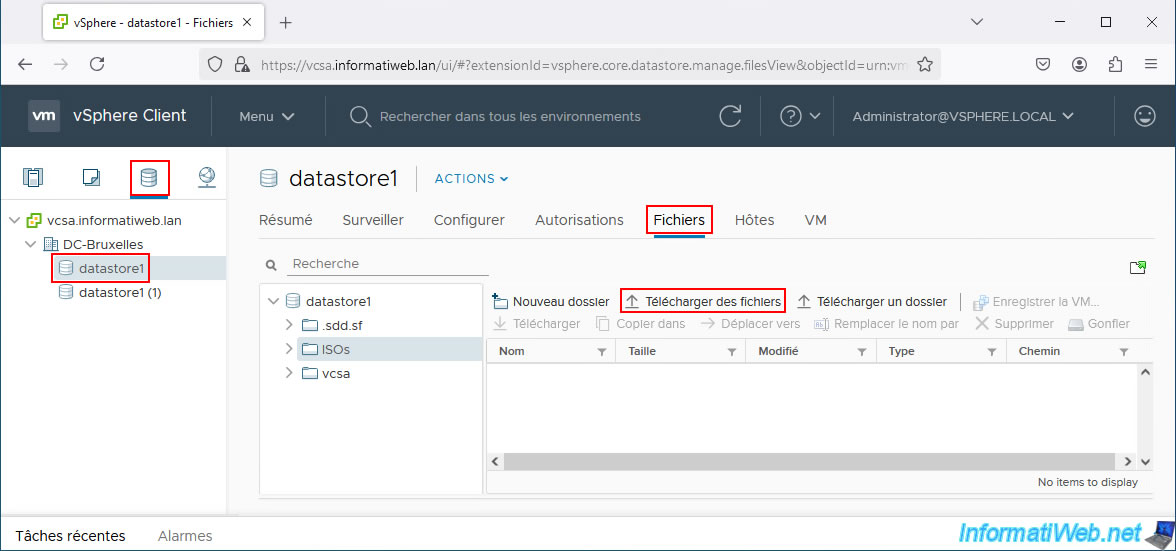
Select your 2 Acronis ISO files and click "Open".
In our case:
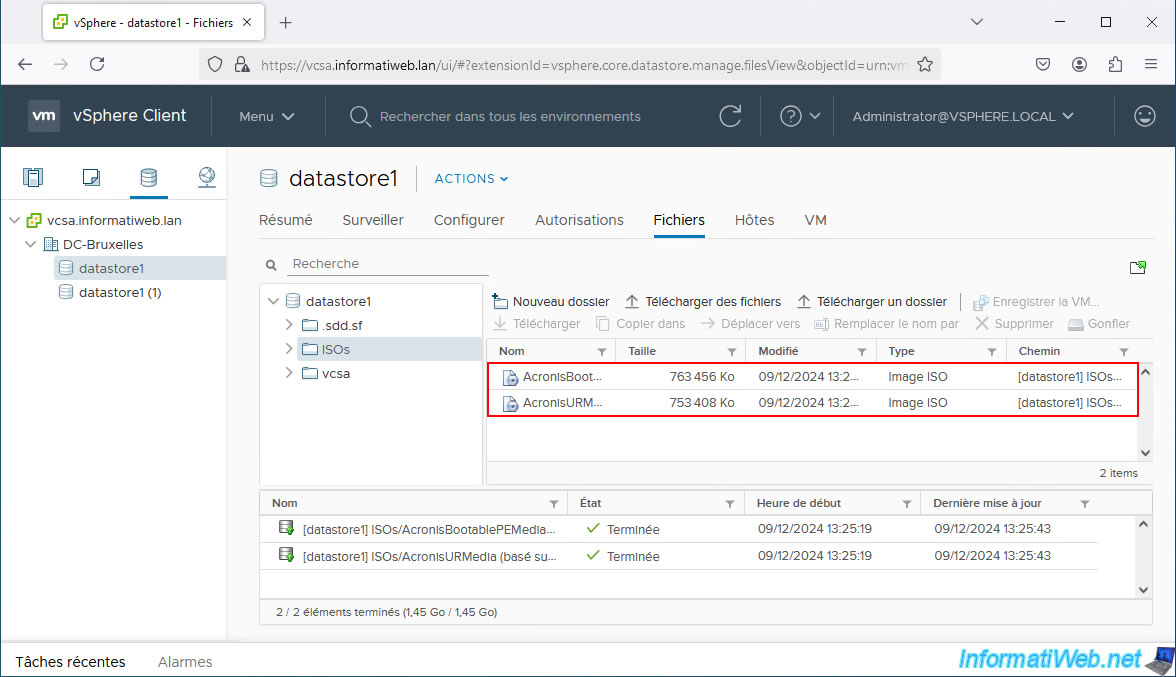
- AcronisURMedia (WinRE-based).iso: our bootable media to access the "Acronis Universal Restore" program.
- AcronisBootablePEMedia (WinRE-based).iso: our rescue media to access the "Acronis Cyber Protect Home Office (True Image)" program.
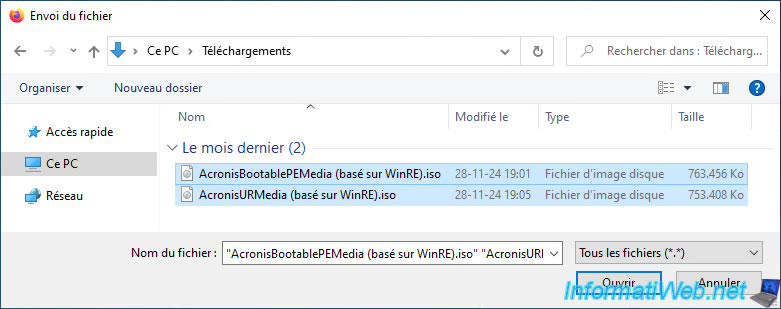
Please wait while your 2 Acronis ISO files are being sent simultaneously.
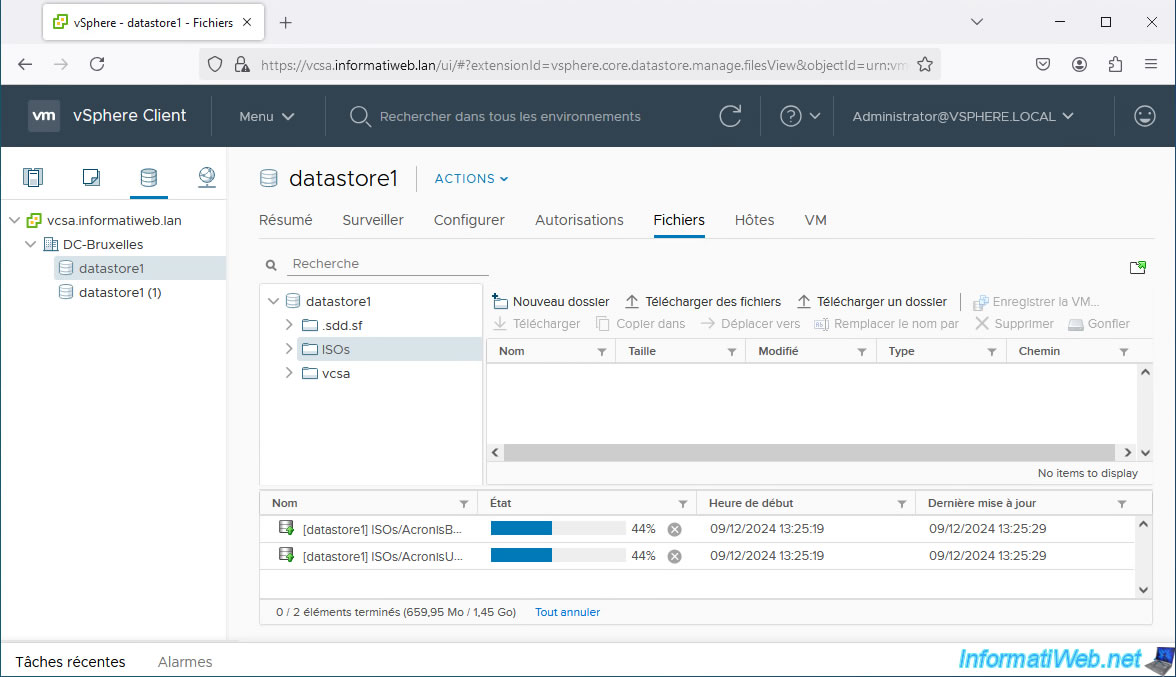
Your Acronis ISO files have been added to your datastore.
2. Create a VM on VMware vSphere (where to restore your Acronis backup)
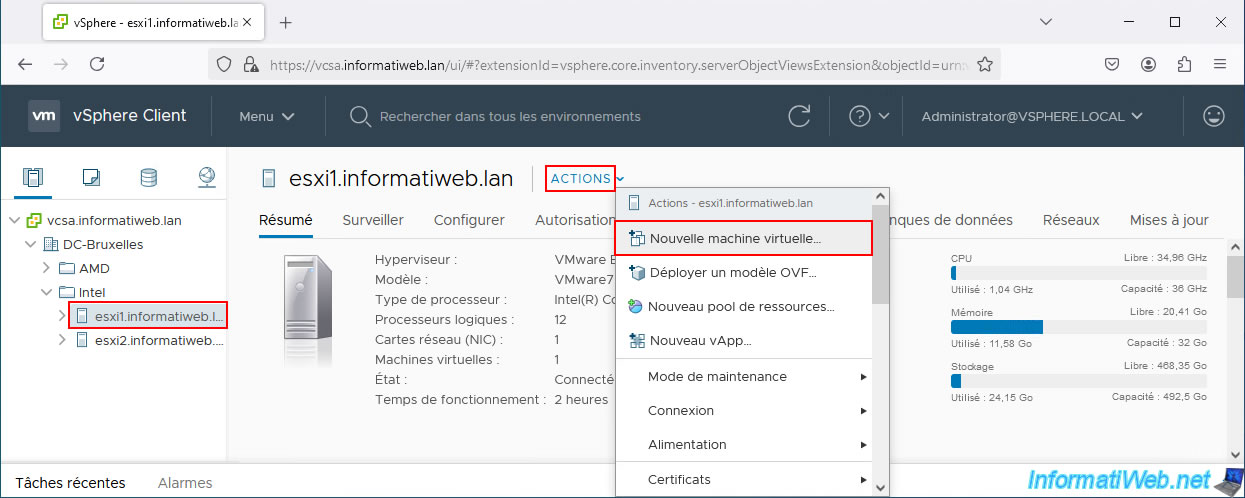
To create your VM on VMware vSphere, go to the "Hosts and Clusters" section and select the desired host.
Then, click on: Actions -> New Virtual Machine.
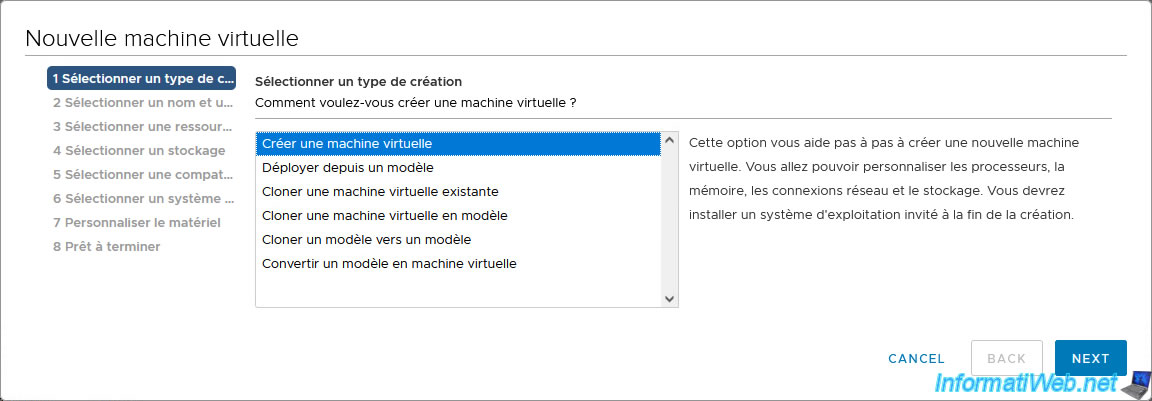
Select "Create Virtual Machine".
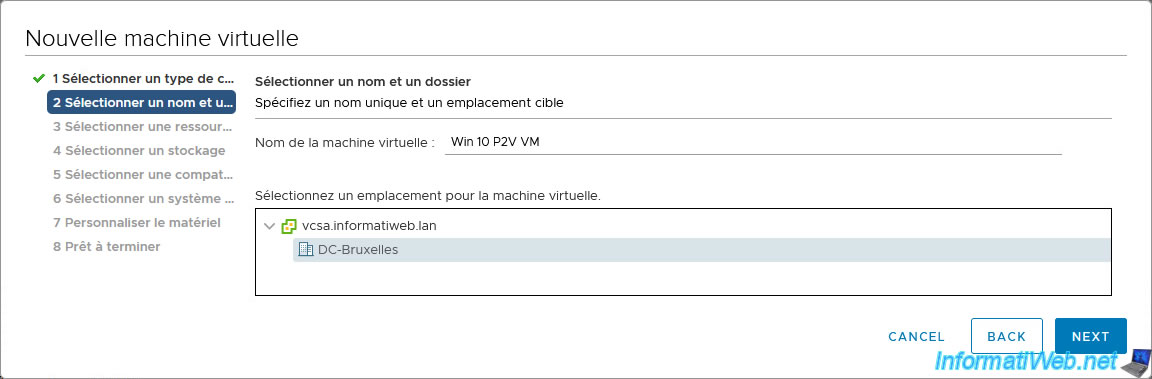
Provide a name for your virtual machine (for example "Windows 10 P2V VM") and select the location where you want to create it.
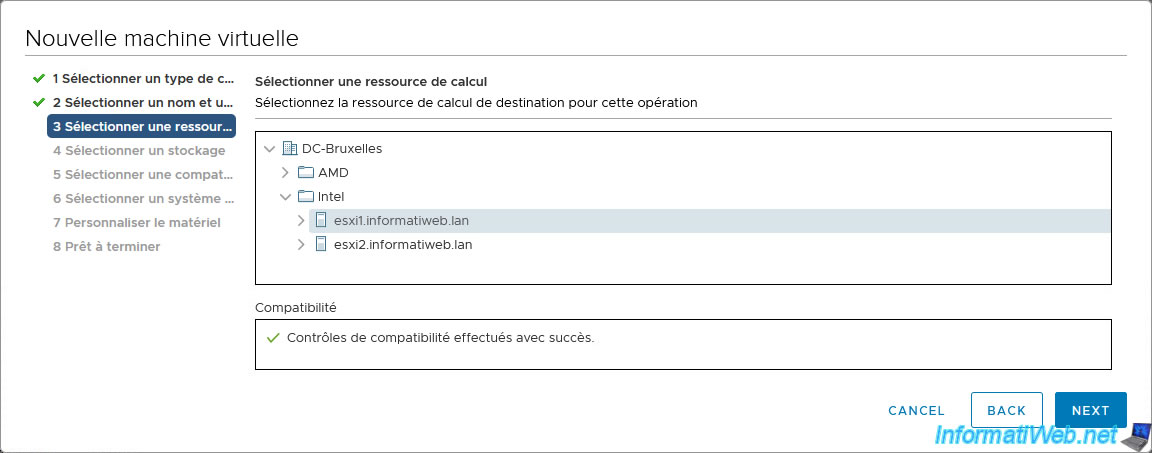
Select the compute resource (host) where you want to create it.
Default: the previously selected host.
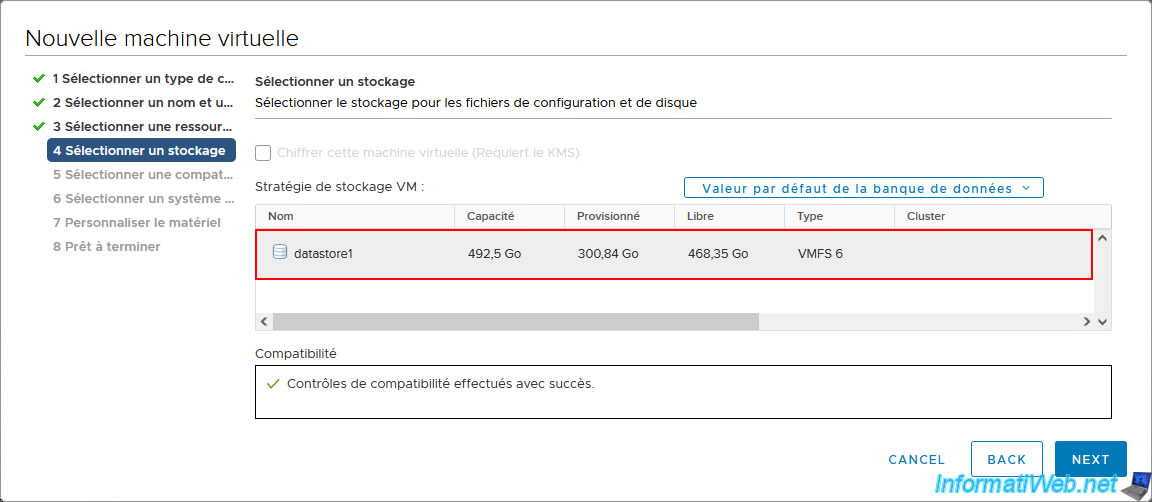
Select the datastore (accessible by this host) where you want to create this virtual machine.
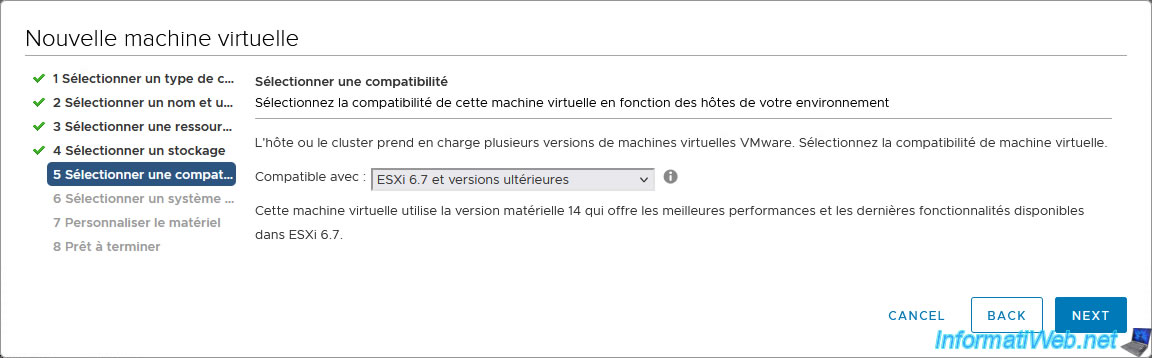
Leave compatibility as default.
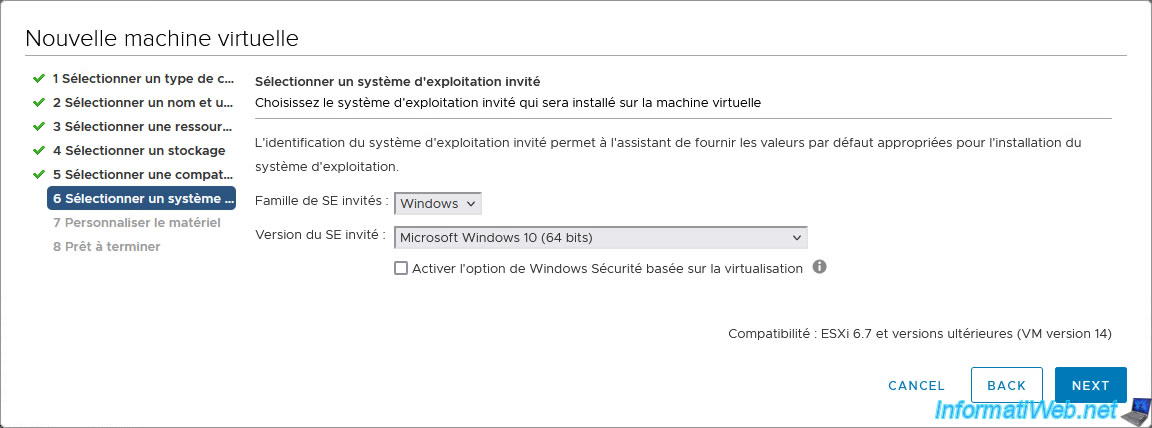
Select the guest OS family and version that matches the operating system that was backed up from your physical PC.
In our case:
- Guest OS Family: Windows.
- Guest OS Version: Microsoft Windows 10 (64-bit).
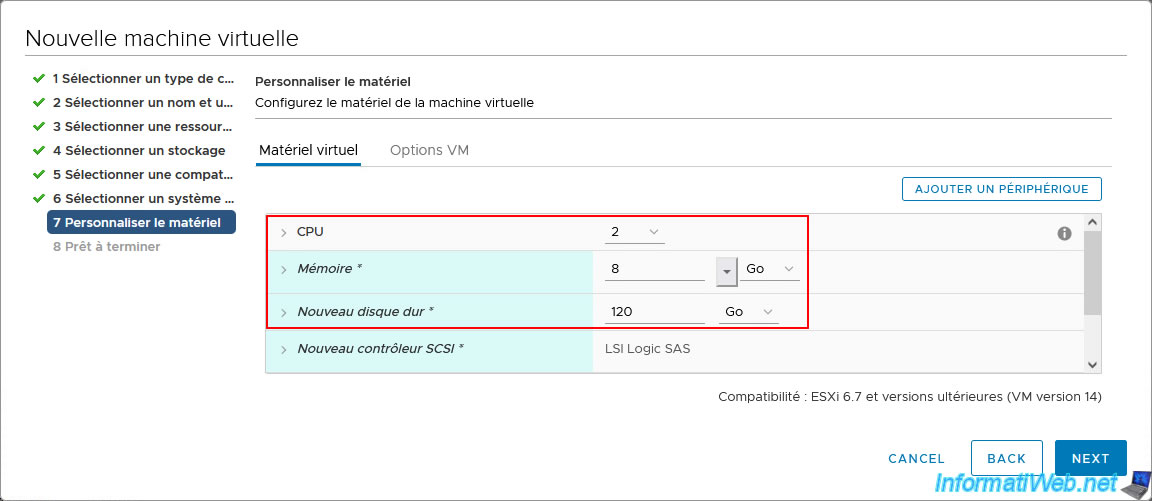
For virtual hardware, start with:
- CPU: allocate at least 2 processor cores, or even 4 cores if you can to improve the performance of this virtual machine.
- Memory: allocate at least 4 GB of RAM for 64-bit versions of Windows, or even 8 GB of RAM for recent versions of Windows 10 and for Windows 11 to keep it smooth.
- New hard disk: do not indicate the size of the physical hard disk backed up by Acronis, but a smaller size sufficient to store the amount of data actually backed up by Acronis and allow you to add data or programs later in this virtual machine.
In our case, Acronis had backed up about 48 GB of data (33 GB on the "C" partition and 15 GB on the "D" partition).
So, we created a 120 GB virtual hard disk to be able to create 2 partitions on it (80 GB for the "C" partition and 40 GB for the "D" partition).
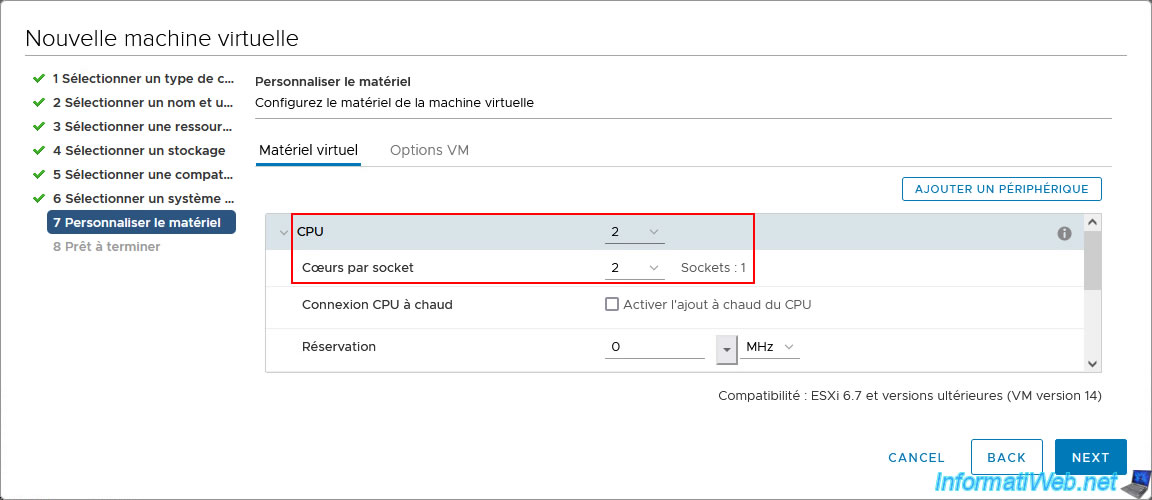
For the "CPU" section, make sure to specify the same number for "CPU" and "Cores per socket".
So, the value for "Sockets" will be "1".
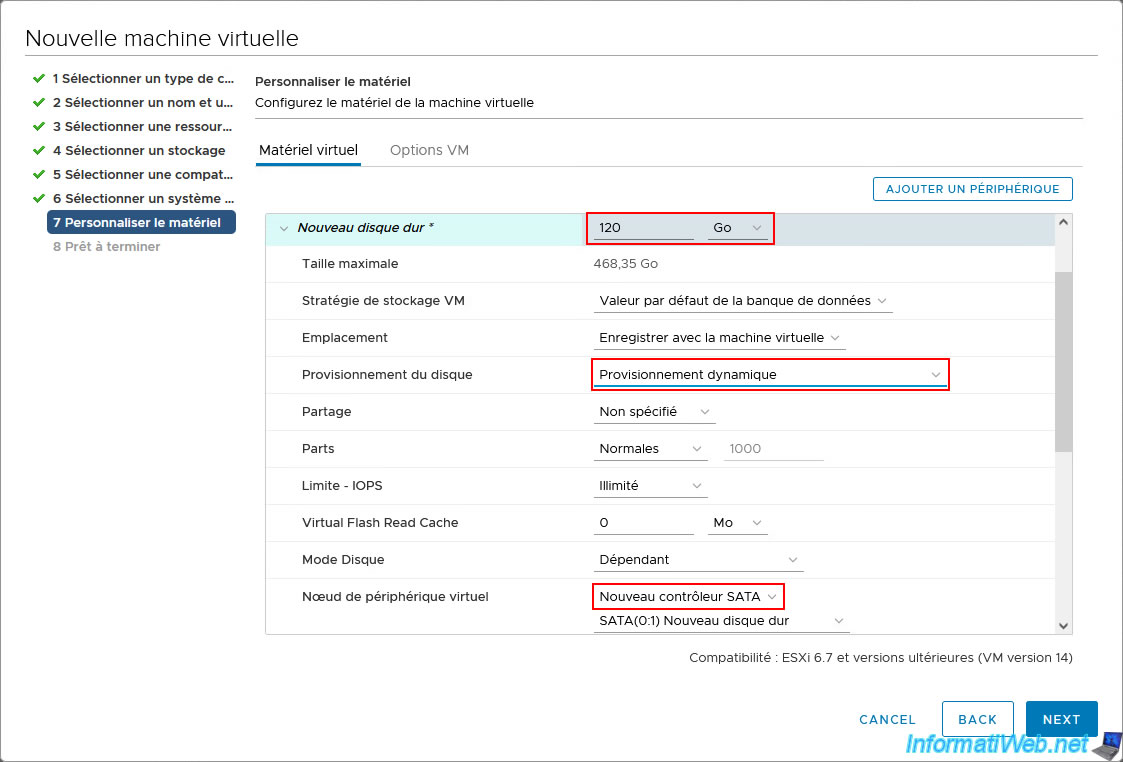
For the virtual hard disk, configure these settings:
- Disk Provisioning: Thin provisioning.
This allows the virtual hard disk to take only the disk space needed for the data it contains on the host's physical disk.
This saves disk space, but in an enterprise setting, it can create an overprovisioning problem. - Virtual Device Node: New SATA controller.
This allows to use the same type of hard disk as on the physical PC backed up via Acronis (although this is not mandatory).
Then, for your virtual machine's CD/DVD drive, select "Datastore ISO File".
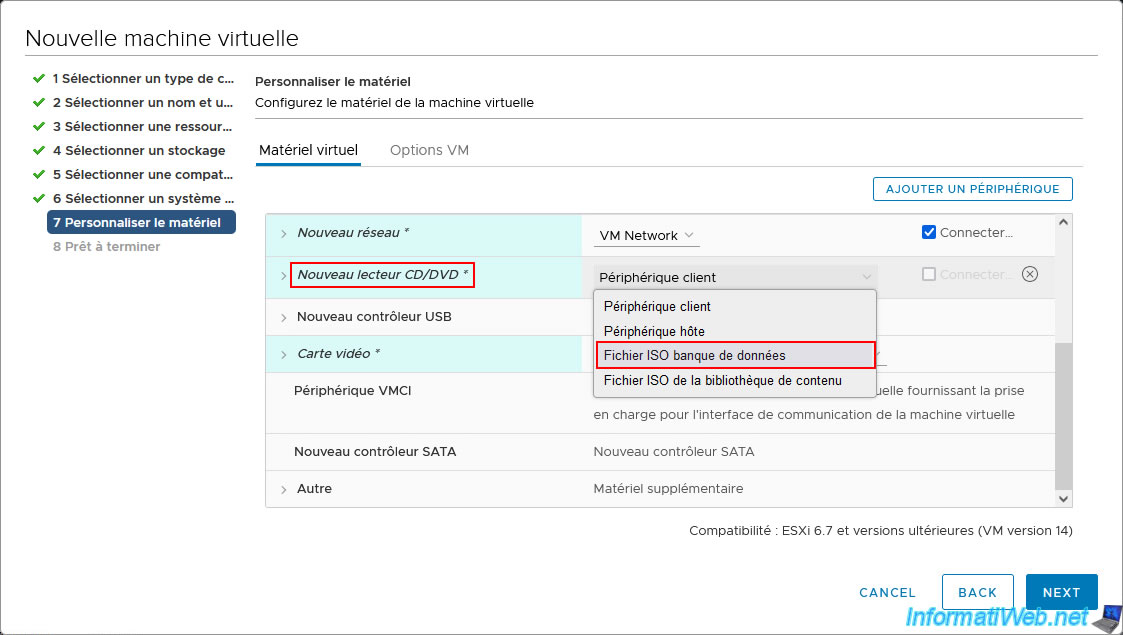
In the "Select File" window that appears, select your "AcronisBootablePEMedia (WinRE based).iso" file and click OK.
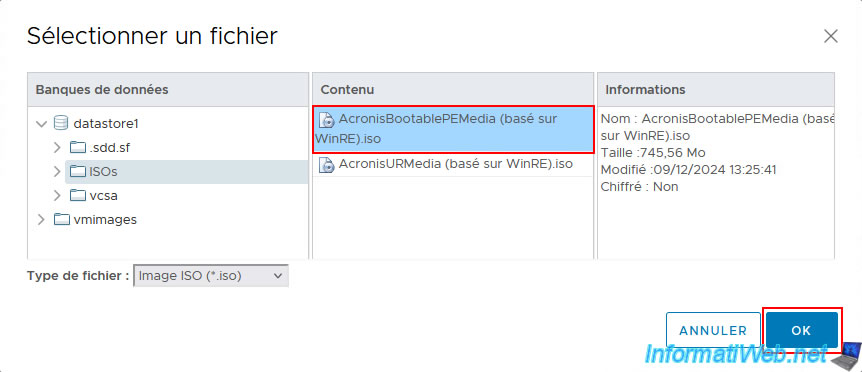
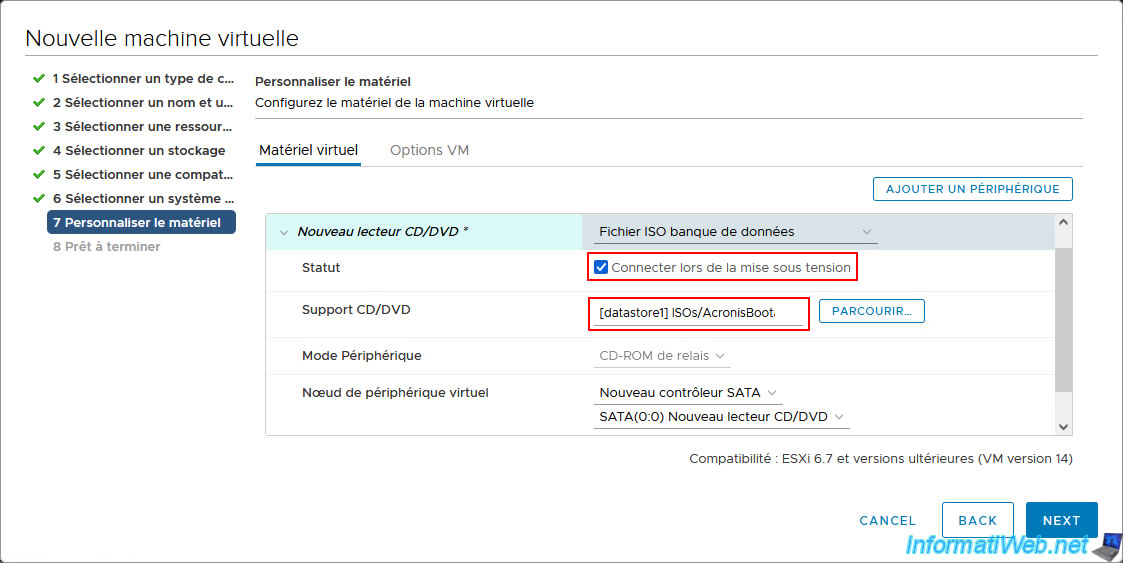
Once the Acronis ISO file is selected, make sure to check the "Connect on power on" box.
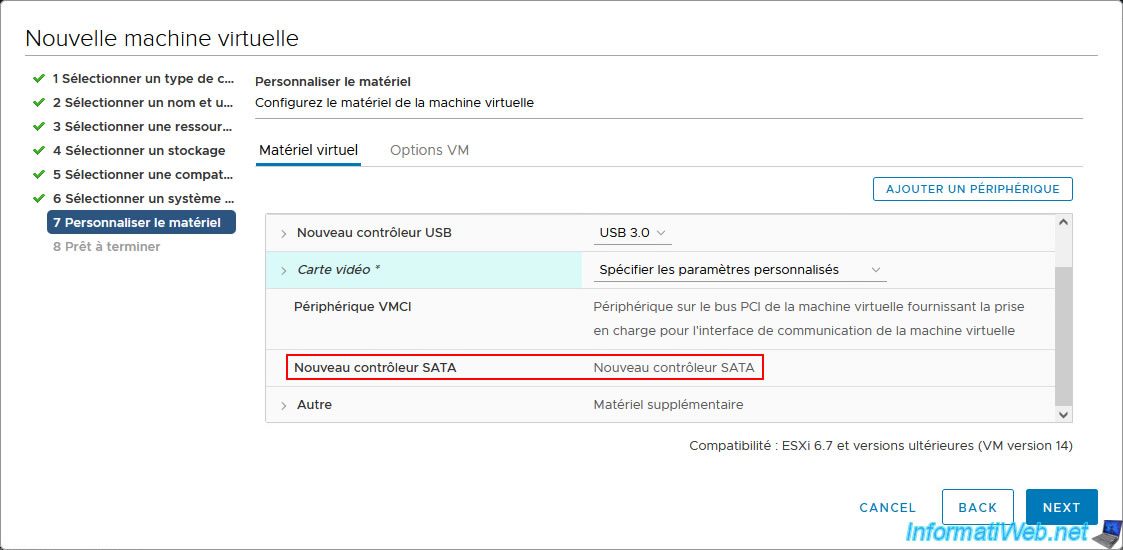
At the bottom of the virtual hardware, you will notice that a new SATA controller has appeared.
In the "VM Options" tab (visible at the top), go to the "Boot Options" section and configure the firmware to use, as well as whether Secure Boot should be enabled or not.
Important : secure boot is only supported with EFI and only from Windows 8.
However, EFI is supported from Windows 7.
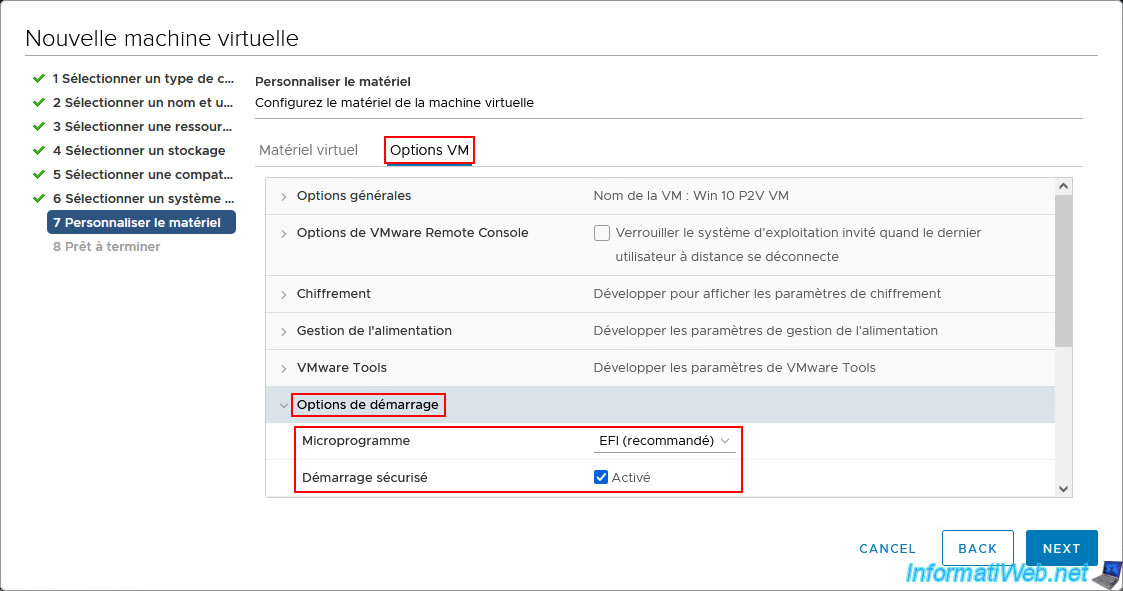
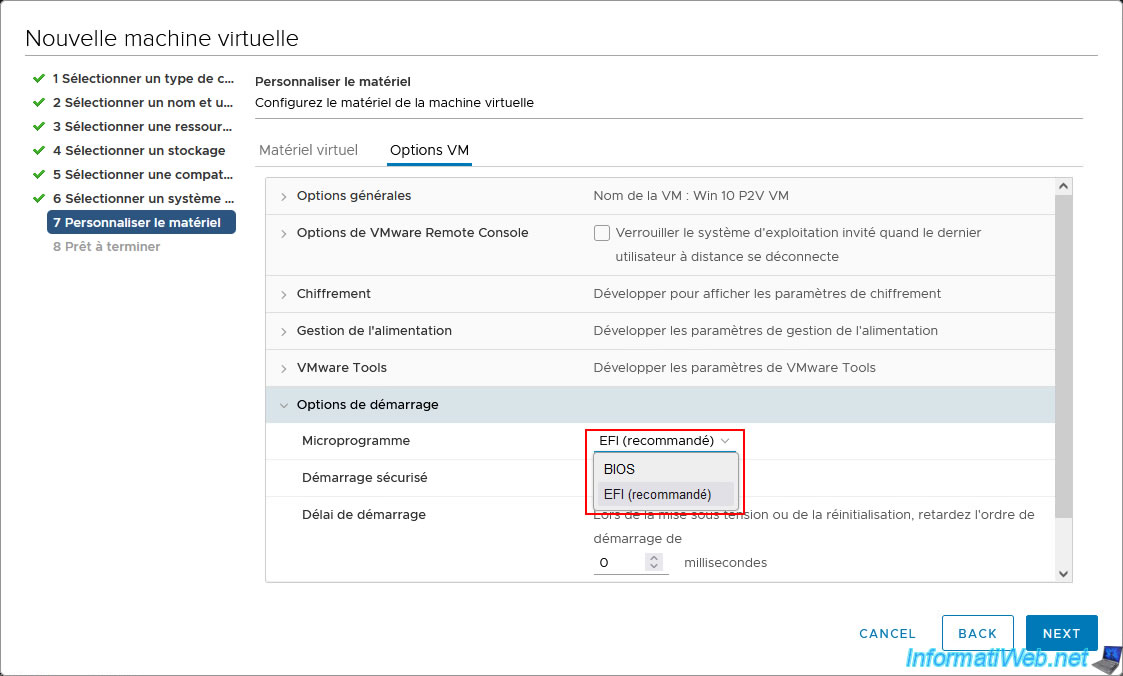
For the firmware, you have the choice between:
- BIOS: select "BIOS" if Windows was installed in Legacy BIOS mode on the physical PC previously backed up via Acronis.
In this case, the partition table of the disk where Windows is installed is of type "Master Boot Record (MBR)". - EFI (recommended): select EFI if Windows was installed in UEFI mode on the physical PC previously backed up via Acronis.
In this case, the partition table of the disk where Windows is installed is of type "GUID Partition Table (GPT)".
Now, click on "Next".
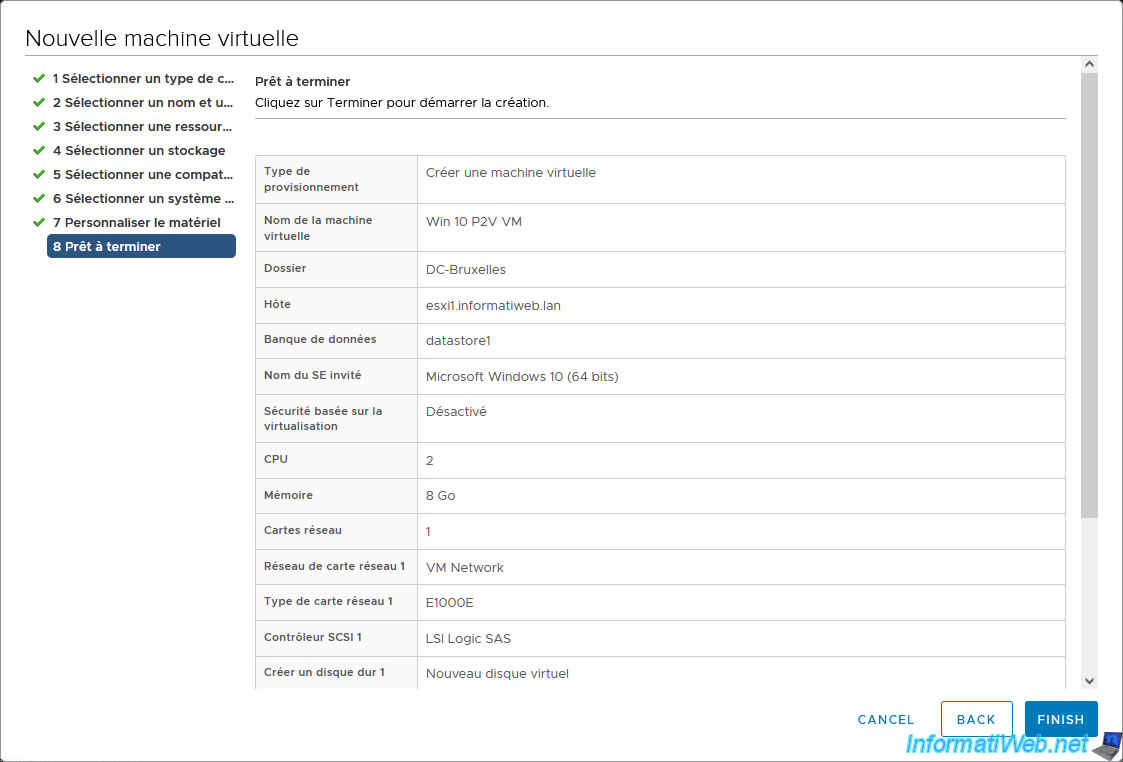
A summary of your VM configuration appears.
Click "Finish".
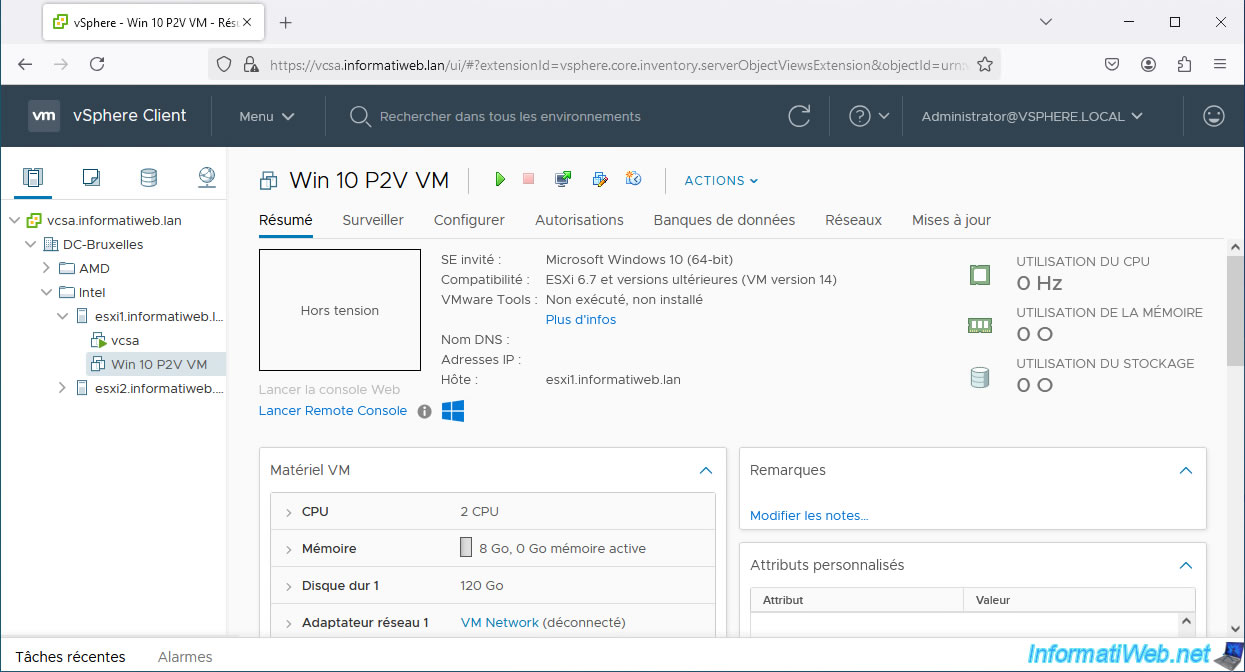
Your virtual machine was created on VMware vSphere.
Share this tutorial
To see also
-

Backup 12/8/2025
Acronis True Image - Acronis Cloud presentation
-
Backup 7/14/2025
Acronis True Image - Create incremental backups
-

Backup 3/30/2026
Acronis True Image - Rescue Media - Check network configuration
-
Backup 3/16/2026
Acronis True Image - Rescue Media - Partition a new disk
You must be logged in to post a comment